
How to Install Raycast on Mac: A Clear Step-by-Step Guide
This guide shows how to install Raycast on Mac with step-by-step instructions for easy setup and enhanced productivity.
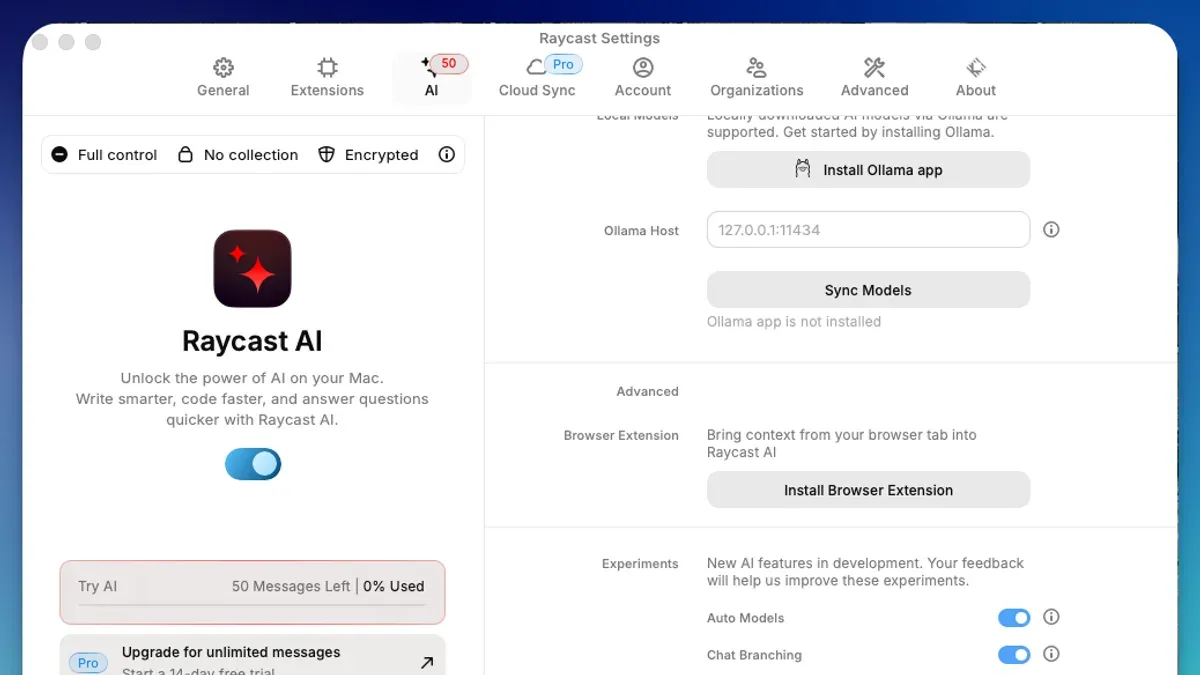
You want to speed up your workflow on Mac by using a productivity tool that integrates smoothly with your system. You’ve heard about Raycast as a potential app launcher and command center but aren’t sure how to get started.
This article explains how to install Raycast on Mac with clear, step-by-step instructions. It also covers initial setup, basic navigation, and how Raycast compares to similar tools on Windows. Whether you’re deciding if Raycast fits your needs or exploring alternatives, this guide gives you practical information to make an informed choice.
Key takeaways
- Download Raycast from the official website or Mac App Store for secure installation.
- Allow necessary permissions in System Preferences to enable full functionality.
- Use the Raycast command bar to quickly launch apps, run scripts, or access settings.
- Raycast is Mac-exclusive; Windows users should consider alternatives like PowerToys or Wox.
- Common installation issues often relate to permissions or outdated macOS versions.
Before you start: What you need to install Raycast on Mac
Raycast is designed to enhance productivity by acting as a quick launcher and command interface on your Mac. To ensure smooth installation and operation, confirm your hardware and software meet the necessary requirements.
Mac hardware and macOS version requirements
The minimum macOS version required for Raycast is macOS Catalina (10.15) or later. Raycast supports Macs with Intel processors as well as Apple Silicon (M1 and later). Ensure your Mac runs at least macOS 10.15; earlier versions are not supported and may cause installation or performance issues.
Internet connection and account requirements
An active internet connection is necessary to download Raycast and receive updates. While you do not need an Apple ID to install Raycast, certain features like syncing extensions or accessing some integrations may require signing in with a GitHub account or creating a Raycast account. Having these accounts ready can streamline setup.
Understanding Raycast’s role
Raycast serves as a productivity launcher that lets you quickly access apps, files, and commands using a keyboard-driven interface. Before installing, consider whether you want a tool to speed up navigation and automate routine tasks, as Raycast focuses on this functionality rather than replacing full-featured app launchers or system utilities.
- Check your Mac’s operating system: Click the Apple menu > About This Mac. Confirm the macOS version is 10.15 or higher. If not, update macOS before proceeding.
- Verify your hardware: Confirm your Mac has an Intel or Apple Silicon processor. This information appears in the About This Mac window.
- Ensure a stable internet connection: Open a web browser and load a webpage to confirm connectivity.
- Prepare accounts if needed: Create or log in to a GitHub or Raycast account to enable advanced features after installation.
How to install Raycast on macOS step-by-step
- Go to Raycast's official website at raycast.com and click the "Download" button. The download file is typically around 60 MB, and your browser will save a.dmg installer file in your default downloads folder.
- Locate the downloaded.dmg file and double-click it to open the installer window. You will see the Raycast app icon and a shortcut to the Applications folder.
- Drag the Raycast app icon into the Applications folder shortcut. This copies the application to your system and usually takes under a minute, depending on your Mac’s speed.
- Open the Applications folder and double-click the Raycast app to launch it. macOS may prompt you with a security warning since the app was downloaded from the internet; click "Open" to proceed.
- During the first launch, Raycast may request permission to control your computer and access accessibility features. Grant these permissions in System Preferences under "Security & Privacy" → "Privacy" → "Accessibility" to enable full functionality.
- After permissions are set, the app will prompt you to log in or create an account. You can sign in with your GitHub account or create a Raycast account using an email address. Logging in syncs your settings and extensions.
Once installed, Raycast typically resides in your menu bar and can be activated with a keyboard shortcut (default is Command + Space). The whole process usually takes just a few minutes from download to initial use.
How to set up Raycast on Mac for first use
After installing Raycast, the initial setup tailors the app to your workflow through customization of shortcuts, integration with macOS features and third-party apps, and adding useful extensions.
- Open Raycast and navigate to Preferences by clicking the Raycast icon in the menu bar or pressing Cmd +,. You should see the settings window with different configuration tabs.
- Customize keyboard shortcuts under the Shortcuts tab. Common setups include assigning Cmd + Space for quick access to Raycast, or using Cmd + Shift + Enter to launch your most used commands. Once changed, test the shortcuts to confirm they activate Raycast or specific commands as expected.
- Go to the Integrations tab to connect Raycast with macOS features such as Calendar, Reminders, and Contacts. Enable permissions when prompted; successful integration lets you manage these apps directly within Raycast.
- Integrate third-party services like GitHub, Slack, or Todoist by linking your accounts in the same tab. After linking, you should be able to run commands like creating GitHub issues or sending Slack messages from Raycast.
- Visit the Extensions tab to browse and add plugins that expand Raycast’s capabilities. Popular extensions include weather updates, clipboard managers, and code snippet utilities. Adding an extension should immediately make its commands available in Raycast’s search.
- Test your setup by using Raycast to execute a few commands, such as opening an app, creating a reminder, or checking the weather. Confirm that everything responds quickly and as configured.
This setup ensures Raycast fits your specific needs, enhancing productivity through personalized shortcuts and seamless app integrations.
How to use Raycast: Basic navigation and commands
Raycast offers a fast and intuitive interface to launch apps, search files, and control your Mac. To start, press the default shortcut Command + Space to open Raycast's command bar. From here, you can type the name of any installed application or file to open it quickly.
Using commands is central to Raycast’s power. For example, typing "open Safari" will launch the Safari browser, while "search documents" can help you locate files within your default folders. Commands can also control system functions—try "toggle Do Not Disturb" to switch notification settings on or off instantly.
To execute a command, follow these steps:
- Press Command + Space to open Raycast’s command bar. You should see a blinking cursor ready for input.
- Type a command or app name, such as "spotify" or "new note". Suggestions will appear below as you type.
- Use the arrow keys to select the desired command or app, then press Enter. The chosen app will open or the command will run.
- To explore extensions or workflows, type "extensions" or "workflows" to find additional tools and automate tasks.
For productivity, consider setting up custom commands to automate repetitive tasks like sending predefined emails or controlling smart home devices. Raycast also supports clipboard history and snippet management to speed up text insertion.
Overall, Raycast’s navigation centers on quick typing and minimal keystrokes, making it a powerful hub for daily Mac activities.
Raycast for Windows: What to expect and alternatives
Raycast is currently not available as a native application for Windows. The development team has focused on macOS due to its unique system integration capabilities, and there is no official release date for a Windows version. Users looking for similar launcher functionality on Windows will need to turn to alternative tools that replicate some of Raycast’s core features.
Several well-established alternatives on Windows include PowerToys Run, Keypirinha, and Wox. Each offers fast application launching, command execution, and plugin support, but they differ in interface design and extensibility.
| Feature | PowerToys Run | Keypirinha | Wox |
|---|---|---|---|
| Open-source | Yes | Yes | Yes |
| Plugin support | Limited | Extensive | Moderate |
| System integration | Deep (Microsoft tool) | Moderate | Moderate |
| Ease of use | High | Medium | Medium |
To get started with these alternatives on Windows, follow these steps:
- Go to the official PowerToys GitHub releases page (https://github.com/microsoft/PowerToys/releases) and download the latest installer. After installation, press Alt + Space to open PowerToys Run. You should see a quick launcher prompt appear.
- For Keypirinha, visit https://keypirinha.com/download.html, download the ZIP, extract it, and run the executable. Press Ctrl + Space to activate its launcher window.
- To try Wox, visit https://www.wox.one/, download the installer, and after installation, press Alt + Space to launch Wox’s command bar. You should see a search bar ready to accept commands and queries.
While none of these alternatives fully replicate Raycast’s macOS-specific integrations, they offer powerful launching and command capabilities on Windows. Exploring plugin repositories for these tools can extend functionality to better fit your workflow.
Troubleshooting common issues installing or using Raycast on Mac
If you encounter installation failures, first verify macOS permissions. Raycast requires full disk access and accessibility permissions to function properly. To check, open System Preferences > Security & Privacy > Privacy, then ensure Raycast is listed and checked under Accessibility and Full Disk Access. If missing, use the '+' button to add Raycast and restart your Mac.
Typical installation failure might show an error like “Failed to move Raycast.app to /Applications.” This often means insufficient permissions or a conflicting app instance. Quit any running Raycast processes (Activity Monitor can help) before reinstalling.
If Raycast launches but immediately crashes, check the console log via Console.app for messages such as “EXC_BAD_ACCESS” or “unhandled exception.” A common fix is to reset Raycast’s preferences by deleting its plist file located at ~/Library/Preferences/com.raycast.macos.plist and then relaunching the app.
For issues with extensions or commands not recognized, first verify your network connectivity since many extensions require online access. Then, open Raycast’s Preferences > Extensions and toggle the problematic extension off and on. If commands still fail, try reinstalling the extension or consult the extension’s documentation for dependencies.
When commands return “Command not found” or “Extension failed to load,” it often indicates outdated or corrupted cache. To clear the cache, quit Raycast and run rm -rf ~/Library/Caches/com.raycast.macos in Terminal, then restart Raycast.
Understanding raycasting beyond Raycast app: A brief note
The term Raycast commonly refers to the Mac productivity app covered in this article, but it also appears in other unrelated contexts that may cause confusion.
Raycasting in software development
In computer graphics and game development, raycasting is a technique used to calculate the path of rays—lines cast from a point in a virtual space to detect intersections with objects. Engines like Unity use raycasting to detect collisions, line of sight, or user input in 3D environments. This is a technical process unrelated to the Raycast app’s function as a launcher and productivity tool.
Other unrelated uses of "raycast" or similar terms
Searches like "how to install x-ray in Minecraft" refer to game modifications that reveal hidden blocks, unrelated to either the productivity app or the raycasting technique. Similarly, "casting from Mac" often involves screen sharing or streaming content to devices like Apple TV or Chromecast, which is distinct from the Raycast application.
Understanding these distinctions helps ensure you find the right information for your needs without mixing technical terms or unrelated software.
- How to Install and Use Magnet on Mac: A Complete Step-by-Step Guide
- How to Install and Set Up Rectangle on Mac: A Step-by-Step Guide
- How to Install AppCleaner on Mac: A Step-by-Step Guide
- How to Install and Set Up OBS Studio on Mac: A Complete Guide
Frequently asked questions
What is raycast for mac?
Raycast for Mac is a productivity tool that acts as a fast launcher and command palette. It allows you to quickly access applications, files, and system commands through a keyboard-driven interface. It integrates with many developer tools and services, enhancing workflow efficiency on macOS.
What is raycast for windows?
Raycast is primarily designed for macOS and does not have an official version for Windows. Windows users looking for similar functionality often rely on alternatives like PowerToys Run or Wox, which offer app launching and command features tailored to the Windows environment.
How to cast on mac?
To cast content from a Mac, you typically use AirPlay by clicking the AirPlay icon in the menu bar or System Preferences under Displays. Select a compatible device like an Apple TV or smart TV to mirror or extend your screen. Some apps also support built-in casting options to send media directly to supported devices.
How to cast from mac?
Casting from a Mac involves enabling AirPlay or using third-party apps for devices that do not support AirPlay. You can mirror your display or stream video and audio to compatible devices via the AirPlay icon located in the Control Center or menu bar. For non-Apple devices, apps like Chromecast offer casting through their own software.
How to use raycasting in unity?
In Unity, raycasting is used to detect objects along a line or ray in the game world. You create a Ray object and use Physics.Raycast to check for collisions with colliders. This technique is commonly used for shooting mechanics, object selection, and AI line-of-sight checks in 3D games.
What this guide does not cover and who should look elsewhere
This guide does not cover advanced scripting within Raycast or enterprise deployment scenarios, which may require additional technical knowledge and access to organizational IT resources. If you need to automate complex workflows or manage Raycast installations across multiple machines in a corporate environment, consulting official Raycast developer documentation or IT specialists is recommended.
For users seeking an alternative launcher with deeper Windows integration or cross-platform options, other tools like Microsoft PowerToys Run or Alfred for Mac may be more suitable.
The single most useful next step is to explore Raycast’s built-in extension marketplace and start adding commands that match your daily tasks. This hands-on approach helps tailor Raycast’s functionality to your workflow, making it a more effective productivity tool right from the start.



