How to Lock a Sheet in Numbers: Step-by-Step Guide for Secure Spreadsheets
Discover how to lock sheets in Numbers by securing cells and using password protection to keep your spreadsheets safe from unwanted edits.
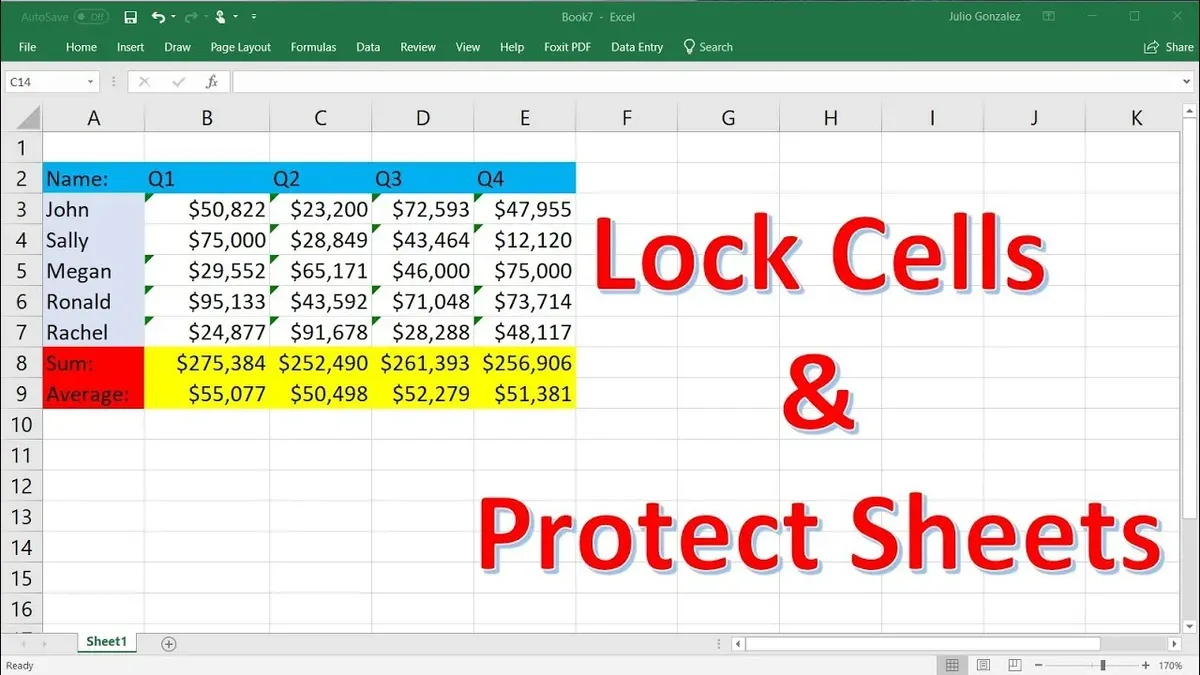
You’ve created a detailed financial report or an important project plan in Numbers, and now you want to ensure that no one accidentally edits key data. However, unlike Excel, Numbers doesn’t offer a straightforward way to lock entire sheets. Understanding how to lock a sheet in Numbers requires a bit of creativity, especially if you use an iPad or iPhone.
This article guides you step-by-step through the options available for protecting your spreadsheets in Numbers. You’ll learn how to secure cells and objects on Mac, apply password protection to the whole spreadsheet, and understand the limitations on iPad. We’ll also compare these features to Excel’s sheet-locking capabilities to clarify what is and isn’t possible within Numbers.
Key takeaways
- Numbers does not allow locking entire sheets but lets you lock individual cells and objects.
- On Mac, you can protect cells and objects via the Format sidebar to prevent editing.
- Password-protecting the entire spreadsheet restricts access but does not lock specific sheets.
- Numbers on iPad has more limited locking options compared to Mac.
- Excel’s sheet locking differs significantly, offering more granular control over sheet protection.
Before you start: What you need to lock a sheet in Numbers
To successfully lock sheets or content in Apple Numbers, you need to ensure your device and app are up to date. On Mac, you should be running macOS Monterey 12.0 or later with Numbers version 12.0 or newer. For iPad and iPhone, iPadOS 15.0 or later and iOS 15.0 or later respectively, along with the latest Numbers app version, provide the best support for locking features.
It's essential to understand the distinction between locking cells or objects within a sheet and password-protecting the entire spreadsheet. Numbers allows you to lock cells and objects to prevent editing, but it does not support locking individual sheets with passwords like Excel. Instead, you can password-protect the whole spreadsheet, which restricts access to all content inside.
Be aware that the interface and available features differ between Mac and iPad. On Mac, you have more granular control with options like locking individual cells or objects through the Format sidebar. On iPad and iPhone, the interface is simplified, so some locking options are accessed differently or are limited. Knowing these device-specific nuances helps you follow the steps smoothly.
- Check your device’s operating system version: On Mac, go to Apple menu > About This Mac; on iPad/iPhone, go to Settings > General > About. Confirm it meets the minimum OS requirements.
- Open the App Store and verify that Numbers is updated to the latest version. If updates are available, install them to access current locking features.
- Launch Numbers and open or create a spreadsheet to confirm the interface matches described instructions (e.g., Format sidebar on Mac or the Format pane on iPad).
- Familiarize yourself with the distinction between locking cells/objects and password-protecting spreadsheets to set realistic expectations about what you can secure within Numbers.
How to lock a sheet in Numbers on Mac by protecting cells and objects
Numbers does not offer a direct way to lock an entire sheet, but you can effectively protect your data by locking individual cells and objects. This prevents accidental edits within your spreadsheet while keeping the rest of the sheet accessible.
- Select the cells or ranges you want to protect: Click and drag to highlight the cells that should be locked. You can select multiple ranges by holding the Command key while clicking.
- Open the Format sidebar: If it’s not already visible, click the Format button on the top right. Inside the sidebar, go to the Cell tab.
- Lock the selected cells: Scroll down in the Cell tab and check the Locked box. This marks the cells as protected from editing.
- Test the lock: Try editing a locked cell; Numbers will prevent changes and display a message indicating the cell is locked.
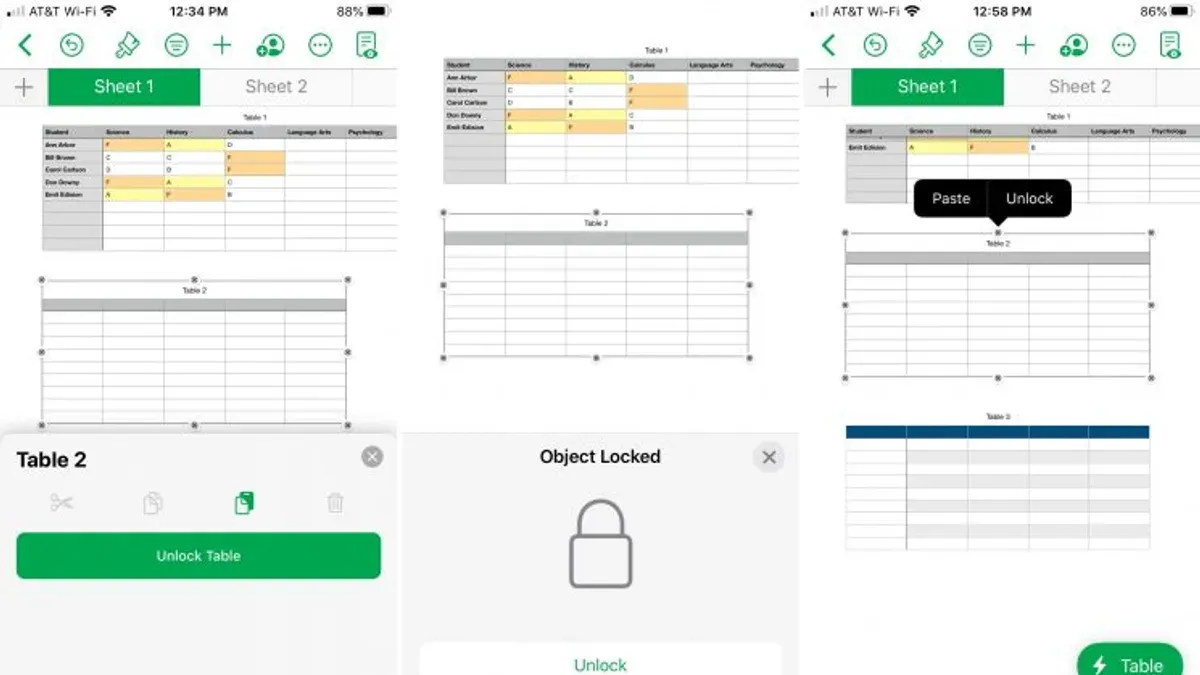
- Lock objects such as charts or text boxes: Click to select the object, then go to the Arrange menu in the top toolbar and choose Lock. Locked objects cannot be moved or edited accidentally.
- Verify object locking: Attempt to move or modify the locked object; Numbers will block the action, confirming the lock is active.
Keep in mind, locking cells or objects protects from edits but does not add password protection. Anyone with access to the spreadsheet can unlock these elements if they know where to look.
How to lock a spreadsheet in Numbers with password protection
Password protecting your entire Numbers file is the most effective way to prevent unauthorized access. This method applies a password to the whole spreadsheet, not to individual sheets within it. When you open a password-protected file, you will see a lock screen prompting you to enter the password before accessing any content.
- Open the Numbers spreadsheet you want to protect.
- Go to the File menu in the menu bar and select Set Password.
- Enter a strong password in the dialog box. Make sure it is something secure yet memorable, as losing this password means you will not be able to open the file again.
- Re-enter the password to verify it, then click Set Password.
- Once set, close and reopen the file to confirm the lock screen appears, requesting the password before allowing access.
This approach is appropriate when you want to protect all the data in your spreadsheet from being opened or edited by others. Unlike locking individual sheets or cells, password protection secures the entire document, making it the closest alternative to sheet-level locking within Numbers. Keep in mind that anyone who can enter the password will have full access to the whole file, so choose your password carefully and keep it safe.
How to lock a spreadsheet in Numbers on iPad: limitations and steps
Numbers on iPad does not offer the ability to lock individual cells or sheets like the Mac version does. This means you cannot selectively protect parts of your spreadsheet from editing. Instead, the only locking option is to password-protect the entire spreadsheet file. This limitation reflects the simplified interface and feature set tailored for iPad use.
To password protect your Numbers spreadsheet on iPad, follow these steps:
- Open your spreadsheet in the Numbers app.
- Tap the three-dot menu button (•••) in the upper right corner of the screen.
- Select Set Password from the menu.
- Enter a strong password, then confirm it on the next screen.
- Optionally enable Use Face ID or Touch ID for easier access.
- Tap Done to apply the password protection.
Once set, anyone opening the file on any device will need the password to access the spreadsheet. However, since you cannot lock individual sheets or cells on iPad, all content within the spreadsheet remains editable once opened.
As a workaround, consider creating separate spreadsheets for sensitive data or exporting your spreadsheet as a PDF to share a static, non-editable version. Additionally, regularly backing up your files to iCloud or another cloud service helps prevent accidental changes.
| Feature | Numbers on Mac | Numbers on iPad |
|---|---|---|
| Lock individual cells | Yes | No |
| Lock individual sheets | No (only cell/object protection) | No |
| Password protect entire spreadsheet | Yes | Yes |
How to lock individual sheets in Excel and why Numbers differs
Microsoft Excel offers robust options for locking individual sheets within a workbook, providing granular control over what users can and cannot edit. In Excel, you can protect a sheet with a password, restrict editing to specific ranges or objects, and allow certain actions like sorting or filtering while blocking others. This level of sheet-specific protection makes Excel a go-to choice when you need to secure parts of your workbook without restricting access to the entire file.
In contrast, Apple Numbers does not support locking individual sheets with passwords. Instead, Numbers focuses on locking specific cells or objects and protecting the entire spreadsheet file with a single password. This means that while you can prevent edits on parts of a sheet, you cannot isolate protection to a single sheet like in Excel. Numbers’ approach is simpler but less flexible regarding sheet-level security.
| Feature | Excel | Numbers |
|---|---|---|
| Lock individual sheets with password | Yes, via Review tab > Protect Sheet | No, individual sheet locking not available |
| Lock specific cells or objects | Yes, granular cell locking possible | Yes, by locking selected cells or objects |
| Password protect entire file | Yes, via File > Info > Protect Workbook | Yes, via File > Set Password |
Consider these user scenarios:
- If you want to share a workbook but restrict editing on certain sheets, Excel’s sheet protection is ideal.
- If you only need to prevent accidental changes to parts of a sheet and secure the entire file, Numbers’ cell/object locking combined with file password protection may suffice.
- Those requiring advanced sheet-level locking may need to use Excel alongside Numbers or convert spreadsheets accordingly.
How to lock specific sheets in Excel: quick overview for Numbers users
In Excel, you can lock individual sheets to control what others can edit or view, a feature Numbers does not offer. This sheet-level protection is accessed through the Review tab, allowing you to set a password and specify precise editing permissions for each sheet separately.
- Open the Excel workbook and select the sheet you want to protect. You should see the sheet’s content displayed.
- Go to the Review tab on the Ribbon and click Protect Sheet. The Protect Sheet dialog box will appear.
- Enter a password in the password to unprotect sheet field. This password is required to unprotect the sheet later.
- Under Allow all users of this worksheet to:, check or uncheck options such as Select locked cells, Select unlocked cells, Format cells, and more. These settings control what users can do on the protected sheet.
- Click OK. You will be prompted to re-enter the password to confirm it. After confirmation, the sheet is protected, and users cannot make unauthorized changes.
- Repeat these steps for any other sheets you want to lock individually, allowing different permissions per sheet as needed.
This granular sheet protection in Excel contrasts with Numbers, which only allows locking cells or objects within a sheet and password protecting the entire file, but not locking sheets individually. Understanding this difference helps set accurate expectations for managing spreadsheet security across these applications.
Troubleshooting common issues when locking sheets or spreadsheets in Numbers
If you find locked cells are still editable, first verify you applied cell or object protection correctly. On Mac, select the cells or objects, then choose Format > Arrange > Lock. If this step is missed, the content remains editable. Also, ensure you saved the changes after locking.
Forgetting a spreadsheet password is a serious issue because Numbers offers no way to recover or reset it. If you see the message “Incorrect password” when opening a file, you must remember the exact password or restore from a backup. There is no password hint or recovery option within Numbers.
Locking objects in Numbers prevents editing but does not stop deletion. If you notice locked shapes or charts can be deleted, this is a known limitation. To reduce accidental deletions, consider grouping objects or saving versions regularly.
Syncing password-protected Numbers files across devices can cause access issues. If you get errors or your file won’t open on iPad or iPhone, confirm all devices run the latest iOS or macOS versions and have updated Numbers. Sometimes re-downloading the file from iCloud or restarting the device resolves sync glitches.
- Check if locked cells or objects respond to edits—if yes, apply Lock via Format > Arrange > Lock and save. You should no longer be able to change locked content.
- If you cannot open a password-protected spreadsheet, verify the password carefully. An incorrect password triggers an error with no reset option.
- To avoid accidental deletion of locked objects, group them: select objects, then Format > Arrange > Group. Grouping helps protect elements together.
- If syncing issues appear, update all devices’ OS and Numbers app, then re-download the file from iCloud. This usually clears access errors.
Tips for managing and sharing locked Numbers spreadsheets securely
When sharing a locked Numbers spreadsheet, always use password protection to restrict access to authorized users only. Before sharing, set a strong password by selecting File > Set Password so that only those with the password can open the file. This adds a necessary layer of security to your data.
Communicate clearly with your collaborators about which parts of the spreadsheet are locked. Inform them that certain cells or objects are protected and cannot be edited, to avoid confusion and accidental data overwrite. This helps maintain the integrity of your spreadsheet while allowing collaboration where appropriate.
Avoid sharing passwords through insecure channels like email or unencrypted messaging apps. Instead, use secure methods such as encrypted messaging services, phone calls, or password managers to transmit passwords safely. Poor password sharing practices are a common cause of unauthorized access and data breaches.
Regularly back up your locked spreadsheets to multiple locations, such as an external drive or cloud storage with encryption enabled. This prevents data loss if the original file becomes corrupted, accidentally deleted, or inaccessible due to password issues. Maintaining backups ensures you always have a recoverable copy of your important work.
- Set a strong password for your Numbers file by going to File > Set Password. You should see a confirmation that the password is active when done.
- Notify collaborators about locked cells or objects via email or a shared document. They should understand editing restrictions before accessing the file.
- Share the password securely using encrypted messaging or a trusted password manager. Avoid sending passwords in plain text over email.
- Make regular backups of your locked spreadsheets to secure locations. Verify backup copies open correctly and retain password protection.
Frequently asked questions
How to lock a sheet in excel?
To lock a sheet in Excel, go to the Review tab and click on "Protect Sheet." You can then set a password and choose what actions users can perform, such as selecting locked or unlocked cells. This prevents changes to the sheet's content unless the correct password is entered.
How to lock sheet in spreadsheet?
Locking a sheet in most spreadsheet programs involves protecting the sheet via a menu option, usually under Review or Tools. This sets permissions to restrict editing. For example, in Numbers, you cannot lock individual sheets directly, but you can protect cells or the entire spreadsheet with a password.
How to lock in numbers in excel?
This phrase seems to mix two programs. In Excel, you lock by protecting sheets or workbooks with passwords. In Numbers, you protect spreadsheets with passwords or lock specific cells and objects, but you cannot lock entire sheets individually as in Excel.
How to lock 1 sheet in excel?
To lock one sheet in Excel, select that sheet, go to the Review tab, and click "Protect Sheet." Set your desired password and permissions for that sheet only. Other sheets remain editable unless separately protected.
Can you password protect a numbers spreadsheet?
Yes, you can password protect a Numbers spreadsheet. Open the spreadsheet, click on the File menu, choose "Set Password," then enter and verify your password. This prevents unauthorized access to the entire spreadsheet file.
Understanding the Limits of Locking in Numbers
While Numbers provides useful tools like locking individual cells and objects, as well as password protecting the entire spreadsheet file, it does not allow locking individual sheets with separate passwords like Excel does. Password protection in Numbers applies to the whole file, meaning you cannot restrict editing access to specific sheets or assign different permissions to different users within the same document. If your workflow requires advanced sheet-level security or multi-user permission settings, spreadsheet applications such as Microsoft Excel or Google Sheets may better meet those needs.
To best protect your data in Numbers, focus on combining cell and object locking with the file’s password protection. This approach secures critical content while still allowing some flexibility. The single most useful next step is to set a strong password for your Numbers file by choosing File > Set Password on your Mac or tapping the More button > Set Password on your iPad. This simple action ensures that your spreadsheet’s content stays safe, even if you cannot lock individual sheets separately.
See also: How to Add a Dropdown Menu in Numbers: A Clear Step-by-Step Guide · How to Freeze Header Rows in Numbers: A Step-by-Step Guide · How to Merge Cells in Numbers: A Clear Step-by-Step Guide · How to Make a Monthly Budget in Numbers: A Step-by-Step Guide for 2026