How to Convert Numbers to Excel Format in Numbers: A Step-by-Step Guide
This guide shows you how to convert Numbers to Excel in Numbers while keeping your data accurate and properly formatted for easy sharing.
You’ve created a detailed spreadsheet in Numbers, but now you need to send it to a colleague who only uses Excel. When you export the file, the numbers don’t always behave as expected in Excel, causing confusion and errors in calculations. If you’re wondering how to convert Numbers to Excel in Numbers while keeping your data accurate and properly formatted, this guide will walk you through each step.
We’ll cover everything from exporting your file correctly, to fixing common issues like text-formatted numbers, phone number formats, and negative values in Excel. By following these clear steps, you’ll ensure your Numbers data remains reliable and easy to work with after conversion.
Key takeaways
- Export Numbers files using the “Export To” > “Excel” option for best compatibility.
- Convert any text-formatted numbers to numeric format in Excel using the VALUE function or paste special.
- Use Excel’s TEXT functions to format phone numbers consistently after export.
- Apply simple formulas to convert negative numbers to positive or vice versa in Excel.
- Check for regional number format differences and adjust decimal or thousand separators accordingly.
Before you start: What you need to convert numbers from Numbers to Excel
To convert numbers from Numbers to Excel effectively, you need to prepare a few things first. Make sure you have the latest version of both Numbers and Excel installed on your device, or access to Excel online. Newer versions handle file compatibility better and reduce the risk of formatting errors. Numbers files use the .numbers format, which Excel cannot open directly, so exporting to .xlsx or .csv formats is essential for Excel compatibility.
Keep in mind that Numbers often stores numbers in ways that Excel may interpret differently. For example, some numbers in Numbers may actually be formatted as text, which can disrupt calculations once opened in Excel. Understanding this difference helps you anticipate potential conversion issues. Also, Excel and Numbers use different approaches to formatting phone numbers, negative values, and regional number formats, so you will need to adjust these after export.
Before exporting, back up your original Numbers file. This safeguards your data if anything goes wrong during the conversion process. Having a backup means you can always return to the original version without losing any information.
- Check you have the latest versions of Numbers and Excel or access Excel online. When done, you can open files without compatibility warnings.
- Locate your Numbers file with the .numbers extension. This is the source file you will export from.
- Understand that Numbers stores some numbers as text or with specific formatting. This means after export, Excel may not recognize all numbers correctly.
- Prepare to export your file to .xlsx or .csv formats, which Excel can open directly.
- Make a copy of your Numbers file as a backup before starting the export. This copy will stay safe if the conversion needs to be redone.
Export Numbers file to Excel format correctly
To ensure your Numbers spreadsheet exports correctly to Excel while preserving number formatting, follow these steps carefully. Start by opening your spreadsheet in Numbers. Then, go to the menu bar and select File > Export To > Excel…. This will open the export dialog with several options.
- In the export dialog, check the box for Include table names if you want Excel to keep your table labels. This helps with organization after export.
- Make sure the option for Export formulas as formulas is selected. This preserves formulas rather than converting them to static values, maintaining dynamic calculations.
- Review other options like Include comments if needed, then click Next.
- Choose the location to save the exported
.xlsxfile and click Export. This generates a file readable by Excel. - Open the exported file in Excel. Check that numbers retain their formatting — for example, currency symbols, decimal places, or percentages should appear correctly. If you notice any formatting issues, compare the original Numbers file and Excel file side by side to identify what changed.
While Numbers’ direct export to Excel usually preserves most number formats and formulas, some complex formatting or custom number styles may not transfer perfectly. In such cases, exporting to CSV can be an alternative since it handles raw data well, but it will not keep formulas or advanced formatting. Choose CSV if your priority is clean, simple data over formatting.
By carefully using the export options and verifying the output in Excel, you can maintain the integrity of your numbers and formulas throughout the transfer process.
Convert text numbers to numbers in Excel after export
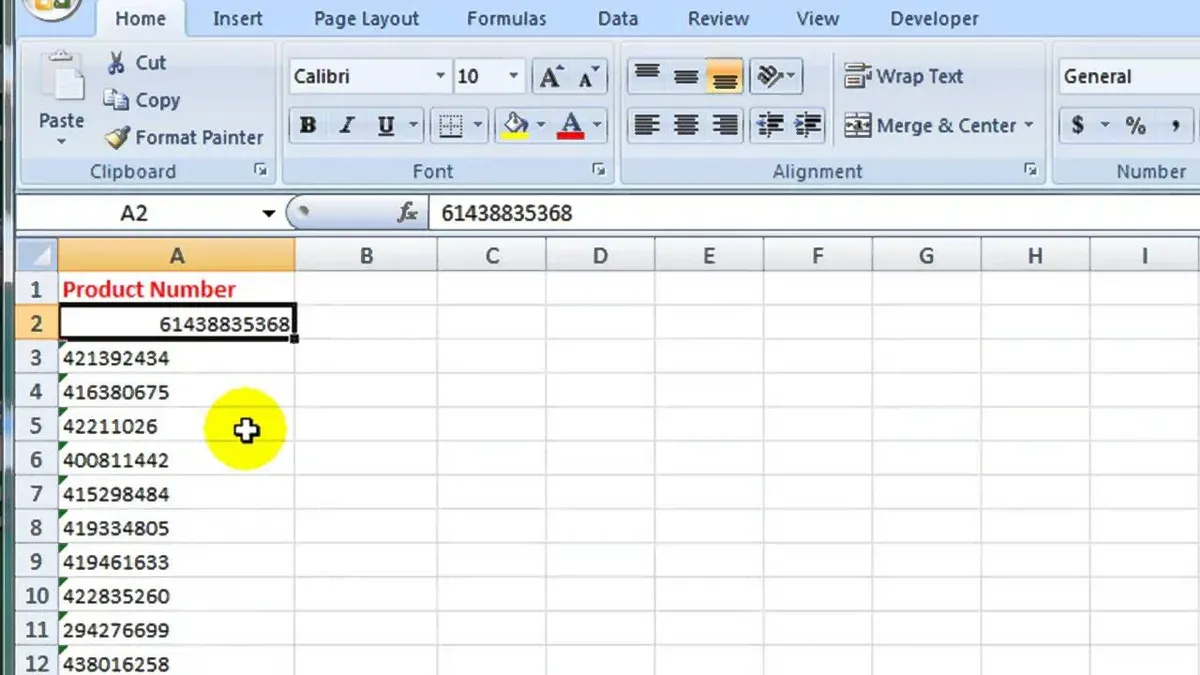
After exporting your Numbers file to Excel, you may notice some numbers appear left-aligned or have a small green triangle in the top-left corner of the cell. These indicators show that Excel recognizes these entries as text, not numeric values. When numbers are stored as text, calculations and functions won’t work correctly, so you need to convert them to true numbers.
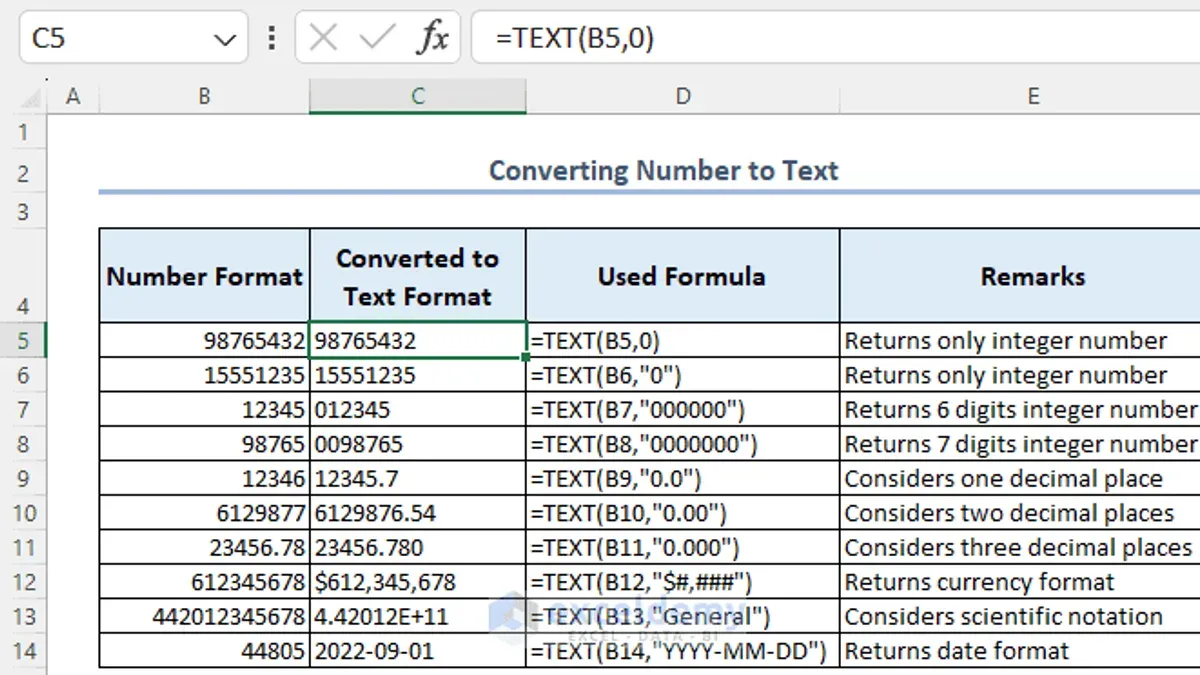
One reliable way to convert text numbers to numeric format is by using Excel’s Text to Columns feature. This tool quickly transforms text entries into numbers without altering your data layout.
- Select the cells containing the text numbers you want to convert. You should see left alignment and possibly error indicators.
- Go to the Data tab on the ribbon and click Text to Columns.
- In the wizard, choose Delimited and click Next without selecting any delimiters.
- Click Next again, then under Column data format, select General.
- Click Finish. The text numbers will convert to numeric values, now right-aligned and ready for calculations.
If you prefer a formula-based method, use the VALUE() function to convert text numbers. For example, if cell A1 contains a text number like "1,234", enter =VALUE(A1) in another cell. This converts the text to a number, handling commas properly.
Numbers formatted with commas or other symbols often remain as text because Excel treats the punctuation as non-numeric characters. Using Text to Columns or VALUE() removes these formatting issues. After conversion, verify the cells are right-aligned and that error indicators disappear, confirming the values are now recognized as numbers.
Convert numbers to phone numbers in Excel
After exporting your Numbers spreadsheet to Excel, phone numbers often appear as plain digits without formatting. To display these numbers as recognizable phone numbers, you need to apply Excel’s custom number formatting. This helps keep phone numbers clear and consistent, especially when preparing data for sharing or further processing.
- Select the cells containing the phone numbers stored as plain digits. Once selected, you will see the numbers highlighted.
- Right-click the selection and choose Format Cells. In the Format Cells dialog, go to the Number tab and select Custom from the category list.
- In the Type field, enter the custom format
(###) ###-####and click OK. Your raw numbers like4155551234will now display as(415) 555-1234. - If your phone numbers lack country codes or are inconsistent in length, use formulas to standardize them. For example, to add a US country code +1, insert a new column and enter
="+1 " & TEXT(A2,"(###) ###-####"), replacingA2with the first cell of your number data. - Be aware that incomplete or irregular numbers may not format correctly. In such cases, clean your data first by removing extra spaces, non-numeric characters, or confirming number lengths before applying formats or formulas.
Following these steps ensures your phone numbers are correctly formatted and ready for use or presentation in Excel, maintaining clarity and professional appearance.
Convert numbers to negative numbers in Excel
To change positive numbers into negative values efficiently, Excel offers two straightforward methods: using Paste Special with multiplication, or applying formulas. Both approaches ensure your data converts correctly, avoiding common pitfalls like errors from zero or blank cells.
- Select an empty cell and type -1. This will be the multiplier to convert your numbers to negative.
- Copy the cell containing -1 by pressing Ctrl+C (Windows) or Command+C (Mac).
- Highlight the range of positive numbers you want to convert to negative.
- Right-click the selected range, choose Paste Special, then select Multiply under the Operation section.
- Click OK. Your positive numbers will instantly change to negative values in place. For example, 100 becomes -100, 45 becomes -45, and 0 stays 0.
This Paste Special method multiplies each cell’s value by -1 without altering cell references or formulas that include these numbers. It’s efficient for bulk changes without adding extra columns.
If you prefer formulas, enter =-A2 (assuming A2 has the original number) in a new column and drag down. To avoid errors with blanks or zeros, use =IF(A2="", "", -A2). This keeps your original data intact while providing negative versions separately.
Remember, formulas referencing these numbers will update accordingly when using negative values. However, if you use Paste Special, formulas pointing to the changed cells automatically reflect the new negative values without further updates.
Convert negative numbers to positive numbers in Excel
When you need to turn negative numbers into positive ones in Excel, the ABS() function is a reliable and straightforward method. This function returns the absolute value of a number, effectively removing any negative sign. For example, if cell A2 contains -45, entering =ABS(A2) in another cell will display 45. This approach is ideal when you want to keep the original data intact and work with positive values separately.
If you prefer to convert negative numbers directly within the same cells without using additional columns, you can use the Paste Special feature with a multiplication factor. Multiplying by -1 reverses the sign of the numbers, so applying this to negative numbers will make them positive. However, be cautious when using this method if your cells contain formulas, as it can overwrite formula relationships and affect data integrity.
Choosing between the ABS() formula and Paste Special depends on your needs: use ABS() if you want to preserve original data or formulas, and Paste Special if you want a quick in-place conversion of values. Always double-check your spreadsheet for any formula dependencies before applying direct cell manipulations.
- Select a blank cell and enter -1, then copy this cell.
- Select the range of negative numbers you want to convert to positive.
- Right-click the selected range, choose Paste Special, then select Multiply under Operation, and click OK. The negative numbers become positive.
- To use the ABS() function, select an empty cell next to your first negative number.
- Enter =ABS(cell_reference), replacing cell_reference with the actual cell (e.g., A2), and press Enter. The negative number displays as positive.
- Copy the formula down the column to convert all negative numbers in that range.
Convert Arabic numbers to English numbers in Excel
Arabic-Indic numerals (٠ to ٩) are used in many Arabic-speaking regions and differ visually and numerically from the Western Arabic numerals (0 to 9) Excel uses by default. When you import or export data containing Arabic-Indic digits, Excel may not recognize them as numbers, causing calculation errors. To fix this, you need to convert these numerals into English numerals compatible with Excel formulas and functions.
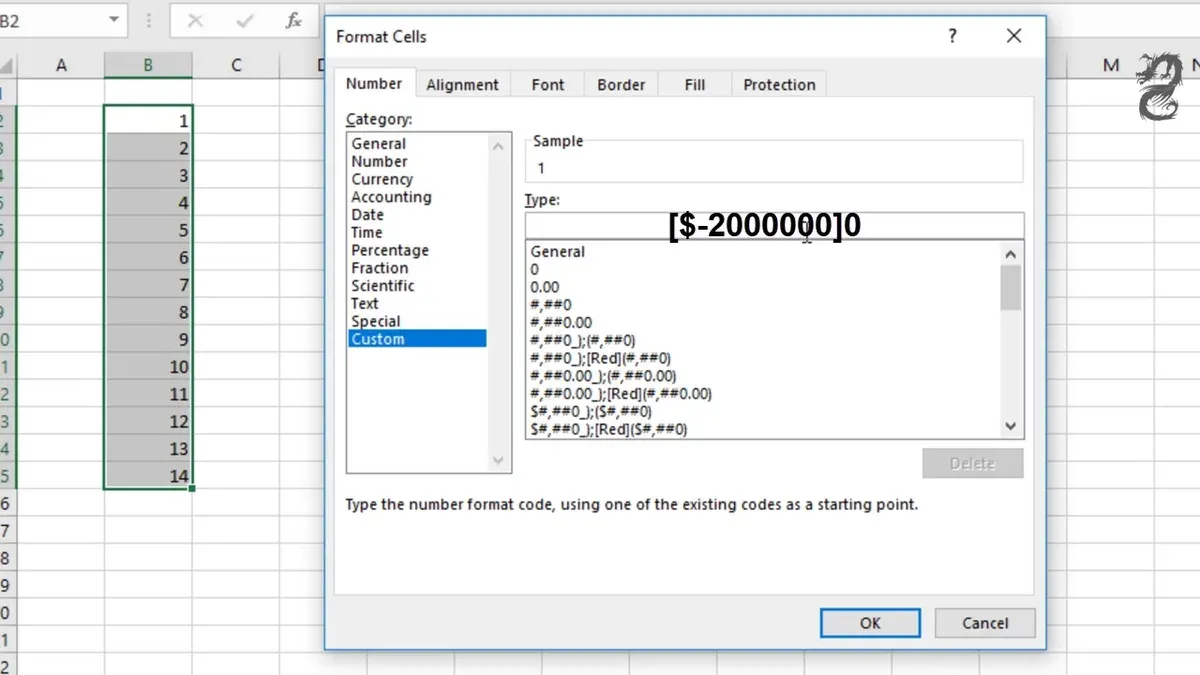
You can perform this conversion using Excel formulas with the SUBSTITUTE function or by running a simple VBA macro. The SUBSTITUTE method replaces each Arabic-Indic digit with its English counterpart, while VBA can automate this process over a range of cells, which is helpful for larger datasets.
- Select an empty cell next to your data. Enter the formula to replace digits, for example: =SUBSTITUTE(SUBSTITUTE(SUBSTITUTE(SUBSTITUTE(SUBSTITUTE(SUBSTITUTE(SUBSTITUTE(SUBSTITUTE(SUBSTITUTE(SUBSTITUTE(A1,"٠","0"),"١","1"),"٢","2"),"٣","3"),"٤","4"),"٥","5"),"٦","6"),"٧","7"),"٨","8"),"٩","9"). After pressing Enter, you should see the Arabic-Indic number converted to English digits.
- Drag the fill handle down to apply this formula to all relevant cells. You will now have English numerals as text that Excel can use for calculations.
- If you want these as actual numbers, wrap the SUBSTITUTE formula inside the VALUE() function, like =VALUE(SUBSTITUTE(...)). This converts the text to numeric values.
- For larger datasets or frequent conversions, use a VBA macro: open the VBA editor with Alt+F11, insert a new module, paste a macro that replaces Arabic-Indic digits with English digits, and run it on your selected range. This automates the substitution process.
- Check your regional settings in Excel under File > Options > Advanced > Editing options. Some locale settings may affect numeral display and input, so ensure your system’s regional format supports English numerals for consistency.
Following these steps will ensure your Arabic-Indic numbers convert properly to English digits, preserving data integrity and allowing Excel to perform calculations correctly.
Troubleshoot common issues converting Numbers data to Excel numbers
After exporting your Numbers data to Excel, you might notice some numbers appear as text. To detect this, select the cells and look for a small green triangle in the top-left corner, indicating text-formatted numbers. You can also use the ISTEXT() function to test cells. These text numbers won’t calculate correctly until converted.
- Select the affected range, then go to the Data tab and click Text to Columns. Choose Delimited, click Next twice, and select General as the Column data format. Click Finish. You should see numbers aligned to the right, indicating numeric format.
- Check for extra spaces or non-breaking spaces that often cause text numbers. Use the formula =TRIM(SUBSTITUTE(A1, CHAR(160), "")) to clean these spaces, then copy and Paste Special > Values over the original data. Numbers will then behave correctly.
- Decimal separators can differ based on locale settings. If you see numbers with commas instead of periods or vice versa, adjust Excel’s locale under File > Options > Advanced > Editing options > Use system separators. Alternatively, use Find & Replace to swap commas and periods as needed.
- If formulas from Numbers don’t work after export, it’s often due to unsupported functions or reference changes. Re-enter formulas in Excel or use Evaluate Formula under the Formulas tab to identify errors. Simplify complex formulas or replace unsupported ones manually.
These steps help maintain data integrity and ensure your Numbers data performs as expected in Excel.
Frequently asked questions
How to convert numbers to numbers in excel?
To convert numbers that are stored as text into actual numbers in Excel, select the cells, then click the warning icon that appears and choose "Convert to Number." Alternatively, use the Paste Special method by copying a blank cell, selecting your text numbers, right-clicking, choosing "Paste Special," and selecting "Add." This forces Excel to recognize the values as numbers usable in calculations.
How to convert numbers to phone numbers in excel?
To format numbers as phone numbers, select the cells, right-click and choose "Format Cells." Under the "Number" tab, select "Special," then choose "Phone Number." If the built-in format doesn’t match your region’s style, use a custom format like "(000) 000-0000" to display the numbers appropriately.
How to convert numbers to negative numbers in excel?
Multiply the numbers by -1 to convert them to negative values. You can do this by entering -1 in a blank cell, copying it, selecting the target numbers, then using "Paste Special" and choosing "Multiply." This changes all selected numbers to their negative equivalents.
How to convert excel values to numbers?
If Excel values appear as text, use the "Text to Columns" feature found under the "Data" tab. Select the cells, click "Text to Columns," choose "Delimited," click "Finish," and Excel will convert the text values to numbers. This method is effective for bulk conversion without formulas.
How to convert text numbers to numbers in excel?
Select the cells with text numbers and look for a green triangle in the corner. Click the warning icon and choose "Convert to Number." If this option isn’t visible, use the VALUE function or multiply the cells by 1 to coerce Excel into recognizing them as numbers.
What This Guide Does Not Cover
This guide does not cover converting numbers within Excel back into Numbers format; its focus is strictly on exporting and preparing Numbers data for Excel. Some complex formulas, conditional formatting, and specialized cell formats may not transfer perfectly due to inherent differences between Numbers and Excel. If you work with extremely large datasets, specialized numeric formats, or rely heavily on advanced formulas, you may need to explore dedicated conversion tools or professional data processing software.
The most useful next step is to carefully review your exported Excel file immediately after conversion. Check key columns for correct number formatting and try simple calculations to ensure data integrity. Catching and correcting any formatting issues early will save time and prevent errors in your Excel workflows.
See also: How to Make a Pie Chart in Numbers: A Clear Step-by-Step Guide · How to Use VLOOKUP in Numbers: A Step-by-Step Guide for Numbers Users · How to Create a Pivot Table in Numbers: A Clear Step-by-Step Guide