How to Record a Podcast in GarageBand: Step-by-Step Guide
This guide shows you how to record a podcast in GarageBand with step-by-step instructions for setup, recording, editing, and exporting your episode.
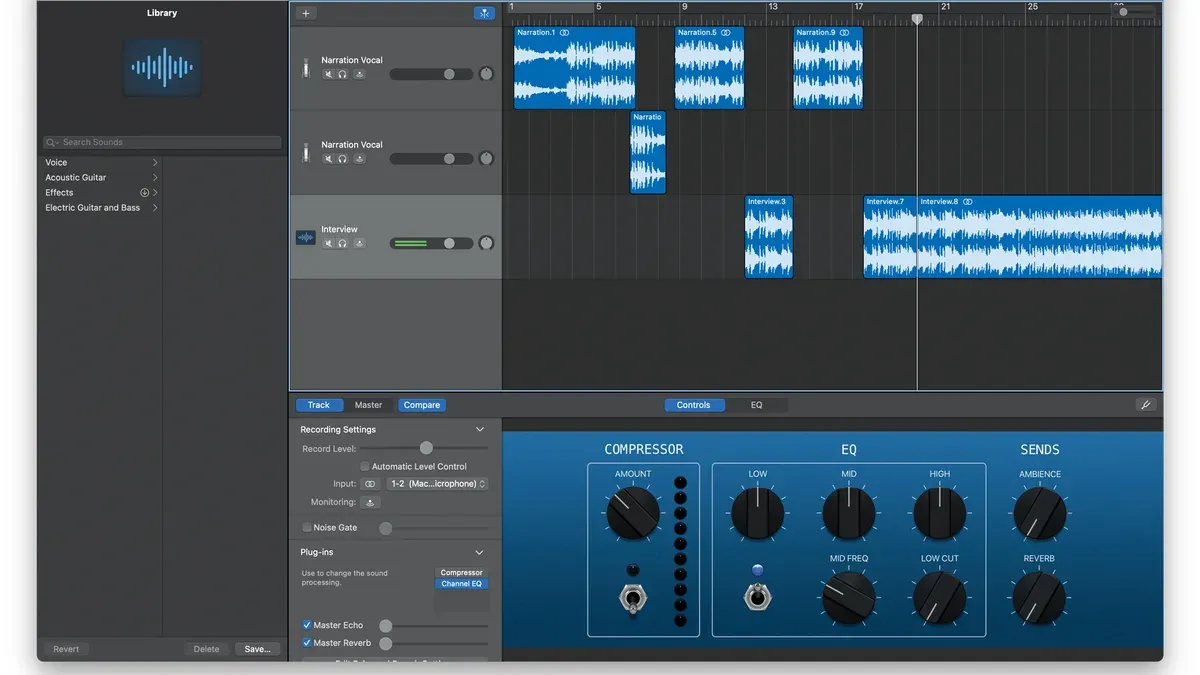
You have a Mac and a great idea for a podcast, but you’re not sure how to get started recording without buying extra gear or software. GarageBand, the free app that comes with your Mac, can handle everything from capturing your voice to exporting your finished episode.
This guide walks you through how to record a podcast in GarageBand with clear, step-by-step instructions. You’ll learn how to set up your recording environment, capture your voice, add multiple tracks for guests, edit your audio, and export your episode ready for publishing. Along the way, practical tips will help you avoid common pitfalls and make the process smoother.
Key takeaways
- Use GarageBand’s “Voice” project template to start your podcast recording quickly.
- Connect a USB microphone or use your Mac’s built-in mic for straightforward setup.
- Record each speaker on separate tracks to simplify editing later.
- Use the built-in editing tools to remove background noise and tighten your audio.
- Export your podcast as an MP3 or AAC file with GarageBand’s Share menu when you’re done.
Before you start: Gather your gear and prepare your setup
To record a podcast using GarageBand, you need to have the right hardware and environment ready before opening the app. Start with a Mac computer, as GarageBand comes preinstalled on macOS and requires no extra purchase or download. Having GarageBand installed means you can jump straight into recording once your gear and space are set up.
Next, choose your microphone carefully. USB microphones are popular for beginners because they plug directly into your Mac without requiring extra equipment. Affordable USB mics like the Audio-Technica ATR2100x-USB or Blue Yeti deliver clear audio quality suitable for podcasting. Alternatively, if you want higher sound fidelity and plan to expand your setup, an XLR microphone connected through an audio interface offers more professional options, but this requires additional hardware and setup.
Headphones are essential to monitor your recording in real time and catch any background noise or audio issues. Over-ear headphones that provide good isolation help you focus on the audio without distractions.
Choose a quiet room with minimal background noise to improve recording quality. Spaces with soft furnishings, carpets, and curtains help reduce echoes and outside sounds. Avoid rooms near busy streets, appliances, or air conditioners running during your session.
Finally, familiarize yourself with the basic GarageBand interface. Open GarageBand, select “New Project,” and explore the controls like the track header, transport bar, and input settings. Feeling comfortable with these elements will make the recording process smoother and reduce frustration.
- Confirm your Mac has GarageBand installed by opening the Applications folder and locating GarageBand. You should see the GarageBand icon and be able to launch the app.
- Connect your microphone: plug a USB mic directly into a USB port or connect an XLR mic to your audio interface, then connect the interface to your Mac via USB or Thunderbolt. You should see the device recognized in System Preferences > Sound > Input.
- Put on your headphones and check sound input levels in GarageBand’s track header by selecting the microphone input. Speak into the mic and watch the input meter move, confirming sound is detected.
- Find a quiet space by testing different rooms and listening for background noise. Record a short test clip and listen back to judge if the room is suitable.
- Open GarageBand and create a new project to explore the interface, ensuring you can locate key features like the record button, track controls, and audio input settings.
Open GarageBand and create a new podcast project
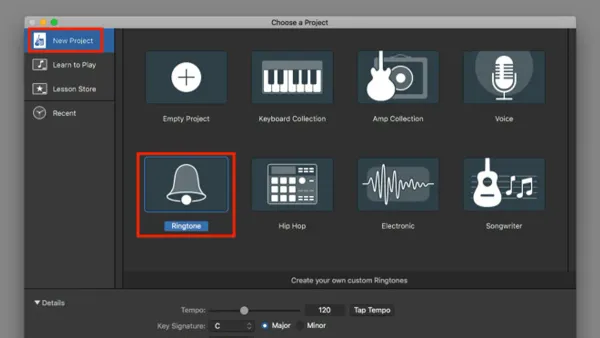
Start by launching GarageBand on your Mac. Once open, you’ll see the Project Chooser window presenting various templates. For podcasting, select the “Voice” template under the Audio section. This template is pre-configured for recording vocals, offering a clean interface and optimized settings for spoken word recording.
If you don’t see the Project Chooser, select File > New from the menu bar to open it. Choosing the “Voice” template automatically sets the track type to audio and applies a preset designed for voice clarity.
Next, check your audio input settings to ensure GarageBand uses your preferred microphone. Go to GarageBand > Preferences > Audio/MIDI. Under the Input Device dropdown, select your external microphone if connected, or the internal microphone if that’s your setup. This ensures GarageBand records from the right source.
Before recording, verify the sample rate by clicking GarageBand > Preferences > Audio/MIDI and looking at the Sample Rate option. For podcasts, 44.1 kHz is standard — it balances audio quality and file size effectively.
Finally, save your project immediately to avoid losing work. Choose File > Save As, enter a clear, descriptive name for your episode or series, and pick a dedicated folder. Organizing your files early prevents confusion and data loss later.
- Open GarageBand and access the Project Chooser window; confirm the “Voice” template is visible.
- Select the “Voice” template and click Create; the main window should open with a single audio track ready.
- Open GarageBand > Preferences > Audio/MIDI and set the Input Device to your microphone; you should see the selected device name.
- Confirm the Sample Rate is set to 44.1 kHz; adjust if necessary.
- Save the project via File > Save As, entering a descriptive name and choosing a folder; the project name should appear in the window title.
How to record your voice on GarageBand
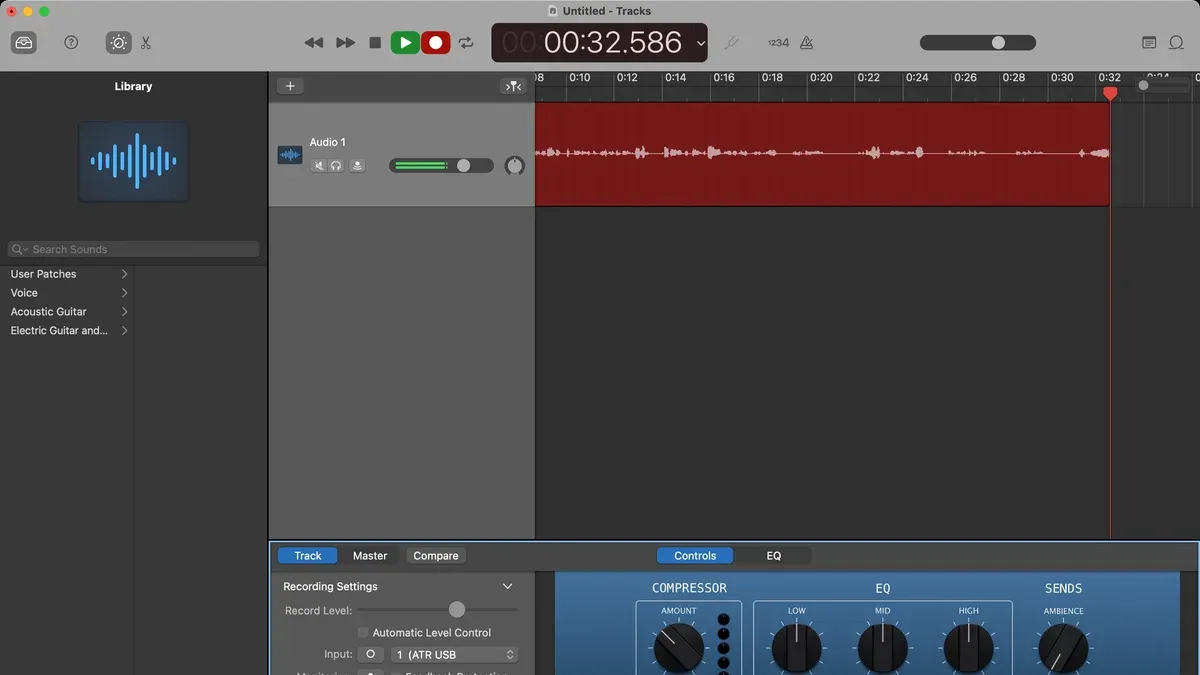
Start by setting your microphone input level correctly to capture clean audio without distortion. Click the track header to select your vocal track, then open the Smart Controls pane (button with a knob icon). Locate the input level meter and adjust the input gain slider so your loudest spoken words peak around -6 dB to -3 dB. This range prevents clipping while keeping the signal strong. Test by speaking at your typical volume and watch the meter response.
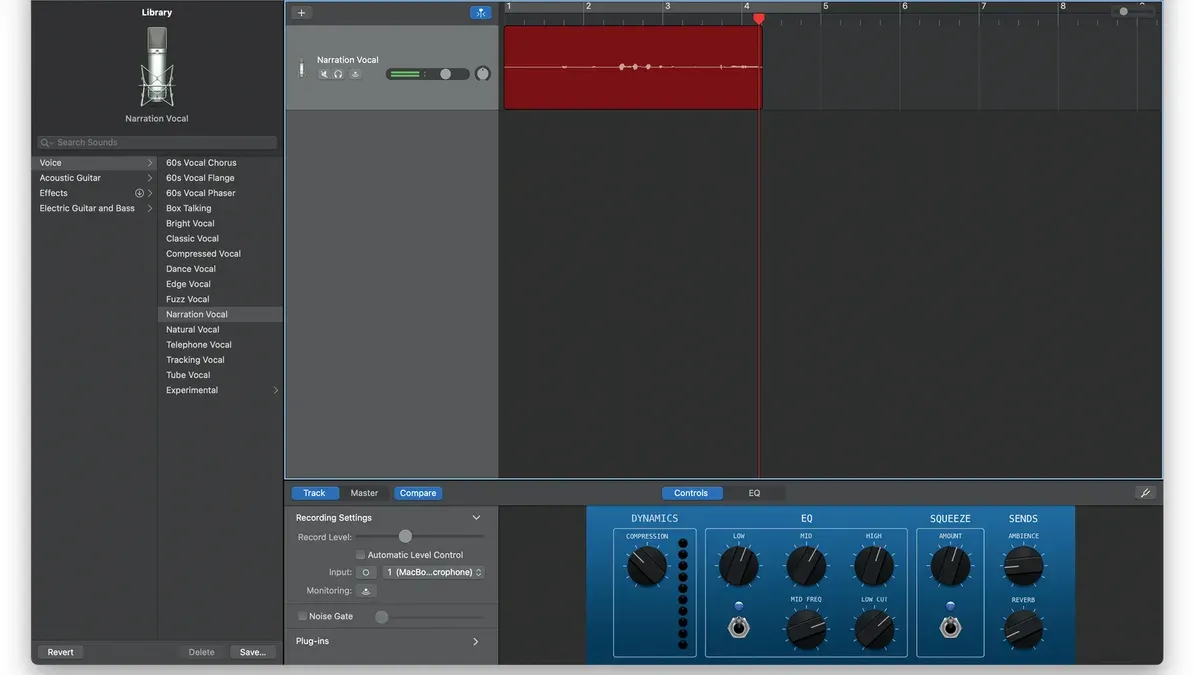
Next, enable monitoring to hear your voice in real time without delay. Click the small headphone icon on the track header to toggle monitoring on. You should hear yourself clearly through your headphones with minimal latency, which helps maintain natural pacing and tone. If you notice echo or feedback, lower the monitoring volume or switch to headphones instead of speakers.
GarageBand’s comping feature lets you record multiple takes and choose the best parts easily. To use it, click the red record button and speak your segment. Stop and re-record as many times as needed; GarageBand automatically saves each take in a take folder. When finished, open the take folder by clicking the disclosure triangle next to the waveform, then listen through takes and select the best sections by clicking them. This non-destructive editing saves time and reduces pressure.
For clear, paced speech, speak naturally but slightly slower than normal conversation. Pause briefly between sentences or ideas to allow for easier editing. Avoid filler words and keep your mouth close to the microphone to reduce room noise. Practicing a few lines before recording helps maintain consistency.
- Select your vocal track and open Smart Controls. Adjust input gain so loud words peak between -6 dB and -3 dB on the meter. You should see green and occasional yellow peaks but no red clipping.
- Click the headphone icon on the track header to turn on monitoring. You should hear your voice with little to no delay. If you hear echo, lower your headphone volume or switch to headphones.
- Press the record button and speak your script segment. Stop and repeat to create multiple takes. GarageBand stores these automatically in a take folder below the track.
- Click the disclosure triangle next to your recorded region to open the take folder. Click individual takes to preview and select the best parts. The chosen parts highlight in the main track.
- Maintain a clear voice with steady pacing, slightly slower than conversational speed. Pause between sentences for easier editing. Keep close to the mic to minimize background noise.
How to record a podcast with GarageBand: Adding multiple tracks and guests
Recording multiple voices on separate tracks improves clarity and editing flexibility compared to a single mixed track. GarageBand allows you to create individual audio tracks for each speaker, which is essential for interviews or co-hosted podcasts.
- Open your GarageBand project and click the “+” button above the track headers to add a new track. Select “Audio” and then “Microphone” for each additional speaker. You should see a new track appear with its own input channel.
- Configure the audio input for each track by selecting the correct microphone or input device in the track’s “Input” dropdown menu. For example, assign Input 1 to your microphone and Input 2 to your co-host’s USB microphone. The track meter should respond to the correct source’s sound.
- Have each participant wear headphones during recording to avoid sound from speakers leaking into microphones, which causes echo and muddiness in the final mix.
- If your guest is remote, record their audio separately using a tool like Zoom or a dedicated recording app. Import their audio file into GarageBand and add it as a new track. Align it carefully with your local recording timeline to keep voices in sync.
By separating each voice onto its own track, you can adjust volume levels, apply effects, and remove noise individually. This setup results in much clearer audio than a single combined track, especially when dealing with multiple speakers or remote guests.
How to use GarageBand to edit your podcast recording
Editing your podcast recording in GarageBand helps improve the flow, remove mistakes, and enhance audio clarity. Start by selecting the audio clip you want to edit in the timeline. Use the Split Regions at Playhead command (Command + T) to cut out unwanted parts like ums, pauses, or mistakes. You can then select and delete these segments, or drag them to rearrange the order. Trim clips by dragging their edges to shorten or extend the audio.
To smooth transitions between clips, apply fades by selecting a clip and dragging the fade handle at the top left or right corner. For overlapping audio, use crossfades by overlapping clips slightly and adjusting their fade handles to create seamless transitions.
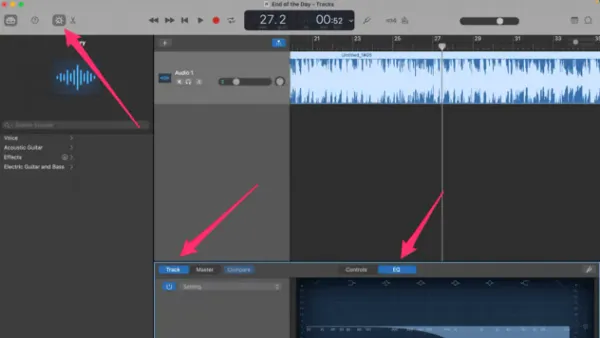
Enhance voice clarity by applying GarageBand's Noise Gate and Channel EQ effects. Enable Noise Gate in the Smart Controls panel and set the threshold to a level that removes background noise without cutting off softer speech. Use the Channel EQ to reduce low-frequency rumble by lowering frequencies below 80 Hz and gently boost 3-6 kHz to brighten the voice. A before-and-after waveform comparison shows Noise Gate reduces background hiss, while EQ clarifies the vocal presence.
For consistent volume, apply Compression with a ratio around 3:1 and a medium attack and release. This evens out loud and soft parts without sounding too squashed. Finally, use Normalization by exporting your project as a WAV or AIFF file and then using GarageBand’s Master Track gain to set peak levels near -1 dB. This prevents clipping and ensures your podcast sounds balanced across devices.
How to save a recording in GarageBand and export your podcast
After you finish editing your podcast, saving your project ensures you can revisit and revise it later. GarageBand projects are saved as files with the extension .band, which contain all your tracks and edits. To save, click File in the menu bar, then select Save or Save As. Choose a clear project name and location on your Mac, so you can easily find it again.
When you’re ready to share your podcast, exporting creates a single audio file suitable for uploading to podcast platforms. GarageBand allows exporting in several formats, but MP3 and AAC are the most common for podcasts due to their good balance of quality and file size.
- Click Share in the menu bar, then select Export Song to Disk. You will see export options.
- Choose a destination folder on your Mac where the exported file will be saved.
- Set the Format to MP3 or AAC. MP3 is widely supported, while AAC generally offers better audio quality at similar file sizes.
- For Quality, select High Quality (192 kbps) or Highest Quality (320 kbps). Higher bitrates increase audio fidelity but also file size. For example, a 30-minute podcast at 192 kbps typically results in a 40-45 MB file, while 320 kbps can be around 65-70 MB.
- Click Export to create your podcast audio file. A progress bar should appear, and once complete, the file will be in your chosen folder.
Backing up your GarageBand projects and exported files is crucial to avoid data loss. Regularly copy your .band project files and exported audio to an external drive or cloud storage. This practice protects your work against accidental deletion or hardware failure.
How to upload your podcast to Apple Podcasts using GarageBand
After exporting your podcast audio from GarageBand, the next step is to get your show online and available to listeners. GarageBand itself doesn’t create a podcast RSS feed, so you’ll need to use a podcast hosting service to upload your episodes and generate the feed. Popular hosts include Libsyn, Podbean, Anchor, and Buzzsprout, which offer straightforward upload interfaces and distribution tools.
- Sign up for an account with a podcast hosting platform. Once logged in, find the option to upload a new episode. You should see fields to add your episode title, description, and the audio file.
- Upload the exported MP3 or AAC file from GarageBand. When the upload completes, the platform will process the file and generate a public URL for your episode.
- Use the hosting platform’s dashboard to manage your podcast RSS feed. This feed is what you submit to directories like Apple Podcasts and Spotify.
- Submit your RSS feed to Apple Podcasts by visiting Apple’s Podcast Connect website (https://podcastsconnect.apple.com). Log in with your Apple ID, add a new podcast, and enter your podcast’s RSS feed URL.
- Apple will validate your feed and usually approve your show within a few days. You’ll receive notifications when your podcast is available in the Apple Podcasts app.
- To reach more listeners, submit your RSS feed to Spotify via Spotify for Podcasters (https://podcasters.spotify.com), following a similar process.
Promotion can start as soon as your podcast is live. Share links on social media, ask friends to subscribe and review, and consider creating a simple website or landing page. Consistent episode releases and engagement with your audience will help grow your listeners over time.
Troubleshooting common recording issues in GarageBand
When recording your podcast, you might encounter issues such as no sound, low input levels, latency, crashes, or background noise. These problems are common but usually straightforward to fix.
Fixing no sound or low input levels
- Check that your microphone is properly connected and selected in GarageBand's Audio/MIDI Preferences under GarageBand > Preferences > Audio/MIDI. You should see your device name in the Input Device dropdown. If not, reconnect your mic and restart GarageBand.
- Adjust the input volume slider located next to the track's input meter. If the meter stays low or does not react to your voice, increase the input gain on your microphone or in your Mac's Sound System Preferences.
- If you see an error message like "No Input Detected", ensure that the microphone is not muted and that the cable is firmly connected.
Dealing with recording latency and sync issues
- Open GarageBand Preferences > Audio/MIDI, set the Audio Buffer Size to a lower value such as 128 or 256 samples. This reduces delay between speaking and hearing your voice.
- If you notice tracks slightly out of sync, use GarageBand's Track Delay slider in the Track Info pane to manually adjust timing by a few milliseconds until the tracks align.
Resolving crashes or freezes during recording
- Close other applications running in the background to free up system resources.
- Ensure GarageBand is updated to the latest version via the Mac App Store to benefit from bug fixes.
- If GarageBand crashes with a message like "Audio Engine Error", restart your Mac and disconnect any USB devices that may cause conflicts.
Improving audio quality when background noise is present
- Use the Noise Gate effect in GarageBand's Track Info > Smart Controls > Noise Gate and adjust the threshold until low-level background noise is reduced without cutting your voice.
- Record in a quiet space and consider using a directional microphone to minimize ambient sounds.
- If persistent noise remains, apply a gentle EQ cut to frequencies where the noise is most prominent, usually below 100 Hz or between 3-5 kHz.
Frequently asked questions
How to record in garageband?
To record in GarageBand, open a new or existing project and select an audio track by clicking the “+” button and choosing “Audio.” Connect your microphone, then click the red Record button in the control bar to start recording. Make sure your input device is correctly set under GarageBand > Preferences > Audio/MIDI before you begin.
How to record a song on garageband?
Recording a song involves creating multiple tracks for different instruments or vocals. Start by adding an audio or software instrument track, then record each part separately using the Record button. Use the built-in metronome for timing, and layer your recordings by adding tracks one after another to build your song.
How to record a podcast on garageband?
To record a podcast, start a new project and select the “Voice” or “Podcast” template for optimized settings. Connect your microphone, create separate tracks if you have guests, and hit Record to capture your audio. Keep levels balanced and monitor your input to avoid clipping or background noise.
How do i record a podcast with garageband?
Record a podcast by opening GarageBand and choosing a new podcast project. Set up your microphone input via Preferences, add multiple tracks if needed for co-hosts or guests, then click Record to begin. Pause and resume as necessary, and use the editing tools to trim or adjust your recording before exporting.
How to use garageband to record a podcast?
Using GarageBand for podcasting involves selecting a suitable project template, connecting your mic, and managing multiple audio tracks for different speakers. Record each segment by pressing Record, then edit your audio with features like noise gate and volume automation. Finally, export your episode in MP3 or WAV format for distribution.
What This Guide Does Not Cover
This guide focuses on the essentials of recording, editing, and exporting a podcast using GarageBand on a Mac. It does not cover advanced audio mixing or mastering techniques that professional podcasters might require to achieve broadcast-quality sound. Additionally, since GarageBand is exclusive to Mac, this article does not address Windows PC alternatives or cross-platform podcasting software. If you need multi-channel remote recording with advanced features, or detailed sound engineering, exploring specialized software like Logic Pro or Adobe Audition might be more suitable.
For now, the best next step is to open GarageBand and start a new podcast project. Begin by selecting the "Voice" template to simplify your setup. Experiment with recording a short test clip to get comfortable with the interface and basic controls like the red record button and track volume sliders. This hands-on approach helps you learn quickly and sets a solid foundation for your first full episode.
See also: How to Record Electric Guitar in GarageBand: A Clear Step-by-Step Guide · How to Make a Hip Hop Beat in GarageBand: Step-by-Step Guide