How to Record iPhone Screen Using QuickTime Player: Step-by-Step Guide
Discover easy steps to record your iPhone screen using QuickTime Player for tutorials, troubleshooting, or sharing gameplay.
Sometimes you need to show exactly what’s happening on your iPhone screen, whether for a tutorial, troubleshooting, or sharing gameplay. Connecting your iPhone to your Mac and using QuickTime Player is a straightforward way to capture your screen without extra apps or complex setups.
This article walks you through how to record iPhone screen in QuickTime Player, focusing on mirroring your device clearly and avoiding common mistakes. You’ll learn each step carefully, from preparing your devices to recording with sound, so you can confidently create high-quality screen recordings.
Key takeaways
- Use a Lightning or USB-C cable to connect your iPhone to your Mac for reliable mirroring.
- Open QuickTime Player, select "New Movie Recording," then choose your iPhone as the camera source.
- Enable microphone input in QuickTime to capture sound from your iPhone or external sources.
- Keep your iPhone unlocked and avoid notifications to prevent interruptions during recording.
- If the iPhone screen doesn’t appear, check the cable connection and trust settings on your iPhone.
Before you start: What you need to record iPhone screen with QuickTime Player
To record your iPhone screen using QuickTime Player, you need a Mac with QuickTime Player installed, which comes pre-installed on macOS. Most Macs running macOS Sierra (10.12) or later support this feature, so ensure your Mac is updated accordingly. Your iPhone should have a Lightning port since this is required for a wired connection to your Mac. Compatible iPhone models include iPhone 5 and later.
Both your Mac and iPhone should be running compatible software versions to avoid connection issues. Ideally, your iPhone should be updated to the latest iOS version available for your device. Before connecting, disable Do Not Disturb on your iPhone to prevent notifications from interrupting your recording. Also, when you connect your iPhone to the Mac for the first time, you will be prompted to "Trust This Computer" on your iPhone; make sure to tap "Trust" and enter your passcode to establish a secure connection.
Keep your Lightning cable handy and ensure it is in good working condition. Faulty cables are a common cause of failed connections and interrupted recordings. With these preparations done, you will be set for a smooth mirroring and recording experience using QuickTime Player.
How to use QuickTime Player to mirror iPhone screen
- Connect your iPhone to your Mac using a Lightning cable. Once connected, your Mac should recognize the device automatically.
- Open QuickTime Player on your Mac. From the menu bar, choose File and then select New Movie Recording. A recording window will appear, showing your Mac’s built-in webcam feed by default.
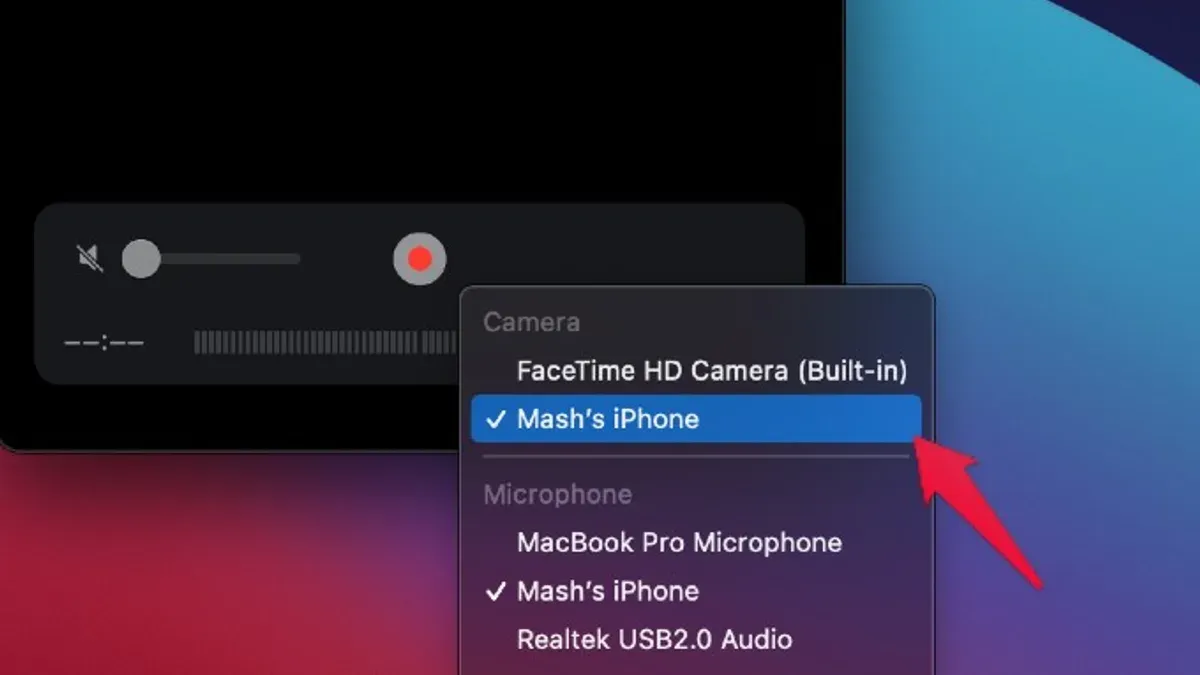
- Next to the red record button in the QuickTime window, click the small arrow to open the recording options menu. Under the Camera section, select your connected iPhone. This switches the video source from the webcam to your iPhone screen.
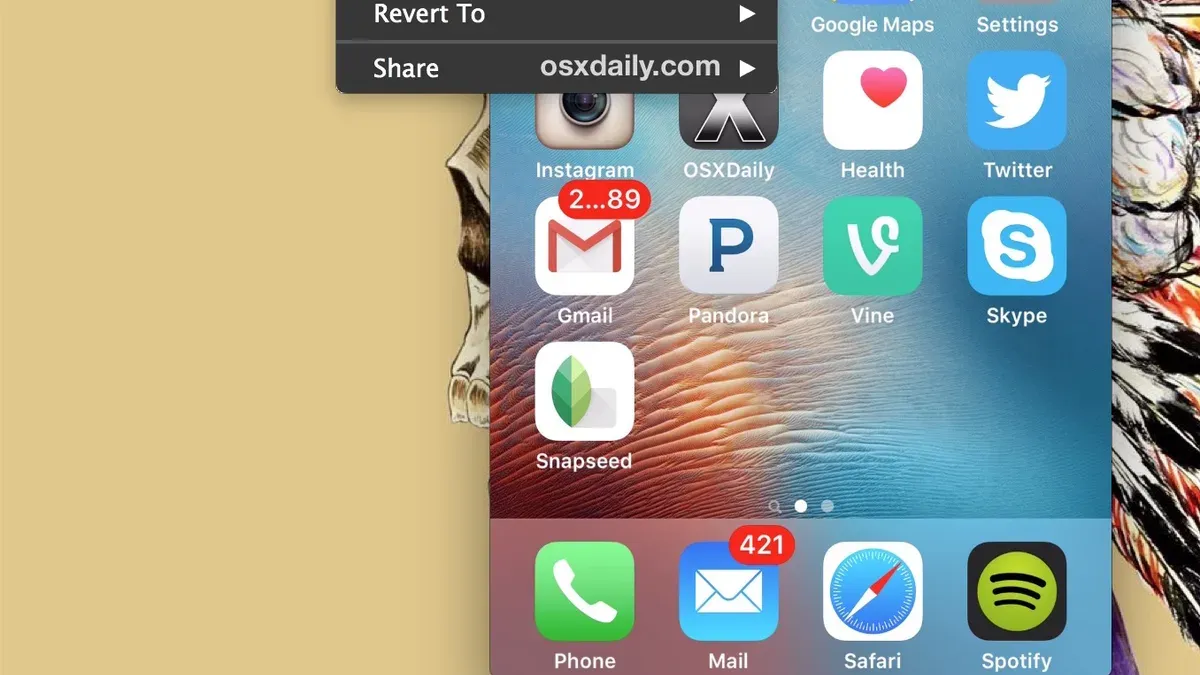
- When you select your iPhone, the screen should immediately mirror on your Mac within the QuickTime window. Check that the display matches what’s on your iPhone, including orientation and responsiveness.
- If the screen is not mirrored or appears delayed, ensure the cable is firmly connected and try unplugging and re-plugging. Minor latency is normal but should not interfere with viewing or recording.
By following these steps, you can see your iPhone’s screen clearly on your Mac before starting any recording. This mirroring is essential for monitoring what you capture and helps avoid common mistakes like recording the wrong screen or missing visual details.
How to record iPhone screen with QuickTime Player
- After your iPhone screen is mirrored in QuickTime Player, locate and click the red Record button at the top of the QuickTime window. When recording starts, you will see a timer counting the duration of your recording, confirming the process has begun.
- While recording, you can manage your session by clicking the Pause button if you need to temporarily stop capturing. This is useful if you want to exclude certain parts from the final video; clicking Resume will continue the recording seamlessly.
- When you finish recording, click the Stop button, located in the same place as the record button. The video will automatically open in QuickTime Player for you to review.
- To save your recording, go to the File menu and select Save.... Name your video and choose a folder on your Mac. By default, QuickTime saves screen recordings as.mov files, which offer high-quality video with good compatibility.
- As an example, a 2-minute recording of an iPhone screen typically results in a.mov file around 30-50 MB, depending on the activity on-screen. QuickTime uses efficient compression, balancing file size and video clarity without needing extra settings adjustment.
Remember, QuickTime Player does not offer advanced quality settings for screen recording, so the default.mov format and resolution will reflect the mirrored iPhone screen's display quality. This means your recording is as clear as what you see on your Mac during mirroring.
How to record iPhone screen using QuickTime Player with sound
When recording your iPhone screen with QuickTime Player, capturing audio can enhance your video. QuickTime allows you to record sound, but it has limitations regarding internal iPhone audio. By default, QuickTime records audio through the Mac’s microphone, which means it picks up sounds from the environment or the iPhone speaker, not the direct internal audio from the iPhone.
To capture audio during recording, you must select the correct audio source. Here’s how to do it:
- Connect your iPhone to your Mac and open QuickTime Player. Choose File > New Movie Recording. You will see the recording window.
- Next to the red record button, click the small arrow to open the dropdown menu. Under Microphone, select your iPhone if it appears. This routes audio from the iPhone’s microphone if available.
- If your iPhone does not appear as an audio source, QuickTime will record audio from your Mac’s built-in microphone instead. This captures ambient sound, which may include iPhone speaker output but can also include background noise.
- Press the red record button to start recording. Speak or play audio on your iPhone to test if sound is captured. Stop recording when done and save your file.
Because Apple restricts direct internal audio capture from iPhone apps via QuickTime, you might notice that internal sounds such as app audio or system sounds do not record clearly. If you need high-quality internal audio, consider using third-party tools designed for screen and audio capture, or use external hardware solutions.
In summary, QuickTime Player can record iPhone screen audio mainly through the microphone, which works best for ambient sound but falls short of capturing internal iPhone audio directly.
Troubleshooting common issues when recording iPhone screen with QuickTime Player
If your iPhone does not appear as a recording source in QuickTime Player, first ensure your Lightning cable is securely connected to both devices. Try using an Apple-certified cable, as some third-party cables may not support data transfer properly. After connecting, unlock your iPhone and, if prompted, tap "Trust This Computer" to allow the connection.
When QuickTime Player fails to detect the iPhone screen, quit and reopen the app, then navigate to File > New Movie Recording. Click the arrow next to the red record button and select your iPhone under both camera and microphone options. If it still doesn’t appear, restart both your Mac and iPhone before attempting again.
For audio issues such as no sound or poor quality, verify that the microphone is set correctly in the recording options menu. Since QuickTime uses the iPhone’s microphone for audio capture, ensure the iPhone’s volume is up and that no other app is using the microphone. Using headphones with a microphone can sometimes improve audio clarity.
If you experience lag, dropped frames, or corrupted video files, close unnecessary applications on your Mac to free system resources. Recording over a USB 2.0 port instead of USB 3.0 may reduce performance, so try different ports if available. Also, keep your iPhone’s screen active during recording to avoid interruptions. If corruption persists, save your recording promptly and consider splitting longer sessions into shorter clips.
Frequently asked questions
How to screen record quicktime player?
To screen record using QuickTime Player, open the app and select "File" from the menu bar, then choose "New Screen Recording." Click the red record button, then select whether to record the entire screen or a portion. When finished, click the stop button in the menu bar to end the recording and save your file.
how to screen record quicktime player
Using QuickTime Player for screen recording involves opening the app, going to "File" > "New Screen Recording," and pressing the record button. You can choose to capture the whole screen or drag to select an area. To stop, click the stop icon in the menu bar, then save your recording.
how to record iphone screen with quicktime player
First, connect your iPhone to your Mac using a Lightning or USB-C cable. Open QuickTime Player, then select "File" > "New Movie Recording." Click the arrow next to the record button and choose your iPhone as the camera source. Your iPhone screen will appear mirrored on your Mac, then click record to start capturing.
how to record iphone screen using quicktime player
Connect your iPhone to your Mac and open QuickTime Player. Select "New Movie Recording" from the File menu, then click the small arrow next to the record button to pick your iPhone as the video source. Your iPhone screen will mirror on your Mac, allowing you to hit record to capture the screen activity.
how to use quicktime player to mirror iphone
Connect your iPhone to your Mac with a cable, then open QuickTime Player and choose "New Movie Recording." Click the dropdown arrow beside the record button and select your iPhone under the camera options. This mirrors your iPhone screen on the Mac, enabling you to view and record it in real time.
What This Method Does Not Cover
QuickTime Player’s screen recording does not support capturing the internal audio from your iPhone directly. Instead, it records sound from an external microphone if one is enabled during recording. Additionally, this method requires a Mac computer with macOS; it cannot be performed solely on an iPhone or a Windows PC. If you have an older Mac or iPhone model, you may encounter compatibility or performance issues, such as lag or connection troubles during mirroring and recording.
If you need to capture internal iPhone audio or use a non-Mac device, consider dedicated third-party apps designed for those purposes. These alternatives often offer more advanced features but require installation and setup beyond QuickTime Player’s built-in capabilities.
Next Step: Practice Mirroring and Recording
To build confidence, start by mirroring your iPhone screen without recording to ensure the connection is smooth and the display looks correct on your Mac. Once comfortable, initiate a short test recording to verify audio input and video quality. This hands-on approach helps you troubleshoot potential issues early and makes future recordings more reliable and efficient.
See also: How to Export and Convert QuickTime Videos to MP4 Format · How to Trim a Video in QuickTime Player: Step-by-Step Guide · How to Join Two Videos in QuickTime Player: Step-by-Step Guide