
How to Trim a Video in Photos App: Step-by-Step Guide
This guide shows you how to easily trim a video in Photos app on your Apple device to remove unwanted sections and share focused clips.
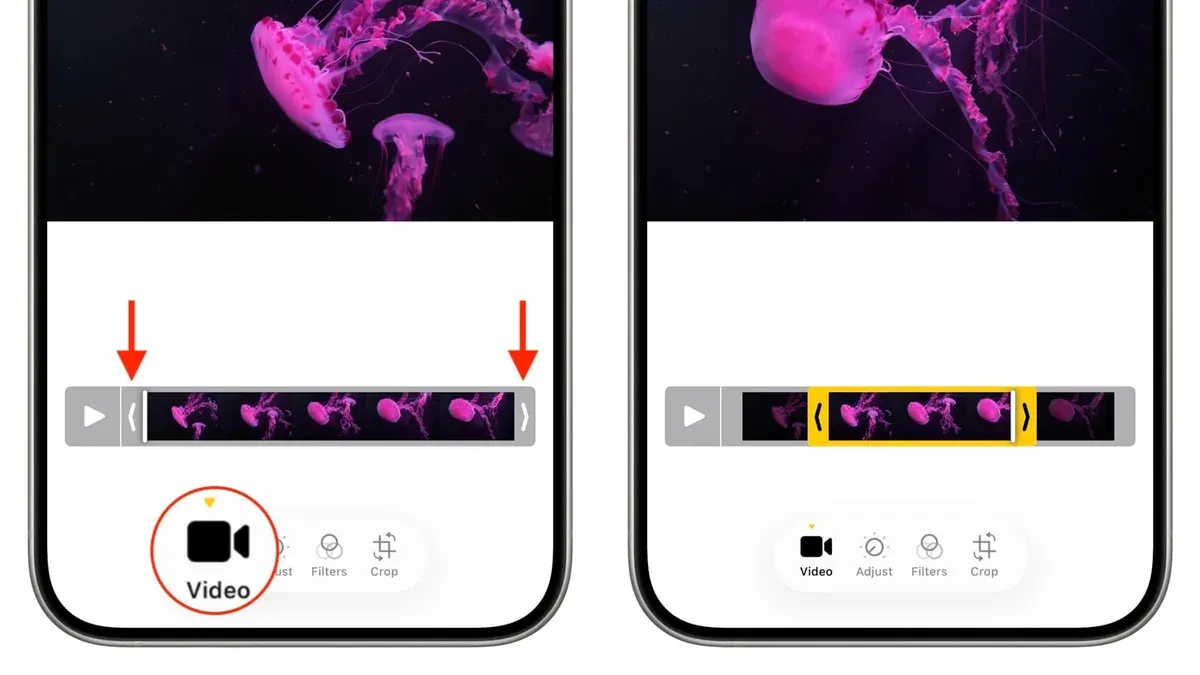
You just recorded a video that’s a bit too long or contains unwanted parts at the beginning or end. Instead of sharing the whole clip, you want to make it shorter and more focused. This guide will walk you through how to trim a video in Photos in Photos app on your Apple device, so you can quickly cut out those unnecessary sections without needing extra software.
Beyond the built-in Photos app on iPhone, iPad, and Mac, you’ll also learn how trimming works in Google Photos and on Android devices, highlighting the strengths and limitations of each option. Step by step, you’ll gain confidence in choosing the best method for your device and needs.
Key takeaways
- You can trim videos directly in the Photos app by opening the video and using the Edit > Trim handles.
- On Mac, the Photos app offers similar trimming tools accessible via the Edit button.
- Google Photos allows trimming but with fewer precise control options than Apple’s Photos app.
- Android devices often rely on Google Photos or default gallery apps for basic trimming features.
- Free third-party apps may be helpful if you need advanced trimming or video editing beyond what Photos offers.
Before you start: What you need to trim a video in Photos app
To trim a video using the Photos app, you need an Apple device such as an iPhone, iPad, or Mac with the Photos app installed. Make sure your device is running a compatible version of iOS, iPadOS, or macOS that supports video editing features within the Photos app. Generally, devices updated to recent operating system versions will have these capabilities.
The Photos app supports common video formats including.mov and.mp4, which are standard for videos recorded on Apple devices. If your video is in a different format, you may need to convert it before trimming. Also, confirm you have enough free storage on your device because editing videos temporarily uses additional space for processing and saving changes.
Before making any edits, it's advisable to back up your original videos. You can do this by saving them to iCloud, transferring them to a computer, or using a cloud storage service. This ensures you can restore the original file if needed.
If you do not have access to the Photos app or use an Android device, alternatives like Google Photos or dedicated Android video editors are available. These apps also offer trimming features but may differ in interface and functionality.
How to trim a video in Photos
Trimming a video in the Photos app is straightforward once you know where to look. First, open the Photos app on your Apple device and find the video you want to edit. Videos are usually marked by a play icon in the corner.
- Tap the video to open it. When the video plays in full screen, look for the Edit button, typically in the upper right corner. Tap it to enter editing mode.
- Adjust the trim handles. At the bottom, you’ll see the video timeline with yellow trimming handles on both ends. Drag these handles inward to set your video's new start and end points. The area between the handles is what will remain after trimming.
- Preview your trimmed video. Tap the play button within the editing interface to watch the selected portion. This helps ensure you’ve chosen the exact segment you want.
- Save your trimmed video. After confirming the trim, tap Done. You’ll be prompted to either Save Video (which overwrites the original) or Save Video as New Clip (which keeps the original and creates a trimmed copy). Choose the option that fits your need.
Using the trimming handles and save options properly ensures you keep control over your video edits without losing original footage unintentionally.
How to trim a video in Apple Photos on Mac
Trimming a video on a Mac using the Photos app involves a slightly different interface compared to iOS devices, but the process remains straightforward. When you open a video in Photos on Mac, you’ll notice the editing options are organized in a toolbar, with trimming handled through a timeline at the bottom of the window. The trimming sliders are yellow and allow precise control over the start and end points of your video clip.
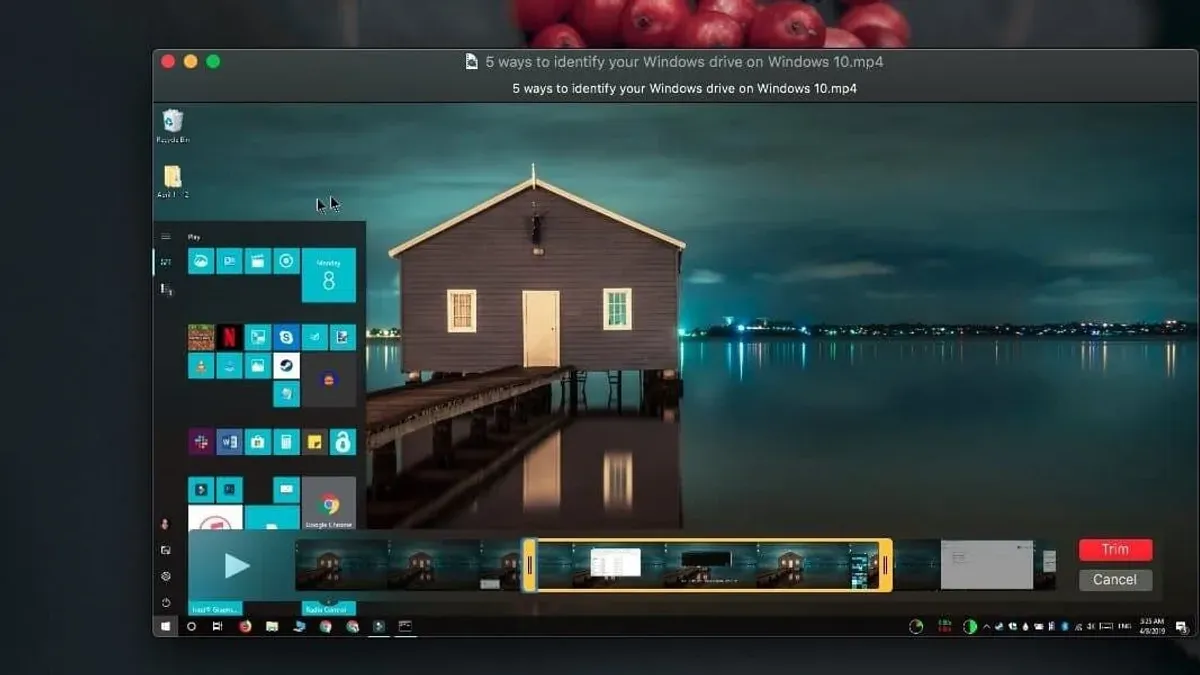
- Open the Photos app on your Mac and locate the video you want to trim. When you select it, the video preview appears in the main window.
- Click the Edit button in the upper-right corner of the window. This opens the editing interface, where you’ll see the video timeline at the bottom with yellow trimming sliders on each end.
- Drag the yellow sliders inward to select the portion of the video you want to keep. As you adjust, you can click the Play button to preview the trimmed section and ensure it starts and ends exactly where you want.
- Once satisfied, click Done to save your trimmed video. The original video is replaced with the trimmed version, but you can always revert to the original by reopening the video and clicking Edit followed by Revert to Original.
Compared to the iOS Photos app, the Mac version provides a larger timeline view, which can make selecting trim points more precise. However, the basic concept of dragging handles to set start and end points remains consistent. This workflow on Mac is ideal when you want to perform quick trims without switching to other apps or software.
How to trim a video in Google Photos app
Google Photos offers a simple way to trim videos, making it a convenient alternative if you use this app for managing your media. While the trimming features are straightforward, they differ slightly from the Photos app on Apple devices, especially in terms of interface and options.
- Open the Google Photos app on your device and navigate to the video you want to trim. When the video is selected, you should see it open in full screen with playback controls.
- Tap the Edit button, usually represented by a pencil icon. This will open the editing interface where you can make adjustments to your video.
- Look for the Trim icon, which typically appears as a scissors symbol or handles on a timeline below the video. Tap this to enter trim mode.
- Drag the sliders at each end of the timeline to select the portion of the video you want to keep. The video preview updates as you adjust these handles, helping you fine-tune the start and end points.
- Once you are satisfied with the trimmed section, tap Save. Google Photos saves the trimmed video as a new copy, preserving the original video unchanged.
One difference to note is that Google Photos does not offer the same depth of editing tools as Apple Photos. For example, you cannot adjust frame-by-frame or use detailed color corrections here. However, its simplicity suits quick trims and works well across Android and iOS platforms. The saved output will appear alongside your other photos and videos in Google Photos, ready to share or further edit.
How to trim a video on Android devices
Trimming videos on Android devices can be done using a variety of apps, including Google Photos and the device’s native Gallery or Video Editor apps. The exact steps and interface vary depending on the manufacturer and Android version, but the general approach is similar across most devices. Google Photos offers a consistent experience, while native apps may provide additional features or different controls.
Using Google Photos on Android
- Open the Google Photos app and find the video you want to trim. You should see a preview screen with a play button.
- Tap the Edit icon (usually looks like sliders or a pencil). This opens the video editor interface.
- Use the trimming handles on the video timeline at the bottom to select the start and end points of your desired video segment. As you move these handles, the preview updates to show your selection.
- Once satisfied, tap Save copy. This creates a new trimmed video while keeping your original file intact.
Using built-in Gallery or Video Editor apps
Many Android devices, such as Samsung, OnePlus, and Pixel phones, include their own Gallery or Video Editor apps with trimming features. For example, Samsung’s Gallery app lets you open a video, tap Edit, then drag the sliders to trim. After adjusting, tap Save or Save as copy. Some devices may label this feature as Trim or Crop video.
Because interfaces differ, look for buttons or icons labeled Edit, then find timeline sliders or handles to adjust the video length. If you don’t see trimming options in your Gallery app, you can usually access Google Photos or download a free video editor from the Play Store.
How to trim a picture or image
Trimming and cropping are terms often used interchangeably, but they actually refer to different actions depending on the media type. Trimming applies to videos, where you cut the timeline to shorten the clip’s length. In contrast, when working with pictures or images, you don’t trim but crop to change the visible area or composition.
In the Photos app, the interface for trimming a video shows timeline handles at the bottom of the screen, allowing you to select the start and end points of the clip. When cropping an image, you’ll see a grid overlay with adjustable corners or edges to reshape the frame. This visual difference helps clarify which action applies to which media.
To crop an image in the Photos app, follow these steps:
- Open the Photos app and select the picture you want to crop. You should see the photo fullscreen with options below.
- Tap the Edit button in the top right corner. This opens the editing interface with various tools.
- Tap the Crop icon, usually represented by a square with overlapping corners. You’ll see a grid overlay appear on the image.
- Drag the corners or edges of the grid to select the part of the image you want to keep. The area outside the grid will be removed after cropping.
- Tap Done to save your cropped image. You should see the photo updated with the new framing.
While you cannot trim a picture like a video, cropping lets you achieve similar goals such as focusing on a specific area or removing unwanted parts. This makes cropping the effective equivalent of trimming when working with still images.
Use free trim video apps for iPhone: When and why to consider them
The built-in Photos app on your iPhone covers most basic video trimming needs with an intuitive interface and easy timeline sliders. However, it has limitations like the absence of frame-level precision and only basic editing features. If you want more control—such as trimming by exact frames, adding effects, or handling multiple clips in one project—you might find dedicated free trim video apps more suitable.
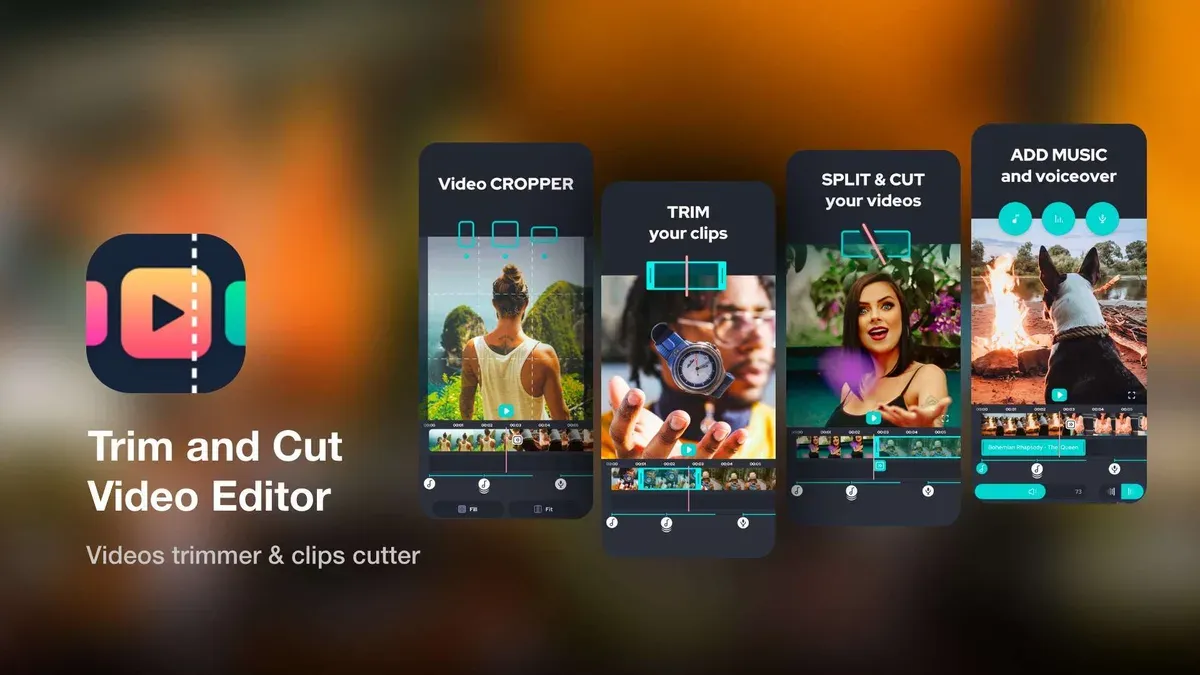
Popular free apps like iMovie, InShot, and Splice offer enhanced trimming tools alongside additional editing options. For example, iMovie lets you trim with greater accuracy and add transitions, while InShot provides quick sharing features and filters. These apps often have higher user ratings and millions of downloads, reflecting their popularity and reliability.
To decide if you need a third-party app, ask yourself whether the Photos app meets your editing goals. If trimming videos quickly without extra features is enough, stick with Photos. But if you require detailed edits, enhanced controls, or creative additions, exploring free apps can be beneficial.
When downloading free apps, only use the official App Store to ensure safety. Check recent user reviews and confirm the app is regularly updated. Avoid apps with excessive permissions or poor ratings to protect your device and privacy.
| Feature | Photos App | iMovie | InShot |
|---|---|---|---|
| Frame-level trimming | No | Yes | Yes |
| Multiple clip editing | No | Yes | Yes |
| Additional effects/filters | Basic | Moderate | Extensive |
| Export options | Standard | Multiple resolutions | Multiple resolutions + social sharing |
| User ratings* | Built-in | Generally high | Generally high |
Troubleshooting common issues when trimming videos in Photos app
If you find the trim handles unresponsive or grayed out, it often means the video format isn’t fully supported or the video is currently syncing with iCloud. Make sure your device is connected to Wi-Fi and wait until syncing completes. Restarting the Photos app can also refresh the interface, allowing the handles to become active.
When a trimmed video doesn’t save, check that you have enough free storage space on your device. Sometimes an error message like “Unable to save video” appears. To fix this, free up space by deleting unnecessary files or apps, then try trimming again. Also, ensure you have the latest iOS version installed, as updates often fix software bugs affecting saving functions.
Trimming sometimes reduces video quality or changes the format unexpectedly. This usually happens if the original video uses an uncommon codec. To avoid this, trim videos recorded directly on your device rather than imported from other sources. If quality loss occurs, consider exporting the trimmed video using the Share option instead of saving over the original.
If the Photos app crashes or freezes during trimming, force quit the app and restart your device. Rebooting often clears temporary glitches. If crashes persist, try trimming a different video to determine if the issue is file-specific or app-related.
To revert trimming edits, open the trimmed video, tap Edit, then select “Revert” at the bottom right. This restores the original video without any trimming. It’s a reliable way to undo changes if you trim incorrectly or want the full video back.
Frequently asked questions
How to trim videos in google photos?
Open the Google Photos app and select the video you want to trim. Tap the Edit icon (usually a pencil or sliders), then use the sliders on the video timeline to set the start and end points. After adjusting, tap Save copy to keep the trimmed version without altering the original.
How to trim an image?
Trimming an image typically means cropping. On Apple devices, open the Photos app, select the image, tap Edit, then use the Crop tool to adjust the frame. Confirm by tapping Done to save the cropped image.
How to trim video free?
You can trim videos for free using built-in apps like Apple’s Photos on iPhone or Google Photos on Android. Both apps allow you to adjust the video’s start and end points without any cost. For more advanced trimming, free apps like iMovie on iOS can also be used.
How to trim videos in Google Photos app?
In the Google Photos app, select the video you want to trim and tap Edit. Use the handles on the video timeline at the bottom to set new start and end times. Tap Save copy to create a trimmed version while keeping your original video intact.
How to trim a video on Android?
Open the Gallery or Google Photos app on your Android device and pick the video to trim. Tap Edit or the pencil icon, then drag the sliders to select the portion you want to keep. Save the video, making sure to use Save copy if you want to preserve the original.
What This Guide Does Not Cover
This guide focuses on basic trimming using the Photos app on Apple devices and Google Photos, providing straightforward ways to shorten your videos. It does not cover advanced video editing features like adding transitions, effects, multi-clip editing, or audio adjustments. If you need these more complex functions, consider using specialized video editing software such as iMovie, Final Cut Pro, Adobe Premiere Rush, or other third-party apps designed for detailed editing work. These tools offer a broader range of creative options but come with a steeper learning curve and may require more device storage and processing power.
The single most useful next step is to open your Photos app now, pick a video, and try trimming it following the step-by-step instructions provided. This hands-on practice will help you gain confidence quickly and understand how trimming fits into your usual photo and video management routine.
See also: How to Safely Merge Two Photos Libraries in the Photos App · How to Create a Slideshow with Music in the Photos App · How to Create a Shared Album in Photos App: Step-by-Step Guide · How to Move Your Photos Library to an External Drive in Photos App



