
Connect Xcode to GitHub: Step-by-Step Setup Guide
This guide shows you how to connect Xcode to GitHub in Xcode for smooth version control and collaboration using built-in source control features.
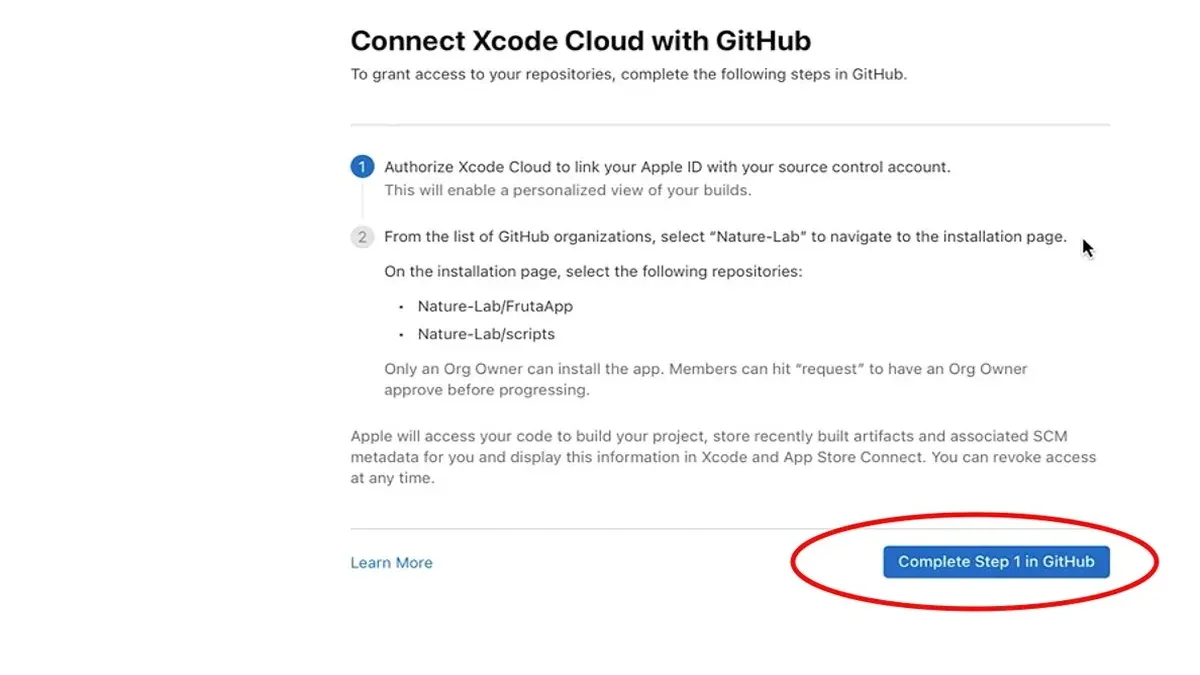
You’ve just finished building an iOS app in Xcode and want to share your progress with your team or back it up securely. Managing your code versions manually can quickly become confusing, especially when collaborating. This article covers how to connect Xcode to GitHub in Xcode, guiding you through integrating your projects seamlessly with GitHub for version control and collaboration.
You'll learn the precise steps to set up Git on your Mac, create or clone repositories, and link your Xcode projects to GitHub using Xcode’s built-in source control features. The guide also highlights common mistakes to avoid and practical tips to help you use GitHub effectively within Xcode without leaving your development environment.
Key takeaways
- Set up Git on your Mac through Terminal before connecting to GitHub in Xcode.
- Create or clone a GitHub repository directly within Xcode’s source control navigator.
- Use Xcode’s Commit, Push, and Pull commands to manage your code versions smoothly.
- Watch for authentication issues and resolve them by updating Git credentials in Keychain Access.
- GitHub Copilot can assist coding, but requires separate setup alongside Git integration.
Before you start: What you need to connect Xcode to GitHub
To connect Xcode to GitHub, you first need a Mac with Xcode installed. You can download Xcode from the Mac App Store by searching for "Xcode" and clicking the Install button. After installation, open Xcode and check your version by selecting Xcode > About Xcode from the menu bar; this confirms you have a proper development environment set up.
Next, ensure you have a GitHub account. If you don’t have one, sign up at github.com. Your GitHub account must have access to at least one repository—either one you own or a collaborator has shared with you—to connect your Xcode projects for version control and collaboration.
Before proceeding, you should have a basic understanding of Git version control concepts like commits, branches, and pushes. This knowledge helps you navigate source control features inside Xcode more effectively.
Additionally, confirm that Xcode Command Line Tools are installed. Open Terminal and run xcode-select --install. If the tools are installed, you will see a message stating the software is already installed; otherwise, a prompt will guide you through installation. This step is essential for Git commands to work smoothly within Xcode.
Optionally, if you plan to use GitHub Copilot within Xcode, prepare by having an active GitHub Copilot subscription and the appropriate extension or plugin installed. This is not required for basic GitHub integration but enhances your coding experience.
Install Xcode and set up Git on your Mac
To start using Git within Xcode, you first need to install Xcode from the Mac App Store. Xcode is a large application, so the download and installation might take some time depending on your internet speed. Once installed, open Xcode from your Applications folder to complete the initial setup, which may include accepting the license agreement and installing additional components.
Next, ensure that Xcode Command Line Tools are installed, as they provide Git support needed for source control operations. Open Terminal and enter the command git --version. If Git is installed, you will see the version number, confirming the tools are ready. If not, Terminal will prompt you to install the Command Line Tools—follow the on-screen instructions to complete this.
Finally, configure Git with your global username and email. This information is used for commits and collaboration on GitHub. In Terminal, enter the following commands, replacing the example details with your own:
git config --global user.name "Your Name"- You should see no error message, indicating the username is set.git config --global user.email "[email protected]"- Again, no error means the email is configured.
To verify your settings, run git config --list in Terminal. This displays all current Git configurations, including your username and email. With Xcode installed, Command Line Tools active, and Git configured, you are ready to connect your projects to GitHub directly from Xcode.
Create or clone a GitHub repository for your Xcode project
To connect your Xcode project to GitHub, you first need a repository to hold the project files. You can either create a new repository on GitHub or clone an existing one directly within Xcode. Each approach has its advantages: creating a new repository lets you start fresh and organize your project exactly how you want, while cloning an existing repository is ideal for collaborating on ongoing projects or using starter templates.
Create a new repository on GitHub
- Log in to your GitHub account and click the New button on the repositories page. You should see a form for repository creation.
- Enter a descriptive repository name that matches your project, add an optional description, and choose whether it will be public or private.
- Do not initialize the repository with a README,.gitignore, or license at this stage; this avoids conflicts when connecting from Xcode.
- Click Create repository. You will be taken to a page with instructions and the repository URL you will use in Xcode.
Clone an existing repository in Xcode
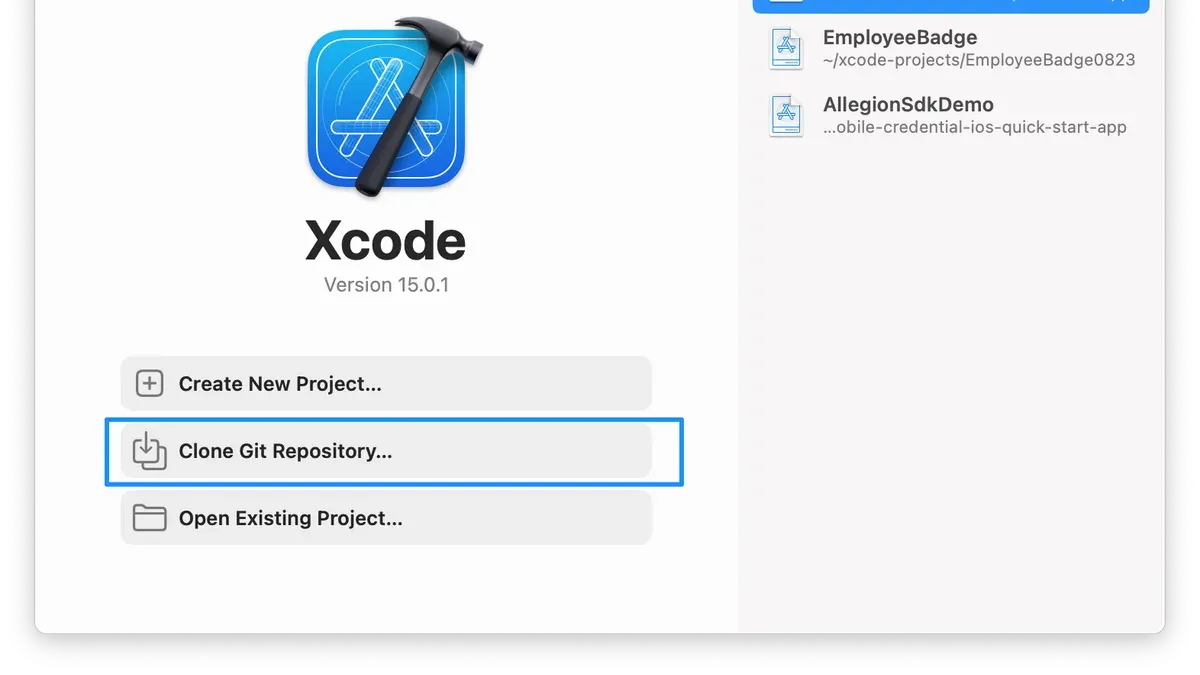
- Open Xcode and navigate to Source Control > Clone from the menu bar.
- Enter the GitHub repository URL or select a repository from your GitHub account if you have integrated your account in Xcode preferences.
- Choose a local directory where the project will be stored and click Clone. Xcode will download the repository and open it.
Organizing your Xcode project for Git involves keeping all project files inside a single folder and ensuring you commit only necessary files. Use a .gitignore file to exclude build artifacts and user-specific settings to keep your repository clean.
Exporting your Xcode project to GitHub means pushing your local project files to the remote repository. After creating or cloning the repository, use Xcode’s source control menu to commit your changes and push them to GitHub. This step finalizes the connection and enables collaboration.
Choosing between creating a new repository or cloning depends on your workflow. New projects benefit from repository creation on GitHub first, while ongoing projects or team collaborations are easier to manage by cloning. Both methods integrate smoothly with Xcode’s source control tools.
Connect your Xcode project to GitHub using source control
To link your existing Xcode project with a GitHub repository, start by ensuring source control is enabled. Open Xcode preferences via the Xcode menu, select the Source Control tab, and check the box labeled Enable Source Control. This activates Git integration features within Xcode, allowing seamless version control management.
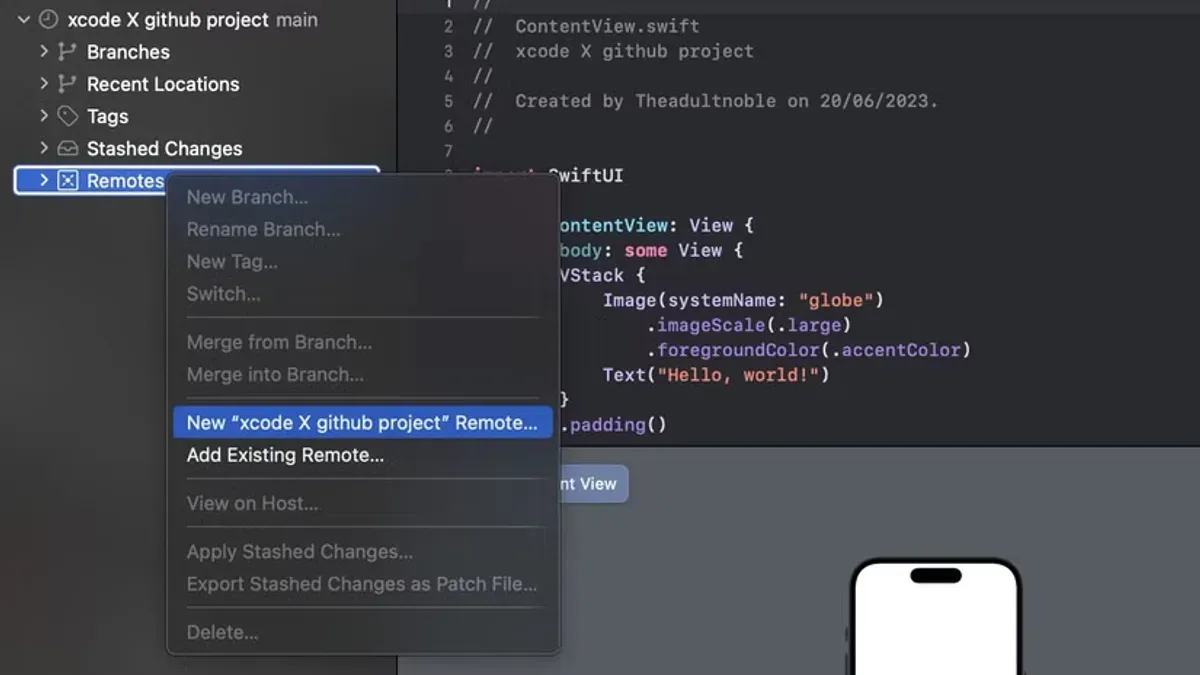
Next, add your GitHub repository as a remote. In Xcode, open the Source Control Navigator by clicking the source control icon in the navigator pane or via View > Navigators > Show Source Control Navigator. Select your project, then right-click the repository and choose Configure <repository name>. In the remotes section, click + Add Remote and enter a name like origin. Paste the GitHub repository URL here. You can use either the SSH URL ([email protected]:user/repo.git) or the HTTPS URL (https://github.com/user/repo.git), depending on your authentication preference.
For authentication, SSH keys offer a secure and password-free connection once set up, while HTTPS requires entering your GitHub credentials or a personal access token when pushing or pulling. If you haven't added SSH keys to your GitHub account, you may be prompted to enter credentials each time.
Now you can commit and push changes directly from Xcode. Use the Source Control menu or the commit button in the toolbar to stage and commit your changes with a descriptive message. After committing, choose Push to upload your changes to GitHub. A successful push will show a confirmation message in the Xcode output pane, and your commit history will update to reflect the latest changes.
By following these steps, you maintain version control entirely within Xcode’s interface, streamlining your workflow and reducing context switching.
How to use GitHub Copilot with Xcode
GitHub Copilot is an AI-powered code completion tool that assists you by suggesting code snippets and entire functions as you write. It can speed up your development process by providing relevant code suggestions based on the context of your project, which is especially useful in iOS app development where repetitive patterns are common.
To use GitHub Copilot with Xcode, you first need to install the GitHub Copilot extension or plugin compatible with your development environment. Currently, GitHub Copilot does not have a native plugin for Xcode, but you can use it through Visual Studio Code or other supported editors alongside Xcode for code generation and then integrate that code back into your project.
Here is a practical workflow to leverage Copilot alongside Xcode:
- Open Visual Studio Code with the GitHub Copilot extension installed and sign in to your GitHub account. You should see Copilot suggestions as you start typing code.
- Write or generate Swift code snippets relevant to your iOS project. For example, when writing a function to fetch data from a network, Copilot can suggest the entire function structure.
- Copy the suggested code from Visual Studio Code and paste it into your Xcode project editor. You will see Xcode’s syntax highlighting and can continue development seamlessly.
Since Copilot currently lacks direct integration within Xcode, this two-editor approach is the most effective. Remember that Copilot suggestions are AI-generated and may require careful review for correctness and security.
To use Copilot effectively, provide clear comments or function signatures before invoking suggestions. This helps the AI understand your intent better. Also, keep an eye on the suggestions’ relevance, and adapt them as needed to fit your app’s architecture and coding standards.
Troubleshoot common issues connecting Xcode to GitHub
When connecting Xcode to GitHub, you might encounter authentication errors such as "Authentication failed" or "Permission denied (publickey)". To fix this, ensure your SSH keys are correctly added to your GitHub account and your Mac's SSH agent is running. Alternatively, if you use HTTPS, double-check your username and personal access token instead of a password, as GitHub no longer supports password authentication.
Git conflicts and merge issues within Xcode often arise when multiple changes clash. The error message "Merge conflict in <filename>" indicates you need to manually resolve conflicting changes. Open the conflicting files in Xcode's source control navigator, look for conflict markers (<<<<<<<, =======, >>>>>>>), and decide which changes to keep. After resolving, mark the conflict as resolved and commit the merge.
If Xcode shows errors like "git: command not found" or "missing command line tools," it means Git or the command line tools are not properly installed or configured. Open Terminal and run xcode-select --install to reinstall the command line tools. Then verify Git is accessible by typing git --version and ensure your PATH environment variable includes Git's location.
Network issues can block GitHub access in Xcode, leading to errors such as "Could not resolve host" or "Failed to connect to github.com." Check your internet connection, firewall, or proxy settings that might restrict Git traffic. You can also test connectivity by running ping github.com in Terminal. If problems persist, try switching between SSH and HTTPS URLs for your remote repository.
Use Xcode source control commands and workflows effectively
Managing your Git workflow directly inside Xcode streamlines collaboration and keeps your project organized. You can create, switch, and merge branches without leaving the Xcode interface, which is essential for working on features or fixes simultaneously.
- Open the Source Control navigator by selecting View > Navigators > Show Source Control Navigator or pressing Command + 2. You should see your branches listed under your repository.
- To create a new branch, click the + (plus) button at the bottom of the Source Control navigator and select New Branch. Enter a clear, descriptive name such as feature/login-screen and confirm. Xcode switches to this branch immediately, visible at the top center of the window.
- Switch branches by double-clicking the desired branch in the Source Control navigator. The project files update to reflect the selected branch's state.
- Commit changes by selecting Source Control > Commit... or clicking the commit button in the toolbar. Stage your changes, write a meaningful commit message that summarizes what was done (e.g., "Add login button and validation"), then click Commit. Successful commits update the commit history pane with your message.
- Push your commits to GitHub by choosing Source Control > Push.... Confirm the remote and branch, then push. Pull updates similarly via Source Control > Pull... to keep your local branch current.
- If conflicts arise during pulls or merges, Xcode highlights conflicting files in the Source Control navigator. Open these files to see conflict markers. Use the built-in merge editor to choose between changes or combine them manually. After resolving conflicts, stage and commit the merge to finalize.
Using these commands keeps your GitHub collaboration smooth and integrated within Xcode’s native environment, reducing context switching and potential errors.
Note: Screenshots of the Source Control navigator showing branches and the commit history can help visualize these steps and are recommended for reference.
Alternatives and limitations: Using GitHub with Xcode on Windows or other platforms
Xcode is designed to run exclusively on macOS, which means you cannot install or use it natively on Windows or Linux systems like Ubuntu. This limitation affects developers who want to maintain Xcode projects or use its GitHub integration without a Mac. However, several workarounds and alternative tools can help bridge this gap depending on your setup and needs.
Using Xcode on Windows via Virtualization or Cloud Services
One approach is to run macOS through virtualization software such as VMware or VirtualBox on Windows. This setup requires a licensed copy of macOS and a sufficiently powerful PC. Once macOS is running virtually, you can install Xcode and use its full GitHub integration as if on a real Mac. Alternatively, cloud-based Mac services like MacStadium or GitHub Codespaces offer remote macOS environments with Xcode pre-installed, accessible through your browser or Remote Desktop. These options incur additional costs and may have latency compared to local use.
Alternative Git Clients and Integration Tools Outside Xcode
If you cannot run Xcode, you can still manage GitHub repositories using cross-platform Git clients such as GitHub Desktop, Sourcetree, or command-line Git. These tools allow you to clone, commit, push, and pull changes on Windows or Linux. For code editing, Visual Studio Code with Swift extensions offers basic Swift support, but it lacks the full iOS simulator and interface builder integration of Xcode. You can combine these tools to maintain your GitHub workflow without Xcode’s native interface.
Unsupported Platforms and Cross-Platform Alternatives
Installing Xcode on Ubuntu or other Linux distributions is unsupported and generally not feasible due to macOS-specific dependencies. For cross-platform iOS development, frameworks like React Native or Flutter allow you to write code on Windows or Linux and build apps for iOS, though you still need a Mac for final compilation and App Store submission. This approach separates the coding environment from the Apple ecosystem requirements.
| Platform/Method | Pros | Cons |
|---|---|---|
| Native Xcode on macOS | Full feature set, native GitHub integration, official support | Requires Mac hardware |
| macOS Virtual Machine on Windows | Access to full Xcode and GitHub tools | Complex setup, licensing issues, performance overhead |
| Cloud macOS Services | No local Mac needed, flexible access | Costly, potential latency |
| Git clients (GitHub Desktop, Sourcetree) on Windows/Linux | Free, cross-platform Git management | No native Xcode integration, manual code syncing |
| VS Code with Swift extensions | Lightweight code editing on all platforms | No iOS simulator or storyboard support |
| Cross-platform frameworks (React Native, Flutter) | Develop on Windows/Linux, multi-platform targets | Still need Mac for iOS build/submit |
Frequently asked questions
How to connect iphone to xcode?
To connect your iPhone to Xcode, use a Lightning or USB-C cable to physically link the device to your Mac. Then, open Xcode and go to Window > Devices and Simulators. Your iPhone should appear in the list; select it to view device details and provisioning options. Make sure your iPhone is unlocked and that you trust the computer when prompted on the device.
How to code in xcode?
Start coding in Xcode by creating a new project from File > New > Project and choosing a template like App or SwiftUI App. Use the code editor to write Swift or Objective-C in the main source files. Utilize features like autocomplete, syntax highlighting, and inline errors to help write clean code. Run your app on the simulator or a connected device to test your code regularly.
How to get xcode on mac?
You can get Xcode on your Mac by downloading it directly from the Mac App Store. Search for “Xcode” and click the download or get button. Once the download is complete, Xcode will install automatically and be available in your Applications folder.
How to install xcode?
Installing Xcode involves downloading it from the Mac App Store and opening the installer. After installation, launch Xcode to complete the setup, which may include accepting license agreements and installing additional components. Ensure your macOS version meets Xcode’s minimum requirements before starting the installation.
How to connect github copilot to xcode?
Currently, GitHub Copilot does not have native integration with Xcode. However, you can use Copilot in code editors like Visual Studio Code and then transfer or sync your code with Xcode projects. Keep an eye on updates from GitHub for future support directly inside Xcode.
Understand the Limits of This Guide
This guide does not cover advanced Git workflows such as rebasing or complex merge conflict resolution, which require a deeper understanding of Git commands and strategies. If your project demands these, consider consulting more specialized Git resources or training. Additionally, GitHub Copilot integration in Xcode is still evolving; it may need extra configuration steps and could offer fewer features compared to its use in other integrated development environments. Keep an eye on updates from GitHub and Apple for improvements.
Also, remember that Xcode is officially supported only on macOS. Running Xcode on Windows or Linux involves workarounds like virtual machines or Hackintosh setups, which can be unstable and are not covered here. If you primarily use non-macOS platforms, exploring alternative development environments or Git clients might be more effective.
To move forward confidently, focus on routinely using Xcode’s built-in source control panel to commit and push your changes, ensuring your GitHub repository stays up to date. This practical habit will strengthen your version control skills and keep your projects synchronized with collaborators.
See also: How to Clear DerivedData in Xcode: Step-by-Step Guide



