
How to Reverse a Clip in iMovie: Complete Step-by-Step Guide
Discover how to reverse a clip in iMovie with simple steps to add creative effects and polish your video edits efficiently.
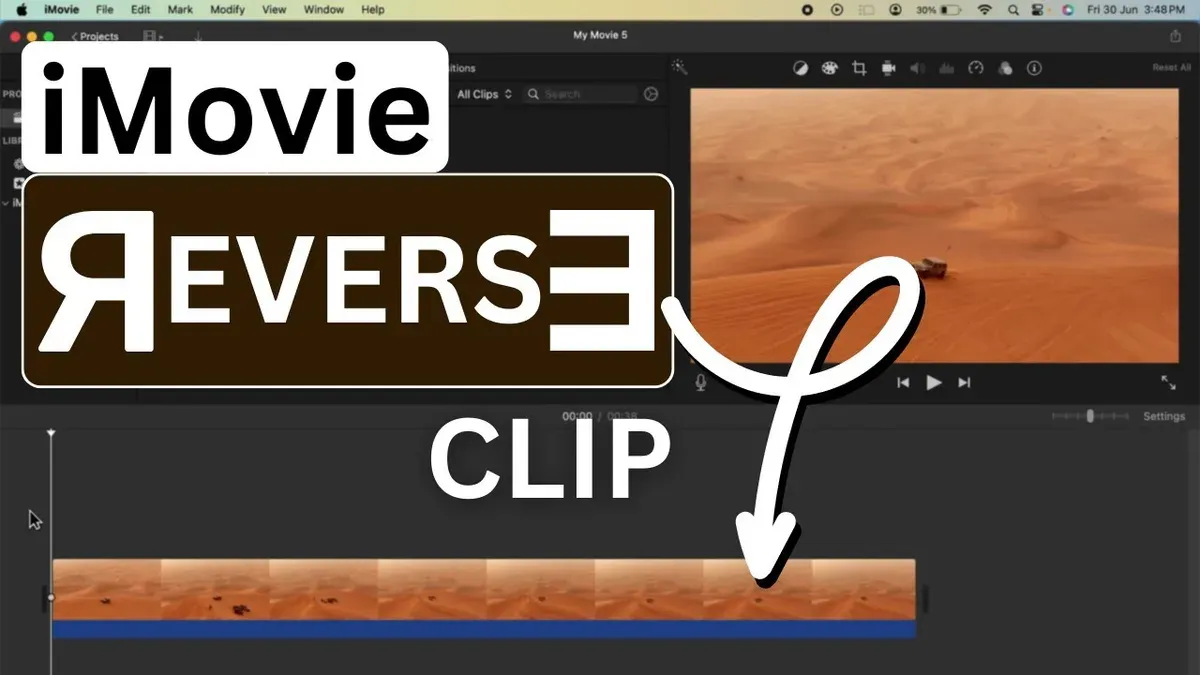
You're working on a video project in iMovie and realize that reversing a clip could add a creative twist to your story. However, figuring out how to reverse a clip in iMovie while managing cuts, moves, and trims can feel confusing without clear guidance.
This article walks you through the entire process, starting with preparing your project and clips. You’ll learn step-by-step how to reverse clips, cut and move them efficiently, and trim videos to keep your edits smooth. Along the way, you'll get tips to avoid common mistakes and ensure your final video looks polished without wasting time.
Key takeaways
- Use the Clip Adjustments bar to reverse clips precisely.
- Cut clips with the Command+B shortcut for quick editing.
- Drag clips in the timeline to rearrange their order easily.
- Trim clips by dragging edges or using the precision editor for accuracy.
- Combine reversing with cutting and moving to create seamless transitions.
Before you start: Prepare your iMovie project and clips
Before you begin reversing clips in iMovie, ensure your setup is ready to avoid interruptions during editing. First, verify that you have the latest version of iMovie installed, as clip reversal features are available in recent updates. You can check this by opening the App Store, navigating to the Updates tab, and confirming iMovie is up to date.
Next, confirm that your video clips are in a format compatible with iMovie to prevent import problems. Common supported formats include MP4 (H.264), MOV, and AVCHD. Using unsupported formats may cause errors or require conversion before editing.
Organizing your clips in the timeline before you start reversing will simplify your workflow. Arrange clips in the order you plan to edit so you can quickly select and reverse specific sections without confusion.
Finally, always back up your project or work on copies of your clips. This precaution protects your original files in case you need to revert changes or encounter unexpected issues during editing.
- Open the App Store and check for iMovie updates. When updated, you should see “Open” instead of “Update”.
- Import your clips into iMovie. Supported formats will import without errors; incompatible formats will prompt a warning.
- Drag your clips onto the timeline in the desired sequence. You should see thumbnails arranged linearly representing your video flow.
- Duplicate your project or copy clips before editing. Your duplicated project will appear separately in the Projects browser.
How to reverse a clip in iMovie step-by-step
- Import the video clip you want to reverse by clicking the Import Media button in the upper-left corner of the iMovie interface. After selecting your clip, drag it down to the timeline at the bottom. You should see the clip appear as a horizontal bar representing its duration.
- Select the clip in the timeline by clicking on it once. The clip will be highlighted, indicating it is active and ready for editing.
- With the clip selected, locate and click the Speed button in the toolbar above the preview window. This icon looks like a speedometer. Clicking it opens the speed adjustment controls for the selected clip.
- In the speed controls panel, check the box labeled Reverse. This option will instruct iMovie to play the clip backwards. Once checked, the clip’s playback in the preview window will switch to reversed motion.
- Press the Play button in the preview window to watch the reversed clip. Confirm that the clip plays backward smoothly and without glitches. This preview lets you verify the effect before finalizing your edit.
If you want to adjust the speed further, you can use the slider or preset speed options in the same speed panel. Remember, reversing a clip does not affect its audio separately; if the clip has sound, it will also play backward unless you mute or replace it.
Following these steps ensures you reverse clips efficiently and can immediately see the results, helping you integrate reversed footage seamlessly into your project.
How to cut a clip in iMovie
Cutting clips in iMovie allows you to isolate specific portions of your video for more precise editing, especially before reversing them. Positioning the playhead exactly where you want to make the cut is crucial to avoid abrupt transitions or jumps in the reversed clip. A well-placed cut lets you focus on the exact segment you want to reverse or manipulate further.
Follow these steps to cut a clip accurately:
- Move the playhead along the timeline to the exact frame where you want to cut the clip. You should see the vertical line indicating the playhead position.
- Use the split clip command by pressing Command + B on your keyboard, or go to the Edit menu and select Split Clip. The clip will split into two separate sections at the playhead.
- Click on the unwanted section of the clip and press Delete if you want to remove it. Alternatively, drag and rearrange the clip sections to change their order in the timeline.
- Review the timeline to ensure your cuts are clean and the transitions between clips are smooth. Precise cuts prevent jarring jumps or audio glitches, which can be especially noticeable when reversing footage.
For example, if you have a 10-second clip but only want to reverse the middle 4 seconds, move the playhead to the 3-second mark and split the clip, then again at the 7-second mark and split. Delete or rearrange the outer sections as needed, leaving the isolated 4-second portion ready for reversing. This method keeps your edits organized and your reversed clip seamless.
How to move clips in iMovie
Rearranging clips in your timeline is essential for combining reversed clips with other footage smoothly. To move a clip, click on it and drag it to the desired position. As you drag, iMovie will highlight the new insertion point, helping you place the clip precisely. When you release the mouse button, the clip snaps into place, eliminating gaps and maintaining continuity.
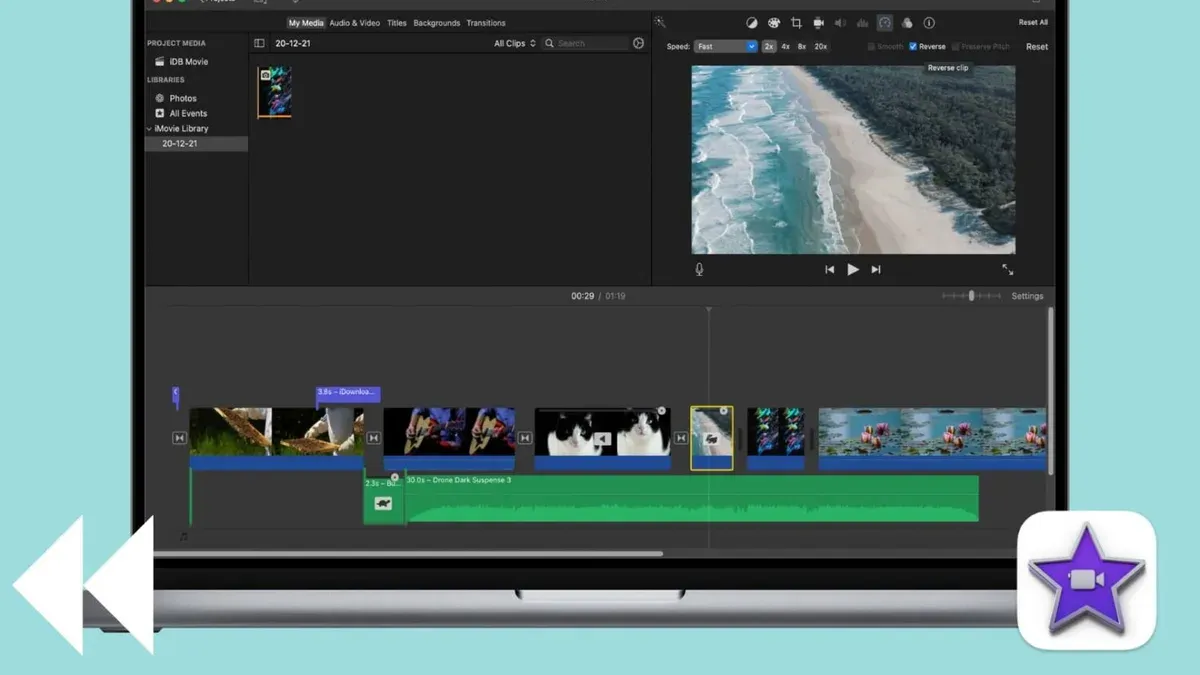
Using the zoom timeline feature can improve control when moving clips, especially for fine adjustments. You can zoom in by clicking the zoom slider at the bottom right of the timeline, allowing you to see clip edges and transitions clearly. This precision is useful when you want to align clips seamlessly or adjust timing after reversing sections.
To move multiple clips at once, hold the Shift key and click each clip you want to move, then drag them together. Moving multiple clips preserves their relative positions, which is helpful when rearranging a sequence. Be aware that moving clips can cause ripple effects, where subsequent clips shift to accommodate the moved clips, so watch for unintended gaps or overlaps.
- Click on the clip you want to move; it becomes highlighted.
- Drag the clip along the timeline; observe the insertion marker indicating where it will be placed.
- Release the mouse button to drop the clip; it snaps into place without gaps.
- Use the zoom slider to enlarge the timeline for precise clip placement.
- To move multiple clips, hold Shift and click each clip before dragging.
- After moving clips, play back the timeline to check for smooth continuity and no unexpected gaps.
Before moving clips, your timeline might have reversed clips separated by gaps or misplaced segments. After moving clips correctly, the timeline will show a continuous flow, ensuring your video plays seamlessly without interruptions.
How to trim a video in iMovie
Trimming a clip in iMovie lets you refine its start and end points, which is especially useful after reversing a clip to ensure smooth transitions. To trim, select the clip in the timeline and notice the yellow handles that appear at both edges. These handles allow you to shorten or extend the clip by dragging them inward or outward.
When you drag a yellow trim handle, the clip's duration changes accordingly, and the timeline reflects this adjustment. Trim carefully to avoid abrupt cuts that might disrupt the flow of your video. Combining trimming with cutting can provide precise control—cut first to isolate the segment you want, then trim the edges for a clean start and finish.
It’s a good practice to preview your clip frequently while trimming. This helps confirm that transitions remain smooth and that the clip fits well with surrounding footage. Watching the playback after each adjustment ensures your edits enhance the overall video without accidental jumps or freezes.
- Select the clip you want to trim in the timeline—yellow trim handles will appear at each edge of the clip.
- Click and drag the yellow handle at the start or end of the clip toward the center to shorten the clip; you will see the clip’s length change in the timeline.
- Release the mouse button when you reach the desired trim point; the clip will now start or end at that new position.
- Play back the trimmed clip by pressing the spacebar or clicking the play button to check the transition quality.
- If needed, adjust the trim handles again until the clip flows smoothly with adjacent clips in the timeline.
How to edit a video in iMovie beyond reversing: tips for smooth results
After reversing your clips, refining your video further can greatly enhance the overall quality and professionalism. Adjusting clip speed lets you create slow-motion or fast-motion effects that complement the reversed footage, adding dramatic or comedic flair. For example, slowing down a reversed clip of a jump can emphasize motion, while speeding up a reversed walk can add a quirky feel.
Using transitions between clips helps smooth out abrupt starts or ends that often appear after reversing. Applying cross dissolve or fade to black transitions softens the visual jump, making the sequence flow naturally. Before adding transitions, preview your video to identify jarring cuts and strategically place transitions for seamless flow.
Audio synchronization is another key area. Reversed clips may cause audio to sound unnatural or out of sync. Detach the audio from the clip by right-clicking it and selecting “Detach Audio.” You can then mute, replace, or adjust the audio independently to maintain sound quality without distracting effects.
Color correction is useful if reversed clips appear visually off due to lighting or exposure changes during reversal. Use the Color Balance and Color Correction tools found in the adjustments bar to tweak brightness, contrast, and color temperature. This can unify the look of reversed clips with the rest of your footage.
- Select the reversed clip in the timeline, click the speedometer icon above the preview window, and adjust the speed slider to slow down or speed up the clip. You should see the clip’s duration change accordingly in the timeline.
- Click the Transitions tab, drag a cross dissolve or fade transition to the start or end of the reversed clip, then play that section. The cut between clips should now appear smoother and less sudden.
- Right-click the reversed clip and choose “Detach Audio.” The audio track separates below the video clip. Mute or replace the audio track to prevent awkward reversed sounds from playing.
- With the reversed clip selected, click the Color Correction button in the toolbar. Adjust exposure, saturation, and temperature sliders until the clip matches the surrounding footage. Preview to confirm consistent color tones.
Troubleshooting common issues when reversing clips in iMovie
If you find the Reverse option grayed out, it usually means the clip format isn’t supported for speed adjustments or the clip is part of a compound clip. To fix this, try converting the clip to a compatible format like MP4 or detach it from any compound clips by selecting the clip and choosing "Break Apart Clip Items" from the Modify menu. Once done, the Reverse option should become available.
When cutting seems inaccurate or clips overlap after splitting, make sure you place the playhead precisely at the intended frame before using the Split Clip command (Command+B). Zoom in on the timeline to improve accuracy. Overlapping clips often happen if you drag clips too close; snap clips by dragging them until you see the yellow alignment guide ensuring no gaps or overlaps.
Missing parts or clips appearing cut off can indicate accidental trimming or timeline glitches. Check the yellow trimming handles on the clip edges and adjust them to restore any missing footage. If trimming looks correct but parts remain missing, try removing and re-importing the clip to refresh it in the timeline.
File corruption or unsupported formats can cause playback issues or prevent reversing. If a clip stutters or won’t play back correctly, test it outside iMovie with QuickTime Player. If it fails there, re-export or convert the original file using a reliable video converter before importing it back into iMovie to ensure smooth editing.
- Select the clip and check if "Reverse" is clickable. If grayed out, verify the clip isn’t part of a compound clip or in an unsupported format.
- If needed, break apart compound clips by selecting the clip and choosing "Break Apart Clip Items" from the Modify menu.
- Convert unsupported clips to MP4 using a video converter, then re-import to iMovie.
- Ensure accurate cutting by zooming in and placing the playhead exactly where you want to split, then press Command+B.
- Drag clips carefully to avoid overlaps, using the yellow snap guides for alignment.
- Check and adjust trimming handles to recover missing clip parts.
- If playback is choppy, test the file in QuickTime and consider re-exporting if corrupted.
Frequently asked questions
How to clip video in imovie?
To clip a video in iMovie, first select the clip in the timeline. Position the playhead where you want to split the clip, then right-click and choose "Split Clip" or press Command+B. This divides the clip into parts, allowing you to delete or move sections as needed.
How to edit a movie in imovie?
Editing a movie in iMovie involves arranging clips in the timeline, trimming their length, adding transitions, and applying effects. You can cut, move, and reverse clips, adjust audio levels, and insert titles. Use the toolbar and inspector panels to access these tools and preview changes in real time.
How to make a video clip reverse?
To reverse a video clip in iMovie, select the clip in the timeline and click the speed adjustment button (the speedometer icon). Check the box labeled "Reverse" to play the clip backward. Ensure the clip format supports this feature, as some imported files may require conversion first.
How to cut in imovie?
Cutting in iMovie is done by splitting clips at specific points. Move the playhead to the desired frame, then split the clip using Command+B or right-click and select "Split Clip." You can then delete or rearrange the resulting segments to refine your video.
How to cut videos in imovie?
Cutting videos in iMovie involves selecting the clip in the timeline and splitting it at the points you want to remove or isolate. Use the split option to break the clip into smaller parts, then select and delete unwanted sections. This process is useful for removing mistakes or tightening your video’s pacing.
What This Guide Doesn’t Cover
Reversing clips in iMovie works only on standard video clips and does not support photos or some complex video formats like certain proprietary or heavily compressed files. Additionally, this method does not automatically reverse audio tracks within the clip; audio will continue to play forward unless you manually edit or replace it. If your project requires reversing audio or handling unsupported media types, you may need to use dedicated audio editing software or more advanced video editors that offer these features.
For users working with multi-layered projects, advanced effects, or professional-grade audio manipulation, iMovie’s reversing features might feel limited. In those cases, exploring software such as Final Cut Pro or Adobe Premiere Pro could provide the flexibility needed.
Next Step: Master Clip Organization
After you’ve practiced reversing and basic clip edits like cutting and moving, focus on organizing your clips effectively within iMovie’s timeline. Using features like clip grouping and markers helps you keep track of your edits and prevents common mistakes like overlapping clips or accidental deletions. This habit will save time and frustration, especially as your projects grow more complex.
See also: How to Add Transitions in iMovie: Step-by-Step Guide for iPhone, iPad, and Mac · How to Fade Out Audio in iMovie: Step-by-Step Guide



