How to Use Two Backup Drives in Time Machine for Reliable Mac Backup
Learn how to set up and manage two backup drives in Time Machine to keep your Mac data safe and backed up in multiple locations.
You rely on Time Machine to keep your Mac's data safe, but using just one backup drive may leave you vulnerable if that drive fails or is unavailable. Setting up two backup drives can provide extra security and flexibility, ensuring your data is backed up in multiple locations.
This article explains how to use two backup drives in Time Machine effectively. You'll learn what equipment you need, how to configure both drives, how to run and access backups from either, and tips for maintaining and troubleshooting your dual backup setup.
Key takeaways
- Use two physically separate drives formatted as APFS or Mac OS Extended (Journaled) for Time Machine backups.
- Set up each drive individually in Time Machine preferences to alternate backups automatically.
- You can manually select which backup drive to use when running an immediate backup via the Time Machine menu.
- Access backups from either drive by entering Time Machine and choosing the desired backup disk.
- Regularly verify both drives’ health and available space to avoid backup interruptions.
Before you start: What you need to use two backup drives with Time Machine
To use two backup drives with Time Machine, you need two separate external drives formatted for Mac backups, typically using APFS or Mac OS Extended (Journaled). Each drive should have sufficient capacity—generally at least twice the size of the data you plan to back up—to accommodate multiple backup versions. Compatibility with your Mac’s operating system is essential; macOS versions from macOS Big Sur onward support multiple backup disks natively.
Drive speed and reliability matter because slower drives can extend backup times, and less reliable drives risk data loss. Solid-state drives (SSDs) offer faster performance but tend to be more expensive, while traditional hard drives provide larger capacities at lower cost. You can alternate backups between drives to create redundancy or use them simultaneously, though macOS will cycle backups rather than run them concurrently.
| Drive Type | Typical Speed | Capacity Range | Reliability | Use Case |
|---|---|---|---|---|
| External SSD (e.g., Samsung T7) | Up to 1,000 MB/s | 500 GB–2 TB | High | Fast backups, mobile use |
| External HDD (e.g., Seagate Backup Plus) | 80–160 MB/s | 1 TB–8 TB+ | Moderate | Large capacity, cost-effective |
- Verify your Mac is running macOS Big Sur or later. You can check this by clicking the Apple menu > About This Mac; the version will be displayed.
- Obtain two external drives formatted as APFS or Mac OS Extended (Journaled). Use Disk Utility (Applications > Utilities) to verify or reformat the drives if needed.
- Ensure each drive has enough free space—at least double your current data size. Check this by right-clicking the drive icon on your desktop and selecting Get Info.
- Connect both drives to your Mac, ideally using USB 3.0 or Thunderbolt ports for faster data transfer. Your Mac should recognize both drives in Finder.
How to set up Time Machine backup with two drives step-by-step
- Open System Preferences and click on Time Machine. You should see an option labeled Select Disk… or the name of your current backup disk.
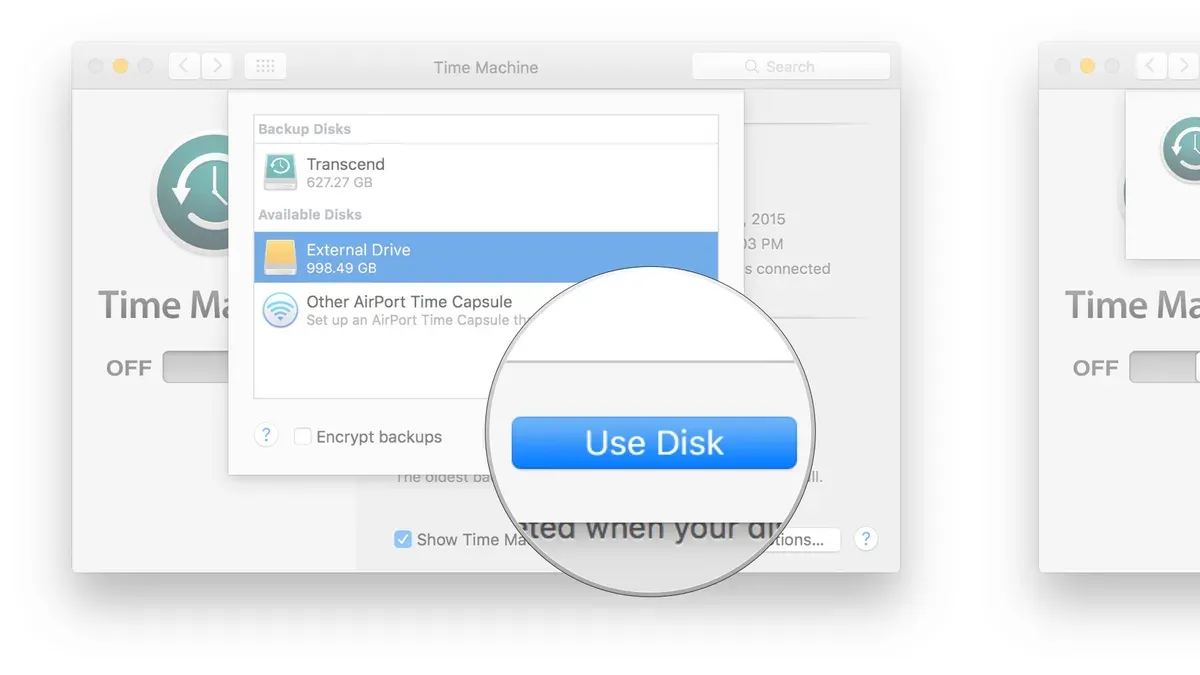
- Click Select Disk… and choose your first external drive. After selection, Time Machine will start using this disk for backups. You should see this disk listed as the current backup destination.
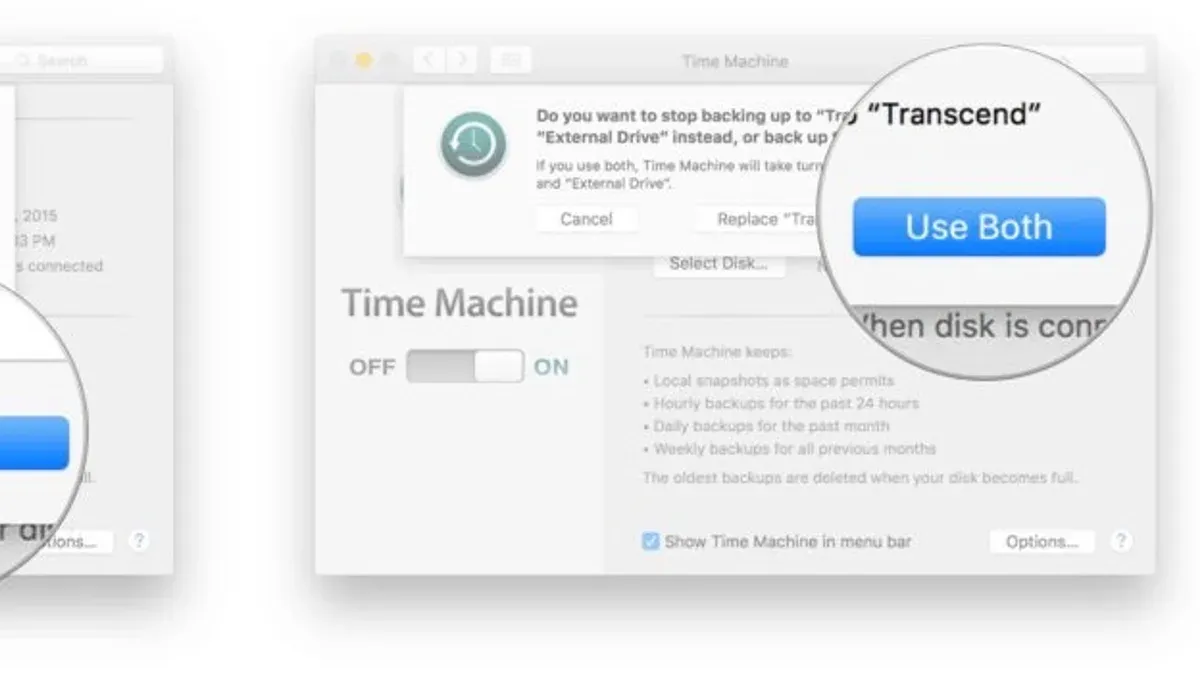
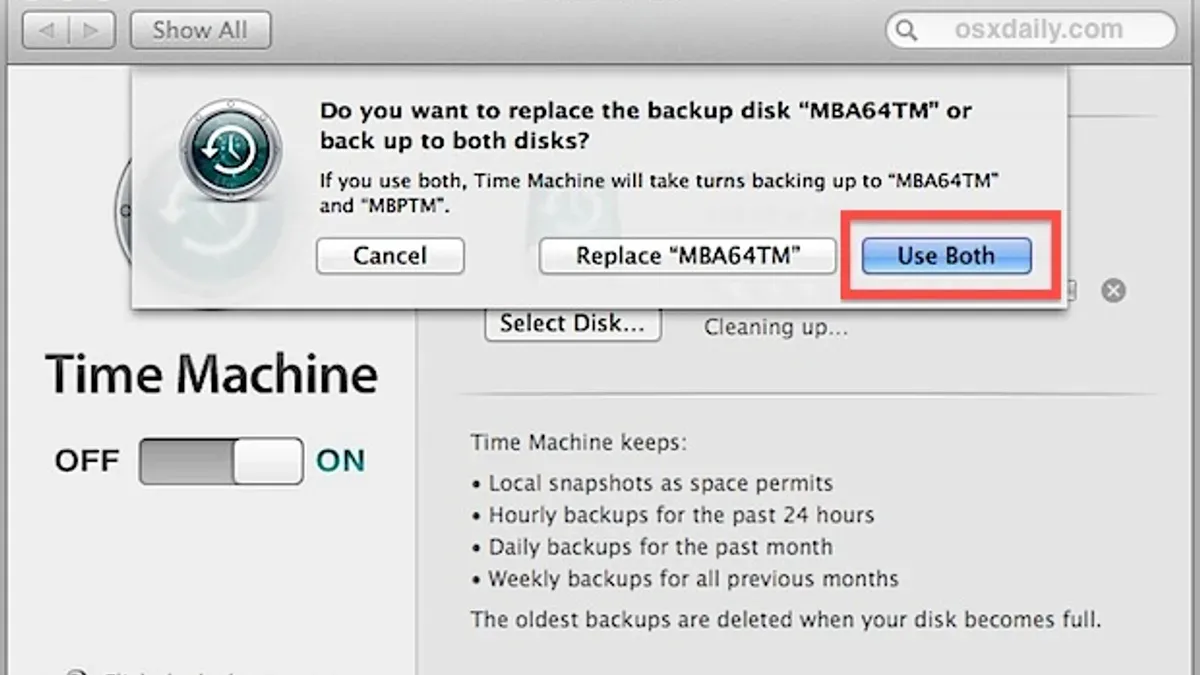
- To add your second backup drive, click the + Add Backup Disk… button (or Select Disk… if the button is not visible). Select your second external drive from the list. Both disks will now appear under the list of backup disks.
- Time Machine will alternate backups between the two disks automatically. This means your Mac will back up to one drive, then the other on the next backup cycle, distributing backups evenly over time.
- To monitor the backup status for each disk, return to Time Machine preferences. You will see each disk listed along with the date and time of its last successful backup. This helps you verify both disks are receiving backups as expected.
- If you need to remove or replace a backup disk, select the disk in Time Machine preferences and click the Remove Disk button. You can then add a new disk following the earlier steps. Removing a disk does not delete its existing backups.
With both disks set up, your Mac alternates backups automatically, providing redundancy and greater data security. Checking backup dates for each disk ensures your backup strategy remains on track.
How to run a Time Machine backup now on either backup drive
You can manually start a backup on either of your two configured Time Machine drives whenever you want to ensure your data is immediately saved. By default, Time Machine alternates automatically between your backup disks, but you can select a specific disk for a manual backup if needed.
- Click the Time Machine icon in the menu bar. If you do not see it, open System Preferences, go to Time Machine, and check "Show Time Machine in menu bar." A dropdown menu will appear.
- From the dropdown, select "Back Up Now." Time Machine will begin backing up on the drive it is currently scheduled to use.
- To switch to the other backup drive, open System Preferences and select Time Machine.
- Click "Select Disk..." and choose the backup drive you want to use for the manual backup. Confirm your choice.
- Return to the Time Machine menu bar icon and select "Back Up Now." The backup will start immediately on the selected disk.
- You will see a progress indicator and a message like "Backing Up: Preparing backup" or "Backing Up: Copying files." Once complete, the message will change to "Backup Completed Successfully." This confirms the manual backup finished on the chosen drive.
Time Machine manages the two drives independently, so manual backups on one disk do not affect the scheduled backups on the other. This flexibility allows you to prioritize one backup drive when needed without interrupting your overall backup strategy.
How to access Time Machine backup from either backup drive
To browse and restore data from your Time Machine backups stored on different drives, you first need to select the backup disk you want to use. This lets you view the backups on that particular drive and pick the files or folders you want to recover.
- Connect the external backup drive you want to access to your Mac and ensure it is mounted.
- Click the Time Machine icon in the menu bar and choose Enter Time Machine. If you don’t see the icon, open System Preferences, go to Time Machine, and check Show Time Machine in menu bar.
- Once inside the Time Machine interface, look at the upper right corner where the backup disk name appears. If it shows the wrong disk, click the gear icon or the disk name and select the desired backup disk from the list.
- Navigate through the timeline on the right side to choose the backup date you want to browse. You can also use the arrows or Finder windows to locate specific files or folders.
- Select the file or folder you want to restore, then click the Restore button at the bottom. The item will be copied back to its original location on your Mac.
Repeat these steps to switch between backup drives whenever you need to access different sets of backups. This method ensures you can fully utilize both drives for data recovery without confusion.
Note: Screenshots typically show the Time Machine interface with the timeline on the right and the selected disk name near the top, highlighting the Restore button at the bottom. These visuals help confirm you are browsing the correct backup source.
How to copy Time Machine backup to another disk safely
Copying an existing Time Machine backup to another disk requires careful handling to preserve the backup’s integrity. Time Machine backups use a special format called a sparsebundle or a backup folder structure that must remain intact to ensure your backups remain usable. Directly copying files with a simple drag-and-drop may cause corruption or incomplete backups.
- Connect both the source backup drive and the target backup drive to your Mac. You should see both drives appear in Finder’s sidebar.
- Open Finder and navigate to the source Time Machine backup disk. Locate the backup folder or the sparsebundle file, which typically has a name like "YourMacName.sparsebundle".
- Use the Terminal app for a safer copy: open Terminal and enter sudo cp -a /Volumes/SourceDisk/YourMacName.sparsebundle /Volumes/TargetDisk/, replacing SourceDisk and TargetDisk with the exact drive names. The
-aflag preserves file attributes and symbolic links. - Wait for the copy to complete. This process can take several hours depending on backup size. Success means the entire sparsebundle or backup folder is duplicated without errors.
- After copying, eject both disks properly. Then, in Time Machine preferences, add the new disk as a backup destination to verify it recognizes the copied backup.
Warnings: Avoid using Finder drag-and-drop or standard copy commands as they may disrupt the sparsebundle structure. If the copy is interrupted or incomplete, the backup on the new disk may be unusable. Additionally, manual copying does not merge backups; it only duplicates the current state. Regular backups should continue on both drives independently to maintain redundancy.
Troubleshooting common issues with two Time Machine backup drives
When using two backup drives with Time Machine, you might encounter issues such as a backup disk not being recognized or failing to mount. If this happens, first unplug and reconnect the drive. Then, open Disk Utility (Applications > Utilities) to check if the disk appears. If it does but shows errors, use the First Aid feature to repair it. Successful repair should make the disk mount and become accessible in Time Machine preferences.
If Time Machine stops alternating backups between drives, verify both disks are still listed under System Preferences > Time Machine > Select Disk. Removing and re-adding a disk can refresh the setup. Also, ensure both drives are connected or available when backups are scheduled to avoid missing cycles.
Slow backup performance or errors during backup can result from a nearly full disk or connection issues. Check the disk’s available space in Finder or Disk Utility. If space is low, consider deleting older backups or excluding large files. For connection problems, try a different cable or port to improve stability.
When a backup disk becomes full, Time Machine usually deletes the oldest backups automatically. If it does not, manually remove some backups or reformat the drive after copying important data elsewhere. Remember, a full disk can cause backup failures, so monitoring free space regularly helps maintain smooth operation.
Frequently asked questions
How to use time machine backup?
To use a Time Machine backup, connect the backup drive to your Mac and open the Time Machine app or click the Time Machine icon in the menu bar. Navigate through the timeline or use the arrows to find the files or folders you want to restore. Select the items and click "Restore" to copy them back to their original locations.
How to backup using time machine?
Set up Time Machine by connecting an external drive and opening System Settings > General > Time Machine. Turn on Time Machine and select your backup disk. Time Machine will automatically back up your Mac hourly, daily, and weekly. You can also add a second backup disk to alternate backups for added security.
How to start a time machine backup?
Once Time Machine is enabled and a backup disk is selected, it will start backing up automatically. To start a backup manually, click the Time Machine icon in the menu bar and choose "Back Up Now." This forces an immediate backup outside the scheduled intervals.
How to run time machine backup now?
Click the Time Machine icon in the menu bar at the top right of your screen. From the dropdown menu, select "Back Up Now." This triggers an immediate backup to the currently selected Time Machine drive, ensuring your data is saved without waiting for the next automatic backup.
how to use time machine backup
Using a Time Machine backup involves connecting your backup drive, entering Time Machine from the menu bar, browsing to the date of the backup you want, and selecting files or folders to restore. You can restore items to their original location or a different folder as needed.
What This Guide Does Not Cover
This guide focuses on using two local external drives with Time Machine and does not cover network-based backups such as those to a NAS or a Time Capsule. If your backup needs involve very large data sets, specialized backup software, or require simultaneous backups to multiple destinations, you may need more advanced solutions beyond Time Machine’s native capabilities. Additionally, Time Machine alternates backups between the two drives, so it does not create true simultaneous backups; this means one backup may be more recent than the other at any given time.
The most effective next step is to test your setup by initiating a manual backup to each drive independently through System Preferences > Time Machine > Back Up Now. This confirms that both drives are configured correctly and working as expected, giving you confidence that your data is protected across both backups.
See also: How to Restore an Entire Mac Using Time Machine: Step-by-Step Guide · How to Change Backup Frequency in Time Machine: Step-by-Step Guide · How to Restore a Single File Using Time Machine on Mac · How to Exclude Folders from Backup in Time Machine: Step-by-Step Guide