
How to Scan a Document into the Notes App on iPhone: Step-by-Step Guide
Discover easy steps to scan a document into Notes in Notes app and organize your papers digitally using your iPhone’s built-in scanner.
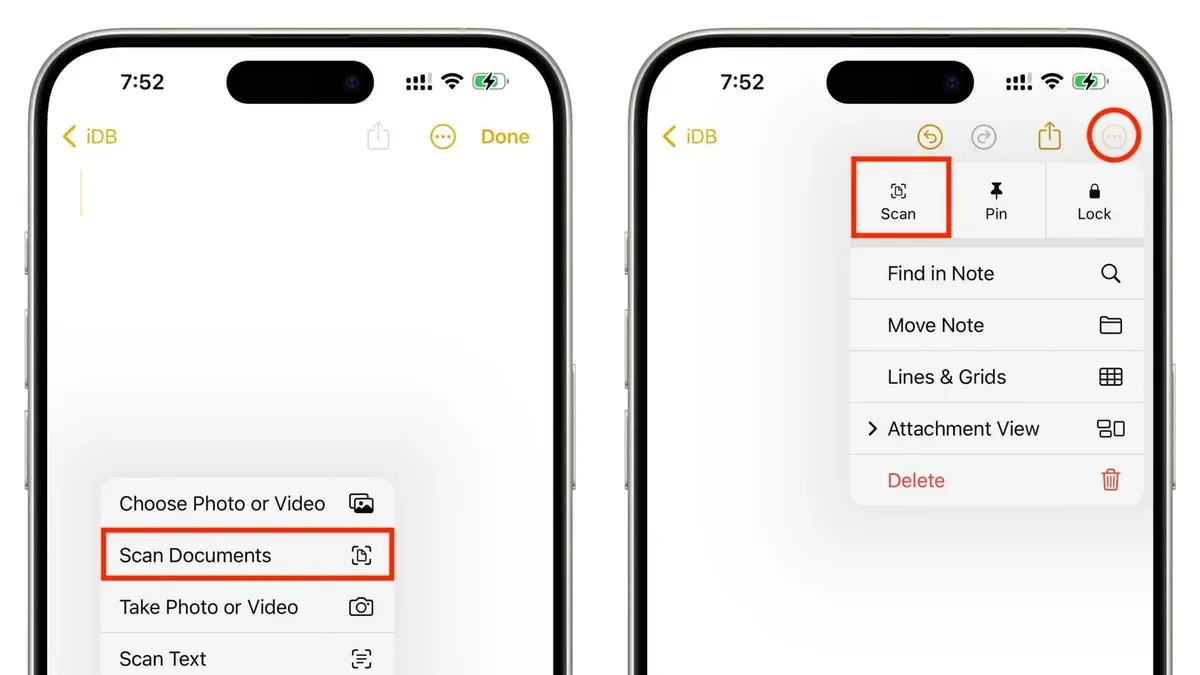
You have a pile of important papers that you need to organize digitally, but using a separate scanning app feels complicated and time-consuming. Fortunately, the Notes app on your iPhone includes a built-in document scanner that lets you quickly capture and save physical documents without extra downloads.
This article shows you how to scan a document into Notes in Notes app with clear, step-by-step instructions. You will learn how to find and use the scanner, adjust your scans for the best quality, save and organize documents within Notes, and even troubleshoot common issues. By following this guide, you can confidently handle all your scanning needs directly within the app.
Key takeaways
- Open or create a note in the Notes app before accessing the scanner.
- Use the camera icon or the plus (+) button to find the document scanner.
- Adjust scan edges manually for better accuracy before saving.
- Organize scanned documents by adding titles and folders within Notes.
- Learn simple fixes if the scanner doesn’t detect your document automatically.
Before you start: What you need to scan documents in Notes
To scan documents directly into the Notes app, you need an iPhone with the Notes app installed, which comes pre-installed on iOS devices. Make sure your iPhone’s camera is working properly, as it is essential for capturing the document images. You also need to grant the Notes app permission to access your camera; without this, the scanner will not function.
Scanning works best when you have good lighting and place the document on a flat surface to ensure clarity and reduce shadows. The built-in scanner captures the document as a PDF file or image embedded within your note, allowing easy viewing and sharing. This method does not require any third-party apps or additional purchases, making it a convenient and cost-effective solution.
Below is a checklist of what you need to prepare before scanning:
| Requirement | Details |
|---|---|
| Device | iPhone with the Notes app (default on iOS) |
| iOS Version | iOS 11 or later (scanner introduced in iOS 11) |
| Camera Access | Camera permission enabled for Notes app (Settings > Notes > Camera) |
| Lighting | Well-lit area to improve scan quality |
| Surface | Flat surface to lay documents |
- Check that your iPhone is updated to iOS 11 or later. You can verify this in Settings > General > About > Software Version. When updated, proceed to the next step.
- Ensure the Notes app has permission to use your camera by going to Settings > Notes > Camera and toggling it on. When enabled, you will be able to access the scanner inside Notes.
- Prepare your document on a flat surface in good lighting to achieve the best scan quality. When ready, open the Notes app to start scanning.
Open the Notes app and create or select a note to scan into
To begin scanning a document into the Notes app, start by locating and launching the Notes app on your iPhone. You can find it either on your Home screen or within the App Library. Once opened, you have two main options: create a new note for your scan or choose an existing note where you want to add the scanned document.
Creating a new note is helpful if you want to keep your scanned documents separate or organized by topic. To do this, tap the New Note button, typically represented by a square with a pencil icon in the bottom right corner. After tapping it, a blank note will open, ready for you to add your scan.
If you prefer to add the scanned document to a note you've already created, simply scroll through your list of notes and tap the one you want. This method is useful for consolidating related information in one place. After selecting the note, you’ll see the note’s content ready for editing.
- Open the Notes app from your Home screen or App Library. You should see a list of your notes or an empty screen if none exist yet.
- To create a new note, tap the New Note button (square with pencil) at the bottom right. A blank note opens, showing a keyboard ready for text input.
- To scan into an existing note, scroll through your notes list and tap the note you want. The note will open, displaying its saved content if any.
Access the document scanner inside the Notes app
Once you have your note open in the Notes app, look for the camera icon at the bottom of the screen. This icon gives you quick access to several media options. Tapping this icon will open a small menu with different actions related to photos and scanning.
- Tap the camera icon located just above the keyboard or at the bottom of the note. When you do this, a menu will appear with options like "Take Photo or Video," "Photo Library," and "Scan Documents."
- Select Scan Documents from the menu. This immediately switches you to the scanning interface within the Notes app.
- Observe the scanning interface: your iPhone’s camera view will fill the screen, with a rectangular frame that helps you line up your document. At the bottom, you’ll find a shutter button to capture the scan, and options to toggle the flash, switch between cameras, or cancel the scan session.
- Check that the interface shows a button labeled Auto or Manual in the top right corner—this controls whether your iPhone scans automatically when it detects a document or waits for you to press the shutter.
- When the scanner is active, position your document within the frame, and the Notes app will guide you through capturing clear, well-aligned pages.
This step connects you directly to the built-in scanning tool in Notes, setting up the document capture process without needing any other apps.
Scan your document: capturing and adjusting the scan
- Place your document flat on a well-lit surface to ensure clear visibility. When positioned correctly, your iPhone’s camera can easily detect the document edges.
- Point your iPhone camera at the document within the Notes app’s scanner interface. The scanner will automatically detect the edges and capture the scan when it is steady and in focus. You should see a yellow highlight around the document edges once detected.
- If the automatic capture does not trigger, tap the white shutter button at the bottom center of the screen to manually capture the scan. After capturing, a preview of the scan appears showing the detected edges.
- Adjust the scan by dragging the blue corners to crop precisely around the document edges. You can also tap the rotate icon at the bottom to correct the scan’s orientation. Once satisfied, tap "Keep Scan" to save the adjustment.
- To scan multiple pages into the same document, position the next page and repeat the capture process. Each new scan is added as an additional page you can review before finishing.
- When you have scanned all pages, tap "Save" to add the scans to your note. You will then see the scanned pages listed within the note for easy access and management.
For example, if scanning a multi-page receipt, you start by automatically capturing the first page where the edges glow yellow. If the second page’s edges are not perfectly detected, you can manually crop by dragging corners to fit the page exactly before saving. This ensures each page is clear and correctly framed in the note.
Save and organize your scanned documents within Notes
After scanning your documents, it's essential to save them properly within the Notes app to keep your files organized and easy to locate. When you finish scanning, tap Save or Done in the upper-right corner. This action stores the scanned images directly into the note you selected or created. You should see your scans displayed as thumbnail previews inside that note.
To keep your scans easy to find, rename the note with a descriptive title. Tap the note's title area at the top, enter a clear name like Tax Documents 2026 or Meeting Receipts, and then tap Done. This helps distinguish notes containing scanned documents from other notes.
For further organization, use folders or tags within Notes. You can move your note into a specific folder by swiping left on the note title in the notes list and tapping Move, then choosing the appropriate folder such as Work or Personal. Tags can be added by typing hashtags (#) within the note, which lets you quickly filter notes by topic or project.
Note that scanned documents appear as multi-page PDFs embedded in the note, whereas images added directly show as individual photos. This distinction helps when you want to edit or share a full document scan versus a single image.
For example, you might have a folder named Receipts containing a note titled July Trip with several scanned pages of receipts all saved and accessible in one place. This structure makes retrieval straightforward and efficient.
Edit and share scanned documents from Notes
Once you have scanned a document into the Notes app, you can easily make edits directly within the note. To annotate or highlight your scan, tap the scanned document to open it, then tap the Markup icon (a pen tip inside a circle). This opens a range of tools including pens, highlighters, erasers, and text insertion. You can draw, highlight areas, or add typed notes. When done, tap Done to save your changes back to the note.
Sharing your scanned documents is straightforward and flexible. To export a scan as a PDF or image, tap the scanned document, then tap the Share icon (a square with an arrow pointing upward). From here, select Save to Files to export as PDF or image, or choose an app such as Mail or Messages to send it directly. You can also share entire notes containing scanned documents by tapping the More button (three dots), choosing Share Note, and inviting collaborators via iCloud or sending the note link through messaging apps.
While Notes offers basic annotation and sharing, its editing tools are limited; for advanced edits like OCR, form filling, or higher resolution scans, dedicated scanning apps may be necessary. However, for quick edits and secure sharing, the Notes app provides a convenient, integrated experience without leaving your iPhone.
Troubleshoot common scanning issues in the Notes app
If the scanner is not detecting your document edges, start by improving the lighting and positioning. Place your document on a flat, well-lit surface without shadows or glare. Hold your iPhone steady and parallel to the document to help the scanner recognize edges more accurately.
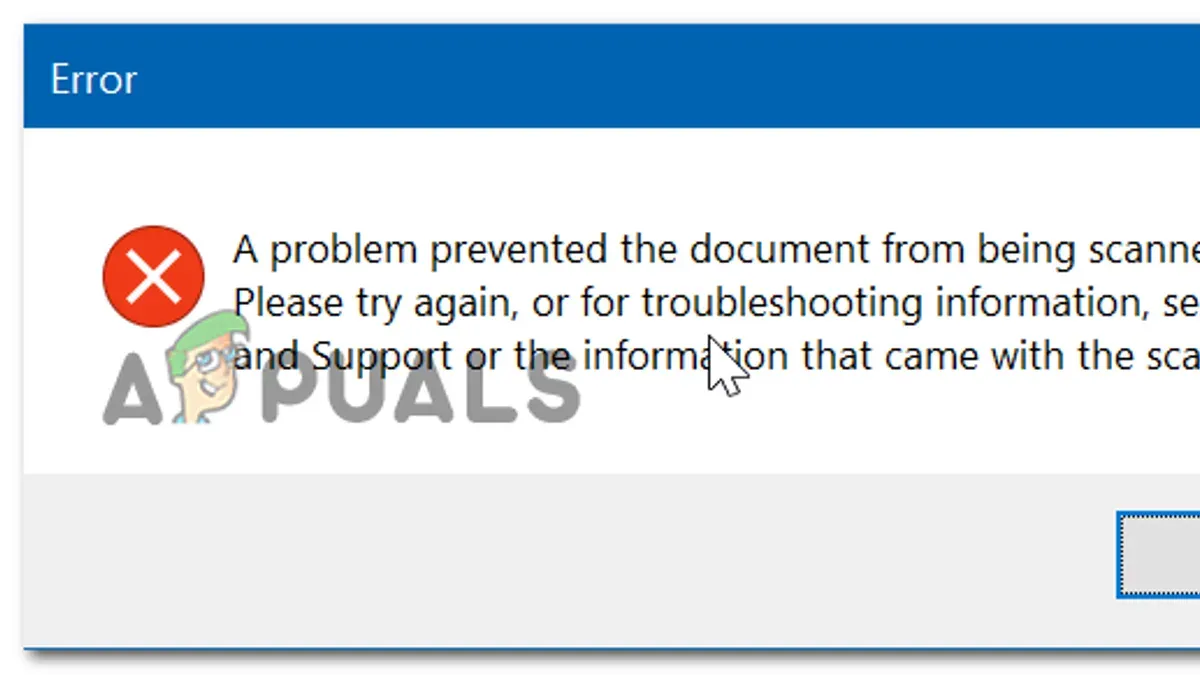
If you receive a message saying the Notes app cannot access the camera, check your camera permissions. Go to Settings > Privacy > Camera and make sure the toggle next to Notes is turned on. Without camera access, the scanner won’t function at all.
Blurry or low-quality scans are often caused by a dirty camera lens or shaky hands. Clean the lens gently with a soft, lint-free cloth. When scanning, hold your device steady and avoid moving until the scan completes to get sharp images.
If you are unable to add multiple pages to a scan, ensure you tap the + Add Scan button after each capture before saving. Missing this step can result in only the first page being saved. Also, make sure your iPhone is not running low on storage, as this can prevent additional pages from saving.
When the Notes app crashes or freezes during scanning, try restarting your iPhone first. If the problem continues, check for an iOS update by going to Settings > General > Software Update and install any available updates. Keeping your system updated often fixes bugs related to the Notes app.
Advanced tips: Maximize your scanning efficiency in Notes
You can access the document scanner quickly without opening the Notes app by using the scanning shortcut from the lock screen or Control Center. To do this, swipe left on the lock screen and tap the Notes icon if available, or add the Notes scanner to Control Center via Settings > Control Center > Customize Controls. This shortcut opens a new note with the scanner ready, saving time when you need to scan on the go.
Combine your scans with typed notes, checklists, or drawings in the same note for richer context. For example, after scanning a receipt, add a checklist for expenses or jot down reminders about the purchase. This keeps related information together and easy to find.
Notes uses optical character recognition (OCR) to make text inside scanned documents searchable. Try searching a keyword from a scanned invoice or contract in the Notes app search bar. If the text appears in results, OCR is working and you can quickly locate specific scans by their text content without manual browsing.
To keep your scanned documents safe and accessible, back up your Notes with iCloud. Go to Settings > [your name] > iCloud and toggle Notes on. This ensures your scans sync across your devices and remain recoverable if your iPhone is lost or replaced. Consider exporting important scans as PDFs to a cloud storage service as an additional backup.
- From the lock screen, swipe left and tap the Notes icon. A new note opens with the scanner active, ready to capture your document.
- After scanning, tap Done to save the scan in the note. Add a checklist below by tapping the checklist icon and typing items related to your scan.
- In the Notes app main screen, enter a keyword found in your scanned document into the search bar. Results show notes containing that text extracted via OCR.
- Open Settings, tap your name, then iCloud. Ensure the toggle next to Notes is enabled to back up your scans automatically.
Frequently asked questions
How to scan a document into notes app?
Open the Notes app and either create a new note or select an existing one. Tap the camera icon above the keyboard or at the bottom toolbar, then choose "Scan Documents." Position your document within the camera frame and the app will automatically capture the scan or let you tap the shutter button manually. Adjust the corners if needed, then save the scan to your note.
How to scan a document into notes app iphone?
On your iPhone, launch the Notes app and open or create a note. Tap the camera icon, then select "Scan Documents" from the menu. Hold your iPhone steady over the physical document, and the scanner will detect and capture the page. You can review, crop, and save the scan directly inside the note.
How to scan a document into apple notes?
In Apple Notes, start or open a note, tap the camera icon, and pick "Scan Documents." Align your document within the frame and let the app scan automatically or tap to capture manually. After scanning, confirm the edges and save the image; it will be embedded in your note for easy access and organization.
How to scan a document on iphone in notes app?
Open Notes on your iPhone and go to the note where you want the scan. Tap the camera icon, then "Scan Documents." Position the document in view and wait for the app to scan it, or tap the shutter to capture. Adjust the scan’s borders if necessary, then tap "Save" to add it to your note.
How to scan a document on notes app?
Inside the Notes app, open or create a note, tap the camera icon, and choose "Scan Documents." Place your document in front of your device’s camera, and the app will scan it automatically or let you capture manually. You can adjust the scan area before saving it within the note for easy reference.
What This Guide Does Not Cover
This guide covers only the built-in scanning feature in the Notes app on iPhone; it does not cover scanning with third-party apps or on other Apple devices like iPad or Mac. The Notes app scanner is designed for straightforward document capture and basic editing. It is not a replacement for professional scanning software with advanced OCR capabilities, batch processing, or detailed image enhancements. If you need features like searchable PDFs, extensive document management, or high-quality image retouching, consider dedicated scanning apps or desktop software.
For now, focus on mastering the Notes app scanner as a quick and reliable tool to capture documents without leaving your iPhone. The simplicity and integration with Notes make it ideal for everyday scanning needs.
To get the most out of your scanning experience, your next step is to regularly practice scanning different types of documents in various lighting conditions. This helps you become familiar with adjusting scan edges and lighting, ensuring crisp and readable scans every time.
See also: How to Add and Customize Tables in the Notes App: Step-by-Step · How to Create a Checklist in the Notes App: Step-by-Step Guide · How to Record Audio in the Notes App: Step-by-Step Guide



