How to Set and Customize a Screen Saver on Your Mac
Learn how to set and customize a screen saver on your Mac to control activation timing and personalize your display.
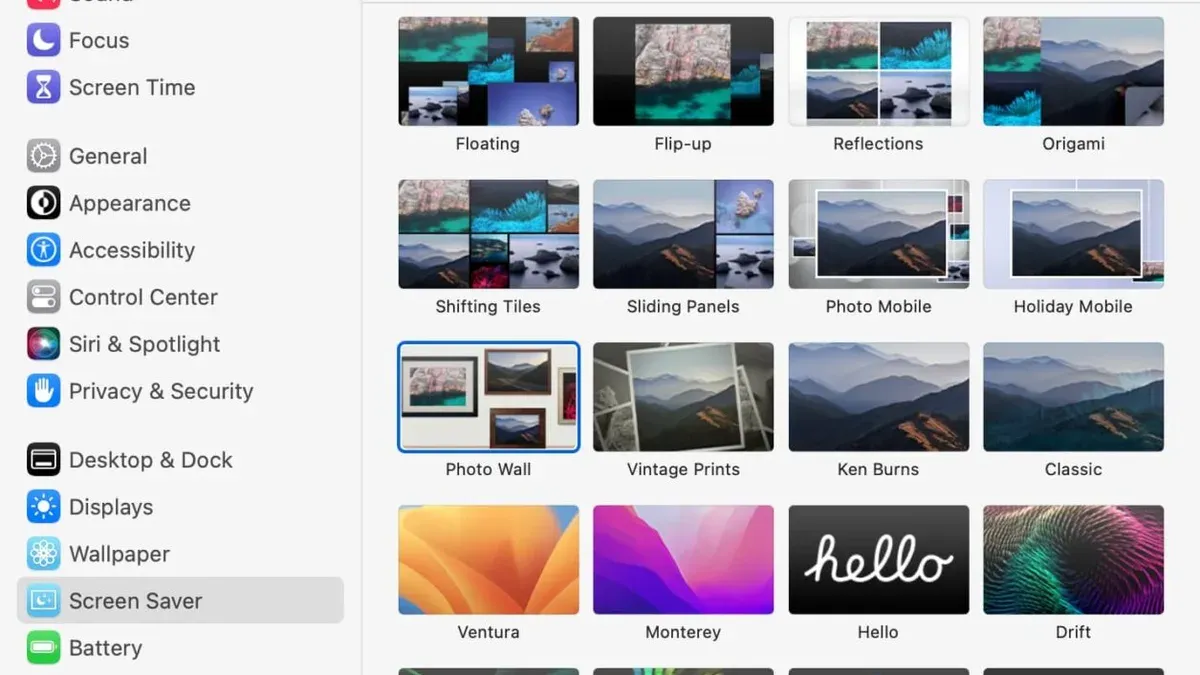
You leave your MacBook Pro at your desk while grabbing a quick coffee, and when you return, the screen has gone dark. Rather than simply turning off, it may be running a screen saver you set up but forgot how to adjust. Knowing how to set a screen saver on Mac helps you control when and how your screen saver activates, providing both security and style.
This article explains practical steps to activate, set, and customize screen savers on any Mac model, including MacBook Air, MacBook Pro, and iMac. You'll learn how to adjust timing precisely, choose from built-in options, and tailor settings for your preferences, avoiding common pitfalls generic guides often overlook.
Key takeaways
- Access screen saver settings via System Preferences > Desktop & Screen Saver.
- Set screen saver start time from 1 minute up to 2 hours of inactivity.
- Choose from Apple’s built-in screen saver styles or add your own photos.
- Use Hot Corners to activate screen saver instantly or disable it quickly.
- Customize screen saver options like random order and display mode for personalization.
Before you start: what you need to know about Mac screen savers
Screen savers on your Mac serve two main purposes: preventing screen burn-in on displays and providing a personalized visual experience when your computer is idle. They activate after a set period of inactivity and can be customized for timing and appearance through macOS settings.
To access and set screen savers, your Mac must be running a version of macOS that supports System Preferences or System Settings, typically available on recent macOS releases. These settings let you choose from various built-in screen saver styles and configure when they begin.
It’s important to understand the difference between a screen saver and display sleep. Screen savers activate while the display remains on, showing animations or images, whereas display sleep turns off the screen entirely to conserve energy.
Screen savers are compatible across Mac models including MacBook Air, MacBook Pro, and iMac. However, variations in hardware and macOS versions may affect available options and performance.
| macOS Version | System Settings Access | Screen Saver Features |
|---|---|---|
| macOS Ventura and later | System Settings > Desktop & Screen Saver | Wide variety of screen savers, including custom photos, timing control |
| macOS Monterey to macOS Big Sur | System Preferences > Desktop & Screen Saver | Standard screen savers and photo albums, basic timing options |
| Earlier versions | System Preferences > Desktop & Screen Saver | Limited styles, fewer customization options |
How to set a screen saver on Mac
- Click the Apple menu at the top left of your screen and select System Preferences (or System Settings on macOS Ventura and later). A window with various settings will open.
- Locate and click on Desktop & Screen Saver. This opens a pane divided into two tabs: one for your desktop wallpaper and one for screen savers.
- Click the Screen Saver tab. You will see a list of available screen saver options on the left and a preview area on the right.
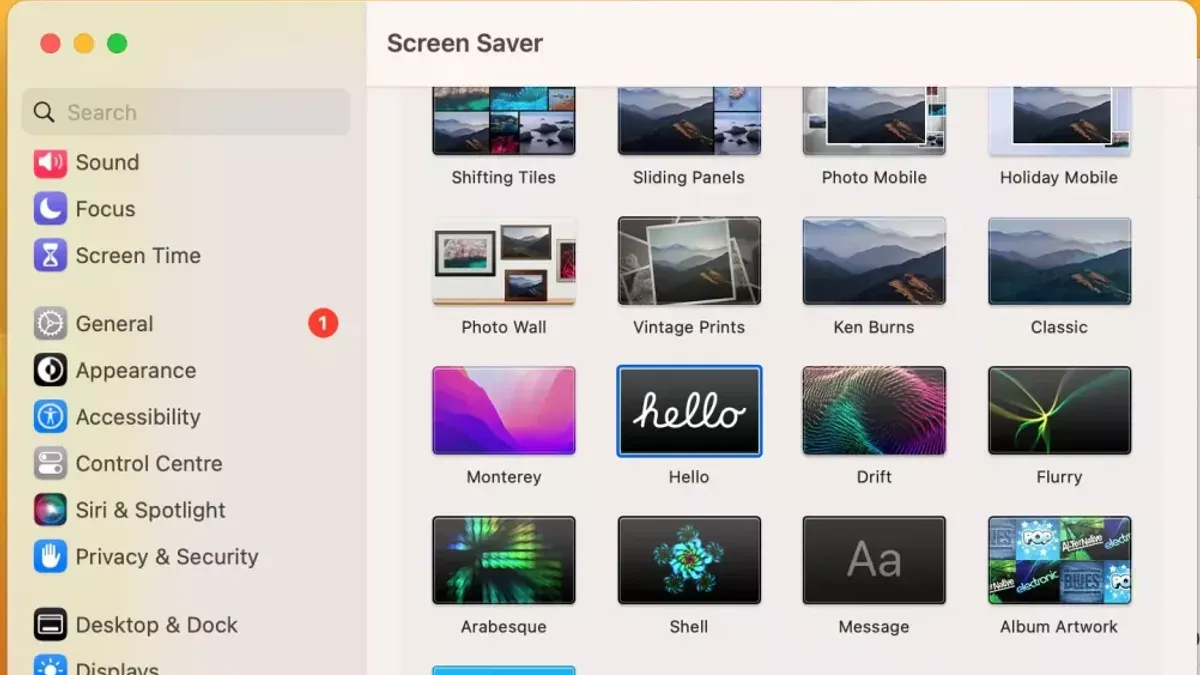
- Browse the screen saver options by scrolling through the list or using the categories, such as Classic, Flurry, or Photos. Click on any option to preview how it looks in the preview area.
- Once you find a screen saver you like, simply select it. Your choice is saved automatically, and it will be the active screen saver when triggered.
- To test your selection immediately, click the Preview button or move your mouse to the hot corner if you have one configured to start the screen saver.
By following these steps, you decide which screen saver appears on your Mac, with an easy way to preview and switch between options without extra confirmation prompts.
How to change screen saver on MacBook, MacBook Air, and iMac
Changing the screen saver on different Mac models follows a similar process but with slight variations in navigation and style options due to hardware and macOS version differences.
- Open System Preferences or System Settings from the Apple menu. On newer macOS versions, this is called System Settings and has a sidebar.
- Click on Desktop & Screen Saver. On some older macOS versions, you may find this in a slightly different location, but it is typically under the main preferences list.
- Select the Screen Saver tab or section. This will display available screen saver styles.
- Scroll through the list of screen saver options. On iMacs, which typically support higher graphics performance, you may see more visually intensive screen savers like "Flurry" or "Arabesque." MacBook Air models, optimized for energy efficiency, may have fewer or simpler options to preserve battery life.
- Click on a screen saver style to preview it in the window. Use the Preview button if available to see how it behaves full screen.
- Once you have chosen a screen saver, close the preferences window to save your selection automatically. There is no explicit “save” button; the change applies immediately.
- Test your new screen saver by activating it manually (e.g., hot corner or menu bar shortcut) to confirm it appears as expected and runs smoothly on your device.
While the overall steps to change screen savers are consistent across MacBook Air, MacBook Pro, and iMac, performance considerations influence which styles are practical. Simpler or static screen savers help extend battery life on portable devices, whereas iMacs can handle more dynamic visuals without issue.
How to set screen saver time on Mac
You can control how long your Mac waits before the screen saver activates by adjusting the timer in the Screen Saver preferences. This timer is labeled as the "Start after" setting and offers preset delay options ranging from 1 minute to 1 hour.
- Open System Preferences or System Settings on your Mac.
- Click on Desktop & Screen Saver.
- Switch to the Screen Saver tab.
- Locate the Start after dropdown menu near the bottom of the window.
- Select a preset delay time such as 5 minutes. Once selected, your Mac will wait that amount of inactivity before the screen saver begins.
For example, setting the timer to 5 minutes means if you do not use the keyboard or mouse for 5 minutes, the screen saver will start automatically.
Keep in mind, the screen saver timer interacts with your Mac’s Energy Saver or Battery settings. If your display sleep time is shorter than the screen saver delay, the display will turn off before the screen saver appears. Adjust these settings accordingly if you want the screen saver to be visible before your display sleeps.
How to activate screen saver on Mac and turn it off when needed
You can start your Mac screen saver manually using Hot Corners or keyboard shortcuts, and disable it if you prefer no screen saver activation.
Activate the screen saver using Hot Corners
- Open System Preferences or System Settings and go to Desktop & Screen Saver.
- Click on the Hot Corners button at the bottom right.
- Choose a corner and set it to “Start Screen Saver” from the dropdown menu.
- Click OK to save your settings.
- Move your mouse pointer to the chosen corner to immediately activate the screen saver.
Activate and deactivate screen saver using keyboard shortcuts
While macOS does not have a default keyboard shortcut to start the screen saver, you can create one using Automator or third-party apps. To stop the screen saver, simply press any key or move the mouse, which returns you to your desktop.
Disable the screen saver if not desired
- Open System Preferences or System Settings and navigate to Desktop & Screen Saver.
- Set the “Start after” option to “Never.”
- This prevents the screen saver from activating automatically.
Disabling the screen saver means your Mac's display will stay on until it sleeps or you manually lock it. This can increase power consumption and raise the risk of screen burn-in on some displays, so consider these trade-offs carefully.
How to customize screen saver settings for personalization
You can personalize your Mac’s screen saver by adjusting its source, appearance, and behavior to better suit your preferences. This customization enhances both aesthetics and functionality beyond default settings.
- Open System Preferences or System Settings and navigate to Desktop & Screen Saver. You should see the current screen saver preview.
- To change the screen saver source, select a category on the left, such as Photos, Folders, or built-in Apple screen savers. For example, choosing Photos lets you use your personal albums, while Apple provides classic animations. The preview updates accordingly.
- If available for the chosen screen saver style, click Screen Saver Options to adjust animation speed or visual effects. For instance, you might slow down a slideshow or alter the transition style. Changes apply immediately in the preview.
- Consider third-party screen saver apps for more advanced effects or unique designs. When using these, ensure compatibility with your macOS version and be cautious of potential performance impacts.
- Compare default styles to customized ones by toggling between them in the settings. Customized screen savers often offer more personal content and tailored motion, whereas defaults prioritize simplicity and system efficiency.
Customizing your screen saver lets you balance visual appeal with system resource use, creating a display that reflects your style while respecting your Mac’s capabilities.
Troubleshooting common screen saver issues on Mac
If your Mac’s screen saver fails to activate or behaves unpredictably, several common causes and fixes can help restore normal function.
Check for system preferences conflicts
Conflicts between Energy Saver (or Battery) settings and Screen Saver preferences often cause timing issues. For example, if your display sleep timer is shorter than your screen saver start time, the screen saver may never appear.
- Open System Preferences (or System Settings) and go to Battery (or Energy Saver).
- Review the Turn display off after slider and note the duration.
- Go back to Desktop & Screen Saver and check the Start after setting.
- Ensure the screen saver start time is shorter than the display sleep time.
- If needed, adjust either setting so the screen saver can activate before the display sleeps.
When done correctly, your screen saver will start after the set delay instead of the display sleeping first.
Resolve app-related issues preventing screen saver activation
Certain apps, especially video players or remote desktop clients, can block the screen saver. To test this:
- Quit all active apps, especially those playing media or using full screen.
- Manually activate the screen saver using a Hot Corner or shortcut.
- If the screen saver starts, reopen apps one by one to identify the culprit.
- Adjust app settings to prevent interference or quit the app when idle.
Addressing app conflicts often resolves failures to activate the screen saver.
Reset screen saver settings if unresponsive
If screen saver preferences become unresponsive or corrupted, resetting them can help.
- Close System Preferences (or System Settings).
- Open Finder, then press Command + Shift + G to open "Go to Folder".
- Enter
~/Library/Preferences/ByHost/and press Enter. - Locate files starting with
com.apple.screensaverfollowed by a long string of characters. - Move these files to the Trash (you may back them up elsewhere first).
- Restart your Mac.
- Reopen Screen Saver preferences and set your desired screen saver.
Resetting preferences often restores responsiveness and fixes persistent bugs.
Understanding the limits of Mac screen saver customization
Screen savers on Mac provide visual variety and help prevent screen burn-in but do not replace the full display sleep feature for saving power. Apple’s official guidance emphasizes that putting your display to sleep using System Preferences or System Settings > Battery is the recommended method for reducing energy consumption, as screen savers keep the display active.
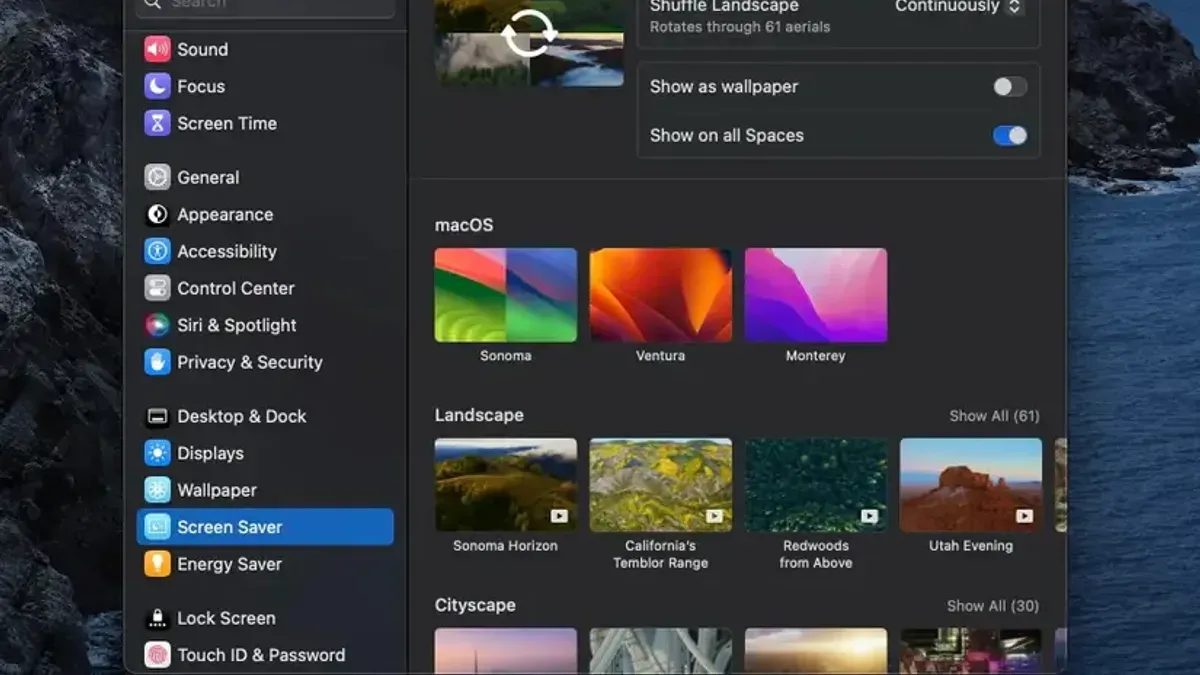
Some older Mac models or earlier macOS versions may lack newer screen saver options such as dynamic animations or integration with Photos libraries. This can limit the customization choices available to you, depending on your hardware and software version.
Additionally, customizing your screen saver appearance or timing does not influence your Mac’s lock screen security settings. Screen saver activation does not automatically lock your Mac; you must enable password requirements separately under System Preferences or System Settings > Security & Privacy > General to secure your device when the screen saver starts.
Users seeking deeper control over display behavior or security may find screen saver settings insufficient and should explore dedicated energy-saving and security settings within macOS.
Frequently asked questions
How to screen save on mac?
To activate a screen saver on your Mac, open System Settings and go to Desktop & Screen Saver. Choose the Screen Saver tab, select a style, and set the start time. You can also start it manually from the Screen Saver menu in the Control Center or by setting a hot corner.
How to set screen saver on mac?
Go to System Settings > Desktop & Screen Saver and click the Screen Saver tab. Pick a screen saver style from the list, then adjust the start time using the "Start after" dropdown. This sets how long your Mac is idle before the screen saver begins.
How to change screensaver on imac?
Changing the screen saver on an iMac follows the same process as other Macs: open System Settings, navigate to Desktop & Screen Saver, then select the Screen Saver tab. From there, choose a different screen saver style to apply it immediately.
How to change screen saver on MacBook?
On any MacBook model, open System Settings, select Desktop & Screen Saver, and go to the Screen Saver tab. Pick a new screen saver from the available options, and it will replace the current one instantly.
How to activate screen saver on Mac?
You can activate the screen saver by waiting for the set idle time or manually through System Settings > Desktop & Screen Saver by clicking "Preview." Alternatively, assign a hot corner in Mission Control settings to start it immediately, or select it from the Control Center's Screen Saver option.
Understanding the limits of Mac screen saver customization
This article does not cover third-party screen saver software installation in depth, which may have different steps and risks. If you want more advanced or unique screen saver options beyond what macOS offers, research and follow the specific instructions from trusted developers carefully. Custom screen saver apps can introduce compatibility issues or security concerns if not vetted properly.
For most users, the built-in macOS settings provide sufficient control over timing, appearance, and behavior of screen savers. However, system-level restrictions mean you cannot customize every aspect, such as animation speed or detailed graphic effects, without additional software.
The best next step is to explore the Screen Saver pane in System Settings. Take a moment to experiment with the available screen saver styles and set your preferred start time under System Settings > Desktop & Screen Saver > Screen Saver > Start after. This helps you balance personalization with energy saving and security needs effectively.