How to Assign and Manage Apps on Desktops on Your Mac
Discover how to assign and manage apps on desktops on your Mac to keep your workspace organized and efficient.
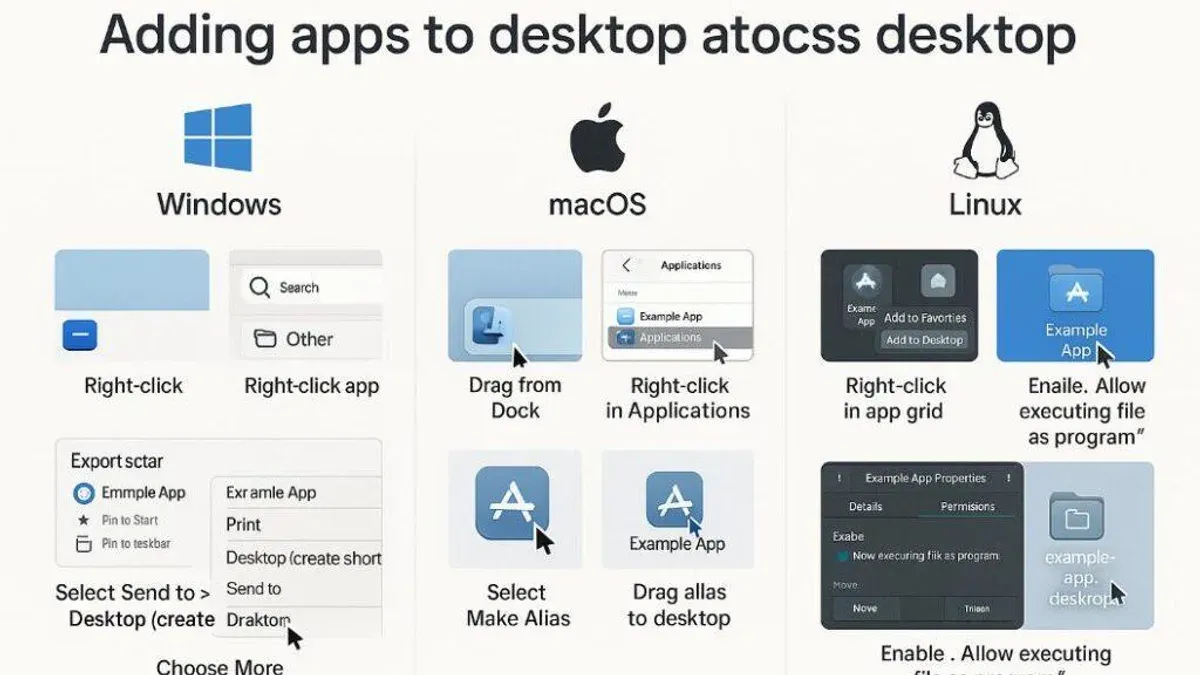
You have multiple apps open on your Mac and want to keep your workspace tidy by assigning specific apps to dedicated desktops. Whether you are juggling creative software, communication tools, or Windows applications running through emulation, knowing how to assign apps to a desktop on Mac can streamline your workflow.
This article guides you through practical steps to add and manage apps across multiple desktops. It also covers how to handle Windows apps on Mac, configure apps efficiently, and use Apple Business Manager for enterprise-level app assignment. Troubleshooting tips are included to resolve common issues when organizing your desktops.
Key takeaways
- Use Mission Control to create and manage multiple desktops effectively.
- Assign apps to specific desktops via the Dock’s Options menu for consistent placement.
- Configure Windows apps on Mac using virtualization tools like Parallels or VMware.
- Leverage Apple Business Manager to assign and manage apps across devices in a business environment.
- Resolve app assignment issues by checking app permissions and system settings.
Before you start: What you need to assign apps to desktops on Mac
To assign apps to desktops on your Mac, ensure your system supports multiple desktops, also known as Spaces. macOS versions from OS X Lion (10.7) onward include this feature, which you can enable via Mission Control settings.
- Verify your macOS version by clicking the Apple menu and selecting "About This Mac." You should see a version at least 10.7 or newer, confirming Spaces support.
- Confirm that multiple desktops are enabled by opening Mission Control (use the F3 key or swipe up with three fingers). Here, you should see your current desktops at the top of the screen.
- Make sure the apps you want to assign are installed and accessible. These can be found through Launchpad, the Applications folder, or the Dock. If an app is missing, install it before proceeding.
- Familiarize yourself with basic Mission Control shortcuts, such as Control + Left/Right Arrow to switch desktops, which will help when assigning apps.
- If you use Windows apps on your Mac, you will need virtualization software or compatibility layers. Popular options include Parallels Desktop—which is widely used for running Windows on Mac—and open-source tools like Wine. Ensure these are installed and configured correctly.
- For business environments, understanding Apple Business Manager is essential. This platform allows centralized app assignment and management across multiple Macs within an organization.
Having these prerequisites in place will streamline assigning and managing apps on different desktops, whether for personal use or enterprise deployment.
How to put apps on Mac desktop: Adding app icons for quick access
Placing app icons on your Mac desktop can speed up access without navigating through folders or Launchpad. You can do this by either dragging the actual app or creating an alias, which is a shortcut that doesn’t relocate the original app.
- Open the Applications folder in Finder or launch Launchpad.
- Locate the app you want to add to your desktop.
- Click and drag the app icon directly to your desktop. This places the original app icon on the desktop, allowing quick launching. You should see the app icon appear where you drop it.
- If you prefer not to move the original app icon, right-click (or Control-click) the app and select Create Alias. An alias icon appears next to the original.
- Drag this alias icon to your desktop. This alias acts as a shortcut to the app, keeping the original in its folder.
- Organize your desktop icons by dragging them into groups or using Finder’s Clean Up By option from the desktop context menu to keep things tidy.
Dragging the original app icon places the app itself on the desktop, which can clutter your Applications folder if moved accidentally. Creating an alias avoids this risk by linking to the app without moving it. Both methods provide quick access, but aliases offer safer organization.
How to add apps to desktop MacBook and assign them to specific desktops
To organize your workspace effectively, you can assign apps to specific desktops (Spaces) using Mission Control. This helps keep work areas separate and supports better focus.
- Open Mission Control by swiping up with three or four fingers on your trackpad or pressing the Mission Control key (usually F3). You will see all open windows and desktops at the top.
- Create additional desktops by clicking the plus (+) button in the top-right corner. You can have multiple desktops for different tasks or apps.
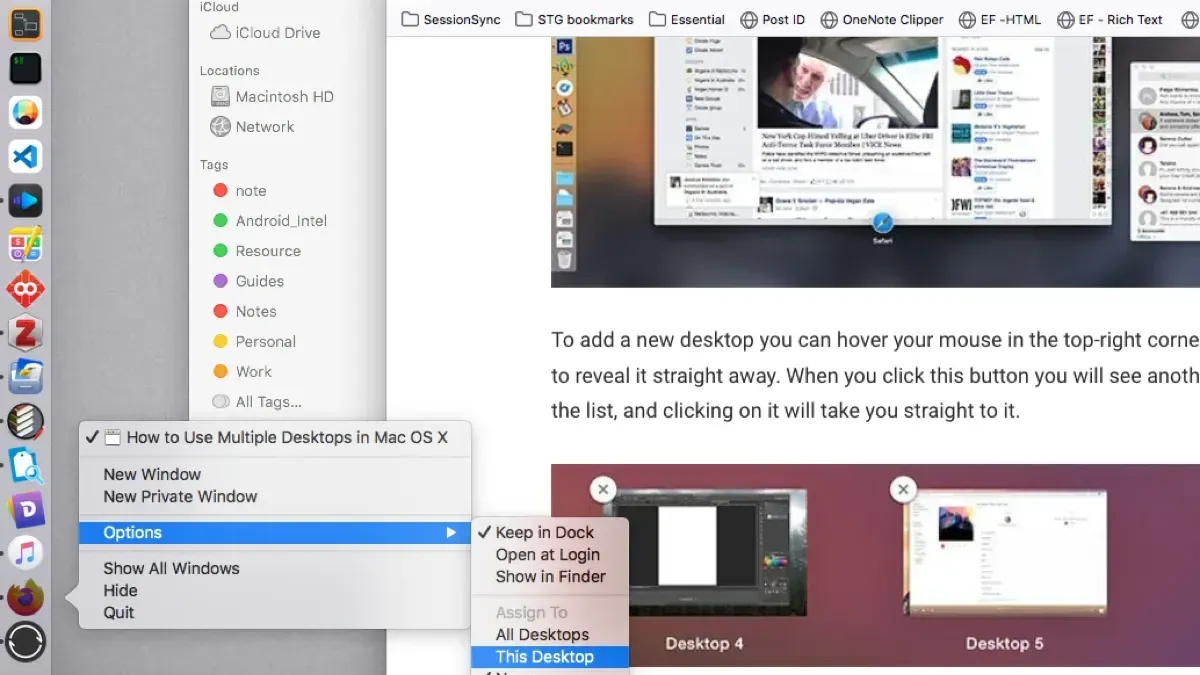
- Right-click (or Control-click) the app icon in the Dock that you want to assign. From the context menu, select Options > Assign To.
- Choose This Desktop to assign the app to the desktop you are currently on, All Desktops to make it appear on every desktop, or None to remove any assignment.
- For example, assign Safari to Desktop 2 by first switching to Desktop 2, right-clicking Safari in the Dock, then choosing Options > This Desktop. Safari windows will now open only on that desktop.
- Switch between desktops by swiping left or right with three or four fingers on the trackpad, using Control + Left/Right Arrow keyboard shortcuts, or opening Mission Control and selecting the desired desktop.
- By assigning apps to specific desktops, you reduce clutter and improve productivity by separating workspaces, making it easier to focus on a single task or project without distractions.
Users typically report smoother workflow when apps like browsers or communication tools are fixed to dedicated desktops, allowing quick access and clear separation of different activities.
How to make apps appear on desktop: Using Launchpad and Dock effectively
Managing app access on your Mac without cluttering the desktop involves leveraging the Dock and Launchpad. Both offer efficient ways to open apps while keeping your workspace organized.
Adding apps to the Dock for persistent access
- Open Finder and navigate to the Applications folder.
- Drag the app icon directly to the Dock, placing it among other app icons.
- Release the icon; it will stay in the Dock for easy access.
- Click the app icon in the Dock anytime to launch it without needing a desktop shortcut.
The Dock provides persistent, one-click access to frequently used apps without adding icons to the desktop, helping maintain a clean workspace.
Using Launchpad for quick app launching without desktop shortcuts
- Click the Launchpad icon in the Dock (a silver rocket).
- Browse or type the app name in the search field at the top.
- Click the desired app to launch it immediately.
Launchpad displays all installed apps in a grid, allowing fast navigation without placing any icons on the desktop or Dock.
| App Access Method | Location | Visibility | Best for |
|---|---|---|---|
| Desktop Icons | Mac desktop | Always visible | Quick drag-and-drop, temporary access |
| Dock | Bottom or side of screen | Persistent, but compact | Frequent app use, quick launching |
| Launchpad | Accessible via Dock or gesture | Hidden until opened | Accessing all apps without desktop clutter |
Choosing between these depends on your workflow: desktop icons offer immediate visibility but add clutter, the Dock balances visibility with space efficiency, and Launchpad provides a clean, organized app overview without adding icons anywhere.
How to move apps to a different desktop on Mac
Managing your workspace efficiently involves relocating app windows between desktops. You can do this quickly using Mission Control or keyboard shortcuts. For apps you use regularly on a specific desktop, assigning them permanently offers a stable setup.
- Open Mission Control by swiping up with three or four fingers on your trackpad or pressing the Control (⌃) + Up Arrow (↑) keys. You will see all your open windows and desktops displayed at the top of the screen.
- Locate the app window you want to move. Click and hold the window, then drag it to the desired desktop thumbnail at the top. Release the window onto that desktop. You should see the app window appear on the new desktop when you switch to it.
- Alternatively, switch to the app window, then use the keyboard shortcut Control (⌃) + Left Arrow (←) or Control (⌃) + Right Arrow (→) to move the window to the adjacent desktop left or right. This moves the active window between desktops without opening Mission Control.
- To assign an app to always open on a specific desktop, right-click (or Control-click) the app icon in the Dock, select Options, and then choose “This Desktop.” The app will open on this desktop by default in the future.
- If you want to remove this permanent assignment, repeat the process and select “None” under Options to allow the app to open on any desktop.
Using these steps, you can flexibly organize your active apps and maintain a clean, purpose-driven desktop layout.
How to use Mac apps on Windows and configure Windows apps on Mac
Running Windows apps on a Mac involves several methods, including virtualization software like Parallels Desktop and VMware Fusion, Apple's Boot Camp, or compatibility layers such as Wine. Virtualization provides a balance between performance and convenience, allowing Windows apps to run alongside macOS apps without rebooting. Boot Camp offers native performance but requires restarting your Mac to switch operating systems. Wine enables some Windows apps to run without a full Windows installation but has limited compatibility.
When using virtualization, you can assign Windows apps to specific Mac desktops by managing the virtual machine window through Mission Control. This allows you to keep Windows apps organized alongside native Mac apps.
For example, configuring the Microsoft To Do desktop app on Mac involves downloading it from the Mac App Store, signing in with your Microsoft account, and setting up task synchronization. Once installed, you can assign Microsoft To Do to a specific desktop via its Dock icon by right-clicking, selecting Options, then Assign To, and choosing a desktop. This helps integrate task management across platforms efficiently.
- Install your preferred virtualization software (e.g., Parallels Desktop) and set up a Windows virtual machine. You should see the Windows desktop running in a window on your Mac.
- Open the Windows app within the virtual machine. The app should launch inside the Windows environment.
- Use Mission Control to create or select a Mac desktop where you want to assign the virtual machine window.
- Right-click the virtual machine icon in the Dock, select Options, then Assign To, and choose the target desktop. The virtual machine window will now stay on that desktop.
- For native Windows apps like Microsoft To Do on Mac, download and install from the Mac App Store. After launching, right-click its Dock icon, select Options, then Assign To, and pick a desktop. The app will open on the selected desktop automatically.
Performance benchmarks indicate Parallels Desktop offers near-native speeds with good graphics support, while VMware Fusion is slightly less optimized but stable. Boot Camp provides the best performance but at the cost of switching OS environments. Wine’s compatibility varies greatly depending on the app. Consider these trade-offs when choosing your setup.
Assign apps in Apple Business Manager for enterprise desktop management
Apple Business Manager (ABM) provides organizations with centralized control to deploy and manage apps across multiple Mac devices. Unlike individual desktop app assignments, ABM enables IT administrators to assign apps remotely to users or devices, streamlining software distribution in enterprise environments.
Through ABM, you can purchase apps in bulk from the App Store and assign them to specific devices or Apple IDs linked to your organization. This ensures that employees have the necessary software pre-installed or available for installation without manual setup on each machine.
To assign apps using Apple Business Manager:
- Sign in to your Apple Business Manager account and navigate to Apps and Books. You should see a catalog of available apps for deployment.
- Purchase or license the desired apps in volume. Successful acquisition will display the apps under your organization's inventory.
- Go to Devices or Users section to select the target Mac devices or user accounts.
- Assign the purchased app licenses to the selected devices or users. A confirmation message will indicate the assignments were successful.
- Ensure that the devices are enrolled in a Mobile Device Management (MDM) solution linked with ABM to automate app installation and updates.
This approach differs from manual assignment on individual desktops by enabling scalable management, reducing IT workload, and maintaining consistent software environments across company Macs. Enterprises managing dozens or hundreds of devices benefit from this centralized app deployment method.
Many organizations adopt Apple Business Manager combined with MDM to maintain compliance and simplify application lifecycle management, especially when integrating cross-platform or specialized business apps.
Troubleshooting common issues when assigning apps to desktops on Mac
If apps do not stay assigned to specific desktops after a reboot, ensure that you have enabled “Assign To” under the Dock icon’s Options menu. Sometimes macOS resets these preferences after updates; reassigning the app can resolve this.
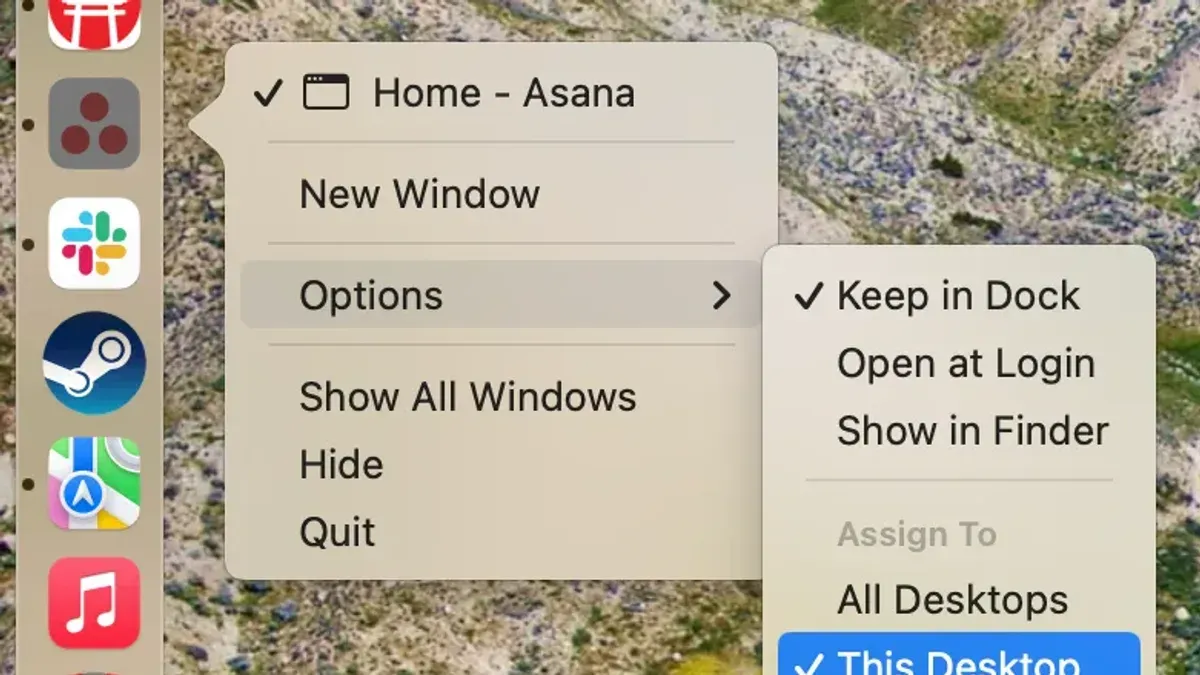
Missing app icons on the desktop or Dock often occur if the app was deleted or moved. Verify the app’s location in Finder. For Dock icons, right-click the app and select Keep in Dock to maintain its presence.
Windows apps running via virtualization tools like Parallels or Wine may not integrate seamlessly, causing window focus or display issues. Updating the virtualization software and ensuring the latest compatibility tools are installed can improve integration.
Performance issues with Windows apps on Mac can stem from limited allocated resources. Adjust CPU and memory settings in your virtualization app to optimize performance without overloading your Mac.
Resetting Mission Control preferences
If desktops behave erratically, such as windows jumping between spaces or desktops not appearing, resetting Mission Control preferences can help.
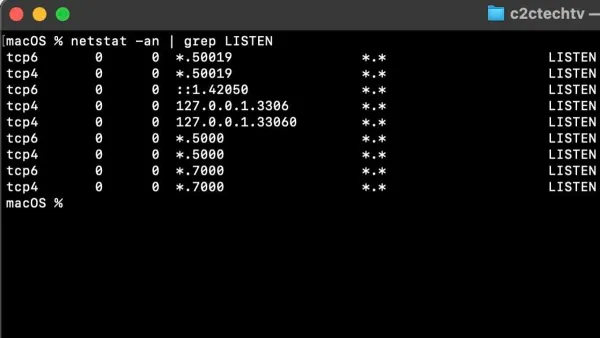
- Open Terminal from Applications > Utilities.
- Enter
defaults delete com.apple.spacesand press Enter. - Then enter
killall Dockto restart the Dock and Mission Control. - Wait a few seconds for the Dock to reload; your desktop spaces will reset.
This process clears corrupted settings causing erratic desktop behavior.
Common error messages like “App not responding on desktop” or “Cannot assign app to space” often indicate permission issues. Ensure apps have the necessary permissions in System Preferences > Security & Privacy > Privacy, particularly under Accessibility and Full Disk Access.
Frequently asked questions
How to add apps to mac desktop?
To add apps to your Mac desktop, locate the app in the Finder's Applications folder or Launchpad, then drag its icon onto the desktop. This creates a shortcut alias, not a copy, allowing quick access without using extra storage.
How to add app to desktop mac?
Adding an app to the Mac desktop involves dragging the app icon from the Applications folder or Dock onto the desktop. If you want the app to open on a specific desktop, assign it to that desktop via the app's Dock icon: right-click, choose Options, then "Assign To" the desired desktop.
How to put apps on a desktop?
Put apps on a desktop by creating aliases of the app icons on that desktop. You can drag the app from Launchpad or Finder onto the desktop. To keep the app consistently on one desktop, use Mission Control to assign it to that desktop through Dock options.
How to add apps to a desktop?
You add apps to a desktop by dragging their icons onto it or assigning them specifically via Dock options under "Options > Assign To". This ensures the app launches and stays on the chosen desktop, useful for organizing workspaces across multiple screens.
How to setup windows app on mac?
To set up a Windows app on Mac, use virtualization software like Parallels Desktop or VMware Fusion, or Apple's Boot Camp for dual-booting. After installing Windows, you can install and run Windows apps. Configure the app’s display settings within the virtualization tool to assign it to specific desktops if supported.
Limits of this guide
This guide does not cover creating or managing multiple desktops themselves in depth, such as configuring Mission Control settings or creating new Spaces. Additionally, it does not fully address the use of third-party app launchers or desktop management tools beyond the default macOS Dock, Launchpad, and Mission Control features. Users seeking advanced multi-desktop workflows or alternative app management software should explore specialized resources or vendor documentation.
For organizing your workspace efficiently, the single most useful next step is to familiarize yourself with the Mission Control preferences in System Settings. Enabling and customizing features like “Automatically rearrange Spaces based on most recent use” or setting app assignment to specific desktops via the Dock’s Options menu can streamline how apps behave across desktops. This foundational step helps you maintain a consistent and productive desktop environment tailored to your workflow.