How to Change Dock Icon Size on Mac: A Step-by-Step Guide
Easily adjust your Mac Dock icon size to enhance visibility and streamline your workspace with this step-by-step guide.
Your Mac Dock can quickly become cluttered or difficult to navigate, especially if you rely on multiple displays or use many applications simultaneously. Adjusting the Dock icon size can help you find what you need faster and keep your workspace organized.
This article explains how to change Dock icon size on Mac and goes beyond simple resizing. You’ll learn how to customize icons, add new ones, and optimize Dock behavior across single and multiple displays to suit complex workflows.
Key takeaways
- Adjust Dock icon size via System Preferences > Dock & Menu Bar using the Size slider.
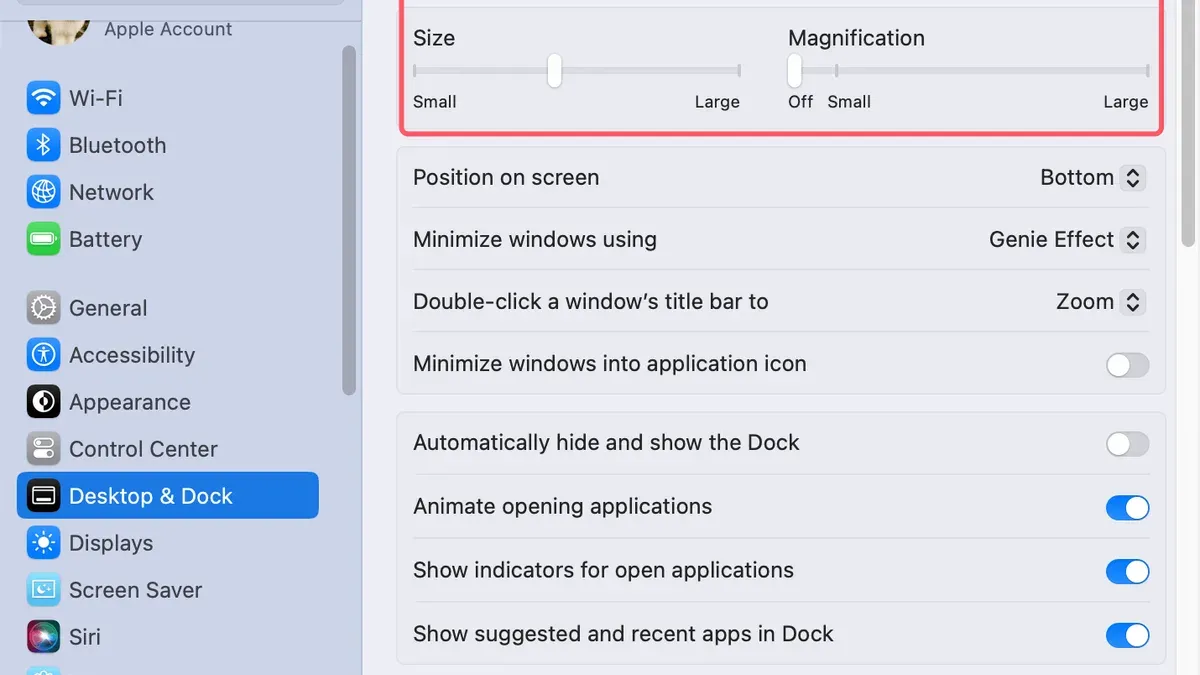
- Make icons larger by dragging the Size slider closer to the maximum or using the magnification feature.
- Add apps or folders to the Dock by dragging them onto it or using contextual menus.
- Manage Dock appearance on multiple displays by setting preferences for each screen.
- Arrange icons by dragging them along the Dock to match your workflow priorities.
Before you start: What you need to know about Dock customization
Customizing the Dock on your Mac involves adjusting settings that influence both appearance and functionality. To make changes, you should be comfortable navigating the System Preferences app and specifically the Dock & Menu Bar pane. This familiarity will help you quickly locate the various options available for Dock size and behavior.
The size of Dock icons directly affects their visibility and the amount of space the Dock occupies on your screen. By default, Dock icon sizes typically range from about 16 pixels at the smallest to 128 pixels at the largest, with the standard default size near 64 pixels. Smaller icons provide more screen real estate but can be harder to see, while larger icons improve visibility but reduce available workspace.
It is important to distinguish between Dock icon size and desktop icon size. Adjusting Dock icon size only changes the icons in the Dock itself, not those on your desktop. Desktop icons are managed separately via Finder view options.
Some Dock customization features require your Mac to be running a compatible version of macOS. For example, multi-display Dock behavior and advanced icon customization options may not be available on older macOS releases. Before proceeding, ensure your system is updated to access the latest Dock features.
How to change icon size on Mac Dock using System Preferences
Adjusting the Dock icon size on your Mac is straightforward through System Preferences. This method allows you to preview changes in real time and find the size that best fits your workflow.
- Click the Apple menu in the top-left corner of your screen and select System Preferences. A window with various system settings will open.
- In System Preferences, click on Dock & Menu Bar. This section controls all Dock-related settings.
- Locate the Size slider near the top of the Dock settings panel. Sliding it to the left will decrease icon size, while sliding it to the right will increase it.
- As you move the slider, watch your Dock at the bottom or side of the screen to see the icons resize immediately. This real-time preview helps you select an optimal size without guessing.
- Once satisfied with the icon size, simply close the System Preferences window to apply and save your changes automatically. There is no need to press a separate save button.
For example, sliding the size control to about 50% will show noticeably smaller icons suitable for saving screen space. Moving it closer to the maximum enlarges icons, making them easier to identify but using more screen area.
Keep in mind that extremely large icons can crowd your Dock, potentially reducing the number of visible icons without scrolling. Choosing a balanced size ensures a cleaner and more efficient Dock appearance.
How to make icons larger on Mac desktop and in the Dock
Desktop icon size and Dock icon size are adjusted separately on your Mac, each serving different purposes for visibility and organization. Enlarging desktop icons enhances file visibility directly on your desktop, while Dock icon size affects the app and folder shortcuts at the bottom or side of your screen.
Enlarging desktop icons
- Click any empty space on your desktop to activate Finder.
- Go to the menu bar and select View > Show View Options or press Command (⌘) + J.
- In the View Options panel, locate the Icon size slider and drag it to the right (for example, increasing from the default 64x64 pixels up to 128x128 pixels).
- Observe that the icons on your desktop enlarge accordingly, making them easier to see without needing to open folders.
Adjusting the icon size here only affects desktop items, not Dock icons.
Enlarging Dock icons
Dock icons are adjusted through System Preferences or System Settings under Dock & Menu Bar. Use the Size slider to increase icon size—moving it towards 128 pixels will make icons larger.
For example, increasing Dock icon size from a default of about 64 pixels to 128 pixels improves visibility when working with many apps, but setting icons too large can reduce the Dock’s available space and cause clutter.
Balancing icon size is key: larger icons aid accessibility and quick recognition, but excessive enlargement may hide other icons or reduce screen real estate.
How to add icon to Dock and customize Dock icons on Mac
Adding applications or folders to your Dock is straightforward and helps streamline access to frequently used items. Customizing Dock icons beyond resizing can personalize your workspace further.
- Open Finder and locate the application or folder you want to add to the Dock.
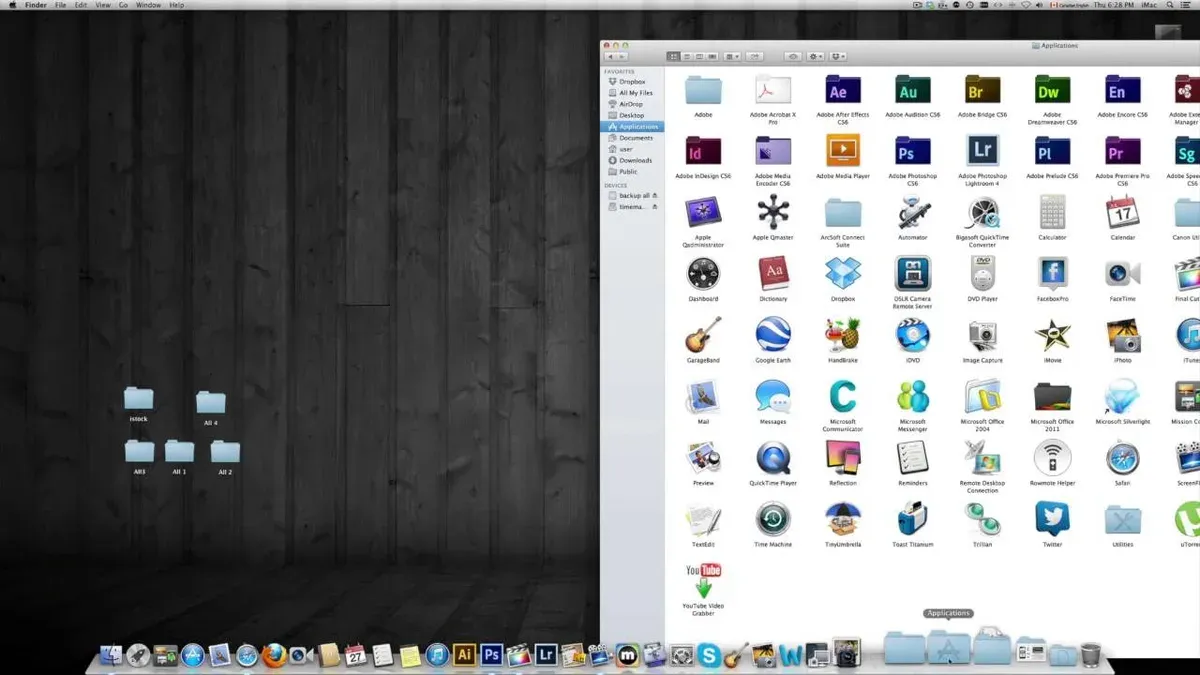
- Click and drag the application or folder icon directly to the Dock. Position it where you want it to appear—icons to the left of the Dock's divider are apps, and to the right are folders and minimized windows.
- Release the icon and confirm it remains in the Dock. You should now see the new icon persistently displayed, ready for quick access.
- To remove an icon, click and drag it off the Dock toward the desktop until you see a "Remove" label or the icon disappears, then release it. The icon will vanish from the Dock but remain on your Mac.
- To change an app’s Dock icon, first prepare the replacement icon image in.icns or.png format, ideally square and 512x512 pixels for clarity.
- Open Finder, navigate to the application’s location (usually in the Applications folder), right-click the app and select "Get Info."
- In the Info window, click the small icon at the top left to highlight it, then paste your new icon image (copy the image first from Preview or Finder).
- Close the Info window. The Dock icon should update immediately; if not, remove and re-add the app to the Dock.
- For more advanced customization, third-party apps like "cDock" or "LiteIcon" allow batch icon changes, themes, and additional Dock tweaks, but use these tools cautiously as they modify system settings.
How to change display icon size and Dock behavior on multiple displays
When using multiple monitors with macOS, the Dock adapts its behavior depending on which display you interact with. By default, the Dock appears only on the primary display, but it can be configured to show on any connected screen by moving your cursor to the bottom (or side) of that display.
Dock icon size is consistent system-wide and cannot be set separately for each display in the standard settings. However, differences in display resolution, pixel density, and scaling affect how Dock icons appear across screens. For example, on a Retina display, Dock icons look sharper and may appear slightly smaller due to higher pixel density, compared to a non-Retina display where icons appear larger but less crisp.
If you want the Dock to appear on all screens simultaneously, macOS does not natively support this. The Dock will only be visible on the active display where the cursor is located near the Dock's position. This behavior can sometimes cause confusion with icon size perception, as the Dock resets its position and icon size based on the display it appears on.
- To move the Dock to a secondary display, position your cursor at the bottom (or side) edge of that screen until the Dock slides into view. You should see the Dock appear on that monitor.
- Note that the icon size remains as set in System Preferences > Dock & Menu Bar; it does not change per display. The difference in appearance stems from display resolution and scaling.
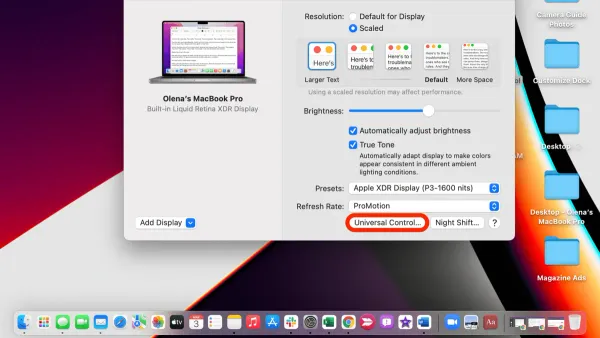
- If you experience inconsistent Dock icon sizing due to mixed Retina and non-Retina monitors, consider adjusting the display scaling options in System Preferences > Displays. Increasing scaling on non-Retina monitors can make Dock icons appear more uniform across screens.
- Remember that macOS does not allow independent Dock icon size adjustment for each display, so balancing scaling settings is the key workaround to achieve a consistent Dock appearance.
How to move and arrange Dock icons on Mac
Organizing your Dock icons can streamline your workflow by placing frequently used apps and folders within easy reach. You can drag icons to reorder them according to your preferences, but some system icons have fixed positions and cannot be moved.
- Click and hold the icon you want to move in the Dock.
- Drag the icon left or right along the Dock until you find the desired position. As you drag, other icons will shift to make space.
- Release the mouse button to drop the icon in the new spot. The Dock updates immediately to reflect the change.
- To separate groups of apps or folders, add spacers by opening Terminal and entering the command
defaults write com.apple.dock persistent-apps -array-add '{tile-data={}; tile-type="spacer-tile";}', then typekillall Dockto refresh. This inserts blank spaces that help visually segment your Dock. - Note that system icons like the Trash or the Finder are fixed and cannot be moved to arbitrary positions.
For example, if you previously had a cluttered Dock with apps mixed randomly, rearranging it to group communication tools on the left and productivity apps on the right can reduce the time spent searching for apps. Adding spacers emphasizes these groups and keeps your Dock organized.
While rearranging improves access to your most-used apps, avoid over-segmenting with too many spacers, which can reduce the Dock’s compactness and consume screen space.
Troubleshooting common issues when changing Dock icon size
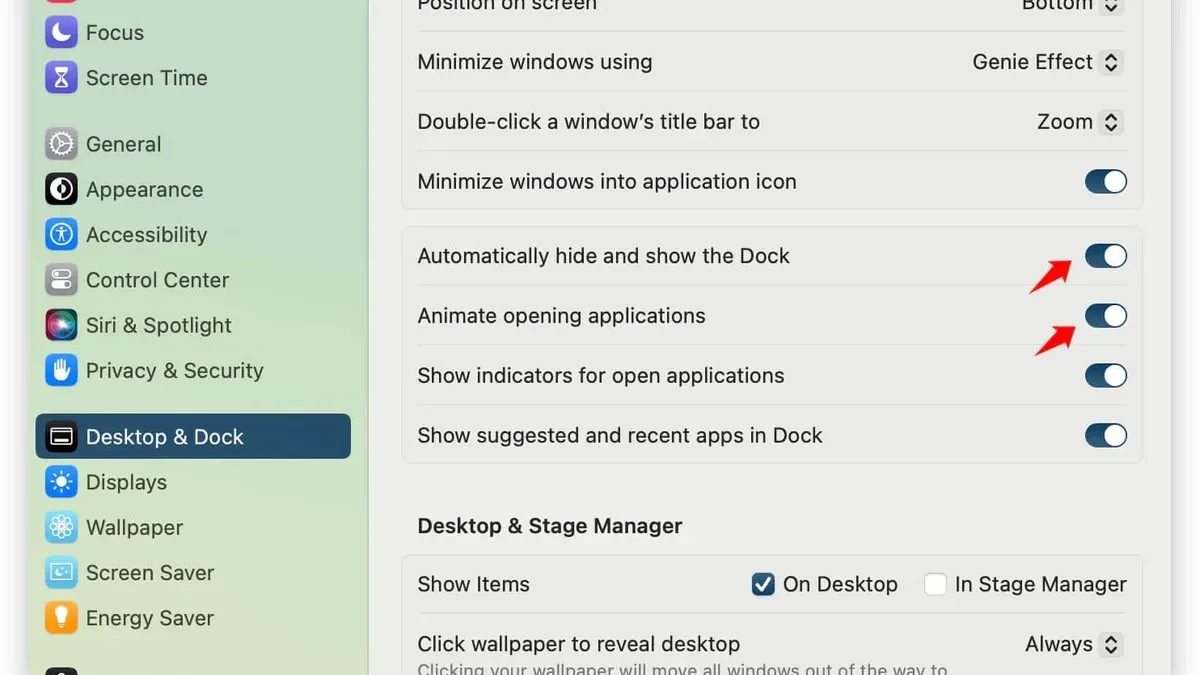
If the Dock icon size slider is unresponsive, first check if System Preferences is fully updated and that no accessibility features are interfering. Restarting System Preferences or your Mac can resolve temporary glitches. If icons do not update after resizing, try toggling “Automatically hide and show the Dock” in System Preferences > Dock & Menu Bar, which can refresh the Dock display.
For Dock disappearing or not showing on multiple displays, verify that “Displays have separate Spaces” is enabled in System Preferences > Mission Control. This setting allows the Dock to appear on the active display. If the Dock still does not appear correctly, logging out and back in or restarting the Dock process can help.
Performance issues may arise when using very large Dock icons, especially on older Macs or with many running apps. Reducing icon size or limiting Dock magnification can improve responsiveness.
Resetting the Dock via Terminal
- Open Terminal from Applications > Utilities.
- Type defaults delete com.apple.dock and press Enter. This resets Dock preferences to default.
- Type killall Dock and press Enter to restart the Dock process.
- Observe the Dock restarting with default settings; the icon size slider should respond normally now.
Checking these settings and using the reset command typically resolves common Dock icon size issues and restores expected behavior.
Frequently asked questions
How to make desktop icons smaller mac?
You can make desktop icons smaller by right-clicking on the desktop and selecting Show View Options. In the window that appears, adjust the Icon Size slider towards the left to reduce the size. This setting affects only desktop icons, not those in the Dock.
How to change the icon size?
To change the Dock icon size, open System Preferences and go to Dock & Menu Bar. Use the Size slider to increase or decrease the Dock icons. For desktop icons, adjust the size using Show View Options on the desktop.
How to change dock icons on mac?
To change a Dock icon, you first need the replacement app or file icon you want. Find the new icon image, then right-click the app or file, select Get Info, and drag the new icon image onto the current icon in the info window. The Dock will update automatically with the new icon.
How to add icon to mac dock?
Add an icon to the Dock by dragging any app, folder, or file directly onto the Dock area. The icon will stay there for quick access until you remove it. You can also add items by right-clicking an app in Launchpad and choosing Options > Keep in Dock.
How to change different icons for dock?
To assign different icons for multiple Dock items, you need to change each app or folder’s icon individually via its Get Info window. Drag a custom image onto the icon in the info panel for each item. Remember that changing icons may not persist if apps update or reinstall.
Limits of this guide and who should look elsewhere
This article does not cover third-party Dock replacement apps or deep system modifications that require advanced knowledge or risk system stability. If you need custom Dock behaviors beyond what macOS offers, or if you want to install utilities that significantly alter Dock functionality, consider consulting specialized resources or experts. Users uncomfortable with Terminal commands or system-level changes should avoid attempting those to prevent unintended issues.
For most users aiming to adjust icon sizes and arrangement within the standard macOS environment, following the steps outlined here will provide effective control over Dock appearance and behavior. The single most useful next step is to explore the System Preferences > Dock & Menu Bar pane thoroughly, as it offers direct access to size sliders, magnification options, position settings, and multi-display behaviors, enabling you to tailor the Dock to fit your workflow and screen setup precisely.