How to Change Font Size in VS Code on Mac: A 2026 Step-by-Step Guide
Discover easy ways to change font size in VS Code on Mac for improved coding comfort using settings, shortcuts, and configuration files.
You open Visual Studio Code on your Mac and notice the default font size feels either too small or too large for comfortable coding. Adjusting font size can improve readability without disrupting your workflow, but the process may seem unclear if you haven’t explored VS Code’s settings fully.
This guide explains how to change font size in VS Code on Mac, covering simple adjustments via the Settings UI, keyboard shortcuts, and direct edits to the settings.json file. You’ll also learn how to adjust font size specifically for the integrated terminal and scale all UI elements, plus understand how macOS system font settings interact with VS Code.
Key takeaways
- Use Preferences: Open Settings and search for "Font Size" under Text Editor for direct control.
- Keyboard shortcuts Cmd + Plus and Cmd + Minus adjust editor font size quickly.
- Edit "editor.fontSize" in settings.json for precise numeric control.
- Adjust "terminal.integrated.fontSize" separately for terminal readability.
- Use "window.zoomLevel" to scale all UI elements without affecting code font size.
Before you start: What you need to know about font size in VS Code on Mac
In Visual Studio Code 2026 on Mac, font size settings are divided primarily into two categories: editor font size and UI font size. The editor font size controls the text within your code files, affecting your coding comfort directly. The UI font size, or zoom level, influences the size of menus, sidebars, and other interface elements. Adjusting one does not automatically change the other.
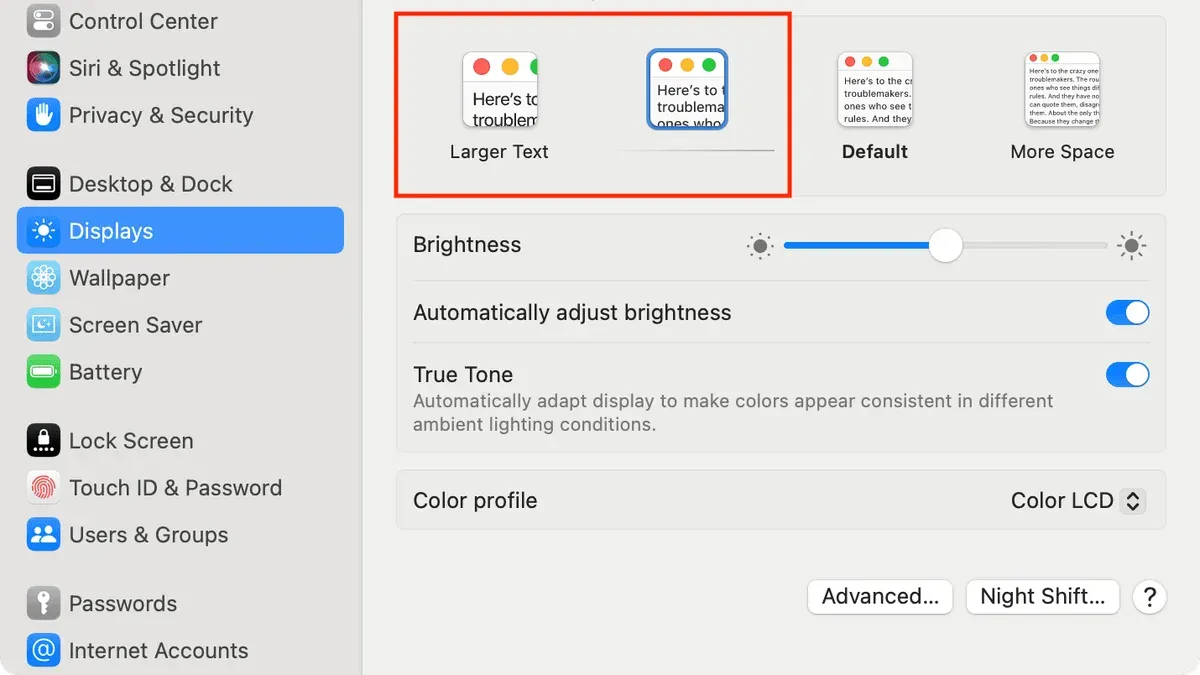
The default editor font size in VS Code 2026 is 14 pixels, while the default UI zoom level is 100%. macOS offers system-wide font scaling options through Display settings, including scaling resolutions and accessibility options like “Larger Text.” These macOS settings affect overall app appearance but do not override VS Code’s internal font size configurations.
You can change font sizes in VS Code either through the graphical Settings UI or by editing the settings.json configuration file, accessible via Code > Preferences > Settings or by opening the Command Palette and typing Preferences: Open Settings (JSON). Knowing which method suits your workflow is helpful before making adjustments.
Keep in mind that changing VS Code font sizes affects only VS Code and does not impact other applications or system fonts on your Mac. Also, ensure your Mac OS version is compatible with VS Code 2026, as font rendering may vary slightly across macOS updates.
How to change font size in VS Code on Mac using the settings UI
- Open Visual Studio Code on your Mac. The main window should appear with your current project or a welcome page.
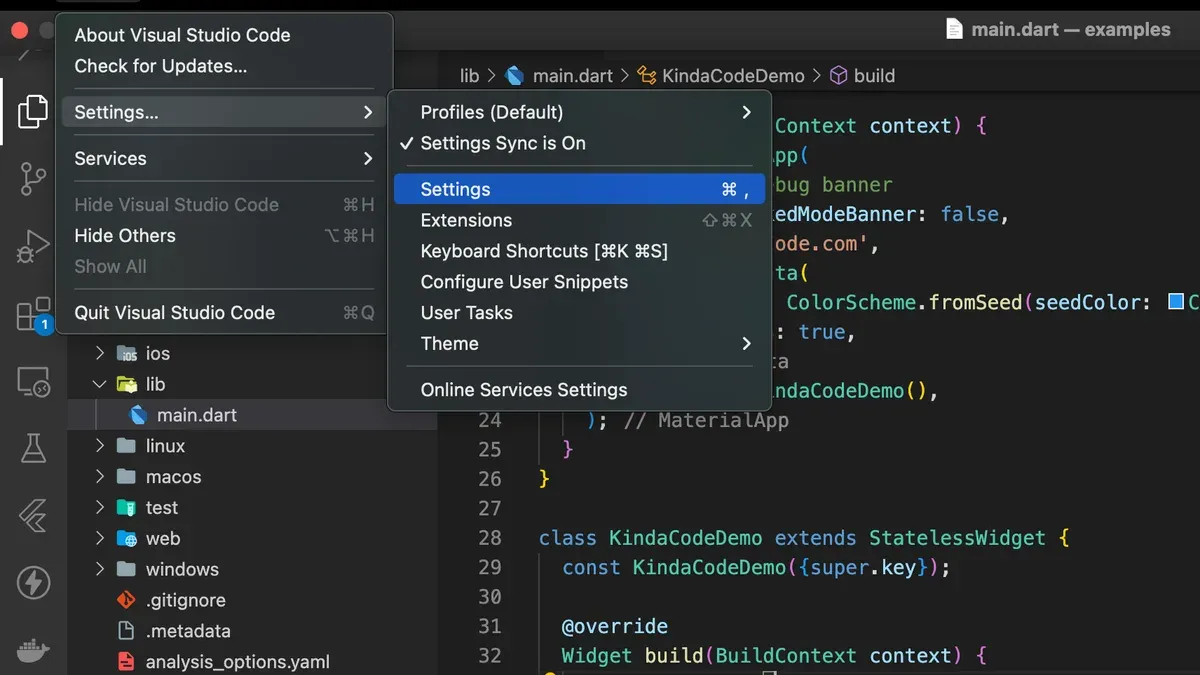
- Access the Settings pane by pressing Command + , on your keyboard or by clicking Code in the menu bar and selecting Preferences > Settings. The Settings tab will open on the right side.
- In the search bar at the top of the Settings tab, type editor font size. This filters the settings to the relevant option labeled Editor: Font Size.
- Adjust the font size by either dragging the slider or clicking the numeric input box next to it and typing your preferred size. Typical coding font sizes range from 12 to 18 pixels; for example, 14 is often a default starting point.
- As you change the value, watch the editor window behind the Settings tab to see a live preview of the font size in your code. This immediate feedback helps you find a comfortable size without guesswork.
- Once satisfied, simply close the Settings tab. The change saves automatically, and your editor font size is updated across all open files and new ones.
Adjusting font size via the Settings UI is the simplest way to customize readability without affecting other UI elements. It preserves your workflow by letting you see the effect immediately, so you can balance comfort with screen space efficiently.
How to increase font size in VS Code on Mac using keyboard shortcuts
You can quickly adjust the font size in Visual Studio Code on your Mac without opening the Settings UI. Keyboard shortcuts allow you to zoom in or out on the entire interface, including the editor, sidebars, and menus.
- Press Command + Plus (+) to zoom in. This enlarges all UI elements and the editor font simultaneously, making everything more readable.
- Press Command + Minus (-) to zoom out. This decreases the size of all UI components and text, fitting more on the screen at once.
- Press Command + 0 to reset the zoom level to the default. This returns both the editor and UI back to the standard size.
Note that these shortcuts zoom the entire VS Code window, not just the editor text. If you want to adjust only the editor font size, use the Settings UI or edit editor.fontSize in settings.json. Zoom shortcuts are best when you need a quick, temporary change for better accessibility or when presenting code to others.
For example, if your eyes feel strained during a coding session, pressing Command + Plus (+) instantly makes everything larger and easier to see without interrupting your workflow. Similarly, when sharing your screen in a meeting, zooming in ensures viewers can read your code clearly. These shortcuts provide fast, reversible adjustments, unlike permanent setting changes.
How to change font size in VS Code on Mac by editing settings.json
For users comfortable with configuration files, editing settings.json offers precise control over font size and related options in VS Code on Mac. This method lets you customize the editor and terminal font sizes beyond what the Settings UI allows.
- Open VS Code and press Cmd + Shift + P to launch the Command Palette. Type Preferences: Open Settings (JSON) and select it. This opens the settings.json file for direct editing.
- Locate the
"editor.fontSize"property or add it if missing. Set it to your preferred numeric value, such as16for a comfortable font size. Example:"editor.fontSize": 16. Increasing this value enlarges the text in the code editor pane. - Optionally, adjust
"terminal.integrated.fontSize"to change the font size in the integrated terminal independently. For example,"terminal.integrated.fontSize": 14balances terminal readability without affecting the editor. - To improve line spacing and readability, add or modify
"editor.lineHeight". A value slightly larger than the font size, such as22when font size is 16, reduces cramped text lines. - Save the settings.json file. You should see font size changes take effect immediately. If not, reload VS Code using Cmd + Shift + P and select Developer: Reload Window.
Example snippet:
| Setting | Value | Effect |
|---|---|---|
| "editor.fontSize" | 16 | Enlarges editor text for better readability |
| "terminal.integrated.fontSize" | 14 | Sets terminal font size separately |
| "editor.lineHeight" | 22 | Increases line spacing to avoid crowding |
This approach provides granular control but requires careful editing to avoid JSON syntax errors. It suits users who prefer configuration files or need customized font sizes beyond the UI's presets.
How to increase font size in VS Code on Mac for the integrated terminal
The integrated terminal in VS Code on Mac has its own font size setting distinct from the editor font size. Adjusting this can improve readability without affecting your code editor.
- Open VS Code on your Mac and access the Command Palette by pressing Cmd + Shift + P. Type Preferences: Open Settings (UI) and select it.
- In the Settings search bar, enter Terminal › Integrated: Font Size to locate the terminal font size option.
- Use the numeric input box to increase the font size value. For example, if the default is 14, try increasing to 16 or 18. The integrated terminal font size will update immediately.
- Open or focus the integrated terminal panel (View > Terminal or Ctrl + `) to see the new font size in effect.
- Compare this with your editor font size to ensure a consistent visual experience. Matching terminal font size to the editor’s font size, or choosing a slightly larger terminal font for clarity, can help maintain workflow comfort.
A common oversight is adjusting only the editor font size, leaving the terminal font too small or too large, which can cause eye strain or disrupt your development flow. Adjusting the terminal font size separately ensures both areas are easily readable.
Before and after screenshots typically show the terminal window with noticeably larger text after increasing the Terminal › Integrated: Font Size setting, while the editor font remains unchanged for precise control.
How to increase font size in VS Code on Mac for all UI elements
To enlarge all UI elements in VS Code on Mac—including menus, sidebars, and panels—you can adjust the Window: Zoom Level setting. This scales the entire interface uniformly, making everything larger beyond just the editor font.
- Open VS Code and press Cmd + Shift + P to open the Command Palette.
- Type Preferences: Open Settings (UI) and select it.
- In the search bar, enter Window Zoom Level.
- Use the slider or enter a number (for example, 1 or 2) to increase the zoom level. Positive numbers zoom in; negatives zoom out.
- Observe the entire interface scale up immediately, including menus, icons, and panels.
You can also quickly adjust this zoom level using keyboard shortcuts: Cmd + = to zoom in and Cmd + - to zoom out, affecting all UI elements.
Scaling the entire UI improves readability for users who find small menus and icons challenging but reduces available screen space. Larger UI elements may cause less code to be visible simultaneously, impacting workflow efficiency.
Compared to increasing only the editor font size, zooming the whole UI affects all interface components, which can be helpful for accessibility but may feel visually overwhelming if set too high. Consider balancing zoom levels to optimize both readability and screen real estate.
Visual comparison between default zoom and increased zoom levels clearly shows larger menus and sidebar text, aiding users who need broader scaling beyond the code editor.
How macOS system font size settings affect VS Code and other apps
macOS offers several system-wide display options that influence font size and readability across all applications, including Visual Studio Code. These settings are found under System Settings > Displays, where you can adjust Resolution and Scaling.
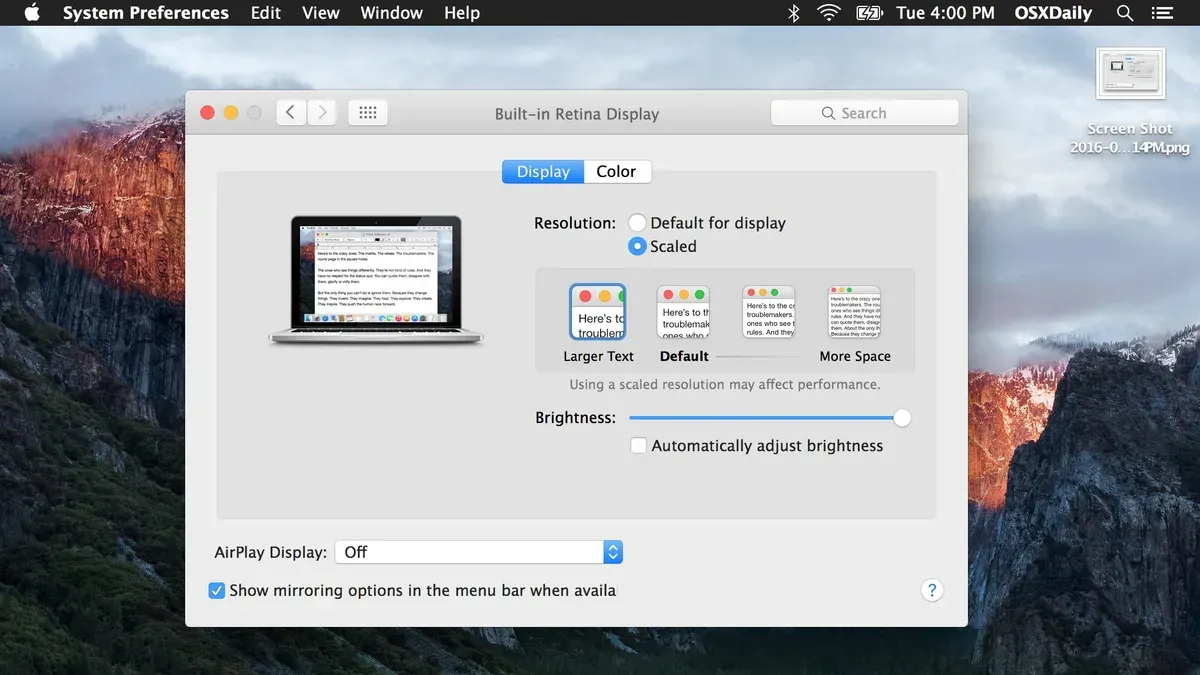
Choosing a lower resolution or a scaled option like “Larger Text” increases the size of system fonts and UI elements, making text in VS Code and other apps appear bigger without changing app-specific settings. For example, selecting “Larger Text” on a Retina display effectively enlarges all interface elements by scaling the display output.
However, system scaling affects all apps uniformly, which can reduce screen real estate and cause some UI elements to appear less sharp. Because of this, many users prefer adjusting font sizes directly within VS Code for finer control over their coding environment.
To adjust macOS scaling:
- Open System Settings and go to Displays.
- Under Resolution, select Scaled to reveal scaling options.
- Choose a scaling option labeled “Larger Text” to increase font and UI element size system-wide.
- Observe VS Code and other apps to confirm that text and interface components are larger and easier to read.
Use macOS display scaling to complement VS Code’s internal font settings when you need broader accessibility improvements across multiple applications.
Troubleshooting common issues when changing font size in VS Code on Mac
If font size changes don’t apply immediately, try restarting VS Code. Sometimes settings updates require a reload to take full effect. Use the command palette (⇧⌘P) and select Reload Window to refresh the interface quickly.
If font size becomes too large or too small and disrupts your workflow, reset to default by opening Preferences: Open Settings (JSON) and removing or adjusting the editor.fontSize or window.zoomLevel values. After saving, reload the window to see the reset applied.
Font rendering or aliasing issues on macOS may cause blurry or uneven text appearance. Ensure you use fonts optimized for coding such as SF Mono or Fira Code. You can also toggle editor.fontLigatures off in settings if ligature rendering causes problems.
Performance can degrade with very large font sizes or high UI scaling levels. This is reported by some users as sluggish typing or delayed UI response. If this occurs, reduce window.zoomLevel or editor font size incrementally until performance stabilizes.
- Restart VS Code or use Reload Window if font changes don’t appear. You should see updated font sizes immediately after.
- Reset font size settings in settings.json if font size is extreme. Saving changes and reloading returns fonts to defaults.
- Switch to a recommended coding font in editor.fontFamily to fix rendering issues. Text should display clearly without blurring.
- Lower
window.zoomLevelor editor font size if you notice slow performance. Responsiveness should improve after adjustment.
- How to Set Up Python in VS Code on Mac: A 2026 Step-by-Step Guide
- How to Open Files and Folders from Terminal with Code Command in VS Code on Mac
Frequently asked questions
How to change font size in mac?
To change the font size on a Mac system-wide, go to System Settings > Displays > Display Resolution and select "Scaled." Choose a larger text option to increase font sizes across apps. For specific apps like VS Code, you need to adjust font settings within the application itself for precise control.
How to increase vs code font size?
You can increase the VS Code font size by opening the settings UI via Code > Preferences > Settings and searching for "Font Size." Adjust the "Editor: Font Size" value to your preferred number, such as 16 or 18, to make the code more readable without affecting other UI elements.
How to change font size on macbook?
Changing font size on a MacBook follows the same process as on any Mac. Navigate to System Settings > Displays and select "Scaled" under resolution. Picking a larger text option increases font sizes system-wide, but individual app settings may still require adjustment for optimal readability.
How to increase font size in mac?
Increasing font size on a Mac involves adjusting display scaling through System Settings > Displays > Scaled options, or increasing font size within specific apps. For coding in VS Code, use the editor font size setting to increase just the text you work with, preserving layout and workflow efficiency.
How to increase text size in vs code mac?
To increase text size in VS Code on a Mac, open the Settings UI and search for "Editor: Font Size." Change the numeric value to a larger size like 16 or 18. Alternatively, use keyboard shortcuts Cmd + Plus (+) to zoom in or edit the settings.json file for precise control over font size.
What this guide does not cover and who should look elsewhere
This guide focuses on font size settings within VS Code and macOS display options; it does not cover installing new fonts or changing font families, which require additional configuration steps. If you have vision impairments, you might need specialized accessibility tools beyond standard font size adjustments to optimize readability and comfort. Additionally, setting extremely large font sizes or high UI zoom levels can reduce the available screen space, potentially hindering your workflow efficiency and requiring careful balance.
The most useful next step is to explore the Settings panel in VS Code under Preferences > Settings, searching for fontSize and window.zoomLevel. Adjust these incrementally while coding to find the optimal balance between readability and workspace usability tailored to your specific Mac display and development needs.