How to Enable Power Query in Excel on Mac: A Step-by-Step Guide
Discover how to enable Power Query in Excel on Mac with simple steps to streamline your data import and transformation process.
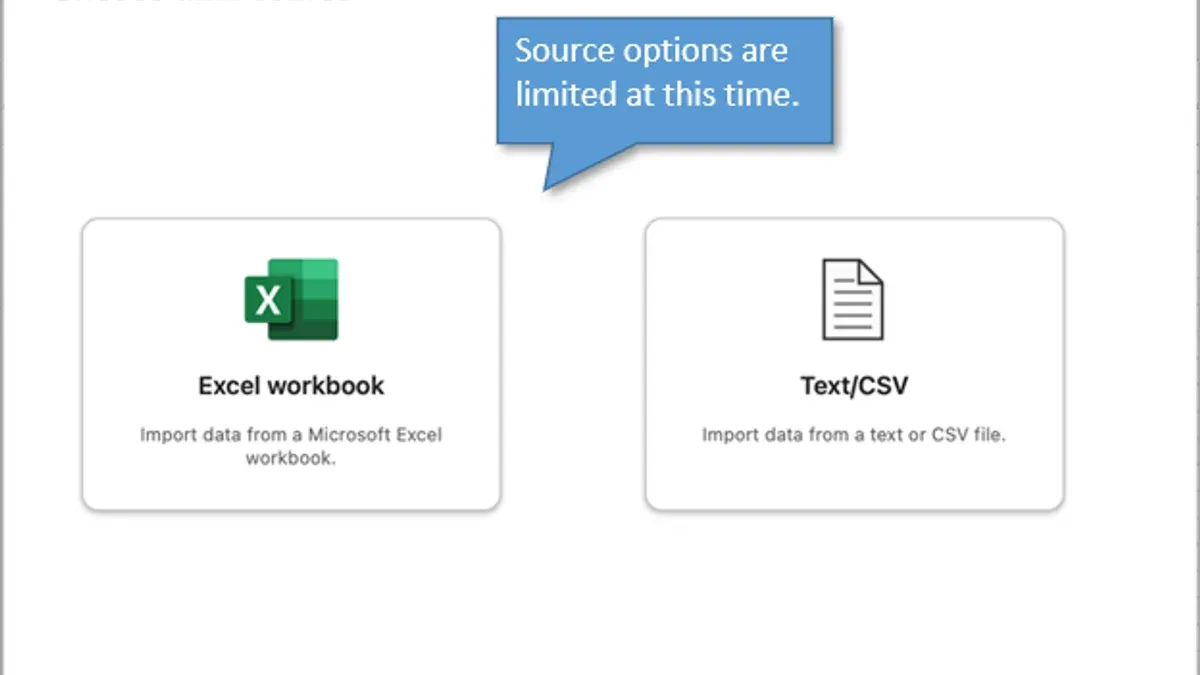
You’re working on a complex dataset in Excel on your Mac and want to streamline your data import and transformation process. You’ve heard that Power Query can help but aren’t sure if it’s available or how to enable it on your Mac. This article explains how to enable Power Query in Excel on Mac, guiding you through the precise steps to access and use this powerful feature effectively.
We’ll clarify common misconceptions about Power Query’s availability on Mac, compare it briefly to Power Pivot and macros, and provide practical instructions to get you started. By the end, you’ll have realistic expectations about what Power Query can do on your Mac and how to integrate it into your workflow.
Key takeaways
- Power Query is included in recent Excel versions for Mac but may require specific updates to be available.
- You access Power Query through the Data tab under the "Get & Transform" section in Excel for Mac.
- Power Pivot is not fully featured on Mac, so Power Query fills much of the data transformation gap.
- Macros are still a viable alternative but serve different purposes compared to Power Query.
- Updating Excel and enabling permissions are common steps to resolve access issues with Power Query on Mac.
Before you start: What you need to use Power Query on Mac
To use Power Query on your Mac, you need to ensure you have the correct version of Excel. Power Query features are available in Excel for Microsoft 365 subscription users on Mac. Older standalone Excel versions, such as Excel 2016 or Excel 2019 for Mac, do not support Power Query natively. If you are using Excel 2013 on Mac or earlier, Power Query is not available at all.
It is important to distinguish between Power Query and Power Pivot. Power Query is primarily a data import and transformation tool, whereas Power Pivot is focused on data modeling and creating relationships between tables. Currently, Power Pivot is not supported on Excel for Mac, so you will not find Power Pivot features available regardless of your Excel version on Mac.
Before enabling or using Power Query, make sure your Mac meets the system requirements for the latest Excel updates. This typically means running a supported macOS version and having the latest updates installed via Microsoft AutoUpdate. There are no separate add-ins required to use Power Query in Excel for Microsoft 365 on Mac, as it is integrated into the Data tab.
- Open Excel and go to the Help menu, then select Check for Updates. You should see an option to update if your Excel is not current.
- After updating, open Excel and look for the Data tab on the ribbon. If you see options like Get Data or New Query, Power Query is available.
- If these options are missing, verify your subscription status to Microsoft 365 and your Excel version by going to Excel > About Excel. The version should indicate it is part of Microsoft 365.
How to access Power Query in Excel on Mac
To start using Power Query in Excel on your Mac, you first need to locate it within the Excel interface. Unlike the Windows version, where Power Query features are more prominent, on Mac you find Power Query tools primarily under the Data tab in the ribbon. Look for the Get & Transform group, which contains options to import and transform data.
- Open Excel on your Mac and navigate to the Data tab in the ribbon at the top of the window. You should see the Get & Transform section on the left side of this tab.
- Click on Get Data within this group. A dropdown menu will appear, presenting various data source options such as From File, From Database, and From Web. Choose the appropriate source for your data.
- After selecting your data source, follow the prompts to browse and select the file, database, or enter the web URL. Once you confirm, Excel will create a new query and open the Power Query Editor window.
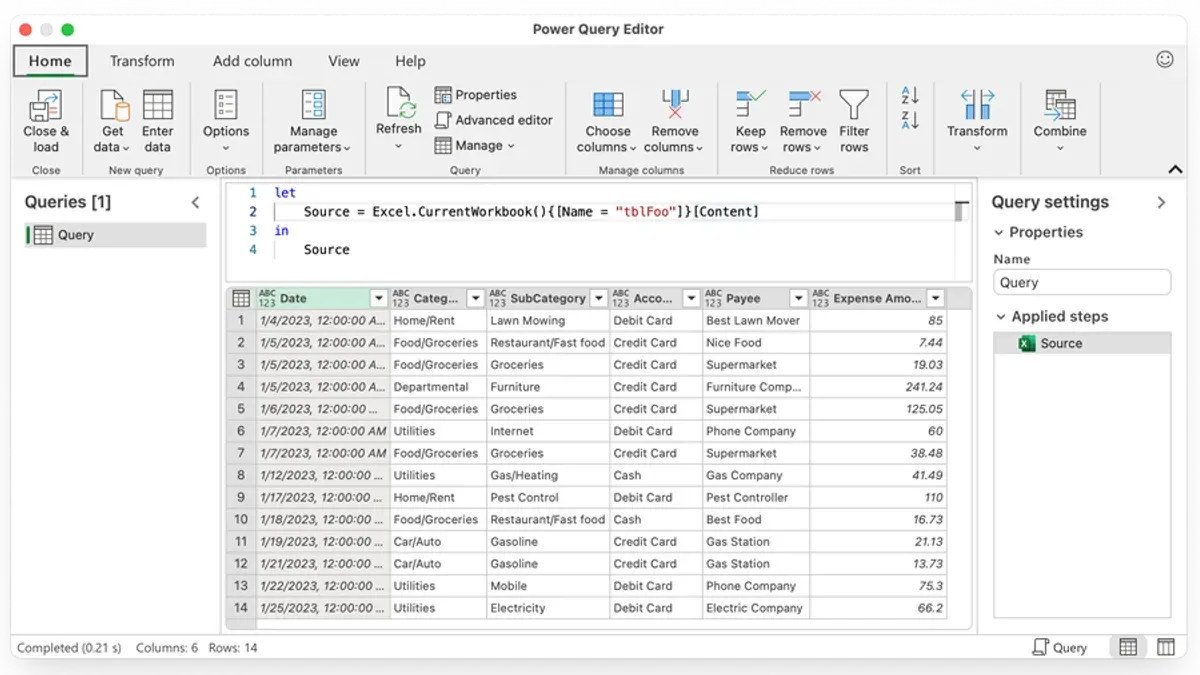
- The Power Query Editor on Mac looks similar to the Windows version but has some layout differences. The ribbon at the top of the editor window contains steps and transformation commands, but some options might be arranged differently or named slightly differently.
- Inside the Power Query Editor, you can preview your data, apply transformations, and manage query steps. When finished, click Close & Load in the upper-left corner to load the transformed data into your workbook.
Remember, the key to accessing Power Query on Mac is starting from the Data tab and using the Get & Transform group. While the interface is not identical to Windows Excel, the core functionality and workflow remain consistent.
How to enable Power Query in Excel on Mac
Power Query comes integrated with Excel for Microsoft 365 on Mac and does not require separate installation. If you do not see Power Query features such as the Get & Transform section under the Data tab, it might be disabled, hidden, or your Excel version may be outdated.
Start by verifying your Excel version to confirm it supports Power Query. To do this, go to the Excel menu and select About Excel. You should see your version number and build. Power Query features are available in recent Microsoft 365 updates; if your version is older than the typical current build, you will need to update.
- Open Excel on your Mac.
- Click Excel in the top menu bar and choose About Excel.
- Note the version number and build displayed. Versions from Microsoft 365 with recent updates include Power Query.
- Close the About window.
- If your version is outdated or Power Query is missing, go to the Help menu and select Check for Updates.
- Follow the prompts in the Microsoft AutoUpdate tool to install the latest Excel version.
- After updating, restart Excel and check the Data tab for the Get & Transform group.
If Power Query still does not appear, check if any add-ins are interfering by going to Tools > Excel Add-ins, then disable unnecessary add-ins and restart Excel.
Note that older standalone Excel versions for Mac do not include Power Query. In such cases, upgrading to Microsoft 365 is necessary to access Power Query functionality.
How to use Power Query on Excel on Mac: Step-by-step data import and transformation
- Open Excel and go to the Data tab. Click on Get Data and choose From File, then select From Text/CSV or From Workbook depending on your source file. You should see a file picker window pop up.
- Select your file and click Import. Power Query Editor will open, displaying a preview of your data. Here, you can visually inspect the rows and columns before making changes.
- Filter rows to remove unwanted data. Click the drop-down arrow next to a column header, then uncheck values you want to exclude or use text filters like Begins With or Does Not Contain. The preview updates immediately to show filtered results.
- Change data types to ensure correct formatting. Click the icon in the column header (e.g., ABC123, calendar icon) and select the appropriate type such as Text, Whole Number, or Date. This is crucial for accurate calculations and sorting later.
- Split columns when needed. Select a column, then use the Split Column button in the toolbar. Choose to split by delimiter (such as a comma or space) or by number of characters. The new columns appear side by side in the preview.
- Apply additional transformations using the ribbon tools. You can remove columns, rename headers, or add custom columns without writing any code. Each action is recorded as a step in the Applied Steps pane, allowing easy edits or removal later.
- Load the transformed data back into Excel. Click Close & Load in the upper-left corner. The cleaned data appears in a new worksheet or can be loaded to the data model if you plan to use it in PivotTables. Confirm the data looks as expected and refresh as needed.
Following these steps allows you to shape your data efficiently using Power Query’s intuitive interface on Mac, without needing to write formulas or VBA macros.
How to enable Power Pivot in Excel on Mac
Power Pivot is a powerful data modeling and analysis tool available in Excel for Windows, but it is not currently available in Excel for Mac. Microsoft’s official documentation confirms that Power Pivot functionality, including the Data Model and DAX formulas, is restricted to the Windows version. This means you cannot enable Power Pivot directly on Excel for Mac as the feature is not included in the Mac Excel build.
However, you do have alternatives for working with data models and pivot tables on a Mac. Excel for Mac supports PivotTables, which let you summarize and analyze your data interactively. While PivotTables on Mac do not offer the advanced data modeling capabilities of Power Pivot, they can often meet basic to intermediate summarization needs.
Additionally, Power Query on Mac can complement your data preparation process. While Power Query does not replace Power Pivot’s relational data modeling, it allows you to clean, transform, and combine data before loading it into a PivotTable. This workflow can cover many use cases that require data shaping before analysis.
Historically, Microsoft introduced Power Pivot in Windows Excel around 2010, and it remains a Windows-only feature. Microsoft has acknowledged user requests for Power Pivot on Mac but has not announced a specific timeline for its release. For now, Mac users will need to rely on built-in PivotTables and Power Query for their data analysis tasks.
Power Query vs macros in Excel for Mac: When to use each
Power Query and macros serve different purposes in Excel for Mac, and understanding their strengths helps you decide which to use. Power Query is a no-code tool designed specifically for importing, cleaning, and transforming data. It offers an intuitive interface where you can shape data without writing any code, making it suitable for tasks like merging tables from different sources or filtering large datasets before analysis.
Macros, powered by VBA (Visual Basic for Applications), automate a wider range of Excel tasks beyond data transformation. These can include formatting worksheets, generating reports, or interacting with other Office applications. On Mac, however, VBA support is more limited compared to Windows, with some objects and methods unavailable or behaving differently. This can restrict what macros can accomplish on a Mac.
For example, if you want to consolidate multiple CSV files into a single table and perform filtering and data type changes, Power Query handles this efficiently with no code. Conversely, if your task involves automating repetitive formatting across multiple sheets or generating custom message boxes, macros are more appropriate despite their Mac limitations.
When deciding between the two, consider whether your task is focused on data import and transformation (choose Power Query) or broader automation including user interaction and formatting (choose macros). Power Query fills many gaps left by VBA’s Mac restrictions, especially for data-centric workflows, while macros remain useful for automating Excel’s interface and workbook events.
Troubleshooting common issues when enabling or using Power Query on Mac
If the Power Query option is missing or greyed out in your Excel ribbon, first check that your Microsoft 365 subscription is active and your Excel is fully updated. Sometimes, the feature can be temporarily disabled due to incomplete updates or corrupted preferences.
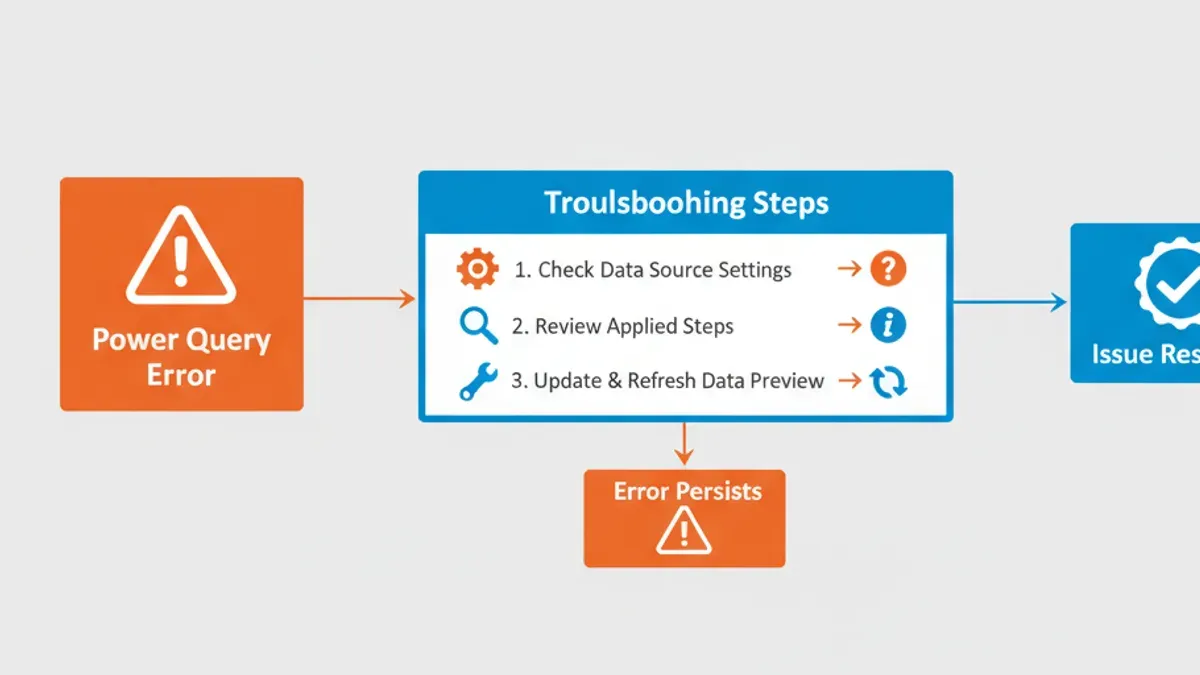
- Open Excel and go to the Help menu, then choose Check for Updates.
When successful, Excel will confirm you have the latest version or install updates automatically. - Restart Excel after updating.
You should now see the Get & Transform section enabled in the Data tab. - If Power Query is still missing, reset Excel preferences by closing Excel, then deleting the preference files located at
~/Library/Preferences/com.microsoft.Excel.plist.
On restart, Excel creates fresh preferences, which often restores missing features.
Data source connection errors often occur when using unsupported formats or incorrect credentials. Power Query on Mac supports common sources like Excel files, CSV, and web data but lacks some connectors available on Windows. When you see error messages such as "Data source not supported" or "Access denied," verify your source type and credentials.
Performance issues or crashes while editing queries can be due to large datasets or complex transformations. Reduce query complexity by breaking down steps or filtering data earlier. Save your workbook frequently to avoid data loss.
If problems persist after these steps, contact Microsoft Support with specific error messages and Excel version details. You might also consider alternative tools for Mac data transformation, such as dedicated ETL applications or using Excel VBA macros where appropriate.
Frequently asked questions
Does excel for mac have power query?
Yes, Excel for Mac includes Power Query, but its availability depends on your Excel version. Power Query is built into Excel for Mac in Microsoft 365 subscriptions and recent standalone versions. If you have an older Excel version, Power Query may not be available or may have limited features.
Does power query work on mac?
Power Query does work on Mac, but with some limitations compared to Windows. The core data import and transformation features are supported, allowing you to connect to common data sources and perform basic transformations. However, advanced connectors and certain custom functions available on Windows might not be present on Mac.
How to use power query in excel on mac?
To use Power Query in Excel on Mac, go to the Data tab and select "Get Data" or "Get & Transform Data." Choose your data source, then use the Power Query Editor to shape and clean your data. When done, click "Close & Load" to import the transformed data into your worksheet.
How to use power pivot in excel on mac?
Power Pivot is not fully supported on Excel for Mac. While you can create basic data models using tables and relationships, the full Power Pivot add-in, including the Data Model and DAX formulas, is only available on Windows. For complex data modeling on Mac, consider using alternative tools or running Excel through a Windows environment.
Does Excel for Mac have Power Query?
Excel for Mac does have Power Query, especially in Microsoft 365 versions. You can find it under the Data tab as "Get Data." Keep in mind some advanced features and connectors available on Windows might be missing or limited on Mac.
Understanding the Limits of Power Query on Mac
This article does not cover Power Query usage in Excel versions prior to Microsoft 365 on Mac, which do not support it natively. If you are using an older edition, Power Query features won’t be available, and alternative data tools or upgrades may be necessary. Additionally, Power Pivot is not available on Mac Excel, so users requiring advanced data modeling should consider using Excel for Windows or specialized data modeling software. Keep in mind that some advanced Power Query features found on Windows might be limited or behave differently on Mac, such as certain connector options or advanced transformations.
To move forward effectively, start by opening Excel on your Mac and locating the Data tab to access Power Query features. Import a simple data source like a CSV file to practice basic transformations—this hands-on step helps you get comfortable and reveals any platform-specific behaviors early. This practical first step ensures you understand what Power Query can do for your workflow before tackling more complex data tasks.
See also: How to Use the F4 Absolute Reference Shortcut in Excel on Mac