
How to Install Dropbox on Mac: A Clear Step-by-Step Guide
Get your files in sync by learning how to install Dropbox on Mac with this clear, step-by-step guide covering setup, permissions, and troubleshooting.
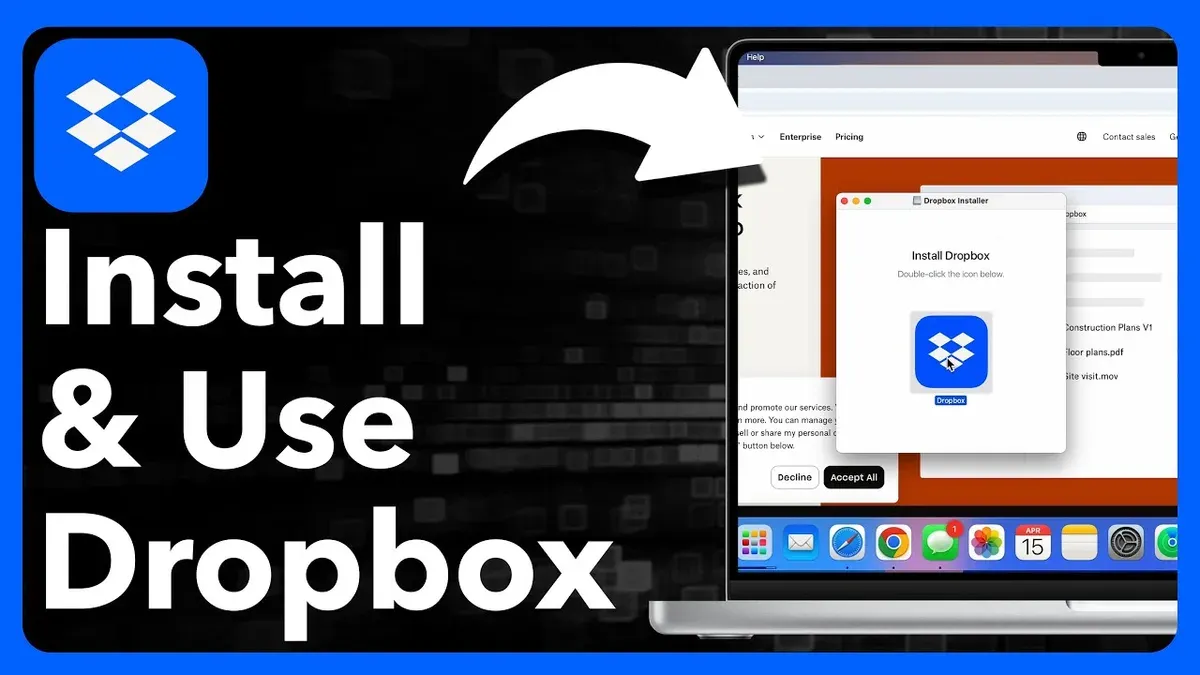
You’ve just got a new MacBook or are setting up your Mac for work, and you want to get all your files in sync. Dropbox is a popular choice for cloud storage, but installing it correctly can sometimes be tricky, especially with newer Mac models and Finder integration. Knowing how to install Dropbox on Mac the right way ensures smooth access to your files without disruptions.
This article walks you through everything you need to know—from downloading the official installer safely to setting up Dropbox on MacBook Air, MacBook Pro, and other Mac laptops. You’ll also learn how to integrate Dropbox with Finder for seamless file management, uninstall it if needed, and troubleshoot common installation issues like permission refusals on the latest macOS versions.
Key takeaways
- Download Dropbox only from the official website to avoid security risks.
- Grant necessary permissions in System Preferences for Dropbox to function with Finder.
- Installation steps are similar across MacBook Air, Pro, and other models but watch for macOS security prompts.
- Uninstalling Dropbox requires removing the app and leftover files to free disk space.
- Common installation issues often relate to macOS privacy settings or outdated software versions.
Before you start: What you need to install Dropbox on Mac
To ensure a smooth installation of Dropbox on your Mac, check that your device meets the necessary requirements and that you have the right setup.
- Verify macOS compatibility: Dropbox supports macOS versions 10.12 (Sierra) and later. Confirm your Mac’s operating system by clicking the Apple menu, selecting About This Mac, and checking the version number. You should see a version at or above 10.12.
- Confirm hardware capabilities: Your Mac should have at least 1 GB of RAM and sufficient processor power to run Dropbox efficiently. Most recent MacBook Air, MacBook Pro, and other Mac laptops meet these standards.
- Ensure an active internet connection: A stable broadband connection is necessary to download the Dropbox installer and to sync files once installed. Without internet access, Dropbox cannot function properly.
- Create or have a Dropbox account ready: You need a Dropbox account—either free or paid—to use the desktop app. You can sign up at dropbox.com if you don’t have one yet.
- Check available disk space: Dropbox requires at least 150 MB of free disk space for the application itself. Additionally, allow enough space for syncing your files, depending on how many you plan to keep in your Dropbox folder. For example, if you plan to sync 10 GB of files, ensure you have more than 10 GB free on your hard drive.
Meeting these prerequisites will help avoid installation errors and ensure Dropbox runs smoothly on your Mac.
How to download Dropbox for Mac safely
Downloading Dropbox from the official source ensures you get the latest, malware-free version. Third-party websites might offer outdated or altered installers that can compromise your Mac's security.
- Open your preferred web browser on your Mac.
- Navigate directly to https://www.dropbox.com/install. You should see the official Dropbox download page.
- Locate the download button labeled for Mac and click it. This should start downloading a file named something like "DropboxInstaller.dmg".
- Once downloaded, verify the file size roughly matches the size stated on the Dropbox website (usually around 100 MB). This helps confirm the file is complete and unaltered.
- Avoid downloading Dropbox from third-party sites or peer-to-peer sources as these can contain malware or modified versions that risk your data and privacy.
Downloading directly from Dropbox’s official site follows security best practices, reducing risks of installing outdated or malicious software. Always double-check the website URL and file name before running the installer to maintain your Mac’s safety.
How to install Dropbox on MacBook Air, MacBook Pro, and other Mac laptops
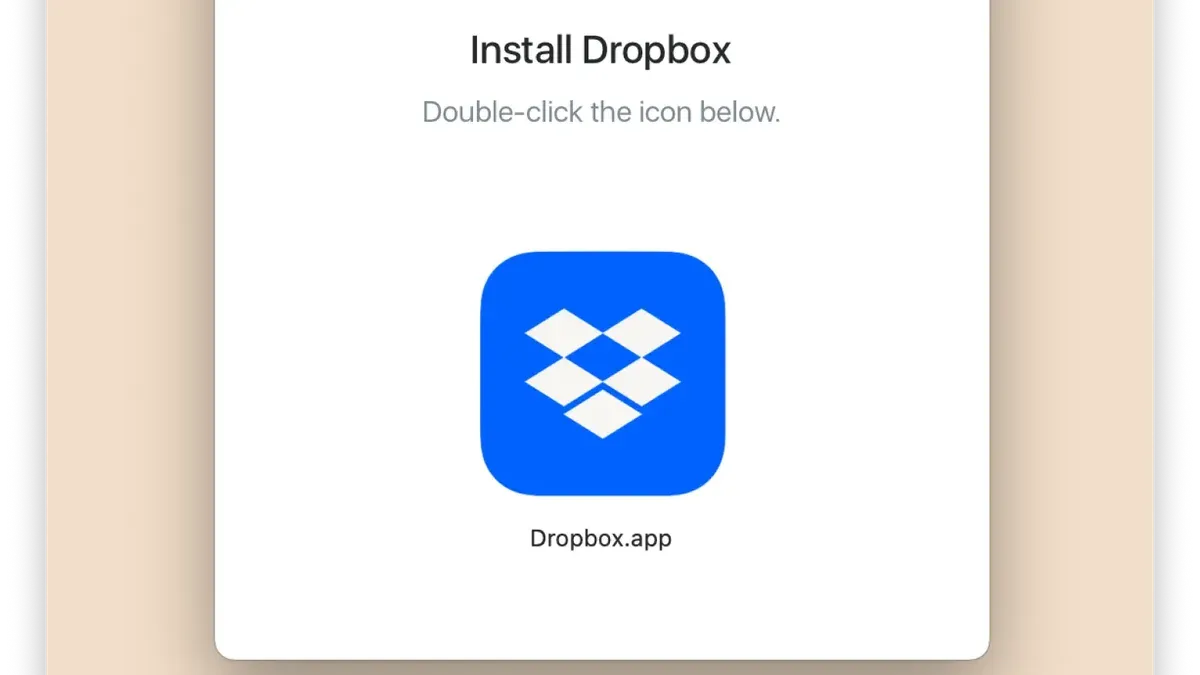
- Locate the downloaded Dropbox .dmg file, usually in your Downloads folder. Double-click it to open the installer window. You should see a window displaying the Dropbox icon and an Applications folder shortcut.
- Drag the Dropbox icon into the Applications folder within this installer window. This copies the Dropbox app to your Mac’s Applications directory. The copy progress bar may appear briefly.
- After copying completes, close the installer window and eject the Dropbox installer drive by clicking the eject icon next to it in Finder’s sidebar or by right-clicking and choosing Eject.
- Open the Applications folder and double-click the Dropbox app to launch it for the first time. macOS may display a security prompt asking for confirmation since Dropbox is downloaded from the internet; click "Open" to proceed.
- Upon launching, Dropbox will prompt you to sign in. Enter your Dropbox account credentials. If you don’t have an account, you can create one directly from the app.
- Follow the on-screen setup prompts to configure initial settings such as selecting folders to sync and enabling Finder integration. You will see Dropbox’s syncing status icon in the menu bar once setup is complete.
This procedure works consistently across MacBook Air, MacBook Pro, and other Mac laptops, ensuring you have Dropbox installed and ready for use.
How to integrate Dropbox with Mac Finder for seamless access
Finder integration allows you to manage your Dropbox files directly within the native Mac file system interface, providing quick access and enhanced workflow efficiency. With Dropbox synced folders visible in Finder, you can browse, open, and organize files as if they were stored locally on your Mac.
To enable Dropbox folder syncing and Finder integration, follow these steps:
- Open the Dropbox desktop app from your Applications folder or menu bar. Once open, click the gear icon and select Preferences. You should see the Preferences window appear.
- Navigate to the Sync tab within Preferences. Here, ensure that Selective Sync is configured so all desired folders are set to sync. This will make those folders appear in Finder under your Dropbox folder.
- Close Preferences and open Finder. In the sidebar, locate and select the Dropbox folder. Your synced files and folders will be displayed here.
- Right-click any file or folder inside Dropbox to access the Finder context menu enhanced by Dropbox. Typical options include Share Dropbox Link, View on Dropbox.com, and Version history. Seeing these confirms the integration is active.
- Look for Dropbox badges on your files in Finder. These small icons indicate sync status—green checkmarks for synced files and blue cloud icons for online-only items. Their presence confirms Finder integration is working correctly.
Using Dropbox badges and context menus within Finder streamlines file management by letting you share links or check file versions without leaving the Finder environment. This tight integration eliminates extra steps and makes Dropbox feel like a native part of your Mac.
How to uninstall Dropbox on Mac when needed
Uninstalling Dropbox properly ensures no residual files remain on your Mac and helps avoid potential storage clutter or conflicts if you reinstall later. Follow these steps carefully, especially if you have synced files stored locally.
- Quit Dropbox: Click the Dropbox icon in the menu bar, then click your profile picture or initials and select Quit Dropbox. The icon should disappear, indicating the app is fully closed.
- Remove the Dropbox application: Open the Applications folder via Finder. Locate the Dropbox app, drag it to the Trash, or right-click and select Move to Trash. This removes the main application file.
- Delete Dropbox folders and cache: In Finder, press Shift + Command + G to open the Go to Folder dialog. Enter
~/Library/Application Support/Dropboxand delete this folder. Repeat the process for~/Library/Caches/com.getdropbox.dropboxand~/Library/Preferences/com.getdropbox.dropbox.plistto remove cache and preferences. - Remove local Dropbox folder if desired: Your Dropbox folder, usually in your Home directory, contains synced files. If you delete this folder, local copies will be removed but your files remain safe in the cloud. Be sure you have backups or no longer need local copies before deleting.
Warning: Uninstalling Dropbox does not delete your online files. However, deleting the local Dropbox folder removes files from your Mac, so confirm your files are synced online before removal.
Using third-party uninstallers can automate cleanup but may remove unrelated files or require payment. Manual uninstallation gives you full control and precision, avoiding unnecessary deletions.
Troubleshooting Dropbox installation issues on Mac
Installing Dropbox on a Mac usually proceeds smoothly, but you may encounter some common problems. Below are typical issues and actionable steps to resolve them.
Dropbox refuses to install due to security restrictions
New Mac models with enhanced security settings might block Dropbox installation, showing messages like "App cannot be opened because the developer cannot be verified." To fix this:
- Open System Settings and go to Privacy & Security.
- Scroll to the Security section and look for a message about Dropbox being blocked.
- Click Allow Anyway next to the message.
- Try launching the installer again; it should proceed without the block.
Installer freezing or crashing
If the Dropbox installer freezes or crashes during setup, it might be due to a corrupted download or conflicting software.
- Quit the installer and delete the downloaded.dmg file.
- Download a fresh copy of the installer from the official Dropbox website.
- Temporarily disable any antivirus or third-party security tools that might interfere.
- Run the installer again; it should complete without freezing.
Dropbox not launching after installation
After installation, Dropbox may fail to launch or show an error like "Unable to start Dropbox." Often this relates to permission issues or leftover files from previous installs.
- Quit Dropbox if running, then open Finder and navigate to
~/Library/Application Support/Dropbox. - Rename this folder to
Dropbox_oldto reset settings. - Restart Dropbox; it should launch and recreate fresh support files.
Conflicts with existing Dropbox versions or permissions
Running multiple Dropbox versions or having incorrect file permissions can cause installation errors.
- Check for any existing Dropbox instances by looking in the Applications folder and Activity Monitor.
- Quit and uninstall all Dropbox versions following official uninstall instructions.
- Repair disk permissions using Disk Utility: open Disk Utility, select your startup disk, and click First Aid.
- Reboot your Mac and install Dropbox again.
For persistent problems, Dropbox Support recommends contacting their help center with specific error messages or logs for tailored solutions.
How to install Dropbox on PC and other laptops: Quick overview
Installing Dropbox on Windows PCs and other laptops involves a process similar to the Mac installation but with platform-specific differences. You should always download the installer directly from the official Dropbox website to ensure you get the latest and safest version.
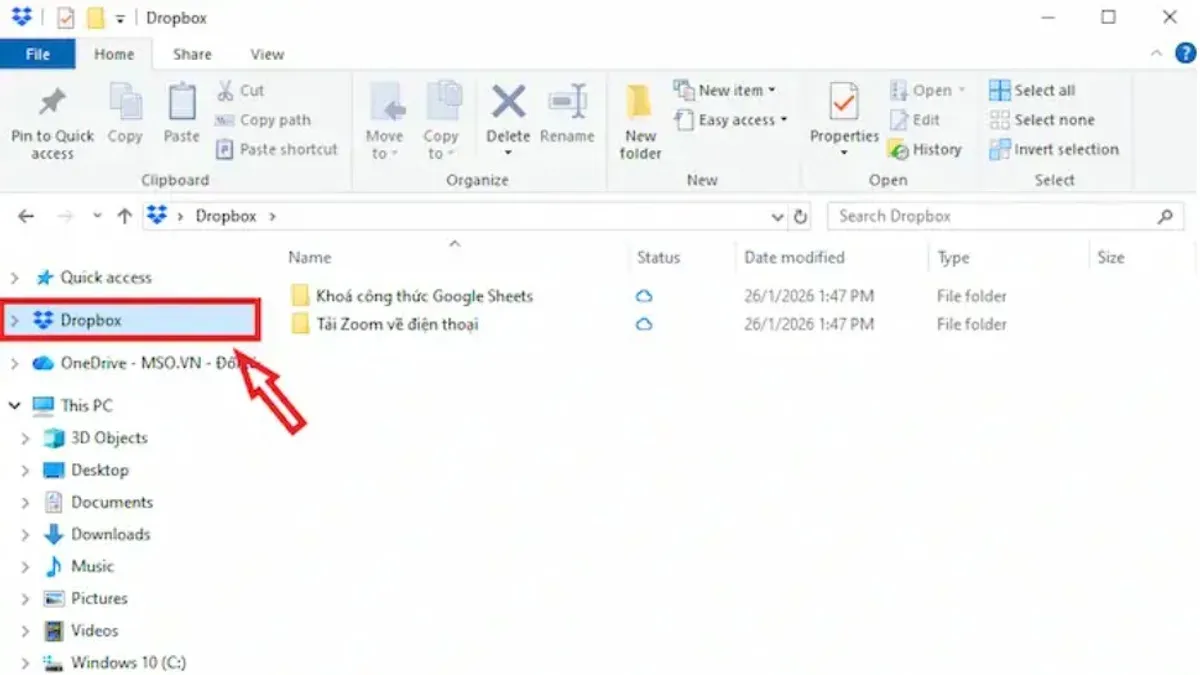
Here is a quick step-by-step guide for Windows PCs:
- Visit the official Dropbox website and download the Windows installer. When the download completes, locate the.exe file in your Downloads folder.
- Double-click the.exe file to launch the installer. You should see a progress bar as Dropbox installs.
- Once installed, Dropbox will automatically launch. You will be prompted to sign in or create an account. After signing in, Dropbox will set up your local sync folder, usually in your user directory.
- Dropbox runs in the system tray, allowing you quick access to settings and file syncing status.
Cross-device syncing works seamlessly once Dropbox is installed and signed in on all your devices. Files added on any device will sync to others when online, enabling smooth workflow continuity.
| Installation Step | Mac | Windows PC |
|---|---|---|
| Download | Official Dropbox website,.dmg file | Official Dropbox website,.exe file |
| Launch Installer | Open.dmg and drag to Applications | Double-click.exe and follow prompts |
| Initial Setup | Sign in and configure preferences | Sign in and set up local folder |
| Integration | Finder integration with badges and menus | File Explorer integration with context menus |
- How to Install Google Drive for Desktop on Mac: A Step-by-Step Guide
- How to Install Microsoft Office on Mac: A Clear Step-by-Step Guide
- How to Install Zoom on Mac: A Clear Step-by-Step Guide
- How to Install Microsoft Teams on Mac: A Complete Step-by-Step Guide
Frequently asked questions
How to install dropbox on mac finder?
To integrate Dropbox with Mac Finder, first install the Dropbox desktop app. During installation, Dropbox adds a Finder extension automatically. If you don’t see Dropbox icons in Finder’s sidebar, go to System Preferences > Extensions > Finder Extensions and ensure Dropbox is enabled. Restart Finder if the icons don’t appear immediately.
How to install dropbox on mac laptop?
Download the Dropbox installer from the official website using Safari or another browser. Open the downloaded.dmg file, then drag the Dropbox icon into your Applications folder. Launch Dropbox from Applications, sign in, and follow the on-screen prompts to complete setup.
How to install dropbox on laptop?
For any laptop, visit the official Dropbox website and download the appropriate installer for your operating system. On Windows, run the.exe file and follow the setup wizard. On Mac, open the.dmg file, drag Dropbox to Applications, then launch and sign in. Always use the official installer to avoid security risks.
Does dropbox work with mac?
Yes, Dropbox is fully compatible with Mac computers. It supports macOS features like Finder integration and offers file syncing, sharing, and backup tailored for Mac users. You may need to grant system permissions during installation for full functionality.
Does Dropbox work with Mac?
Dropbox works seamlessly with Mac systems, providing desktop synchronization and Finder integration. It supports macOS security features and updates regularly to maintain compatibility with new Mac models and system versions.
What this advice does not cover
This article does not cover advanced Dropbox business or enterprise deployment scenarios, which may require IT administrator involvement. If you are managing multiple user accounts on a corporate network, need to configure Dropbox with specific security policies, or require centralized control over file sharing and access, consult your IT department or Dropbox business support resources.
For most individual Mac users, the steps outlined here will guide you through installing and integrating Dropbox effectively. However, if you encounter issues beyond typical installation errors or require customization for complex workflows, professional assistance may be necessary.
The single most useful next step is to launch the Dropbox app immediately after installation and complete the initial sign-in process. This ensures Dropbox begins syncing your files with your Mac Finder integration properly and allows you to adjust preferences such as selective sync and notification settings to fit your workflow.



