How to Install Microsoft Remote Desktop on Mac: A Step-by-Step Guide
Discover easy steps to install Microsoft Remote Desktop on Mac and configure remote access to your Windows PC with helpful troubleshooting tips.
You want to access your Windows PC remotely from your Mac, but the installation process for Microsoft Remote Desktop isn’t straightforward. Whether you prefer downloading from the Mac App Store or need an alternative installation method, knowing the right steps can save you time and frustration.
This article explains how to install Microsoft Remote Desktop on Mac, covering both App Store and non-App Store options. It also guides you through setting up remote access to a Windows PC and includes practical troubleshooting tips for common issues.
Key takeaways
- You can install Microsoft Remote Desktop directly from the Mac App Store or via an official Microsoft website package if you prefer not to use the App Store.
- Setting up remote access requires enabling Remote Desktop on the Windows PC and configuring network permissions.
- Common issues include connection errors, firewall blocks, and incorrect credentials, all with straightforward fixes.
- Using Microsoft Remote Desktop on Mac supports multiple simultaneous connections and clipboard sharing between devices.
Before you start: what you need to install Microsoft Remote Desktop on Mac
To install Microsoft Remote Desktop on your Mac, ensure your device meets the basic requirements. You need a Mac running macOS 11.0 Big Sur or later, as these versions support the latest Microsoft Remote Desktop app. For smooth operation, a Mac with at least 4GB of RAM and a recent processor model is recommended.
A stable internet connection is essential both to download the app and for remote desktop sessions. You will also need a Microsoft account to access remote Windows PCs securely.
Gather details about the Windows PC you want to connect to, including its IP address or hostname and user credentials (username and password). This information is crucial for establishing a remote session.
Decide whether you prefer to install the app from the Mac App Store or via alternative methods such as direct download. Each approach has different steps and potential restrictions.
- Check your Mac’s macOS version by clicking the Apple menu > About This Mac. You should see macOS 11.0 or newer.
- Verify your internet connection is active by opening a web browser and visiting a website.
- Confirm you have your Microsoft account email and password ready for sign-in.
- Obtain the Windows PC’s IP address or hostname by accessing its network settings.
- Decide on your installation method: App Store or non-App Store (download from Microsoft website or other sources).
How to install Microsoft Remote Desktop on Mac from the App Store
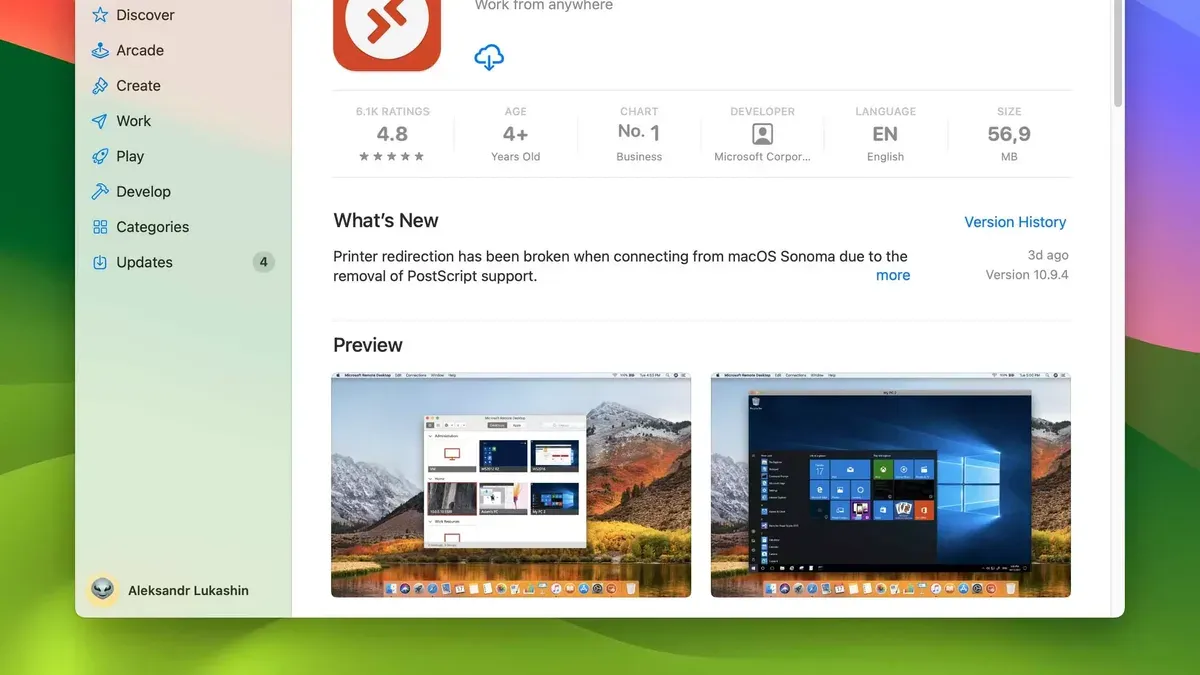
- Open the Mac App Store from your Dock or the Applications folder. You should see the App Store main interface.
- Use the search bar in the top-left corner to type "Microsoft Remote Desktop". The search results will display related apps.
- Look for the app published by "Microsoft Corporation". Confirm the publisher to ensure you select the official version, avoiding similarly named apps from other developers.
- Click the "Get" button next to Microsoft Remote Desktop, then click "Install App". You may be prompted to enter your Apple ID password or use Touch ID to authenticate.
- Once installed, the button changes to "Open". Click "Open" to launch the app. On first launch, you may be asked to grant permissions such as access to network connections and notifications.
- After granting permissions, the app opens to its main interface, ready for setup. You should see a welcome screen or options to add a remote desktop connection, confirming successful installation.
Images showing the App Store search for Microsoft Remote Desktop, the app page with publisher details, and the installation confirmation screen help verify each step visually.
How to install Microsoft Remote Desktop on Mac without App Store
If you prefer not to use the Mac App Store or cannot access it, you can install Microsoft Remote Desktop using the official installer from Microsoft’s website. This method requires manual download and installation but offers the same functionality.
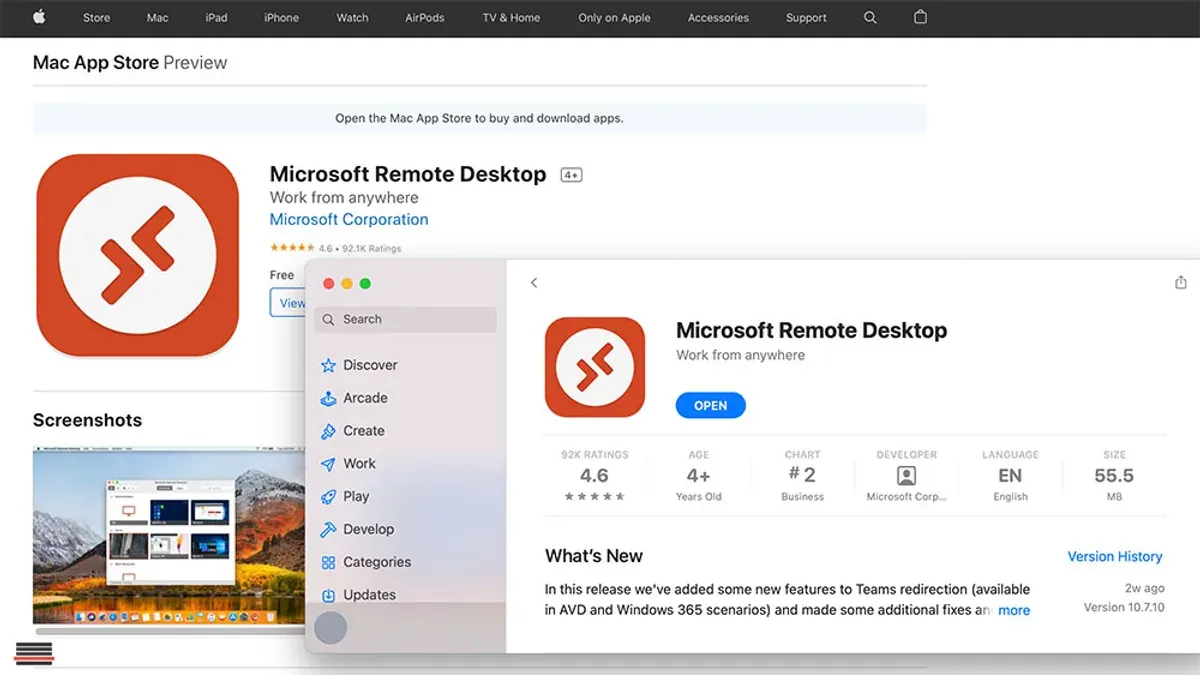
- Visit the official Microsoft Remote Desktop download page at Microsoft Remote Desktop for Mac. You should see options to download a.pkg or.dmg installer file.
- Download the latest version of the installer file. Verify the website URL carefully to ensure it is the official Microsoft site to avoid malicious software.
- Once downloaded, locate the installer file in your Downloads folder and double-click it. For a.dmg file, a mounted drive will appear; open it and then double-click the installer package (.pkg) inside.
- Follow the on-screen instructions to proceed with the installation. When macOS prompts with a security warning, click "Open" if you trust the source.
- If you encounter a Gatekeeper warning stating the app is from an unidentified developer, go to System Preferences > Security & Privacy > General tab, then click "Open Anyway" next to the warning about the installer.
- After installation finishes, open Microsoft Remote Desktop from your Applications folder. You should see the main interface ready for setup.
This manual installation usually takes slightly longer than the App Store method due to the extra steps but is straightforward once you are familiar with handling macOS security prompts.
How to set up Microsoft Remote Desktop on Mac for Windows PC access
- Open the Microsoft Remote Desktop app and click the “Add PC” button. Enter the PC name or IP address of the Windows machine you want to connect to. Successful input will display the PC in your connections list.
- Click “User Account” and choose “Add User Account” to enter your Windows username and password. Save the account to avoid repeated login prompts.
- Configure connection settings by clicking “Show More.” Adjust display resolution, color quality, and sound options. For example, select “Play on this device” under Sound to hear audio from the Windows PC on your Mac.
- Enable device redirection under the “Devices & Audio” tab to allow access to your Mac’s clipboard, printers, or drives during the session. Ensure these match your workflow needs.
- On the Windows PC, confirm Remote Desktop is enabled under System Properties > Remote settings. The PC must allow connections from devices running Remote Desktop with Network Level Authentication for security.
- Return to the Mac app and double-click the added PC to initiate the connection. A successful connection shows the Windows desktop within the app window.
- If you encounter errors like “Remote Desktop can’t connect” or error code 0x204, verify network connectivity, firewall settings on Windows, and that the PC is powered on and reachable.
Example screenshots typically show the Add PC dialog filled with the PC name, User Account settings with saved credentials, and the connection window displaying the remote desktop. Common troubleshooting includes checking IP accuracy, user permissions, and network firewalls blocking port 3389.
How to install and set up Windows Remote Desktop on Mac
Microsoft Remote Desktop on Mac serves as the official client for using Windows Remote Desktop Protocol (RDP). To connect successfully, you need to enable Remote Desktop on your Windows PC and ensure network and firewall settings allow the connection.
| Windows Edition | Remote Desktop Availability | Notes |
|---|---|---|
| Windows 10/11 Home | Not available (cannot act as RDP host) | Can only use Remote Desktop as a client; consider upgrading to Pro to enable hosting |
| Windows 10/11 Pro, Enterprise, Education | Available (can host Remote Desktop sessions) | Supports incoming RDP connections; enable Remote Desktop in system settings |
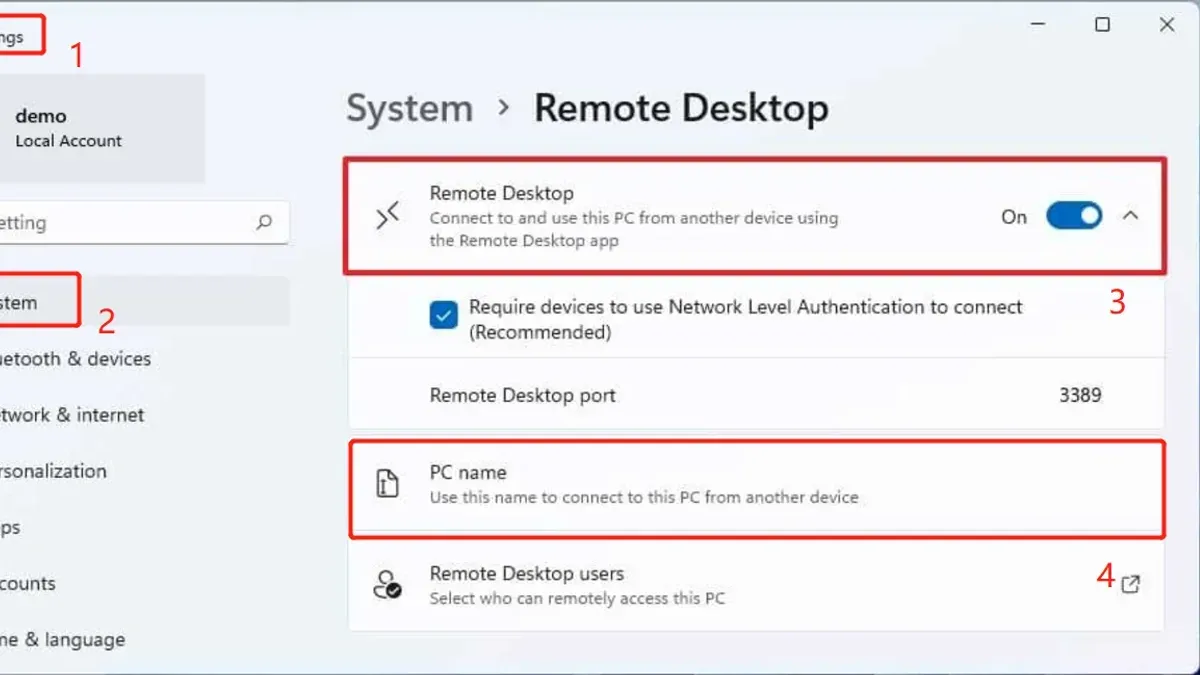
- On your Windows PC, open Settings > System > Remote Desktop.
- Toggle Enable Remote Desktop to On; confirm the action if prompted.
- Note your PC name or IP address shown under the Remote Desktop settings; you will need this to connect.
- Check your Windows firewall settings by opening Windows Defender Firewall > Allow an app or feature through Windows Defender Firewall. Ensure Remote Desktop is allowed on Private and Public networks.
- If your PC is behind a router, configure port forwarding for TCP port 3389 to your PC’s local IP address to allow external connections.
- On your Mac, open Microsoft Remote Desktop, click Add PC, and enter the PC name or IP address.
- Enter your Windows user account credentials when prompted; save the connection for future use.
- Click your saved connection to start the remote session. A successful connection shows your Windows desktop on your Mac.
Keep in mind that Windows Home editions do not support hosting Remote Desktop sessions, so you cannot connect to a Home edition PC as a remote host. Also, network setup, especially on corporate or secured networks, might require additional configuration or permissions.
Troubleshooting common issues when installing or using Microsoft Remote Desktop on Mac
If Microsoft Remote Desktop won’t install or open, macOS security settings often block it. Look for “App can’t be opened because it is from an unidentified developer.” To fix this, open System Preferences > Security & Privacy > General and click Open Anyway beside the blocked app message. Restart the app afterward.
Connection errors like timeouts, authentication failures, or black screens commonly occur due to network or credential issues. Verify your Windows PC is reachable, Remote Desktop is enabled, and credentials are correct. A firewall blocking port 3389 is a frequent cause—ensure that port is open on your network.
Performance problems and lag during remote sessions may result from slow internet or high CPU usage on either device. Lower the display resolution and color depth in Microsoft Remote Desktop’s preferences to improve responsiveness.
Keep both macOS and Microsoft Remote Desktop updated to avoid compatibility problems. Updates often include bug fixes that resolve connection and performance issues.
- Open System Preferences > Security & Privacy > General, and if a message about blocked Microsoft Remote Desktop appears, click Open Anyway. You should then be able to launch the app.
- Check your Windows PC’s Remote Desktop settings: confirm Remote Desktop is enabled and the PC is on the same network or accessible via VPN. Successful setup allows a test connection without errors.
- Adjust Remote Desktop display settings by selecting a lower resolution and 16-bit color depth under the app’s preferences. Performance should improve noticeably.
- Ensure your Mac and Microsoft Remote Desktop app are both updated. After updating, test connectivity again to confirm resolved issues.
- How to Install and Use Chrome Remote Desktop on Mac
- How to Install AnyDesk on Mac: A Clear Step-by-Step Guide
- How to Install TeamViewer on Mac: A Complete Step-by-Step Guide
- How to Install Microsoft Teams on Mac: A Complete Step-by-Step Guide
Frequently asked questions
How to install windows remote desktop on mac?
To install Windows Remote Desktop on a Mac, you can download the Microsoft Remote Desktop app from the Mac App Store or obtain it from Microsoft's official website if you prefer not to use the App Store. Once downloaded, open the app and follow the setup prompts to connect to your Windows PC.
How to add microsoft remote desktop on mac?
After installing the Microsoft Remote Desktop app, open it and click the “Add PC” button. Enter the Windows PC name or IP address in the “PC name” field, then configure user account and other settings as needed. Save the connection to add it to your list for easy access.
How to set up windows remote desktop on mac?
Setting up Windows Remote Desktop on Mac involves adding your Windows PC to the app with its network details and user credentials. Ensure Remote Desktop is enabled on your Windows machine under System Properties > Remote settings. Adjust firewall settings if necessary to allow remote connections.
How to download microsoft remote desktop on mac?
You can download Microsoft Remote Desktop on Mac directly from the Mac App Store or from Microsoft's official website for a non-App Store option. Choose the version compatible with your macOS, download the installer, and follow the installation instructions.
Does microsoft remote desktop work on mac?
Yes, Microsoft Remote Desktop works on Mac, allowing you to connect to Windows PCs or servers remotely. The app supports multiple sessions, clipboard sharing, and high-quality video streaming, making it a practical solution for cross-platform remote access.
What this guide does not cover and who should look elsewhere
This guide does not cover enterprise deployment via mobile device management (MDM) or advanced network configurations like VPN setup. If your organization requires remote desktop access within a managed IT environment, consult your IT department or specialized documentation. Users with outdated macOS versions may face compatibility issues not addressed here, as Microsoft Remote Desktop requires macOS 11 or later for optimal performance. This article also assumes you have administrative rights on both your Mac and the Windows PC you intend to access remotely; without these permissions, setup and connection may not be possible.
The single most useful next step is to verify that your Windows PC is configured to allow remote connections by enabling Remote Desktop under System Properties > Remote settings, and ensure that your Mac and PC are on the same network or properly reachable through your firewall settings. Confirming these settings prevents common connection failures and lays the foundation for a successful remote desktop experience.