
How to Install and Set Up Rectangle on Mac: A Step-by-Step Guide
This guide shows you how to install and set up Rectangle on Mac to manage windows efficiently with keyboard shortcuts and snapping.
You often find yourself juggling multiple windows on your Mac, struggling to keep your workspace organized. Managing windows manually can be tedious and disrupt your workflow.
This article explains how to install Rectangle on Mac, a lightweight and free window management app that simplifies arranging windows with keyboard shortcuts and snapping features.
You'll get clear, step-by-step instructions on downloading and installing Rectangle safely, setting it up for efficient use, and avoiding confusion with similarly named or related software like Box, VirtualBox, and Movie Box.
Key takeaways
- Download Rectangle from its official website to avoid unsafe versions.
- Grant necessary permissions in System Preferences under Security & Privacy for smooth operation.
- Use predefined keyboard shortcuts or customize them in Rectangle Preferences for window management.
- Be aware that Rectangle is different from Box (file storage) and VirtualBox (virtual machines).
- Troubleshoot common installation issues by checking Accessibility permissions and restarting the app.
Before you start: What you need to install Rectangle on Mac
Rectangle is a macOS app designed specifically for window management, helping you arrange and resize application windows quickly using keyboard shortcuts or drag-and-drop. It is not related to Box apps, VirtualBox, or Movie Box, which serve entirely different purposes like cloud storage, virtualization, or video streaming.
To install Rectangle, your Mac must be running macOS 10.11 (El Capitan) or later. This minimum system requirement ensures compatibility and smooth operation. Additionally, Rectangle requires Accessibility permissions to control windows and respond to your inputs; without these permissions, key features will not function.
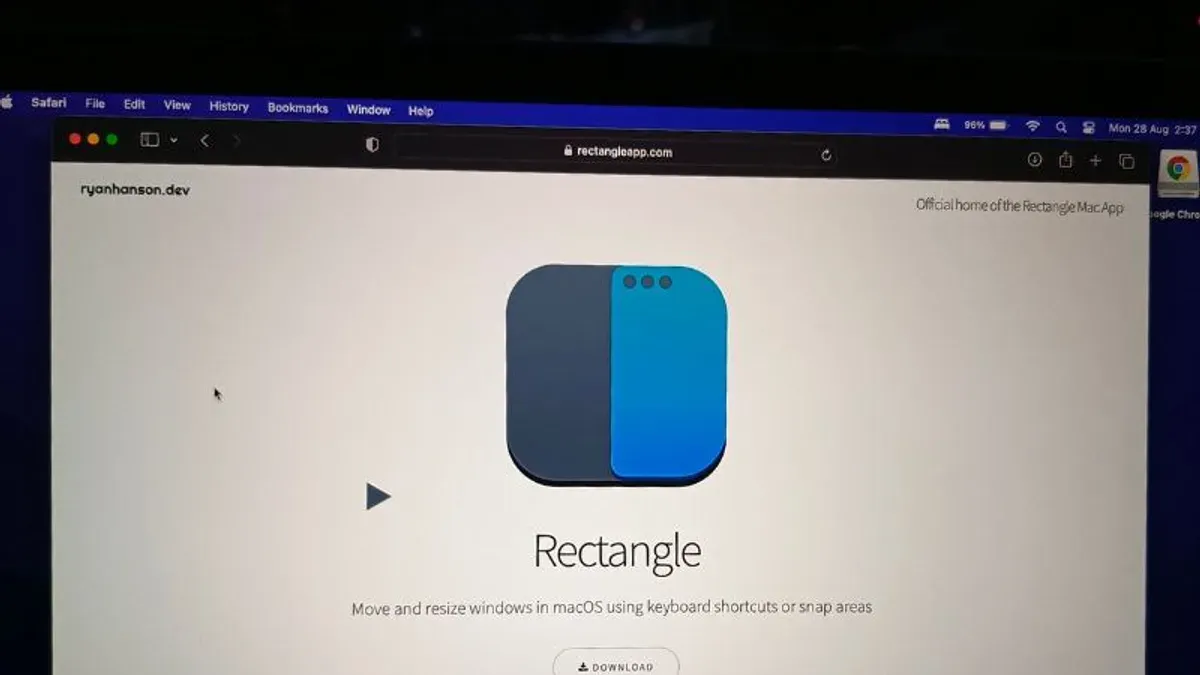
For safe downloading, always use the official Rectangle website or trusted repositories such as the GitHub page maintained by the developer. Avoid third-party download sites to prevent tampered or outdated versions.
| App | Purpose | Typical Use | Relation to Rectangle |
|---|---|---|---|
| Rectangle | Window management | Resize and organize windows via shortcuts | Focus of this guide |
| Box | Cloud storage | File syncing and collaboration | Unrelated software |
| VirtualBox | Virtualization software | Run guest operating systems | Unrelated software |
| Movie Box | Video streaming | Watch movies and TV shows | Unrelated software |
- Check your macOS version by clicking the Apple menu and selecting "About This Mac". Verify it is macOS 10.11 or later. If not, update your system first.
- Prepare to grant Accessibility permissions: after installation, Rectangle will prompt for this. You can also open System Settings > Privacy & Security > Accessibility to enable Rectangle manually.
- Download Rectangle only from its official website or its official GitHub repository. Confirm the site URL to avoid scams.
How to download Rectangle for Mac safely
To ensure you are downloading Rectangle from a trustworthy source, always use the official website or the verified GitHub repository maintained by the developer. Avoid third-party download sites that may host outdated or modified versions, which can compromise security or fail to work properly.
- Open your preferred web browser and go to the official Rectangle GitHub page at https://github.com/rxhanson/Rectangle. You should see a clean layout listing the project details, releases, and documentation.
- Click on the "Releases" tab near the top to access the latest versions. The page will display the most recent release at the top, including version number, release date, and assets for download.
- Choose the version compatible with your macOS. Usually, the latest release supports macOS 10.11 and later. Check the release notes if you need confirmation of compatibility.
- Under the assets section for your chosen release, click the file named "Rectangle.dmg" to download the installer disk image. Your browser should start the download and show it in the downloads list.
- When the download completes, verify the file size is consistent with what is listed on the GitHub page to avoid incomplete or corrupted downloads.
By following these steps, you minimize the risk of downloading unofficial or unsafe files. The official sources provide the most up-to-date and secure versions of Rectangle to ensure proper functionality.
How to install Rectangle macOS app step by step
- Locate the downloaded Rectangle.dmg file in your Downloads folder and double-click it to open the disk image. You should see a new window displaying the Rectangle app icon and a shortcut to the Applications folder.
- Drag the Rectangle app icon into the Applications folder shortcut within the window. This copies the app to your Applications directory and prepares it for use.
- Open the Applications folder and double-click the Rectangle app to launch it. The first time you open it, macOS may display a warning about opening an app downloaded from the internet; click Open to proceed.
- Upon launching, Rectangle will prompt you to grant Accessibility permissions necessary for window management. To do this, click the button labeled Open System Preferences or manually open System Preferences and go to Security & Privacy > Privacy > Accessibility.
- In the Accessibility pane, click the lock icon at the bottom left and enter your administrator password to make changes. Then, check the box next to Rectangle to grant it permission. Close System Preferences once done.
- Return to Rectangle; it may prompt you to restart the app. Quit Rectangle and relaunch it from the Applications folder to apply the new permissions.
- To have Rectangle start automatically at login, open its preferences by clicking the Rectangle icon in the menu bar and selecting Preferences. Check the box labeled Launch Rectangle at login. This setting ensures Rectangle runs in the background whenever you start your Mac.
Following these steps will install Rectangle correctly, enable it to manage your windows, and set it to launch automatically for convenience.
| Screenshot | Description |
|---|---|
| Disk image window showing Rectangle and Applications folder shortcut | Drag Rectangle app icon to Applications folder |
| macOS Security & Privacy Accessibility settings | Granting Accessibility permission to Rectangle |
| Rectangle Preferences window | Enabling Launch at login option |
How to set up Rectangle on Mac for optimal window management
After installing Rectangle, configuring its preferences and shortcuts is key to improving your workflow. Follow these steps to customize the app for efficient window management.
- Open the Rectangle app from your Applications folder or the menu bar icon. You should see the Rectangle icon appear in the menu bar, indicating it is active.
- Click the Rectangle menu bar icon and select Preferences. The preferences window will open, displaying available options and keyboard shortcuts.
- Review the Keyboard Shortcuts tab to see default window snapping keys, such as Option + Command + Left Arrow to snap a window to the left half of the screen. Confirm these work as expected by trying a few.
- To customize shortcuts, click the shortcut you want to change, then press the new key combination. For example, you might change snapping left to Control + Left Arrow if that fits your workflow better. Ensure the new shortcut does not conflict with existing macOS shortcuts.
- Use the Options tab to enable features like Snap areas or adjust window resize increments for finer control.
- Test your new setup by arranging multiple windows using your custom shortcuts. Compare this with the default settings to see if the changes improve your speed and comfort.
- Consider setting up shortcuts for corner snaps or moving windows between displays if you use multiple monitors regularly.
- Close the preferences window to save your settings. Rectangle will now use your customized shortcuts and preferences to manage windows efficiently.
By tailoring shortcuts and options, you can streamline window positioning, reduce manual resizing, and enhance multitasking productivity with Rectangle.
How to use Rectangle Mac app effectively
Rectangle streamlines window management by letting you snap and resize windows quickly using keyboard shortcuts or drag gestures. This helps you keep your workspace organized without manually dragging window edges.
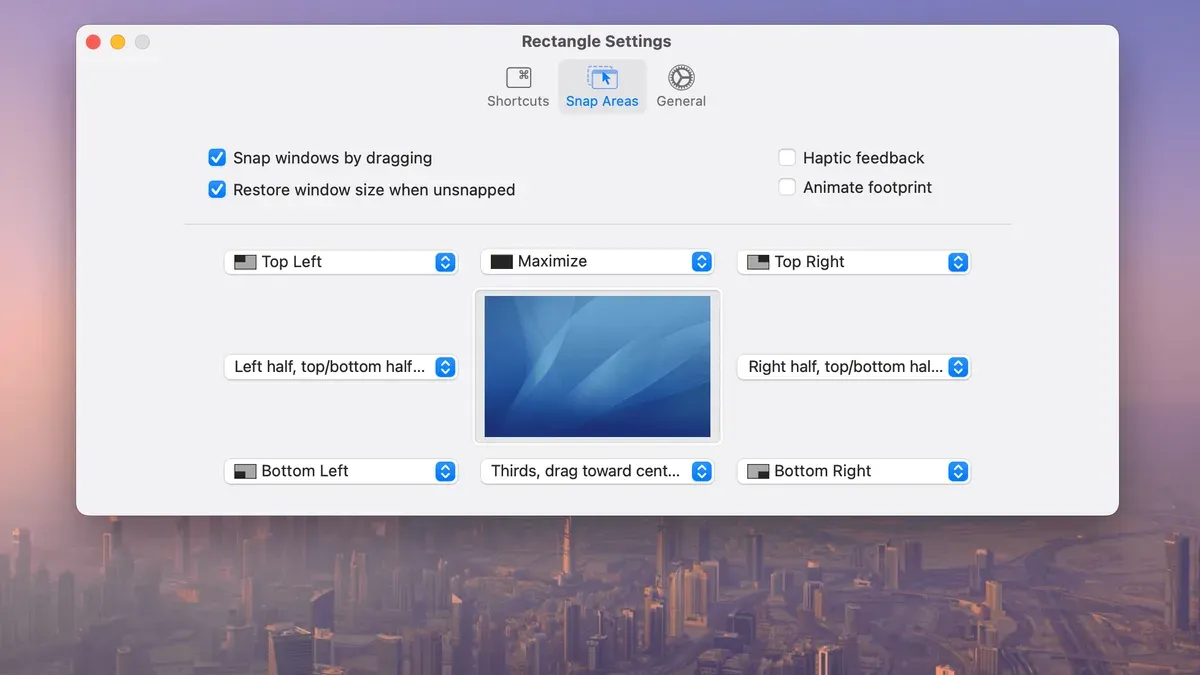
Basic window snapping is done by dragging a window to the screen edge or corner, which resizes it to half or a quarter of the screen. Using keyboard shortcuts, you can move windows precisely without a mouse. For example, pressing Control + Option + Left Arrow snaps the active window to the left half of the screen.
- Open two applications you want to view side by side.
- Click the first window to activate it.
- Press Control + Option + Left Arrow to snap it to the left half of the screen.
- Activate the second window by clicking it.
- Press Control + Option + Right Arrow to snap it to the right half.
- Both windows now share the screen evenly, allowing side-by-side work.
You can combine Rectangle with macOS native features like Mission Control or Spaces to manage multiple desktops or view all windows at once. While Rectangle enhances window resizing and positioning, it does not replace macOS features like full-screen mode or split view. It also lacks advanced tiling options found in some paid apps.
For multi-window workflows, use Rectangle’s corner snap shortcuts to position windows in any quarter of the screen. This is useful when monitoring several apps simultaneously, such as having a browser, notes, and chat windows all visible.
Keep in mind, Rectangle requires accessibility permissions to control windows, and some apps with custom window behaviors may not respond perfectly to all shortcuts.
Troubleshooting common Rectangle installation and setup issues
If Rectangle does not launch or quits unexpectedly, first check that it is added to your Login Items: go to System Settings > General > Login Items and ensure Rectangle is listed and enabled. If it is missing, add it manually to start Rectangle automatically at login.
Missing Accessibility permissions are a frequent cause of malfunction. Open System Settings > Privacy & Security > Accessibility and confirm that Rectangle is checked. If it isn’t, enable it and restart the app. Without this permission, Rectangle cannot control window management and will not respond to shortcuts.
Conflicts with other window management tools can cause unexpected behavior or shortcut failures. If you have apps like Magnet, BetterTouchTool, or Spectacle installed, consider disabling or uninstalling them temporarily to check whether Rectangle works correctly.
If keyboard shortcuts do not respond, verify that they are enabled and correctly assigned in Rectangle’s preferences. Also, check System Settings > Keyboard > Keyboard Shortcuts > App Shortcuts for any conflicts or overrides that might block Rectangle’s shortcuts.
Common error messages such as “Accessibility permission denied” or “Failed to start at login” indicate permission or settings issues. Rebooting your Mac after adjusting permissions often resolves these errors.
- Open System Settings > Privacy & Security > Accessibility. Make sure Rectangle is checked. If not, check it and restart Rectangle. You should now be able to use window shortcuts.
- Go to System Settings > General > Login Items. Add Rectangle if it’s not listed. This ensures it launches automatically.
- Temporarily disable other window management apps. Relaunch Rectangle and test shortcuts. If problems stop, adjust settings or remove conflicting apps.
- Open Rectangle preferences and verify shortcuts. If needed, reassign shortcuts to unique key combinations not used by other apps or macOS.
- If Rectangle still quits unexpectedly, uninstall and reinstall the latest version from the official GitHub page, then repeat the permission granting steps.
Clarifying related software: Box, VirtualBox, and Movie Box on Mac
Rectangle is a window management app designed to help you organize and resize app windows quickly on macOS. However, people often confuse it with other similarly named software like Box, VirtualBox, or Movie Box, which serve very different purposes.
| App | Purpose | Installation Method | When to Use |
|---|---|---|---|
| Rectangle | Window management and snapping tool for macOS. | Download from official GitHub releases and install like a normal Mac app. | When you want to improve window organization and multitasking on your Mac. |
| Box (Box Drive, Box Tools) | Cloud file storage and synchronization service. | Download from Box website and install to sync files between cloud and Mac. | When you need secure cloud storage and file sharing. |
| VirtualBox | Virtual machine software to run other operating systems on your Mac. | Download from Oracle's site, install, then create and run virtual machines. | When you want to run Windows, Linux, or other OSes inside macOS. |
| Movie Box | Unofficial streaming app, often unsupported and unrelated to Mac productivity. | Not recommended or officially supported for Mac installation. | Generally avoid due to legal and security risks. |
Choosing Rectangle is best when your goal is to manage window layouts efficiently, enhancing your workflow without switching contexts.
If you require cloud storage for work files, Box or Box Drive is appropriate, not Rectangle.
VirtualBox is a powerful tool for running entire operating systems within macOS, vastly different from what Rectangle does.
Movie Box is unrelated to these productivity tools and is not suitable or recommended for Mac users looking to improve window management or file handling.
- How to Install AppCleaner on Mac: A Step-by-Step Guide
- How to Install and Customize Cursor Editor on Mac
- How to Install and Set Up OBS Studio on Mac: A Complete Guide
- How to Install iTerm2 on Mac: A Complete Step-by-Step Guide
Frequently asked questions
How to install box on mac?
To install Box on your Mac, visit the official Box website and download the Box Drive installer. Open the downloaded.dmg file and drag the Box icon into your Applications folder. Once copied, launch Box from Applications and sign in with your Box account to start syncing files.
How to set up box on mac?
After installing Box Drive, open the app and sign in using your Box credentials. You can then select which folders to sync locally or access your files directly via the Box folder created in Finder. Adjust sync preferences through the Box menu bar icon under Preferences to manage bandwidth or selective sync.
How to install virtual box on mac?
Download the latest VirtualBox installer from the official Oracle VirtualBox website. Open the.dmg file and follow the on-screen prompts to run the installation package. You may need to allow system extensions in Security & Privacy settings during installation for VirtualBox to work properly.
How to install box tools on mac?
Box Tools is typically installed alongside Box Drive or can be downloaded separately from the Box website. After installation, Box Tools integrates with your Mac to enable editing of Microsoft Office and PDF files directly from Box. Ensure you have Box Drive installed first, then install Box Tools and allow necessary permissions when prompted.
How to install box drive on mac?
Go to the Box website and download the Box Drive installer for Mac. Open the downloaded.dmg file and drag the Box Drive icon into your Applications folder. Launch the app and sign in with your Box account to begin syncing files between your Mac and Box cloud storage.
What this guide does not cover and who should look elsewhere
This guide does not cover advanced Rectangle customization via scripting or third-party plugins and is intended for general users seeking straightforward installation and basic setup. If you require complex window management workflows or integration with automation tools like AppleScript or Keyboard Maestro, consider exploring Rectangle’s official documentation or specialized forums.
The single most useful next step after installing and setting up Rectangle is to familiarize yourself with its keyboard shortcuts found under System Preferences > Keyboard > Shortcuts > App Shortcuts. Customizing these shortcuts to fit your workflow ensures smoother window management and avoids conflicts with other macOS shortcuts.



