Mac Keyboard Shortcut to Find and Replace: How to Use and Customize It
Discover how to use and customize the Mac keyboard shortcut to find and replace text quickly and efficiently in your documents.
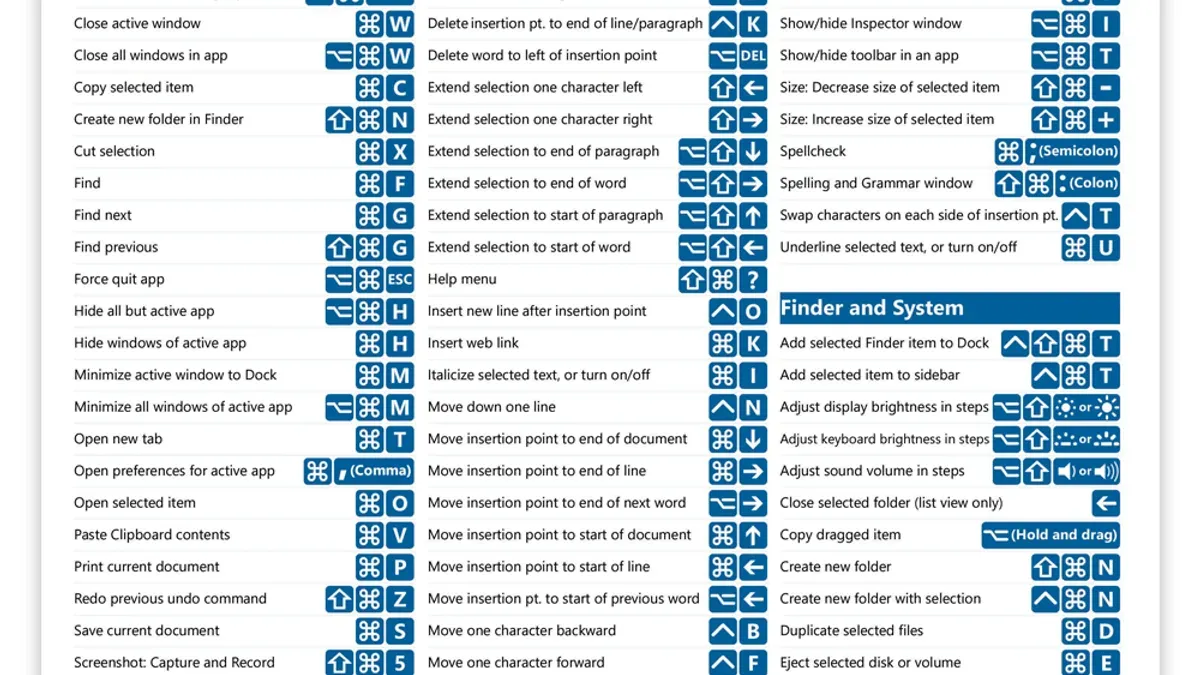
You are editing a document on your Mac and need to quickly replace multiple instances of a word or phrase. Instead of manually searching and editing each one, using the Mac keyboard shortcut to find and replace streamlines this process efficiently.
This article explains what find and replace means on Mac and why it matters, walks you through the default keyboard shortcuts, and shows how to customize them to suit your workflow. You will also learn how to adjust shortcuts within different Mac apps, tackle common troubleshooting issues, and discover practical tips to maximize your productivity with find and replace actions.
Key takeaways
- The default Mac shortcut for find and replace is Command + Shift + H in many apps like TextEdit and Pages.
- You can customize find and replace shortcuts via System Preferences under Keyboard > Shortcuts > App Shortcuts.
- Some apps require modifying shortcuts within their own preferences for find and replace functionality.
- Common issues include shortcut conflicts and incorrect app focus, which can be resolved by checking settings or restarting the app.
- Using find and replace with keyboard shortcuts saves significant time, especially when combined with batch editing and regex features where supported.
What find and replace means on Mac and why it matters
Find and replace is a fundamental function in text editing that allows you to locate specific words or phrases and substitute them with different text throughout a document or code file. On a Mac, this tool streamlines editing by reducing manual searching and typing, which is especially valuable when dealing with large documents or repetitive changes.
Using keyboard shortcuts for find and replace significantly speeds up the process compared to navigating menus with a mouse. For instance, pressing Command + F opens the find bar instantly, and Command + Option + F jumps directly to the replace feature. This can save several seconds per action, which adds up to minutes or more in extended editing sessions.
Common scenarios include correcting a misspelled term repeated throughout a report, updating variable names in code, or replacing placeholder text in templates. Imagine editing a 20-page document where you need to change a company name used 50 times; using shortcuts, you can perform this action in seconds rather than manually scanning each instance.
How to find and replace on Mac using default keyboard shortcuts
The standard shortcut to open the find bar on Mac is Command + F. This works consistently across native apps like TextEdit and Pages, as well as many third-party programs. However, when it comes to replace functionality, the shortcuts can vary.
For instance, in TextEdit, after pressing Command + F to open the find bar, you can reveal the replace field by clicking the drop-down arrow or pressing Command + Option + F. This shortcut immediately brings up the find and replace dialog, allowing you to enter text to find and what to replace it with.
In Microsoft Word for Mac, Command + F opens the Navigation pane for searching, but to access the traditional find and replace dialog directly, use Command + Shift + H. This shortcut opens a separate window where you can input the text to find and the replacement, with options like match case and whole words.
Google Docs on Mac uses Command + F to find, but replace requires clicking the three-dot menu in the search bar or using Command + Shift + H. Unlike native Mac apps, Google Docs relies on its web interface conventions, so shortcut behavior differs.
For example, in TextEdit, to replace “apple” with “orange,” press Command + Option + F, type “apple” in the find field and “orange” in replace, then use the buttons to replace occurrences one by one or all at once. In Word, pressing Command + Shift + H opens the replace dialog directly, where you can perform the same action with additional formatting options.
Understanding these variations helps you use find and replace efficiently across different Mac software without confusion.
How to change keyboard shortcuts on Mac for find and replace
To customize find and replace shortcuts on your Mac, start by opening System Preferences, then click Keyboard and select the Shortcuts tab. From the sidebar, choose App Shortcuts and click the + button to add a new shortcut.
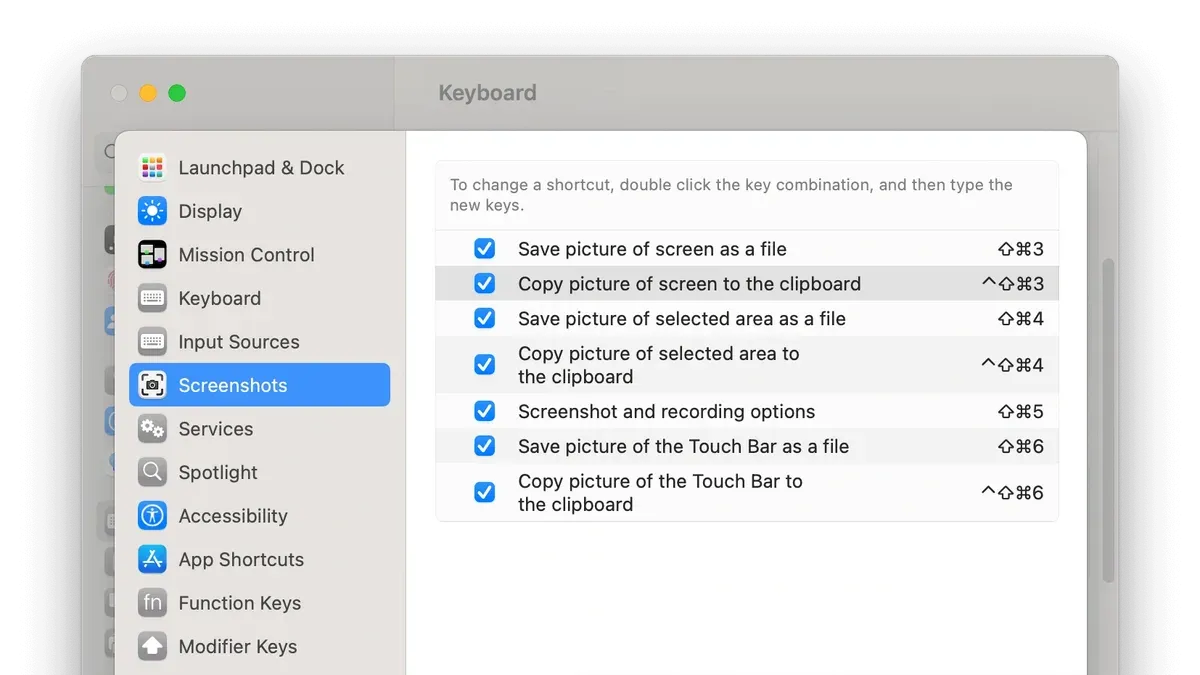
In the dialog that appears, you can target either all applications or a specific app by selecting it from the Application dropdown. Next, enter the exact menu command name you want to create or change, such as "Find…" or "Replace…"—this must match the menu text precisely. Finally, click the shortcut field and press the key combination you want to assign, like Command+Control+F, then hit Add.
For example, if you often use Pages but want a quicker replace shortcut, you could set Command+Control+R for "Replace…". Customizing shortcuts is useful when default combinations conflict with other apps or when you prefer easier-to-reach keys. Remember that setting conflicting shortcuts may cause unexpected behavior, so choose combinations thoughtfully.
This method works across macOS apps that use standard menu commands, giving you flexibility to tailor shortcuts for your workflow.
How to change shortcuts in Mac apps for find and replace
When system-level shortcut customization does not meet your needs, many Mac apps offer their own preferences for modifying keyboard shortcuts. This is especially useful when you want finer control or app-specific commands that the system settings cannot address.
For example, Microsoft Word lets you customize shortcuts within the app. To change the find and replace shortcut, open Word and go to Tools > Customize Keyboard. In the Categories list, select Edit, and then find the EditReplace command in the Commands list. Click inside the Press new keyboard shortcut box and enter the desired key combination, such as Command+Option+R. Press Assign to save the change, then close the dialog. This method overrides system shortcuts only within Word, avoiding conflicts elsewhere.
Google Docs, on the other hand, does not support in-app shortcut customization directly on Mac, so you must rely on system preferences or browser extensions. This highlights a limitation: app-specific customization is preferable when available, as it allows precise adjustments without affecting global shortcuts.
Common mistakes and troubleshooting with find and replace shortcuts on Mac
One frequent issue is shortcut conflicts with other system-wide or app-specific shortcuts. For example, Command+Shift+H, commonly used for replace in some apps, might clash with a browser’s history shortcut or a custom utility. When this happens, the find and replace function won’t activate as expected.
To resolve conflicts, check System Preferences > Keyboard > Shortcuts and review other shortcuts using your preferred key combination. You can reassign or disable conflicting shortcuts here to ensure your find and replace commands work smoothly.
Sometimes, shortcuts don’t respond because the app isn’t the active window or the text field is not editable. For instance, trying to use find and replace in a read-only PDF or a locked document will disable these shortcuts.
Diagnose shortcut issues by testing them in a simple app like TextEdit. If shortcuts fail there, restart the app or your Mac. Also, verify the shortcut is correctly assigned under System Preferences or the app’s own keyboard settings.
Remember to avoid assigning shortcuts already reserved by macOS features like Mission Control or Spotlight, which can prevent your customized find and replace shortcuts from working.
Practical tips to maximize efficiency with find and replace shortcuts
Integrating find and replace shortcuts into your daily workflow can significantly reduce editing time, especially when combined with navigation shortcuts like Command+G (Find Next) and Command+Shift+G (Find Previous). Using these together allows you to quickly cycle through instances before deciding to replace, enhancing precision.
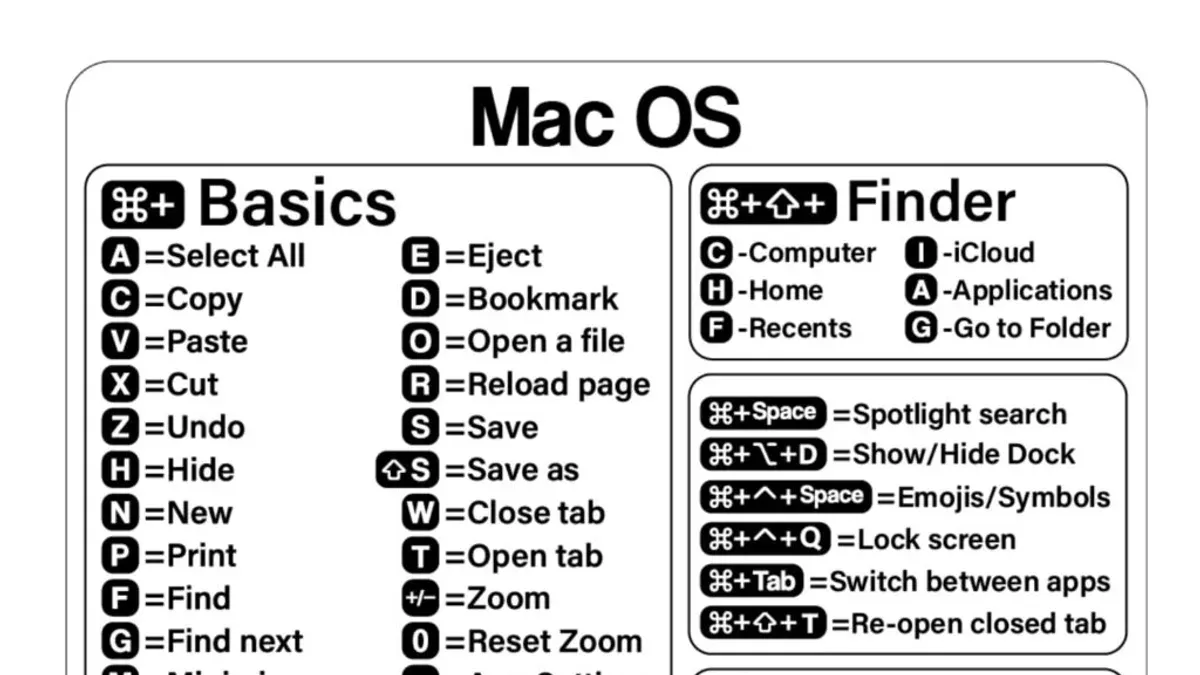
Advanced features such as wildcards and case sensitivity are accessible in many Mac apps through the find and replace dialog. For example, in Microsoft Word, after invoking the shortcut, you can enable "Use wildcards" under the "More" options to perform complex searches like replacing all dates matching a pattern. This reduces manual scanning and correction.
While shortcuts speed up routine replacements, manual menu commands remain useful for complex tasks requiring dialog customization or when shortcuts conflict with other app functions. For instance, if you need to review each replacement individually, using the menu's "Find and Replace" dialog offers more control.
Picture editing a 10,000-word document to replace a specific term: using shortcuts combined with navigation can cut the task time by at least half compared to manual menu navigation, streamlining repetitive edits and minimizing errors.
- Mac Keyboard Shortcut to Select a Word: How to Do It Fast and Customize
- Mac Keyboard Shortcut to Jump to End of Document Explained
- Mac Keyboard Shortcut to Jump to Start of a Line Explained
- Mac Keyboard Shortcut to Paste Without Formatting Explained
Frequently asked questions
How to find and replace shortcut?
On a Mac, the default shortcut to open the Find and Replace window is Command (⌘) + F to open Find, then Option (⌥) + Command (⌘) + F to open Find and Replace directly in some apps. This shortcut may vary depending on the application you are using, so checking the Edit menu's Find section can confirm the exact keys.
How to find and replace on Mac quickly?
To quickly perform find and replace, use the shortcut Command (⌘) + F to locate the search bar, then access Replace by clicking the corresponding button or pressing Option (⌥) + Command (⌘) + F if supported. Typing your target text and replacement ensures fast editing without manually scanning documents.
What is the find and replace shortcut on Mac?
The standard shortcut for Find is Command (⌘) + F. For Find and Replace, many Mac apps use Option (⌥) + Command (⌘) + F, but this can differ by software. Always verify the shortcut in the Edit menu under Find to be certain.
How to change keyboard shortcuts on Mac for find and replace?
Go to System Settings > Keyboard > Keyboard Shortcuts > App Shortcuts. Click the '+' button, select the app or choose All Applications, enter the exact menu command name like “Find and Replace…”, then set your preferred shortcut. Changes take effect immediately but test to avoid conflicts.
Can I customize find and replace shortcuts in individual Mac apps?
Yes, many Mac apps allow custom shortcuts either through the system Keyboard Shortcuts pane or within the app’s own preferences under Keyboard or Shortcuts. For example, Microsoft Word and some text editors provide their own shortcut customization panels for find and replace commands.
What this guide does not cover and when to seek other solutions
This guide does not cover find and replace functionality in command-line tools or advanced scripting environments, which require different methods such as using Terminal commands or scripting languages like AppleScript or Python. Some third-party Mac applications may not support keyboard shortcut customization or use unique shortcuts that differ from macOS standards, so consult those apps’ help resources for specific instructions. Additionally, changing system-wide keyboard shortcuts through System Settings > Keyboard > Keyboard Shortcuts can sometimes create conflicts with other app shortcuts or macOS functions, which may require troubleshooting or reverting changes.
The most useful next step is to open System Settings and navigate to Keyboard > Keyboard Shortcuts > App Shortcuts to create or modify your find and replace shortcuts precisely. This lets you tailor shortcuts per app or system-wide to better fit your workflow, while avoiding conflicts by testing changes incrementally.