How to Open and Run.msi Files on Mac: A Clear Step-by-Step Guide
Discover practical methods to open and run.msi files on your Mac using extraction tools, virtualization software, and compatibility layers.
You’ve downloaded or been sent a file with a.msi extension and want to open it on your Mac. Since.msi files are installer packages designed for Windows, macOS does not support them natively, which can cause confusion and frustration.
This article explains how to open.msi file on Mac effectively. You'll learn why these files don’t work directly on macOS, practical ways to extract or run them using third-party tools, virtualization software, or compatibility layers, and how to convert them to Mac-friendly formats.
Key takeaways
- .msi files are Windows installer packages not supported natively on Mac.
- You can extract contents of.msi files on Mac using tools like The Unarchiver or Keka.
- To run.msi installers, virtualization software like Parallels Desktop or VMware Fusion is required.
- Wine and Wine-based apps offer limited ability to run some Windows installers but with variable success.
- Converting.msi files to Mac-compatible installers is possible but often complex and not guaranteed.
Before you start: What is a.msi file and why it matters
A.msi file is a Windows Installer Package used primarily on Microsoft Windows operating systems. It contains all the data and instructions needed to install software, including files, registry entries, and configuration settings tailored specifically for Windows environments.
Unlike Windows, Mac OS uses different installer formats such as.dmg and.pkg files, which are designed to work with Mac’s file system and installation processes. This fundamental difference means that.msi files are not natively supported on Mac computers.
Understanding the Windows-centric design of.msi files sets realistic expectations when handling them on a Mac. Since these files are built to interface with Windows Installer services, they cannot be opened or executed directly on Mac OS without additional tools or workarounds.
Official documentation from Microsoft confirms that.msi files are proprietary to Windows Installer technology, while Apple’s support resources emphasize the use of.dmg and.pkg for Mac software installation. This technical incompatibility explains why opening or running.msi files on a Mac requires specific methods beyond the standard double-click installation.
How to open.msi file on Windows: The standard process
On Windows, opening a.msi file is straightforward because the operating system natively supports this installer format through the Windows Installer service. When you double-click a.msi file, Windows automatically launches this service to execute the embedded installation instructions.
This service manages the entire installation process, including extracting files, configuring system settings, and registering components as specified by the installer package. This seamless integration is why.msi files are typically simple to use on Windows without requiring additional software.
- Locate the.msi file in File Explorer.
- Double-click the.msi file. The Windows Installer service should launch, opening the installation wizard.
- Follow the on-screen prompts to proceed with the installation, such as agreeing to license terms and selecting installation options.
- Once completed, the installer will confirm that the application has been installed successfully.
Microsoft documentation describes the Windows Installer as "a Windows service that manages the installation and removal of software." This native support means users rarely encounter compatibility issues when handling.msi files on Windows.
Why do.msi files not work on Mac natively?
Mac OS lacks the Windows Installer service, which is essential for interpreting and executing.msi installer packages. This service is a core component of the Windows operating system, responsible for managing the installation, maintenance, and removal of software distributed as.msi files.
Additionally, the system architecture and application programming interfaces (APIs) of Mac OS differ fundamentally from those of Windows. Mac OS uses a Unix-based kernel and frameworks, whereas Windows relies on the Win32 API and related components. These differences prevent Macs from directly executing.msi files, as the instructions within the installer rely on Windows-specific system calls and services.
Apple does not provide official support or universal compatibility layers for.msi files. Unlike executable formats such as.dmg or.pkg designed for Mac,.msi files are not recognized by macOS’s Installer app or other native utilities. Compatibility matrices from developer documentation confirm that.msi is exclusive to Windows environments, and no native macOS APIs handle.msi execution or extraction.
How to open.msi file on Mac using third-party extraction tools
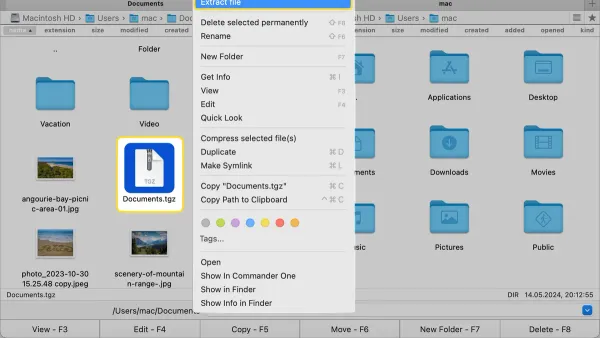
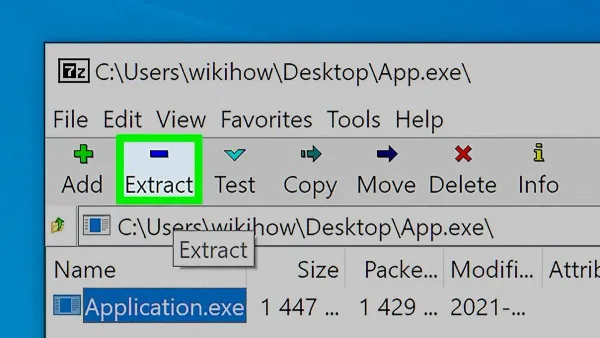
You can extract the contents of a.msi file on your Mac using third-party archive utilities, allowing you to access files packed inside without running the installer. This method is useful if you want to inspect or manually retrieve specific files from the.msi package.
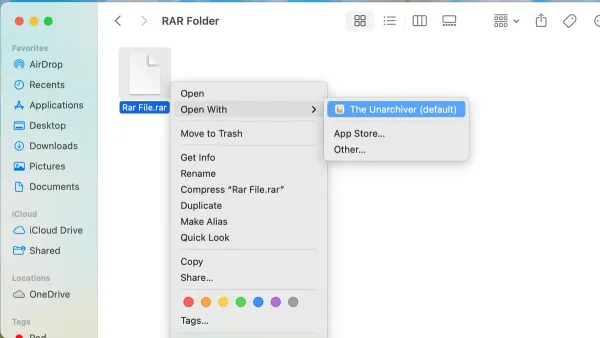
- Download and install a compatible extraction tool such as The Unarchiver or Keka from their official websites or the Mac App Store.
- Locate the.msi file you want to open in Finder.
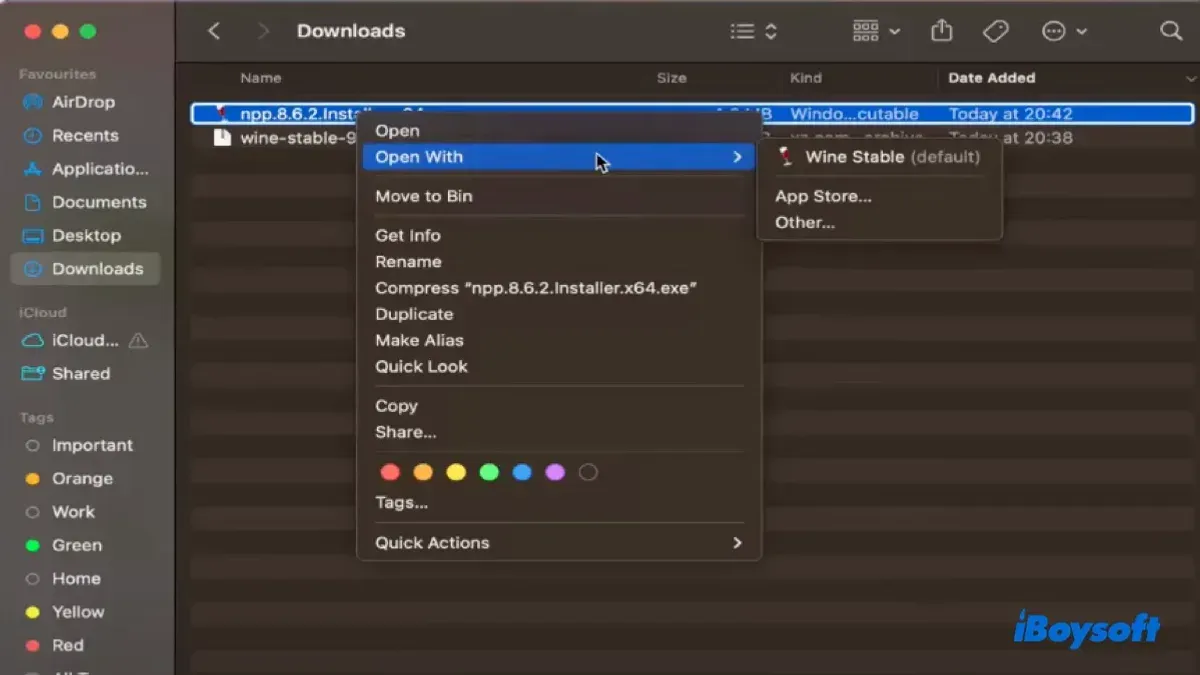
- Right-click the.msi file, choose Open With, and select your installed extraction tool (e.g., The Unarchiver or Keka). The tool will then extract the archive.
- Choose a destination folder for the extracted content when prompted. After extraction, open this folder to view the files and subfolders contained within the.msi.
- Inspect the extracted files—these typically include folders such as
Program Files,Data, and various.dll or.exe files, depending on the installer.
Keep in mind, this process only extracts files; it does not execute installation scripts or configure software on your Mac. For full installation, you’ll need a Windows environment or compatible virtualization.
Example: Extracting a sample.msi file might reveal a folder structure with _Streams, _Tables, and Binary directories containing installation data files.
How to run.msi file on Mac using virtualization software
To run a.msi installer on your Mac with full compatibility, you can use virtualization software to create a Windows environment. Popular virtualization apps include Parallels Desktop, VMware Fusion, and the free VirtualBox.
- Download and install your chosen virtualization software. For example, get Parallels Desktop from its official site and follow the installation prompts.
- Set up a new Windows virtual machine (VM) within the virtualization software. You will need a valid Windows ISO file and a Windows license key to complete this step.
- Start the Windows VM and complete the initial Windows setup, including account creation and system updates.
- Within the Windows VM, locate your.msi file either by transferring it from your Mac or downloading it directly inside the VM.
- Double-click the.msi file inside the Windows VM to launch the Windows Installer, then follow the on-screen instructions to install the software as you would on a native Windows PC.
This method offers full compatibility since the.msi runs in an actual Windows environment. However, it requires purchasing a Windows license and sufficient hardware resources—virtual machines can consume several gigabytes of RAM and CPU power, which might impact Mac performance.
Performance varies depending on your Mac's specifications and the virtualization software used. Parallels Desktop often provides smoother integration but is paid, while VirtualBox is free but less polished.
Visual confirmation of VM setup includes the Windows desktop appearing inside a window on your Mac, and successful.msi installation is indicated by the usual Windows installation dialogs completing without errors.
How to run.msi file on Mac using Wine or Wine-based apps
Wine is a compatibility layer that allows you to run some Windows applications and installers, including certain.msi files, directly on Mac without setting up a full Windows virtual machine. Installing Wine or Wine-based apps like CrossOver provides a user-friendly way to handle Windows software on Mac.
- Download and install Wine or a Wine-based app such as CrossOver from their official websites. Once installed, open the Wine interface or CrossOver's application menu.
- Locate the.msi file you want to run. In Wine, you can run the installer by opening Terminal and typing wine msiexec /i path/to/installer.msi. In CrossOver, use the "Run Command" feature, select the.msi file, and start the installation.
- Follow the on-screen installation prompts as you would on Windows. Successful launch or installation indicates Wine is handling the.msi file correctly.
Wine supports many but not all.msi installers, with better success on lightweight or simple applications. Complex installers requiring deep Windows-specific services or drivers often fail or cause stability issues. For example, basic utility installers frequently run well, while large software suites may not install properly.
Using Wine is a practical option if you want to avoid a full Windows VM, but be aware of its limitations and test the specific.msi file for compatibility before relying on this method.
How to convert.msi files to Mac-compatible formats
Converting.msi installer files to Mac-compatible formats such as.pkg or.dmg involves repackaging the Windows installer contents for Mac OS installation frameworks. This method is mostly practical for developers or advanced users who need to adapt software not available in native Mac formats.
Several tools exist that extract.msi contents and facilitate repackaging into Mac installer bundles. For example, utilities like pkgbuild and productbuild (command-line tools included with Mac OS) allow manual creation of.pkg installers from extracted files. Third-party apps like Packages can also help build GUI-based Mac installers from these extracted files.
Here is a basic manual repackaging procedure:
- Use a third-party extraction tool (e.g., msiextract) to extract the.msi content. You should see all installation files unpacked into a folder.
- Organize the extracted files into a folder structure that matches Mac OS conventions (e.g., placing binaries in /Applications or /usr/local/bin). Once done, the folder should reflect the desired install locations.
- Use pkgbuild to create a component package from the folder:
pkgbuild --root <folder> --identifier com.example.app --version 1.0 output.pkg. Successful execution produces a.pkg file ready for installation. - Optionally, use productbuild to create a distribution package for more complex installers.
Despite these possibilities, this approach has notable challenges. The repackaged installer may lack necessary Windows-specific dependencies or scripts, causing incomplete installations or application failures. Experts warn that repackaging is often error-prone and rarely guarantees full functional parity with the original Windows installer.
This method is best suited when no native Mac version exists and virtualization or Wine solutions are not viable. Otherwise, using a Windows environment to run the.msi or obtaining a Mac-native installer is generally more reliable.
Troubleshooting common problems when opening or running.msi files on Mac
If extraction tools do not recognize your.msi file, ensure the file is not corrupted or partially downloaded. Common error messages include "Invalid archive" or "Cannot open file." Try re-downloading the file or using a different extraction tool like The Unarchiver or Keka.
Virtual machines may display errors such as "Windows installation failed" or experience sluggish performance. Verify your VM settings have sufficient RAM (at least 4 GB recommended) and CPU cores allocated. Also, ensure virtualization is enabled in your Mac's BIOS/firmware. Updating virtualization software to the latest version can resolve compatibility issues.
With Wine or Wine-based apps, errors like "DLL not found" or application crashes are frequent. Installing required Windows dependencies via Winetricks, such as.NET Framework or Visual C++ Redistributables, often fixes these problems. Consult the Wine AppDB for specific installer compatibility notes.
Missing Windows dependencies during installation can cause silent failures or incomplete installs. Check the installer’s documentation for prerequisites and install them within your VM or Wine environment. Official forums such as Microsoft Community, WineHQ, and virtualization software support pages provide troubleshooting guides and user discussions.
- Confirm the.msi file integrity by re-downloading or trying another extraction tool; success is when the file contents open without errors.
- Adjust VM resource allocation in settings (RAM, CPU), enable virtualization technology, and reboot the VM; success is a smooth Windows startup without error messages.
- Use Winetricks to install missing dependencies like.NET or VC++ redistributables; success is the installer launching without missing DLL errors.
- Consult official support forums for error-specific solutions; success is finding a documented fix or workaround matching your error.
Refer to official screenshots and guides linked on support sites for visual aid during troubleshooting.
Frequently asked questions
Do msi files work on mac?
No,.msi files do not work natively on Mac because they are Windows Installer packages designed specifically for Windows operating systems. Macs cannot execute these files directly without additional software or methods.
How to open msi file on mac?
You can open the contents of an.msi file on Mac using third-party extraction tools like The Unarchiver or Keka, which allow you to view the files inside but not run the installer itself. For running the installer, virtualization or compatibility layers are required.
How to open a.msi file?
On Windows, you simply double-click the.msi file to launch the Windows Installer. On Mac, you need to use extraction tools to access its contents or run Windows via virtualization software to open and execute the.msi installer.
How to run a.msi file?
Running a.msi file requires a Windows environment. On a Mac, you can run.msi files by installing Windows through virtualization software like Parallels Desktop or VMware Fusion, or by using Wine-based applications that provide a Windows compatibility layer.
How do i open a msi file on mac?
To open a.msi file on Mac, use extraction tools such as The Unarchiver to unpack the file’s contents. If you want to install software from the.msi, you must run it within a Windows environment set up via virtualization or Wine, since macOS does not support.msi installers directly.
What this advice does not cover and who should look elsewhere
This article does not cover running or opening.msi files for software that requires deep Windows system integration, kernel-level drivers, or hardware-specific components. Such software cannot run properly on a Mac without a full Windows environment because virtualization or compatibility layers do not provide direct access to low-level system features.
If your.msi file installs software that depends on Windows-specific drivers or system services, your best option is to use a full Windows installation via Boot Camp (on Intel Macs), virtualization software like Parallels Desktop or VMware Fusion, or a dedicated Windows PC.
The single most useful next step is to determine exactly what the.msi file contains and whether it is possible to extract its contents using tools like The Unarchiver or Keka. If extraction is sufficient, this avoids the need for complex virtualization setups. Otherwise, setting up a virtual machine with Windows is the most reliable way to run.msi installers and their software on your Mac.