
How to Open.ARW Files on Mac: Clear Step-by-Step Guide
Discover simple steps to open.ARW files on Mac using built-in apps, professional editors, and conversion tools for Sony raw images.
You’ve just transferred your latest Sony camera photos to your Mac, only to find the.ARW files don’t open as easily as JPEGs. This is a common scenario for photographers encountering raw image files on Mac systems. Understanding how to open.arw file on Mac is essential to view, edit, or convert these high-quality Sony raw files efficiently.
This article guides you through practical steps to access.ARW files using built-in Mac apps, professional software options, and conversion tools. You’ll also learn about the ARW format’s nature, cross-platform compatibility, and how to troubleshoot common issues. Whether you’re a beginner or an advanced user, this balanced guide helps you select the workflow and software best suited to your needs.
Key takeaways
- Preview.ARW files easily with macOS Preview or Photos apps.
- Use professional editors like Adobe Lightroom or Capture One for advanced editing.
- Convert.ARW files to JPEG or TIFF using free tools or built-in converters.
- Consider cross-platform options if you work between Mac and Windows.
- Troubleshoot common issues like missing codecs by updating software or installing plugins.
Before you start: What you need to open.ARW files on Mac
.ARW files are Sony’s proprietary raw image format, capturing unprocessed sensor data from your camera. Unlike JPEGs, raw files retain full image detail and dynamic range but require specialized software to interpret and edit them properly.
To work with.ARW files on Mac, you need compatible hardware and software. Most Macs running macOS Mojave (10.14) or later support native raw image handling in built-in apps like Preview and Photos, but full editing may require professional tools.
Ensure your Mac has sufficient storage space because raw files are significantly larger than JPEGs. You may also want to convert.ARW files to more common formats like TIFF or DNG for compatibility with other applications.
Software options range from free apps like Apple Photos and Preview to paid professional editors such as Adobe Lightroom and Capture One, which offer advanced raw processing tailored to Sony cameras.
- Check your macOS version by clicking the Apple menu > About This Mac. You should see Mojave (10.14) or later for native support.
- Verify available disk space in the Storage tab of About This Mac; aim for at least several gigabytes free to manage large raw files.
- Decide which software fits your needs: use Photos for basic viewing or install Lightroom for advanced editing.
How to open.ARW files on Mac using built-in apps
The simplest way to view.ARW files on a Mac without additional software is by using the Preview app. Preview supports raw files natively, allowing you to open and examine your Sony camera images quickly.
- Locate the.ARW file in Finder.
- Right-click the file and select Open With > Preview.
- The image will open in Preview, where you can zoom, rotate, and inspect the photo details.
Preview offers only basic viewing capabilities; it does not support raw editing or batch processing of.ARW files. For importing and organizing, the Photos app on macOS can also handle.ARW files. Simply drag your.ARW images into Photos to import them. You will be able to view and perform simple edits like cropping or exposure adjustment.
Apple has enhanced native raw support over recent macOS updates, improving compatibility and color accuracy for Sony raw formats. However, for advanced editing or batch workflow, dedicated software remains necessary.
How to open.ARW files on Mac with professional photo editing software
For advanced editing of.ARW files on Mac, Adobe Photoshop and Adobe Lightroom are widely used tools offering comprehensive RAW processing capabilities.
- Open Adobe Lightroom and click the Import button in the Library module. Navigate to your.ARW files, select them, and click Import. You will see thumbnails appear in your catalog, ready for non-destructive editing.
- In Adobe Photoshop, open the.ARW file directly by selecting File > Open and choosing your file. Adobe Camera Raw will launch automatically, allowing you to adjust exposure, white balance, and other RAW settings before opening the image for further editing.
Dedicated RAW editors such as Capture One and ON1 Photo RAW offer specialized tools tailored for Sony.ARW files, with enhanced color profiles and tethered shooting support.
| Software | RAW Support | Color Editing | Tethered Capture | Batch Processing | Workflow Integration |
|---|---|---|---|---|---|
| Adobe Lightroom | Excellent | Advanced | Limited | Yes | Strong catalog and export tools |
| Adobe Photoshop | Excellent | Extensive via Camera Raw | No | Limited | Layer-based editing |
| Capture One | Best for Sony RAW | Superior color control | Yes | Yes | Professional tethering and session management |
| ON1 Photo RAW | Strong | Robust | Yes | Yes | All-in-one editing suite |
Choosing between these options depends on your workflow: Lightroom excels for catalog management and batch edits, Photoshop is ideal for pixel-level retouching, while Capture One and ON1 offer enhanced color fidelity and tethered capture optimized for Sony cameras.
How to convert.ARW files to other formats on Mac
Converting.ARW raw files to more common formats like JPEG, TIFF, or PNG allows easier sharing and compatibility with a wider range of software. You can do this using built-in apps or dedicated converters, depending on your needs.
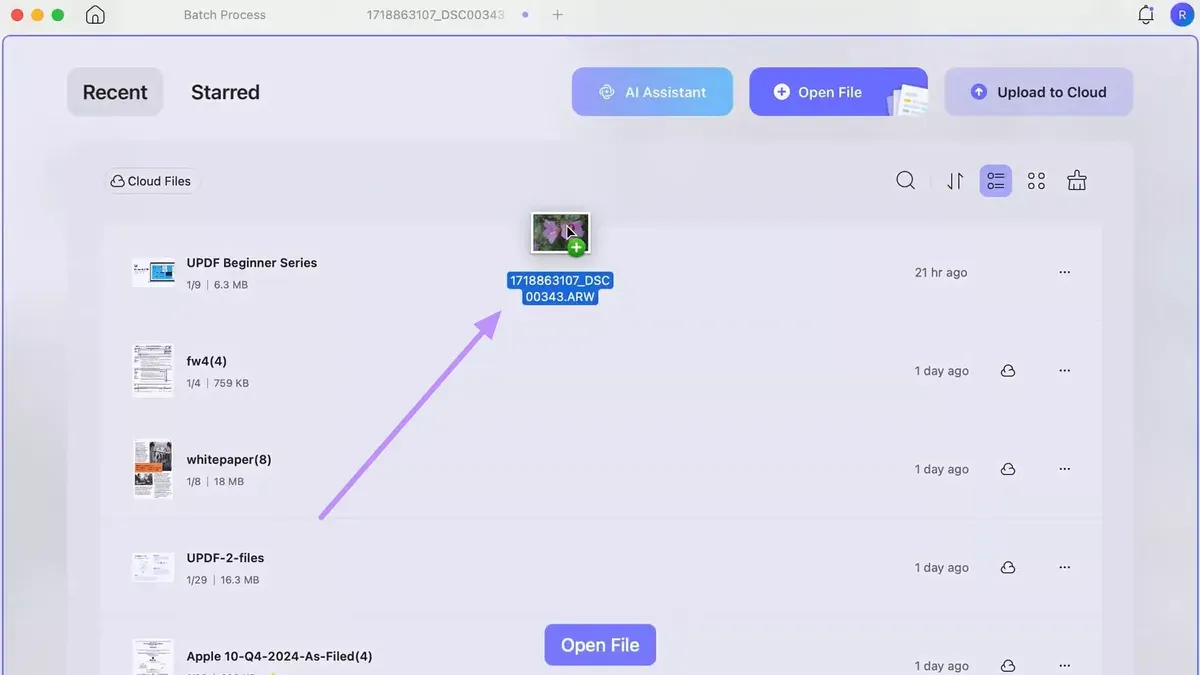
Using Preview or Photos to export.ARW files
- Open your.ARW file in Preview or Photos.
You should see the image displayed clearly. - Go to the File menu and select Export (in Preview) or Export from the toolbar in Photos.
An export dialog box will appear. - Choose your desired format (JPEG, TIFF, or PNG) from the Format dropdown menu.
The selected format will be applied to the exported file. - Adjust quality settings if available (for example, JPEG quality slider in Preview).
Higher quality preserves more detail but increases file size. - Select the destination folder and click Save.
Your file is converted and saved in the chosen format.
Using dedicated converters and Adobe Lightroom for batch conversion
For multiple.ARW files, Adobe Lightroom allows batch exporting with format and quality presets, streamlining conversion. Dedicated apps like RawTherapee or XnConvert also provide bulk conversion options.
Batch converting saves time but may require initial setup of export parameters. Lightroom preserves metadata and color profiles better than some standalone converters.
Pros and cons of converting.ARW files
- Pros: Converted files are easier to open on various devices and apps, smaller in size (JPEG), and more shareable.
- Cons: Conversion to JPEG or PNG compresses or flattens data, losing some dynamic range and editing flexibility compared to the original raw file.
Preserving image quality during conversion
Choose TIFF or PNG for lossless conversion when editing flexibility is important. JPEG should be used when smaller file size and compatibility are priorities. For example, a 25MB.ARW file often converts to a 5MB JPEG with slight quality loss visible in fine details and shadows.
How to open.ARW files on Windows and cross-platform considerations
To view.ARW files on Windows, you can use the built-in Photos app, but you must first install the Microsoft Camera Codec Pack for raw image support. Alternatively, FastStone Image Viewer offers a free, lightweight option with basic editing and batch processing capabilities. These apps differ from Mac counterparts, as Mac native apps often integrate better with system-wide color profiles and offer more seamless previews.
Transferring.ARW files between Mac and Windows is straightforward using external drives formatted as exFAT or via cloud storage services like OneDrive or Google Drive, ensuring file integrity without format alteration.
For consistent editing across platforms, universal raw converters such as Adobe DNG Converter can standardize.ARW files into DNG format, compatible with most editors on both Mac and Windows. Cloud-based editors like Adobe Lightroom Web also provide cross-platform access without file format concerns.
Windows 7 users may face challenges opening.ARW files directly due to limited codec support. Installing third-party raw codecs or using software like FastStone or Adobe Lightroom can overcome these limitations.
How to view.ARW files on Windows
Windows does not natively support.ARW raw files, so you need to install additional software or codecs to view them effectively.
- Download and install the Raw Image Extension from the Microsoft Store. After installation, open File Explorer and navigate to your.ARW file to see a thumbnail preview and open it with the Photos app.
- If you prefer a free third-party viewer, download and install IrfanView along with its plugins. Open IrfanView, then use File > Open to select your.ARW file. You should see the raw image rendered properly.
- Another free option is RawTherapee, which allows you to view and perform basic adjustments on.ARW files. Launch RawTherapee and open the.ARW file through File > Open.
- Note that default Windows tools like Photos and File Explorer offer limited raw editing capabilities and sometimes may not display correct thumbnails without the Raw Image Extension.
- For quick previews without installing full editing software, use the Raw Image Extension combined with the built-in Photos app or lightweight viewers like IrfanView.
Using these methods, you can view.ARW images on Windows with ease. Screenshots typically show the correct rendering of Sony raw files in these viewers, confirming proper setup.
How to open.ARW files in Photoshop
- Launch Adobe Photoshop and select File > Open from the menu. Navigate to your.ARW file and click Open. Photoshop will automatically open the file in the Adobe Camera Raw (ACR) plugin interface.
- In the Adobe Camera Raw window, adjust raw processing settings such as Exposure, Contrast, Highlights, and Shadows using the sliders on the right panel. These changes preview immediately in the image preview area.
- Use additional ACR tools like the White Balance selector or Detail tab for sharpening and noise reduction to refine your image before proceeding.
- Once satisfied with adjustments, click Open Image at the bottom right. The file will open in Photoshop’s main workspace as a smart object or rasterized layer, depending on your Camera Raw preferences.
- Make further edits in Photoshop as needed. When finished, save your work by selecting File > Save As and choose Photoshop (.PSD) or TIFF format for maximum quality and compatibility with layered edits.
- If Photoshop fails to open the.ARW file, ensure your Adobe Camera Raw plugin is updated to the latest version via the Creative Cloud app. Alternatively, convert the.ARW file to DNG format using Adobe DNG Converter to improve compatibility.
How to edit.ARW files effectively on Mac
Editing.ARW raw files on Mac requires a workflow that preserves image quality through non-destructive adjustments. Adobe Lightroom is a popular choice, combining powerful cataloging with precise editing tools designed for raw photos.
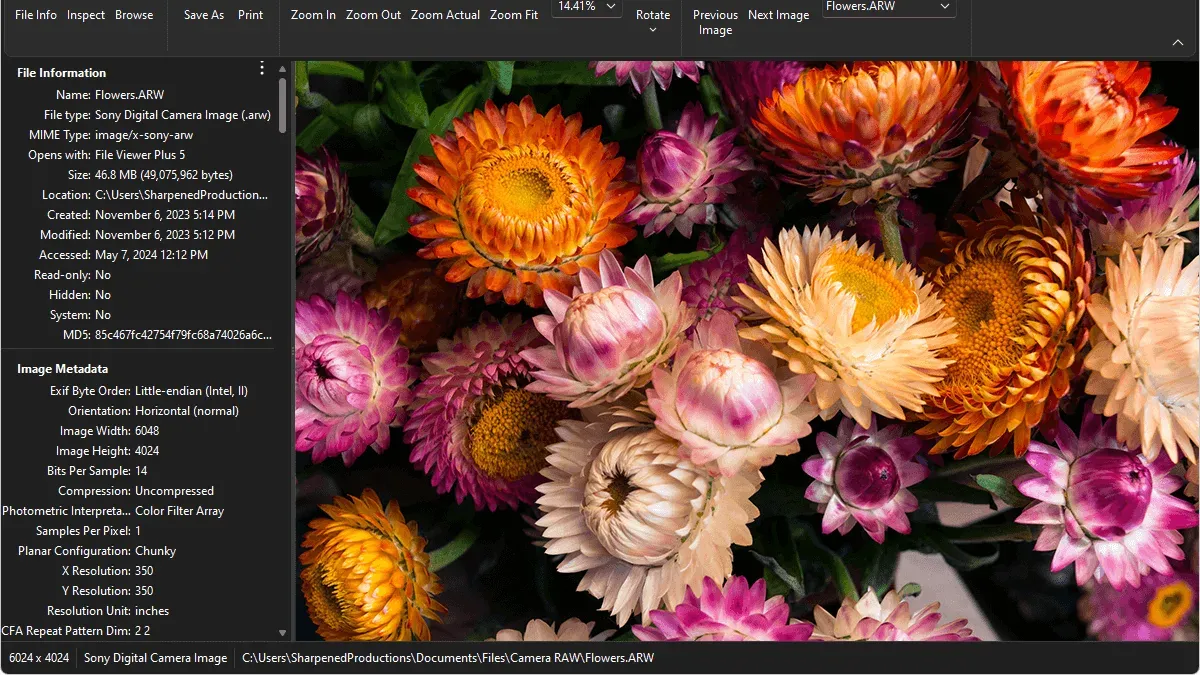
- Import your.ARW files into Lightroom by selecting File > Import Photos and Videos. You should see thumbnails appear in the Library module.
- Switch to the Develop module to access editing controls. Your raw image will display with full data, allowing extensive adjustments without quality loss.
- Begin with exposure correction using the Exposure slider to balance brightness. Adjust Highlights and Shadows to recover detail in bright and dark areas. Successful adjustment reveals balanced image lighting.
- Use the White Balance tool to correct color temperature and tint, matching the scene’s natural tones. The photo should now have neutral, realistic colors.
- Apply noise reduction under the Detail panel, increasing Luminance to reduce grain without sacrificing sharpness. The image should appear smoother with fine details intact.
- Enhance colors selectively with the HSL/Color panel, adjusting Hue, Saturation, and Luminance for targeted refinement.
- After editing, export your image by choosing File > Export. Select JPEG or TIFF format, set resolution (e.g., 300 ppi for print), and specify output size. Exported files will preserve your edits ready for web or print use.
For example, importing a shadow-heavy landscape.ARW file into Lightroom, applying exposure +0.75, reducing highlights by -30, and increasing shadows by +40 can reveal hidden details. Coupled with moderate noise reduction (Luminance around 20), the final export presents a vivid image with balanced light and minimal grain.
Troubleshooting common problems opening or viewing.ARW files
If your.ARW files won’t open on Mac or Windows, start by checking the exact error message. Messages like “Unsupported file format” or “Cannot open file” often indicate software incompatibility or missing updates.
- Update your photo software and operating system to the latest versions. This ensures support for recent Sony camera models and raw formats. After updating, try opening the.ARW file again; it should open without errors.
- If you see an error about a corrupted file, try opening the file in a different app like Adobe Lightroom or RawTherapee. If the file still doesn’t open, the file may be damaged. Use specialized repair tools such as Stellar Repair for Photo to attempt recovery. Successful repair will allow you to view or edit the image.
- If native macOS apps like Preview or Photos fail to open the.ARW file, switch to third-party software designed for raw images. Programs like Capture One or ON1 can handle problematic files and offer more robust support.
- For Windows users, install the latest Raw Image Extension from the Microsoft Store to improve compatibility. If problems persist, try alternative viewers like IrfanView.
- When all else fails, check if the file extension is correct and the file was fully transferred or copied. Incomplete file transfers often cause open failures.
Following these steps helps resolve most common issues with.ARW files, enabling you to access and work with your Sony raw images efficiently.
- How to Open and View.NEF Files on Mac and Windows
- How to Open.cr3 Files on Mac: Complete Step-by-Step Guide
- How to Open.heic Files on Mac: Clear Step-by-Step Methods
- How to Open.webp Files on Mac: Practical Step-by-Step Methods
Frequently asked questions
How to open arw file?
You can open an ARW file using the Preview app on your Mac by simply double-clicking the file, or by importing it into professional photo editing software like Adobe Photoshop or Lightroom. If the file doesn't open directly, ensure your software supports Sony’s ARW raw format and consider updating to the latest version. Additionally, converting the ARW file to a more common format like JPEG or TIFF is an option if viewing or editing software lacks native support.
How to open arw files on windows?
On Windows, you can open ARW files using the Photos app with the Raw Image Extension installed from the Microsoft Store, which adds support for Sony raw files. Alternatively, use professional software such as Adobe Lightroom or Capture One, which handle ARW files natively. If these options are not available, converting the ARW files to JPEG or TIFF using a dedicated converter can provide compatibility with more common image viewers.
How to view arw files on windows?
Viewing ARW files on Windows requires either enabling the Raw Image Extension in the Microsoft Store or using specialized photo software like Adobe Photoshop or Lightroom. Without these, you can convert the files to JPEG for easy viewing. Some free applications like IrfanView with plugins may also display ARW files, though support can vary by version.
How to convert arw file?
To convert an ARW file, use software like Adobe Lightroom or free converters such as RawTherapee, which allow exporting to formats like JPEG, TIFF, or PNG. Open the ARW file within the application, adjust any desired settings, then use the export or save-as function to select your preferred format. This conversion enables easier sharing and compatibility with non-raw image viewers but may reduce editing flexibility.
How to view arw files?
Viewing ARW files depends on your platform: Macs can use Preview or Photos, while Windows users need the Raw Image Extension or photo editing software that supports raw formats. Some camera manufacturers provide their own viewing software compatible with ARW files. For a quick view without conversion, use applications designed for raw images that maintain the file’s quality and metadata.
Limits of this guide and when to seek advanced solutions
This guide does not cover professional color grading workflows that require specialized hardware calibration or software beyond typical consumer-level photo editors. If you need precise color management, advanced retouching capabilities, or integration with video workflows, consider dedicated color grading tools like DaVinci Resolve or hardware-calibrated monitors paired with professional-grade software. Additionally, this article focuses on general use cases and may not address camera-specific raw processing nuances or the latest proprietary updates from Sony.
The most useful next step is to choose the software that fits your current needs and skill level and start by importing a sample.ARW file directly into it. For many users, beginning with Apple’s built-in Preview or Photos app offers a straightforward introduction. From there, explore the software’s file import options, paying close attention to settings such as raw conversion profiles or color space choices, to get the best out of your Sony.ARW files on your Mac.



