
How to Export Emails to PDF in Mail App: Step-by-Step Guide
Discover simple steps to export emails to PDF in Mail app on Mac, iPhone, and iPad, including tips for handling multiple emails and Outlook users.
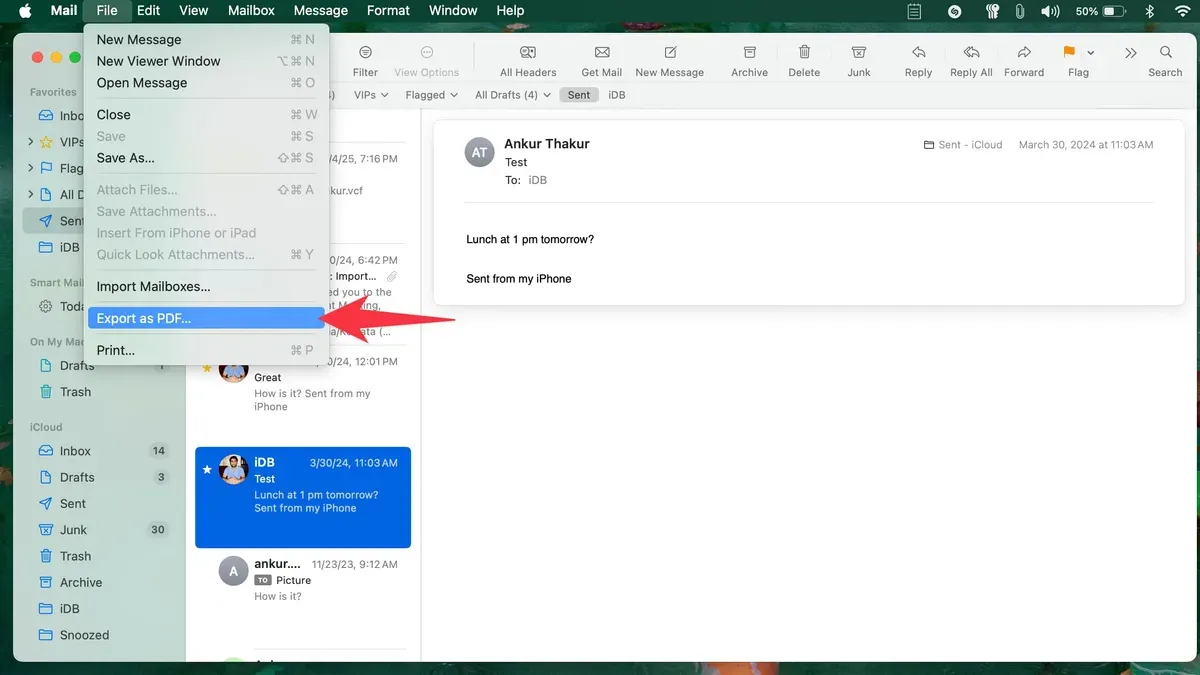
Imagine you need to save an important email for your records or share it with a colleague in a universally accessible format. You might wonder how to export emails to PDF in Mail app efficiently without losing formatting or attachments. This guide walks you through clear, step-by-step instructions to export both single and multiple emails as PDFs using the Mail app on your Mac, along with helpful tips for Outlook users and iPhone or iPad owners.
Whether you want to archive correspondence, comply with documentation requirements, or simply keep a backup, this article covers everything from preparing your system to troubleshooting common issues. You’ll learn practical methods that go beyond basic exporting, ensuring you can save your emails exactly how you need them.
Key takeaways
- You can export a single email to PDF on Mac via the Mail app’s File menu using “Export as PDF.”
- To save multiple emails at once, select them and use the Print dialog’s “Save as PDF” option for batch exporting.
- Outlook users need to use print-to-PDF or third-party tools since Outlook does not natively export to PDF.
- On iPhone and iPad, use the Share button and select “Print,” then pinch out on the preview to save emails as PDFs.
- Common issues include missing attachments or formatting changes; the guide explains simple fixes for these problems.
Before you start: What you need to export emails to PDF
To export emails to PDF successfully, you need to have access to the Mail app on your Mac or iOS device. This includes Macs running macOS versions that support the native Mail app, as well as iPhones and iPads with iOS or iPadOS that include the Mail app. For users working with Outlook emails, you’ll need either the Outlook desktop app installed on your computer or access to the Outlook web version through a browser.
Basic familiarity with your device’s printing and file-saving functions is essential because exporting emails to PDF relies on the built-in print-to-PDF capability. This means you'll use the print dialogue to create the PDF file, so knowing how to navigate print menus and save files will make the process smoother.
Optionally, having a PDF viewer or editor like Preview on Mac or a third-party app on iOS can help you review and manage the PDFs after export. Supported devices include Macs with macOS, iPhones, and iPads with current iOS or iPadOS versions, along with Outlook desktop versions compatible with your operating system or Outlook on the web.
- Ensure your device is updated to a macOS or iOS version that supports the Mail app’s printing features. You should be able to open an email and access the Print option from the File menu or share sheet.
- Open the Mail app and confirm you can view your emails. When you select an email, you should see options like Reply, Forward, and Print available.
- For Outlook users, verify you can open your emails either in the Outlook desktop app or through Outlook on the web. You should be able to access a print option in these interfaces.
- Confirm that your device lets you save or export a file as PDF from the print dialogue. This typically appears as a “Save as PDF” option or a PDF dropdown menu.
- If available, launch a PDF viewer or editor to open a test PDF file. This step ensures you can review your exported emails after saving.
How to export an email to PDF in the Mail app on Mac
Exporting a single email to PDF in the Mail app on Mac is straightforward and utilizes built-in macOS features. First, open the Mail app and select the email you want to export. Make sure the email is fully loaded and displays all content you wish to save, including images and attachments previews.
- With the email selected, go to the File menu and choose Print... or press Command+P. This opens the Print dialog.
- In the Print dialog, locate the PDF button in the bottom-left corner. Click it to reveal a dropdown menu.
- Select Save as PDF... from this dropdown. A save window will appear where you can choose the destination folder for your PDF file.
- Enter a clear and descriptive file name to easily identify the email later. Then click Save to export the email as a PDF document.
- Once saved, open the PDF to confirm it contains the full email content, including any visible attachments or previews. The formatting should closely match the email as viewed in the Mail app.
This method uses native macOS capabilities without additional software. The key step is choosing Save as PDF... from the Print dialog’s PDF menu to generate a complete email snapshot in PDF format.
How to export multiple emails to PDF in the Mail app on Mac
To export several emails at once in the Mail app, start by selecting the emails you want to save as a PDF. Hold the Shift key to select a continuous range or the Command key to pick non-adjacent emails. Once selected, use the Print command to prepare them for export.
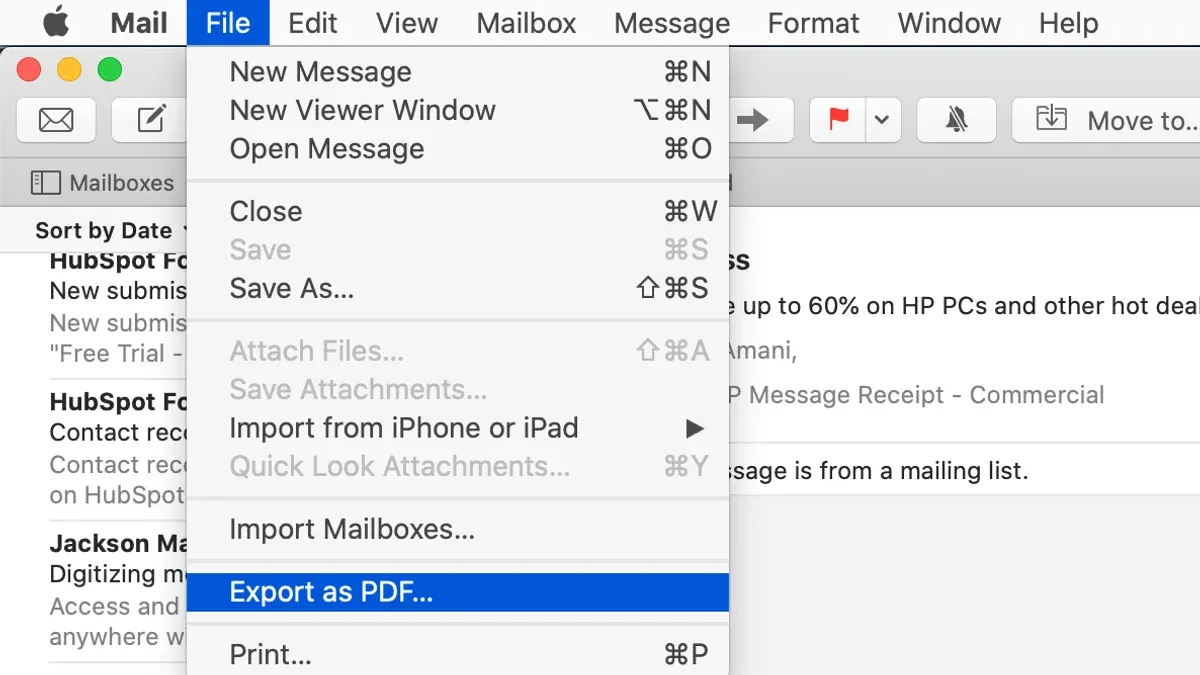
When you print multiple emails, the Mail app combines them into a single printout, which you can then save as one PDF file. This method merges the emails sequentially, which is convenient but can affect readability if the emails are very different or lengthy.
Follow these steps to export multiple emails:
- Select the emails by clicking each while holding Shift or Command; the selected emails will be highlighted.
- Go to the menu bar and choose File > Print or press Command + P; the Print dialog should appear showing a preview combining your emails.
- Click the PDF button at the bottom left of the Print dialog and select Save as PDF; a save dialog will open.
- Choose a file name and location, then click Save; your emails are saved as one PDF file combining all selected messages.
For better organization, consider grouping emails by topic or sender before exporting. This helps ensure the compiled PDF is easier to navigate. Keep in mind that attachments are not embedded in the PDF; they appear as references or icons, so you might need to save attachments separately.
Compared to exporting a single email, the file size of a combined PDF will be larger, and the content may require scrolling through multiple messages. Balancing the number of emails per PDF can improve readability and file manageability.
How to export Outlook emails to PDF
Exporting emails to PDF in Outlook requires a slightly different approach than in the Mail app. You can use both the Outlook desktop application and Outlook on the web, but the process and limitations vary. Outlook does not provide a built-in feature to batch export multiple emails to PDF, so you will need workarounds for exporting more than one email at a time.
- Open the Outlook app or go to Outlook on the web and select the individual email you want to export. You should see the email content displayed in the reading pane.
- Use the Print function by selecting File > Print in the desktop app or clicking the three dots menu in the web version and choosing Print. A print preview window will open.
- In the printer selection dropdown, choose a PDF printer such as “Microsoft Print to PDF” or select the “Save as PDF” option if available. This will let you save the email content as a PDF file.
- Choose your save location and file name, then confirm the save. The email is now exported as a PDF document you can archive or share.
- For multiple emails, note that Outlook does not support batch exporting to PDF natively. You will need to export emails one by one following the above steps or consider third-party tools designed to batch convert Outlook emails to PDF, such as “Adobe Acrobat” or specialized Outlook add-ins.
Outlook’s PDF export does not embed attachments directly into the PDFs. You will need to save attachments separately if you want to keep them alongside your PDFs. Compared to the Mail app, Outlook’s export features are more limited and require more manual steps or additional software for batch operations.
| Feature | Mail App | Outlook |
|---|---|---|
| Single Email Export to PDF | Built-in, easy via Print > Save as PDF | Available via Print > PDF printer or Save as PDF |
| Multiple Emails Export to PDF | Supports multi-select and combined PDF export | Not supported natively; requires manual export or third-party tools |
| Attachments in PDF | Not embedded; attachments saved separately | Not embedded; attachments saved separately |
| Third-party Tool Support | Optional for enhanced features | Often required for batch exporting |
Using third-party tools can simplify batch exporting and help with preserving attachments or converting emails with complex formatting. Look for reputable Outlook add-ins or PDF converters compatible with your Outlook version.
How to export emails as PDF on iPhone and iPad using the Mail app
On your iPhone or iPad, you can export a single email to PDF using the native Mail app without installing additional software. The process involves using the Print feature to generate a PDF preview that you can save or share. Keep in mind that the Mail app on iOS does not support exporting multiple emails as a PDF at once, so you will need to repeat the steps for each email individually.
- Open the Mail app and select the email you want to export. You should see the email content displayed.
- Tap the Reply/Forward icon, which looks like an arrow pointing left inside a box, located at the bottom or top of the screen. A menu will appear.
- Choose Print from the menu options. This opens the Printer Options screen with a print preview of your email.
- On the print preview, perform a pinch-out gesture (spread two fingers apart) on the preview image. This will open the email as a full-screen PDF preview.
- Tap the Share icon (a square with an upward arrow) in the upper-right corner. You will see options to save the PDF to Files, send it via Mail or Messages, or share it through other apps.
- Select Save to Files to store the PDF on your device or iCloud Drive, or choose another sharing method as needed. Once saved or shared, your email is now exported as a PDF.
This method gives you a clear PDF copy of the email content as it appears on screen. However, attachments are not included in the PDF and must be saved separately. For multiple emails, repeat these steps for each message individually, as iOS Mail does not provide a batch export feature.
Troubleshoot common problems when exporting emails to PDF
When exporting emails to PDF, you might encounter a few common issues. One frequent problem is missing images or attachments in the PDF. Attachments are not embedded within the PDF export; they remain separate files. To preserve attachments, save them separately before or after exporting the email. Inline images should appear, but if they don’t, check that the email is fully loaded and displayed correctly before exporting.
If the exported PDF appears incomplete or cut off, verify your print settings. In the Print dialog, ensure the correct paper size and scaling options are selected. Sometimes, emails with complex formatting or long threads can cause pages to truncate. Preview the print output carefully before saving to PDF to catch this.
Another common limitation is that some apps, including the Mail app, do not support selecting multiple emails at once for PDF export on iOS devices. This restriction means you must export emails individually or use a Mac for batch exports.
If you experience file saving errors or permission issues, confirm you have access rights to the folder where you are saving the PDF. Saving to locations like iCloud Drive or local folders without proper permissions can cause errors. Try saving to your Desktop or Documents folder as a test.
When these limitations or errors persist, consider using third-party PDF tools designed for email exports. These apps can offer batch processing, better attachment handling, and more robust formatting options.
- Open the email and confirm it is fully loaded with all images visible. The export should include inline images if this is true.
- In the Print dialog, check that Paper Size is set to "US Letter" or "A4" and that Scale is at 100%. The preview should show the full email content without cutoff.
- Try exporting a single email first on your device to confirm basic functionality before batch exporting.
- Check file save location permissions by saving to Desktop. If successful, permission issues are likely causing previous errors.
- If multiple email export is needed on iOS or Outlook, evaluate third-party apps that support batch PDF creation with attachments.
Frequently asked questions
How to export email to pdf outlook?
To export an email from Outlook to PDF, open the email you want to save, then select File > Print. In the print dialog, choose Microsoft Print to PDF as the printer option, and click Print. You will be prompted to choose a location to save the PDF file. This method works for individual emails and preserves the email formatting.
How to export mail in pdf?
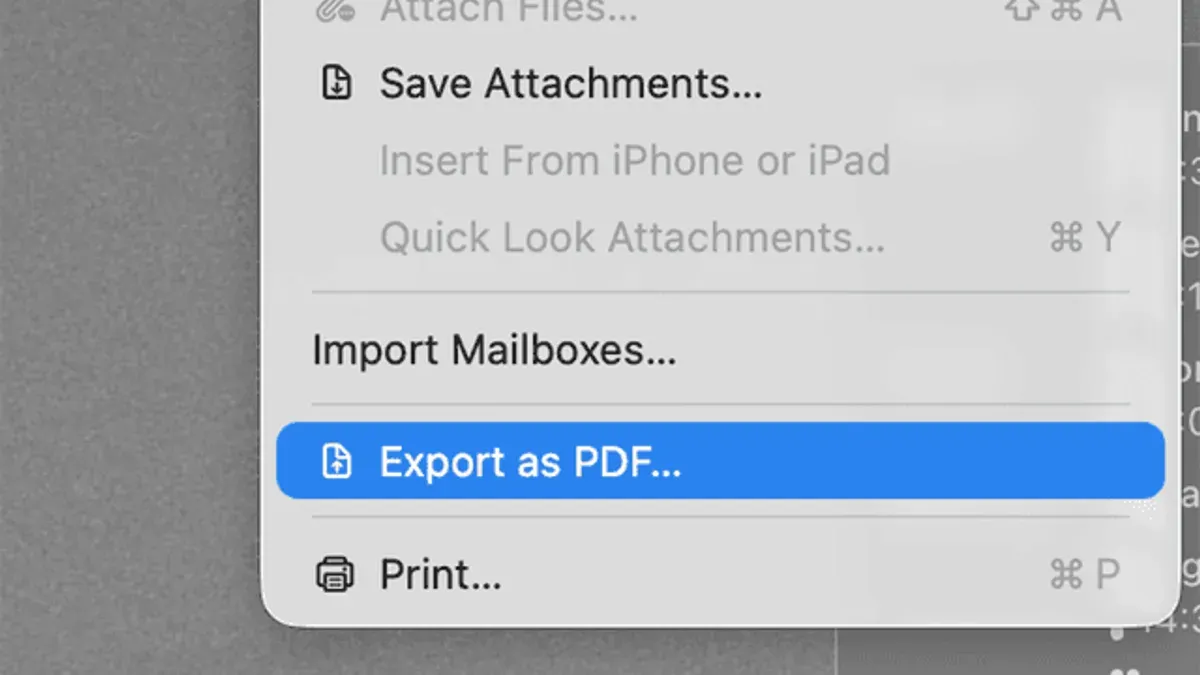
Exporting mail to PDF varies depending on the app. On Mac's Mail app, open the email, go to File > Export as PDF, then choose the destination. On Outlook, use the print-to-PDF feature by selecting File > Print, then picking a PDF printer. This approach allows you to save any selected email as a PDF quickly.
How to export email to pdf?
In most mail apps, exporting an email to PDF involves opening the email, then using the print option. Instead of printing to paper, select a Save as PDF or Print to PDF option. You can then pick where to save the file. This simple step works across many mail clients and platforms.
How to export outlook mail as pdf?
To export Outlook mail as PDF, open the email, click File > Print, and select Microsoft Print to PDF or another PDF printer from the printer dropdown. Click Print, then choose where to save the PDF. This method exports the email with its formatting intact.
how to export outlook emails to pdf
For exporting multiple Outlook emails to PDF, you can select all desired emails, then use the File > Print option with a PDF printer. However, Outlook does not have a built-in batch export feature, so third-party tools or manual export one by one might be necessary for large batches. Using the print-to-PDF option is the most straightforward approach for a few emails.
What this guide does not cover
This guide does not cover automated or bulk email archiving solutions beyond manual export, nor does it address exporting emails with complex embedded media or encrypted content. If you manage large volumes of emails regularly or need to preserve intricate formatting and attachments automatically, specialized email archiving software or managed services may be more appropriate. Additionally, exporting encrypted emails often requires decryption keys and specific handling that goes beyond the steps outlined here.
The most useful next step is to practice exporting a single email to PDF following the step-by-step instructions provided earlier. This will help you become familiar with the process and settings, such as choosing the correct destination folder and verifying the PDF output. Once comfortable, you can confidently expand to exporting multiple emails or using workarounds for Outlook and iOS devices, ensuring your email saving workflow is smooth and reliable.
See also: How to Use Hide My Email in Mail App: A Step-by-Step Guide · How to Set Up Mail Rules in the Mail App: A Step-by-Step Guide · How to Create an Email Signature in the Mail App: Step-by-Step Guide · How to Unsend an Email in Mail App: Clear Steps for Apple Users



