How to Use Hide My Email in Mail App: A Step-by-Step Guide
Step-by-step guide to using Hide My Email in Mail app to keep your personal email private while managing aliases easily.
You want to keep your personal email address private while still receiving messages from websites, newsletters, and contacts. Apple’s Hide My Email feature lets you create unique, random email addresses that forward to your real inbox, helping you avoid spam and protect your identity.
This guide covers how to use Hide My Email in Mail app, showing you step-by-step how to set it up, send emails using these aliases, manage them efficiently, and troubleshoot common issues. Whether you’re new to Hide My Email or looking for clear instructions to integrate it smoothly into your daily email use, this article will walk you through the entire process.
Key takeaways
- Hide My Email creates unique random addresses that forward to your personal inbox.
- Set up Hide My Email aliases directly in the Mail app via your iCloud settings.
- Choose a Hide My Email address as the sender when composing emails for privacy.
- Manage and deactivate aliases easily in iCloud settings to control your email flow.
- Troubleshoot common issues by checking iCloud status and Mail app permissions.
Before you start: What you need to use Hide My Email
To use Hide My Email within the Mail app, you must have an Apple ID with an active iCloud+ subscription. Hide My Email is a feature included only with iCloud+ plans, so without this subscription, the option won’t be available. Make sure your device supports this feature; most recent versions of iOS, iPadOS, and macOS running the native Mail app are compatible.
Hide My Email generates unique, randomized email addresses that forward messages to your personal inbox. This means when you use it, your real email address remains private, while you still receive all correspondence. Familiarity with basic Mail app functions—like composing, sending, and reading emails—will help you integrate Hide My Email smoothly into your routine.
Apple allows users to create multiple Hide My Email aliases, typically up to several dozen, providing flexibility in managing different services or contacts. For exact limits and detailed feature descriptions, consult Apple’s official documentation on iCloud+ features. Preparing with these requirements ensures you can activate and manage Hide My Email effectively in the Mail app.
- Verify you have an Apple ID signed in on your device. Once signed in, open Settings and tap your name at the top. You should see “iCloud” listed; tap it to confirm you have an iCloud+ subscription. If so, you’re ready to proceed.
- Check your device’s operating system version supports Hide My Email by opening the Mail app and looking for Hide My Email options when composing a message. If available, you can start setting it up.
- Review basic Mail app usage skills such as composing and sending emails so you can understand where Hide My Email integrates within these steps.
How to set up Hide My Email in the Mail app
- Open the Settings app on your iPhone or iPad. Scroll down and tap your name to access Apple ID settings.
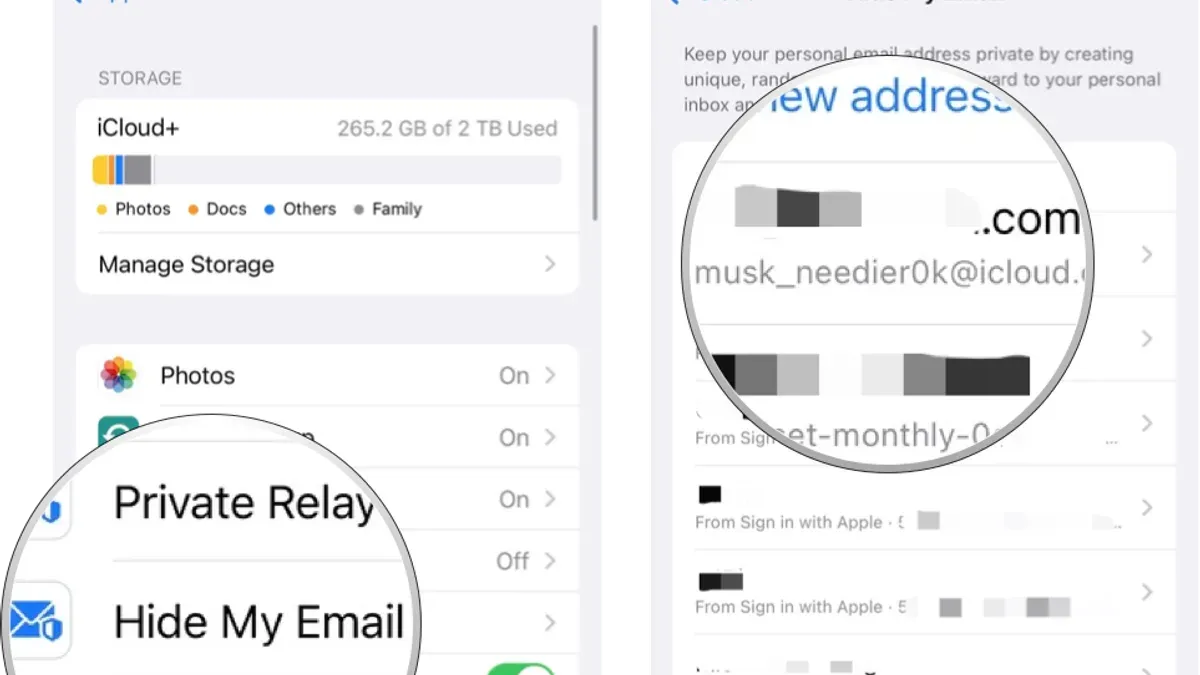
- Tap iCloud, then select Hide My Email. Here, you will see options to create and manage your email aliases.
- Tap Create new address. The system will generate a random email alias for you automatically.
- Assign a label or name to this alias for easy identification later, such as "Newsletter Sign-ups" or "Online Shopping." This helps you track what each alias is used for.
- Confirm by tapping Done. Your new Hide My Email alias is now linked to your iCloud account.
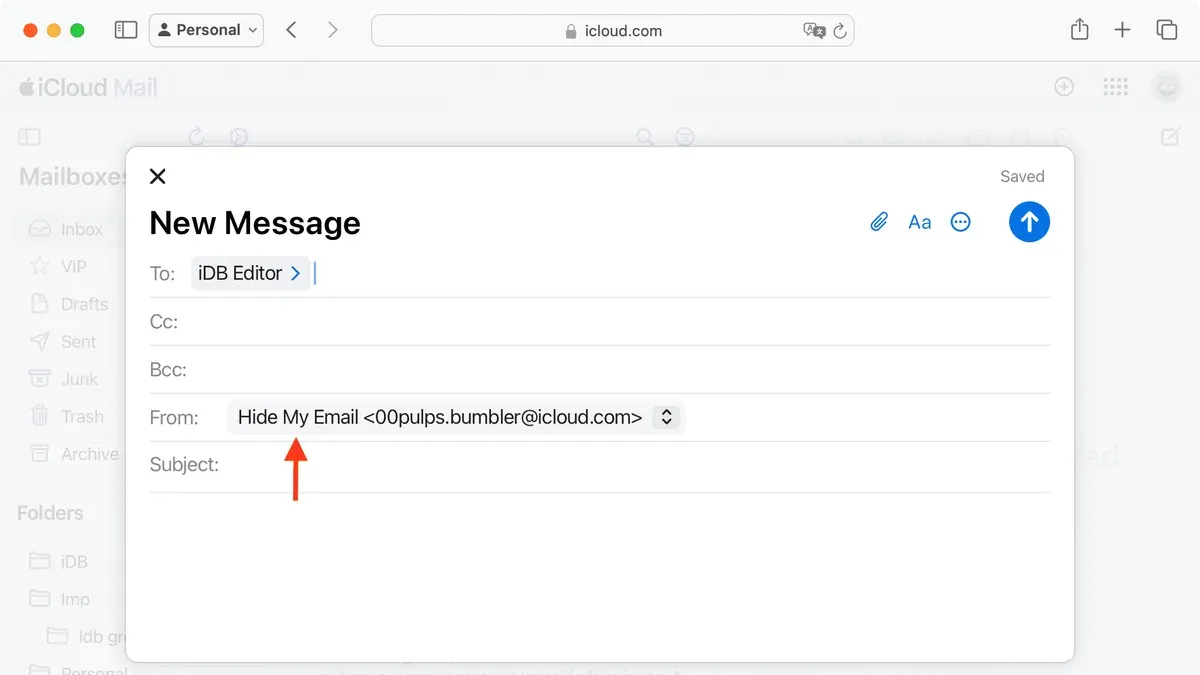
- Next, open the Mail app. When composing a new message, tap the From field. You should see your newly created Hide My Email address available to select as the sender.
- If you do not see the alias, return to Settings > Mail > Accounts > iCloud and ensure Hide My Email is enabled for your account.
Following these steps sets up Hide My Email within the Mail app, allowing you to send messages without revealing your personal address. The alias is directly linked to your iCloud account, ensuring that replies continue to reach your inbox securely.
How to use Hide My Email when sending an email in Mail app
When composing a new message in the Mail app, you can choose which Hide My Email alias to send from, keeping your personal address private. By default, the Mail app uses your primary email, but switching to an alias is simple and flexible.
- Tap the compose button to start a new email. You will see the “From” field above the recipient line.
- Tap the “From” address. A list of your available email addresses, including your Hide My Email aliases, will appear.
- Select the Hide My Email alias you want to use. The address in the “From” field updates to the alias.
- Compose your email and send it. The recipient will see the alias address instead of your personal email.
Replies to emails sent from an alias come back to your regular inbox, routed through the alias to keep your personal address hidden. When forwarding an email sent from a Hide My Email alias, the Mail app continues to use the alias as the sender, maintaining your privacy.
It’s helpful to assign different aliases for different contacts or services, such as one alias for newsletters and another for online shopping. This way, you can easily track where emails come from and disable an alias if needed without affecting other communications.
For example, you might use [email protected] as an alias for newsletters and [email protected] for retail accounts. When you send an email from [email protected], replies will arrive in your inbox but show they came through that alias.
How to access and manage your Hide My Email aliases
You can find and control your Hide My Email aliases through your device’s iCloud settings or directly in the Mail app preferences. Managing your aliases allows you to rename them for easier identification, deactivate ones you no longer use, or delete them permanently. Additionally, you can review forwarding activity and set notifications to stay informed about alias usage.
- Open the Settings app on your device and tap your name at the top to access Apple ID settings. Scroll down and select iCloud, then tap Hide My Email. You will see a list of all your active and inactive aliases.
- Tap any alias to view detailed information, including the email address, the app or website it’s linked to, and recent forwarding activity. This screen also shows usage history such as last received emails.
- To rename an alias, tap Edit at the top right, enter a new label, then tap Done. This label helps you quickly identify the alias without changing the actual email address.
- If you want to temporarily stop emails from forwarding, toggle off Forward to Me. This deactivates the alias without deleting it, so you can reactivate later if needed.
- To delete an alias permanently, scroll to the bottom of the alias details and tap Delete Alias. Confirm your choice in the popup. Deleted aliases cannot be recovered, so use this option carefully.
- Back in the main Hide My Email screen, tap Notifications to enable alerts for new emails received through your aliases. This helps you monitor activity without opening the Mail app constantly.
Within the Mail app, you can also access alias management by opening Preferences > Accounts > iCloud > Manage Hide My Email. This opens the same interface as the iCloud settings. Compared to the Mail app, the Settings app provides a clearer overview with more detailed usage history and easier access to notification controls.
How does Hide My Email work behind the scenes
Hide My Email generates unique, randomized email addresses that forward messages directly to your personal inbox. These aliases act as intermediaries, masking your true email address to protect your privacy. When someone sends an email to a Hide My Email alias, Apple’s servers receive it first and then securely forward it to your actual email without revealing it to the sender.
This forwarding mechanism helps reduce spam and tracking because your real email address is never exposed to the sender. Each alias can be used for different services or contacts, limiting the spread of your personal email and making it easier to identify sources of unwanted emails. According to Apple’s privacy policy, the company does not use the content of your emails for advertising or analytics, reinforcing the security of your communications.
However, there are limitations to consider. Some services may not accept randomized aliases due to email verification methods or spam filters, which can cause delivery delays or failures. Additionally, while Apple employs encryption and strict data handling practices, third-party security reviews emphasize that no system is entirely immune to vulnerabilities. Being aware of these factors helps set realistic expectations for Hide My Email’s performance and security.
How to stop using Hide My Email or disable an alias
If you decide to stop using Hide My Email or want to disable a particular alias, you can do so easily within your iCloud settings. Disabling an alias will stop forwarding emails sent to it, but you won’t lose any emails previously received through that alias. It’s important to transition carefully to avoid missing important messages when moving back to your personal email address.
- Open Settings on your iPhone or iPad, then tap your name at the top to access Apple ID settings. You should see your iCloud options.
- Tap iCloud, then select Hide My Email. This will open a list of all your active aliases.
- Choose the alias you want to disable. You’ll see options to Deactivate Alias or Delete Alias. Deactivating stops new emails from forwarding but preserves the alias for potential reactivation, while deleting removes it permanently.
- Tap Deactivate Alias. You will see a confirmation prompt—confirming this will immediately stop emails from forwarding to your personal inbox.
- To transition back to your personal email, update your contact information on any services or contacts where you previously used that alias. This avoids losing emails sent to the disabled alias.
After deactivation, any emails sent to that alias will be blocked or bounced, depending on the service. Because the alias no longer forwards messages, be sure to notify important contacts to use your real email address. This precaution helps prevent missing critical emails during the transition.
If you prefer, you can delete the alias instead of deactivating it, but deletion is permanent and unrecoverable. Use deletion only when you are certain you no longer need the alias or want it associated with your account.
How to use Hide My Email on non-Apple devices like Windows
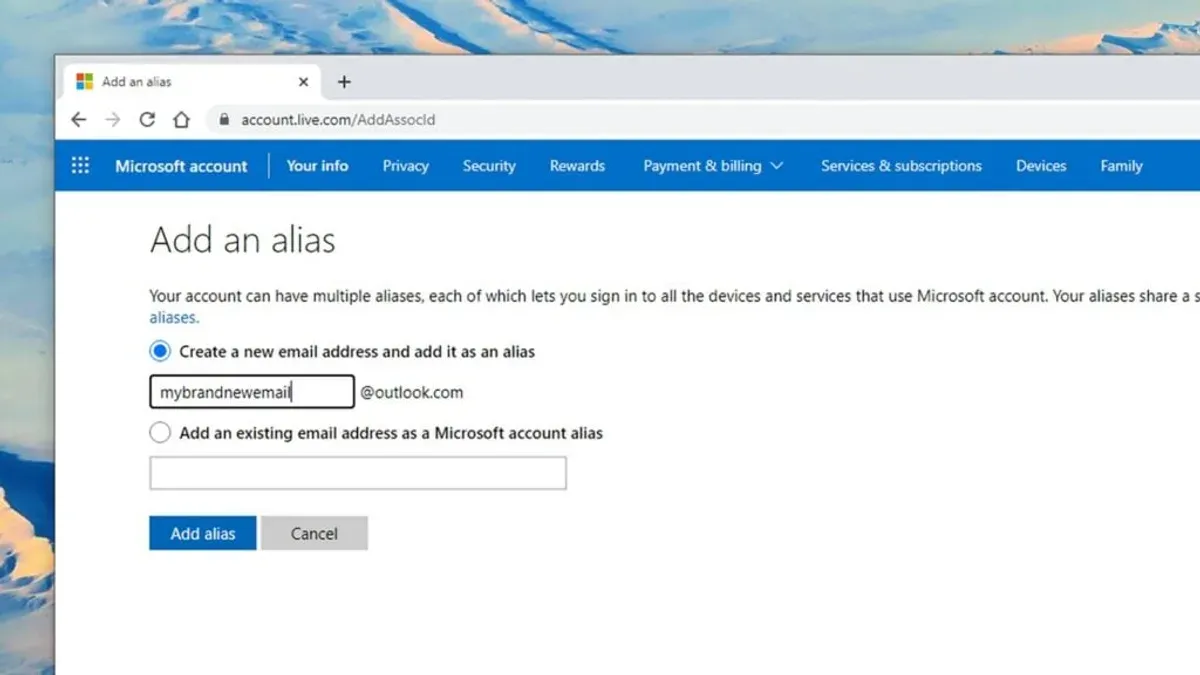
While Hide My Email is designed primarily for Apple devices, you can still access and manage your aliases on a Windows PC using a web browser. To do this, visit iCloud.com and sign in with your Apple ID. From there, open the Account Settings and navigate to the Hide My Email section. This allows you to view your active aliases, create new ones, and deactivate or delete them remotely.
When sending emails using a third-party email client on Windows, you can use your Hide My Email aliases as the sender address. However, you will need to configure your email client to send through your regular email service provider and manually enter the alias as the "From" address. Replies to the alias will still forward to your main inbox, but the integration is not as seamless as it is in the native Mail app.
Compared to Apple devices, Windows users lack direct Mail app integration, which means no automatic alias selection or built-in management features within the email client. Managing aliases requires manual steps through iCloud.com, and some functionality like notifications for alias usage may not be available.
| Feature | Apple Devices (Mail app) | Windows (Third-party email clients via iCloud.com) |
|---|---|---|
| Create and manage aliases | Built-in in Mail app and iCloud settings | Via iCloud.com only |
| Select alias when sending mail | Easy selection inside Mail app composer | Manual entry of alias as "From" address |
| Automatic forwarding of replies | Seamless and automatic | Automatic but relies on alias forwarding setup |
| Notifications for alias activity | Available via system notifications | Not available |
| Alias usage monitoring | Detailed reports in iCloud settings | Limited to iCloud.com interface |
To manage your Hide My Email aliases effectively on Windows, regularly log in to iCloud.com to check alias status and usage. Consider keeping detailed notes of which alias corresponds to which service or contact to avoid confusion. Remember that while you can fully manage aliases remotely, the ease and automation available on Apple devices are limited on non-Apple platforms.
Troubleshooting common issues with Hide My Email in Mail app
If your Hide My Email alias does not appear as an option when composing a new email, first check that the alias is active in iCloud settings. Sometimes aliases may be deactivated or deleted accidentally. Also, ensure the Mail app is updated to the latest version, as outdated software can cause sync glitches.
- Open Settings on your device and tap your Apple ID, then select iCloud.
- Tap Hide My Email and verify the alias is listed and marked as active.
- Restart the Mail app and try composing a new email; the alias should now appear in the From field dropdown.
If emails sent from your Hide My Email alias are marked as spam or not delivered, confirm that the recipient’s email server supports forwarded messages. Using multiple aliases for different services can reduce spam risks. Check your spam folder and ask recipients to whitelist your alias email.
Difficulty accessing or managing aliases often results from iCloud syncing issues. To resolve this, sign out and back into iCloud on your device to refresh your account data.
- Go to Settings > [your name] > Sign Out.
- Sign back in with your Apple ID credentials.
- Open the Hide My Email settings again and verify your aliases are visible.
Sync issues across devices can cause inconsistencies in alias availability. Make sure all devices use the same Apple ID and have iCloud Mail enabled in Settings. Additionally, verify that each device has a stable internet connection to allow proper synchronization.
Following these steps should resolve the most frequent Hide My Email issues in the Mail app and restore smooth, private email use.
Frequently asked questions
How to use apple hide my email?
To use Apple Hide My Email, you first need to create a unique, random email address alias via iCloud settings or the Mail app on your device. When sending emails, select this alias as the sender address to keep your personal email private. The alias forwards messages to your real inbox, letting you receive mail without revealing your true address.
How to access hide my email?
You can access Hide My Email aliases through the Settings app on your iPhone or iPad by navigating to your Apple ID > iCloud > Hide My Email. Here, you will see a list of all active aliases, where you can view details, deactivate, or create new ones. You can also manage these aliases in the Mail app when composing emails.
How to hide email when sending email?
When composing a new email in the Mail app, tap the "From" field to open your email address options. Select one of your Hide My Email aliases instead of your personal address. This way, the recipient sees only the alias, protecting your real email from being exposed.
How to hide my email on iphone?
On your iPhone, go to Settings > [your name] > iCloud > Hide My Email to create or manage your email aliases. When sending mail, open the Mail app, tap the "From" field in a new message, and choose a Hide My Email address to send from. This keeps your personal email hidden during correspondence.
How to create hide my email?
Create a Hide My Email alias by opening Settings, then tapping your name, selecting iCloud, and choosing Hide My Email. Tap "Create new address" to generate a random email alias that forwards messages to your personal inbox. You can name or label each alias to remember its purpose.
What This Guide Does Not Cover
Hide My Email requires an active iCloud+ subscription and relies on Apple’s infrastructure to forward emails from your aliases to your actual inbox. It may not function properly with all email providers or third-party applications that do not support forwarding from alias addresses. If you use non-Apple email clients extensively or require advanced email management features beyond forwarding, you might need to explore dedicated email alias services or custom forwarding solutions.
Additionally, this guide does not cover managing Hide My Email through the iCloud website or in iOS Settings outside the Mail app. For those scenarios, Apple’s official support pages provide detailed instructions tailored to those platforms.
Next Step: Start Creating Your First Hide My Email Alias
To begin protecting your personal email, open the Mail app and compose a new message. When selecting the "From" field, tap it and choose "Hide My Email" to create a new alias. This quick action integrates Hide My Email seamlessly into your daily emailing, allowing you to send messages without exposing your real address. Once you’ve sent a few emails this way, revisit your Mail app’s settings to review and manage your aliases regularly to keep control over your privacy.
See also: How to Block a Sender in the Mail App: Clear Steps for Apple Users · How to Create an Email Signature in the Mail App: Step-by-Step Guide