How to Record with a MIDI Keyboard in GarageBand: Step-by-Step Guide
Follow this step-by-step guide to connect and record with a MIDI keyboard in GarageBand for smooth, high-quality MIDI performances.
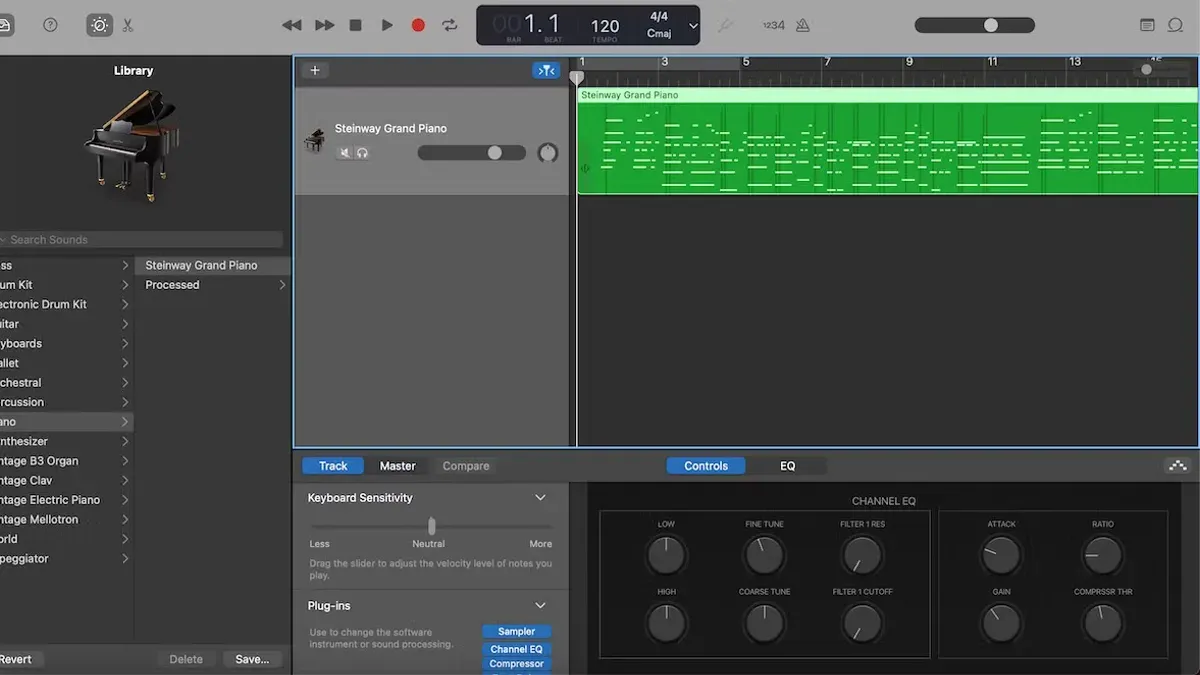
You have your MIDI keyboard ready and GarageBand open, but the MIDI notes you play don’t seem to be recording or sounding quite right. You want to capture your performance smoothly but aren’t sure how to set up everything correctly. This guide walks you through how to record with a MIDI keyboard in GarageBand, from connecting your device to refining your recorded tracks.
You'll learn the step-by-step process to configure GarageBand’s settings for minimal latency and optimal MIDI input. We’ll also cover common issues you might encounter and practical tips to improve your MIDI recording experience. By following the instructions patiently, you’ll gain confidence in making creative music with your MIDI keyboard and GarageBand.
Key takeaways
- Ensure your MIDI keyboard is properly connected via USB or MIDI interface before launching GarageBand.
- Create a new Software Instrument track to record MIDI data effectively.
- Adjust the Audio/MIDI preferences to minimize latency, such as lowering the buffer size.
- Use GarageBand’s MIDI editor to correct timing and note velocity after recording.
- Check for common issues like incorrect MIDI channel settings or disabled track monitoring if you don’t hear sound.
Before you start: What you need to record MIDI in GarageBand
To record MIDI in GarageBand, you first need a MIDI keyboard. This can be a USB-MIDI keyboard, which connects directly to your Mac or iOS device via USB cable, or a traditional MIDI keyboard using MIDI DIN connectors that require a MIDI interface or adapter. Popular USB-MIDI keyboards include models like the Akai MPK Mini and Novation Launchkey, while traditional keyboards often need a USB to MIDI DIN adapter or an audio interface with MIDI ports.
Next, ensure your device supports GarageBand. On Mac, GarageBand works seamlessly with most MIDI devices via USB. For iPad or iPhone, you may need a Lightning to USB Camera Adapter or USB-C adapter, depending on your model. Confirm you have the latest GarageBand version installed to access all MIDI features.
Finally, having a basic understanding of GarageBand’s interface will help you follow recording steps smoothly. Familiarize yourself with the track area, library, and transport controls like Record and Play. With these essentials ready, you’ll avoid hardware or software surprises as you begin your MIDI recording journey.
How to use a MIDI keyboard with GarageBand: Connecting your device
- Locate the USB cable that came with your MIDI keyboard and connect it from the keyboard’s USB port directly to your computer or compatible iOS device using a USB adapter if needed. When connected correctly, your device should power the keyboard or the keyboard’s indicator light will turn on.
- If you have a MIDI DIN keyboard (with traditional 5-pin MIDI ports), connect it to your computer using a MIDI interface or a USB-MIDI adapter. Connect the keyboard’s MIDI OUT to the interface’s MIDI IN, then connect the interface to your computer via USB. The keyboard may require external power.
- Open GarageBand and go to the menu bar at the top. Select GarageBand > Preferences (on Mac) or tap the Settings gear icon (on iOS), then navigate to the Audio/MIDI tab or MIDI Devices section.
- Check the list of MIDI devices recognized by GarageBand. Your MIDI keyboard should appear by its model name or as a generic USB MIDI device. If it appears, GarageBand is ready to receive MIDI signals from your keyboard.
- If the device does not appear, try these troubleshooting steps: unplug and reconnect the cable, try a different USB port or adapter, verify the keyboard is powered on, and restart GarageBand. Also, ensure your MIDI keyboard is compatible with your operating system and GarageBand version.
How to record MIDI keyboard in GarageBand: Setting up your track
- Open GarageBand and click the + button above the track headers to create a new track. You will see a dialog offering track types.
- Select Software Instrument and click Create. This track type is designed to receive and play MIDI input through virtual instruments.
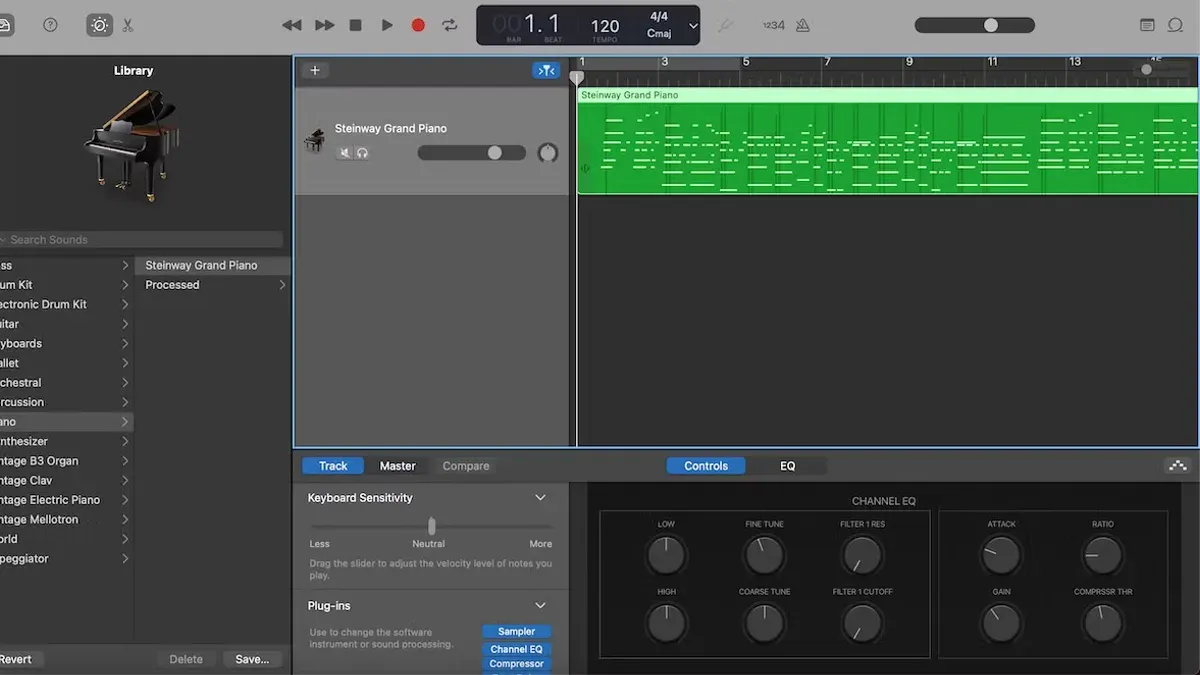
- In the Library pane on the left, choose an instrument sound that responds well to your MIDI keyboard, such as Grand Piano or Synthesizer. The sound you pick here will play when you record MIDI notes.
- Look at the track header and enable Monitoring by clicking the small speaker icon if you want to hear your keyboard live through GarageBand.
- Confirm that the input source for the track matches your MIDI keyboard device. This is usually automatic but can be checked and adjusted in the Smart Controls under Track > Input if needed.
- Turn on the Metronome by clicking the metronome icon in the control bar at the top to keep your timing steady while recording.
- Set the project Tempo by clicking the tempo display near the control bar and entering a BPM value that suits your piece. This will guide both the metronome and quantization later.
Once these steps are completed, your GarageBand track is properly set up to capture MIDI keyboard performances with clear sound and timing assistance.
How to record MIDI in GarageBand: Recording your performance
Now that your track is set up, it’s time to capture your MIDI performance. First, arm the software instrument track by clicking the red record-enable button next to the track name; this tells GarageBand which track will receive MIDI input.
- Click the red record button in the transport controls at the top of the GarageBand window. You should see the playhead start moving and the MIDI input levels react as you play your keyboard.
- If you enabled the metronome and count-in earlier, listen to the clicks before your recording begins; this helps you play in time.
- Play your MIDI keyboard smoothly and deliberately to get clean note data. Avoid overlapping notes too much, which can cause muddiness in the MIDI recording.
- Click the stop button when you finish. The recorded MIDI region will appear as a colored block on the timeline in your track.
- Press the spacebar or click play to listen back to your performance. You can see the notes visually in the piano roll editor by double-clicking the MIDI region to review and plan your edits.
For example, a short 4-bar MIDI clip will show as a rectangular colored segment aligned with your project’s tempo grid. If the timing feels off, try recording again using the metronome count-in for better precision.
How to use GarageBand MIDI editing tools to refine your recording
After recording your MIDI performance, GarageBand offers powerful editing tools to polish your track. Start by opening the Piano Roll editor, accessible by double-clicking the MIDI region. Here, you can see each note's pitch, timing, and length visually displayed, making it easier to spot mistakes or parts to improve.
- Quantize your notes: Select the notes you want to fix, then open the Quantize menu on the left panel. Choose a timing value like 1/16 or 1/8 notes to align your performance to the grid. When done correctly, your raw, slightly off-beat notes will snap perfectly in time, giving the clip a tighter feel.
- Adjust velocity and note length: Use the Velocity slider below the Piano Roll to raise or lower the dynamics for selected notes. Shorten or lengthen notes by dragging their edges in the editor. This lets you create more expressive, natural-sounding MIDI parts.
- Copy, paste, and loop MIDI regions: Select a MIDI region in the timeline, then use Command+C and Command+V to duplicate parts. Drag the right edge of the region to loop it seamlessly. This technique helps build arrangements quickly by reusing strong sections.
- Apply MIDI effects and automation: Click the Smart Controls button to open effects like Arpeggiator or Modulation. Use automation lanes to control volume, pan, or effect parameters over time, adding movement and variation to your MIDI tracks.
Comparing a raw MIDI clip to a quantized one shows clear improvement: the original may have uneven timing and inconsistent velocities, while the quantized version aligns notes perfectly and balances dynamics for a polished sound.
Troubleshooting common issues when recording MIDI in GarageBand
When your MIDI keyboard isn’t detected by GarageBand, first check that your USB or MIDI cable is firmly connected. If GarageBand doesn’t show your device, open GarageBand > Preferences > Audio/MIDI and verify the device appears in the MIDI input list. Restarting GarageBand or your computer often resolves recognition issues.
If you hear no sound when playing or recording MIDI, ensure the software instrument track is selected and the volume is turned up. Confirm that the track’s Monitoring button is enabled (the headphone icon). Also, check that the correct instrument patch is loaded and not muted.
Latency or delay during recording can interrupt your flow. To minimize this, go to GarageBand > Preferences > Audio/MIDI and reduce the Audio Buffer Size to a lower setting, such as 128 or 64 samples. Remember that a very low buffer size may increase CPU load and cause audio glitches.
If recording fails or GarageBand crashes, try closing other applications to free system resources. Save your project frequently to avoid data loss. Updating GarageBand and your macOS to the latest versions can fix known bugs affecting MIDI recording.
For general performance optimization, disable background apps, turn off Wi-Fi if not needed, and close unnecessary browser tabs. Using a powered USB hub can improve connection stability for USB MIDI keyboards.
Common error messages and fixes:
- “MIDI Device Not Found”: Reconnect cables, check device power, and confirm driver installation if applicable.
- No Sound on Playback: Verify track selection, instrument assignment, and monitoring settings.
- High Latency Warning: Lower buffer size or close other CPU-intensive apps.
- GarageBand Unexpected Quit: Update software, reduce plugin usage, and restart your Mac.
Frequently asked questions
How to use midi keyboard with garageband?
To use a MIDI keyboard with GarageBand, first connect it to your Mac or iOS device via USB or MIDI interface. Open GarageBand and create a new software instrument track. Make sure the keyboard is recognized by checking the MIDI status in GarageBand’s preferences under Audio/MIDI. You can then play your keyboard and hear the selected instrument sound in GarageBand.
Can you use a midi keyboard with garageband?
Yes, GarageBand fully supports MIDI keyboards for both Mac and iOS versions. Connecting a MIDI keyboard allows you to play, record, and edit MIDI performances using GarageBand’s built-in instruments and effects. This setup is common and straightforward once the hardware is properly connected and configured.
Can you use a MIDI keyboard with GarageBand on iPhone or iPad?
Yes, you can use a MIDI keyboard with GarageBand on iPhone or iPad by connecting it via a Lightning to USB adapter or a USB-C adapter, depending on your device. Some Bluetooth MIDI keyboards also work wirelessly. After connection, GarageBand will automatically detect the keyboard, allowing you to play and record MIDI tracks.
What types of MIDI keyboards work best with GarageBand?
GarageBand works well with most class-compliant USB MIDI keyboards that don’t require additional drivers. Keyboards with velocity-sensitive keys and aftertouch provide better expression. Compact MIDI controllers with drum pads and knobs can enhance your workflow but aren’t required for basic recording.
How do I fix latency issues when recording MIDI in GarageBand?
To reduce latency, lower the buffer size under GarageBand’s Preferences > Audio/MIDI > Buffer Size to values like 64 or 128 samples. Close other apps that use audio resources and disable software monitoring if you’re using hardware monitoring. Using a wired connection instead of Bluetooth can also improve latency.
Understanding the Limits of This Guide
This guide focuses on connecting a basic MIDI keyboard directly to GarageBand and recording MIDI tracks within the software. It does not cover advanced MIDI routing techniques, external MIDI gear setups beyond simple keyboard-to-GarageBand connections, or integration with professional studio equipment. If you require complex MIDI setups involving multiple devices, external sound modules, or detailed synchronization workflows, you will need to consult specialized resources or consider dedicated digital audio workstations designed for professional environments.
Now that you have learned how to set up your MIDI keyboard, record your performance, and use GarageBand’s editing tools, the single most useful next step is to experiment with different software instruments and layering multiple MIDI tracks. This practice will help you understand how to build richer arrangements and develop your musical ideas more fully. Remember to save your projects regularly and explore GarageBand’s latency settings under Preferences > Audio/MIDI to optimize your setup as you create.
See also: How to Record Electric Guitar in GarageBand: A Clear Step-by-Step Guide · How to Use Apple Loops in GarageBand: A Step-by-Step Guide · How to Export a Song as MP3 in GarageBand: Step-by-Step Guide