How to Change Playback Speed in QuickTime Player: A Step-by-Step Guide
Discover simple steps to adjust playback speed in QuickTime Player for better video viewing on your Mac without extra software.
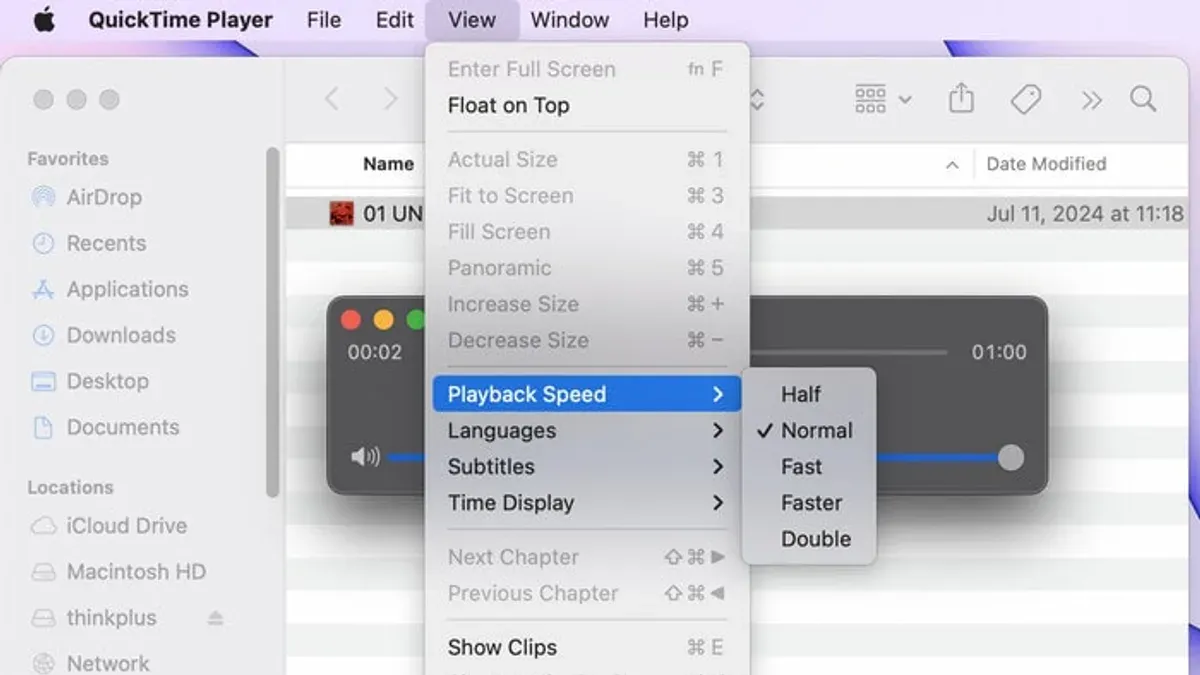
You’re watching a recorded lecture or a long video on your Mac and want to speed it up without losing clarity. QuickTime Player is your go-to app, but you might wonder how to adjust the playback speed effectively.
This article covers how to change playback speed in QuickTime Player with practical, step-by-step instructions. You’ll learn keyboard shortcuts, the use of A/V controls if available, how to export a faster or slower version, and when third-party tools might be necessary. Along the way, you’ll understand the limitations and workarounds to get the best viewing experience without extra software.
Key takeaways
- Use Option + Right Arrow or Option + Left Arrow keys to adjust playback speed in QuickTime Player.
- The A/V controls panel offers limited speed options and may not appear in all QuickTime versions.
- You can export a video at a different speed by choosing File > Export As and adjusting settings.
- Third-party plugins can provide more precise speed control but require installation outside QuickTime.
- Restarting QuickTime or your Mac often resolves playback speed adjustment glitches.
Before you start: What you need to change playback speed in QuickTime Player
To adjust playback speed in QuickTime Player, you first need to have the app installed on your Mac. QuickTime Player comes pre-installed on macOS versions starting from macOS Sierra and later, so no additional download is usually necessary. Make sure your macOS is up to date to access the latest features and improvements.
Next, you will need a compatible video file. QuickTime Player supports common video formats including MOV, MP4, M4V, and some AVI files. If your file is in an unsupported format, QuickTime Player may not open it or allow playback speed adjustments.
It is also essential to understand that QuickTime Player’s built-in playback controls offer limited speed adjustment options. You can slightly increase or decrease speed during playback but cannot set precise speeds or save altered speeds without exporting. For more advanced speed control, third-party apps or plugins might be necessary.
- Locate the video file you want to play and ensure it is in a supported format (e.g., MOV or MP4). When you open it with QuickTime Player, the video should load and play normally.
- Open QuickTime Player from your Applications folder or Dock. The player window should appear with playback controls at the bottom.
- Check your macOS version by clicking the Apple menu > About This Mac. Confirm it is macOS Sierra or later to ensure compatibility with QuickTime features.
- Familiarize yourself with the basic playback controls: play/pause button, timeline scrubber, and volume control. These are the starting points for adjusting speed.
How to change playback speed on QuickTime Player Mac using keyboard shortcuts
You can quickly adjust the playback speed of your video using built-in keyboard shortcuts in QuickTime Player. This method is straightforward and requires no extra menus or settings.
- Open your video file in QuickTime Player. You should see the video ready to play.
- To increase the playback speed, press Option + Right Arrow. Each press will speed up the video incrementally, typically up to about 2x speed. You will notice the video playing faster.
- To decrease the playback speed, press Option + Left Arrow. Each press slows the video down incrementally. This lets you watch content more slowly.
- If you want to return the playback speed to normal (1x), continue pressing Option + Left Arrow or Option + Right Arrow until the video plays at regular speed.
Keep in mind that these shortcuts adjust speed in fixed steps and don’t offer fine-grained control. The speed changes are visible immediately, making it easy to find the right pace without navigating menus.
How to increase playback speed in QuickTime Player using the A/V controls (if available)
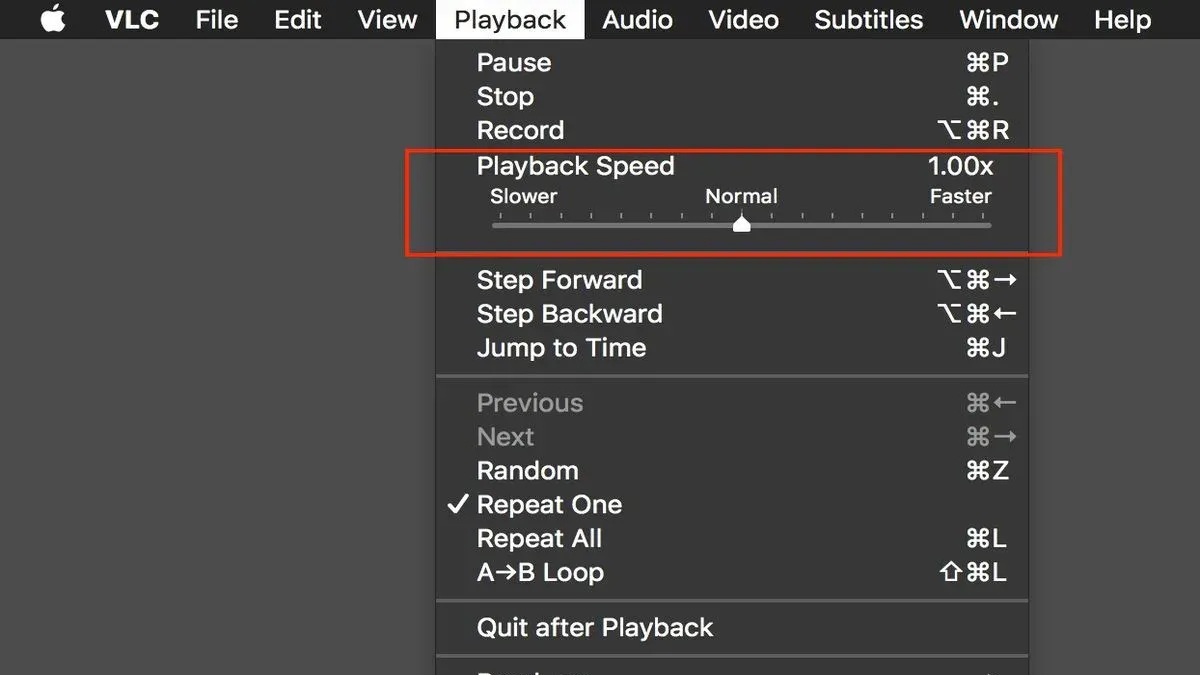
QuickTime Player sometimes includes audio/video (A/V) controls that allow you to adjust playback speed with more precision than keyboard shortcuts. These controls may be accessed through the menu bar or by right-clicking on the video itself. However, note that not all versions of QuickTime Player display these controls, so you might not see this option depending on your macOS and app version.
- Open your video in QuickTime Player.
- Click on the “View” menu in the top menu bar and select “Show A/V Controls” or right-click (Control-click) on the video and choose “Show A/V Controls.” A small panel should appear.
- Locate the playback speed slider or buttons within this panel. It is usually labeled with speed values such as 0.5x, 1x, 1.5x, 2x, or shown as a slider that you can drag.
- Adjust the slider or click the buttons to increase or decrease the playback speed gradually. You will see the video respond immediately, playing faster or slower according to your setting.
- Use this method for more precise speed adjustments than keyboard shortcuts allow. For example, you can select 1.25x or 1.75x speeds if the slider supports it.
If you do not see the A/V controls option, your version of QuickTime Player might not support this feature. In that case, you can try other methods described in this article.
How to change video speed in QuickTime Player by exporting a modified copy
QuickTime Player does not natively allow you to permanently change the playback speed and export the video at that new speed. While you can adjust playback speed temporarily during viewing, exporting a video with a modified speed requires using additional apps or workarounds. One common approach is to use Apple’s iMovie, which integrates well with QuickTime files and allows you to change speed before exporting.
To export a video with changed speed using iMovie, first import your video from QuickTime Player into iMovie. Then adjust the clip’s speed using iMovie’s speed controls. After that, export the video to create a new file with the modified speed. The exported file will play at the adjusted speed regardless of the player used.
- Open iMovie and create a new project. You should see a blank timeline ready for clips.
- Drag your video file into iMovie’s project media area. The clip should appear ready to edit.
- Drag the clip onto the timeline. The clip’s thumbnail will appear along the timeline.
- Click the speed control button above the preview window (looks like a speedometer). You should see speed adjustment options.
- Select a custom speed or preset (e.g., 2x faster or 0.5x slower). The clip duration on the timeline will change accordingly.
- When satisfied, go to File > Share > File to export the video. Choose your resolution and quality settings.
- Save the file to your desired location. The exported video will play at the new speed with preserved quality.
Compared to the original, the exported video will have a playback speed baked in, so it behaves consistently across all players. File size may vary slightly depending on export settings but quality remains comparable if you use similar resolution and compression. This approach provides a reliable way to create a permanent speed-changed video when QuickTime Player’s real-time controls are insufficient.
How to increase video speed in QuickTime Player with third-party plugins or apps
QuickTime Player’s built-in playback speed options can be limiting for users seeking more precise or varied control. To overcome these restrictions, you can use trusted third-party apps or plugins that either integrate with QuickTime or work alongside it to modify video speed more flexibly. Popular apps like VLC Media Player, IINA, and plugins such as Perian (though outdated) offer greater control over playback speed and support a wide range of formats.
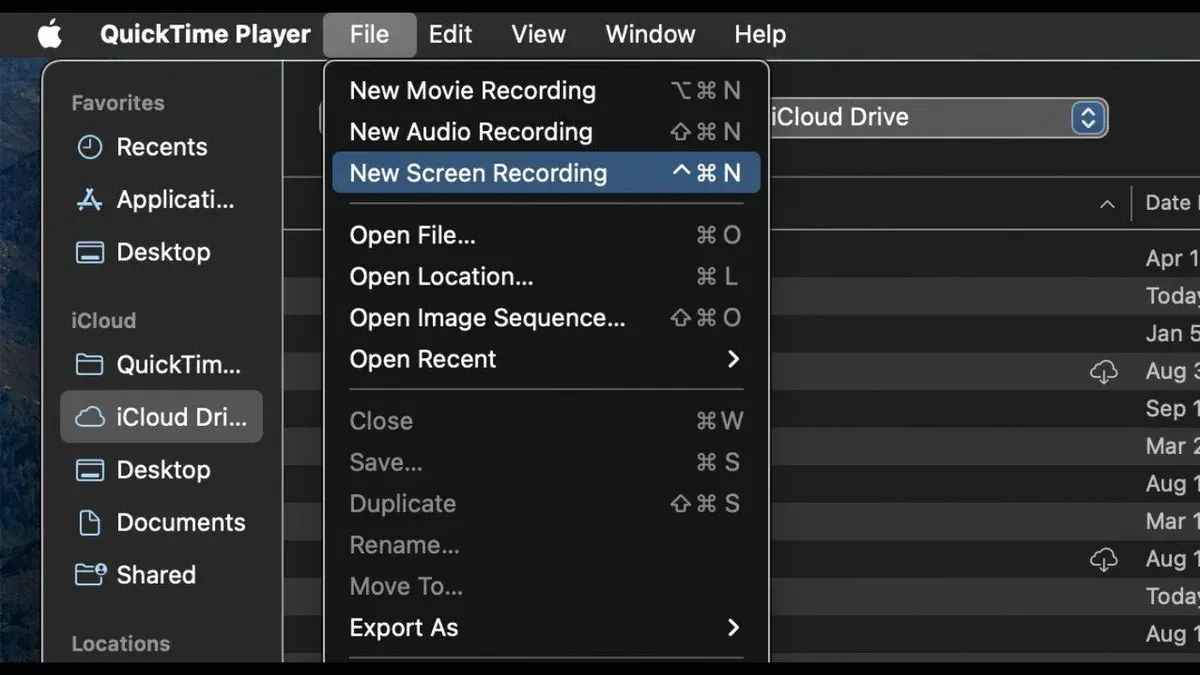
Using these apps typically involves opening your video file within them, adjusting the playback speed through their dedicated controls, and then playing back the adjusted video. After changing the speed, you can export the file if needed and continue playing it in QuickTime Player. Keep in mind that not all third-party tools directly modify QuickTime’s playback but rather provide an alternative player with enhanced speed controls.
When selecting third-party software, prioritize safety and compatibility. Download apps from official websites or trusted sources to avoid malware. Verify compatibility with your current macOS version and check recent user reviews or ratings to ensure the tool meets your needs without causing system instability.
- Download and install a trusted media player like VLC or IINA from their official website. You should see the app appear in your Applications folder once installation completes.
- Open your video file within the third-party app by selecting File > Open File. The video begins playing in the new player window.
- Locate the playback speed controls—usually found under Playback or in the toolbar—and adjust the speed slider or preset options. The video playback rate changes immediately, visible in the playback speed indicator.
- If you want to save the adjusted speed permanently, look for an export or save option within the app. Export the video at the new speed, then open this exported file in QuickTime Player to confirm it plays at the desired rate.
- Regularly check for app updates and verify compatibility with your macOS to maintain smooth operation and security when using third-party tools alongside QuickTime Player.
Troubleshooting common issues when changing playback speed in QuickTime Player
If playback speed controls are not responding or missing, the first step is to restart QuickTime Player. This often resolves minor glitches and restores missing interface elements. When the app reopens, check if the speed controls appear and function as expected.
Video stuttering or audio desynchronization at higher speeds can occur due to hardware limitations or file complexity. To improve playback, try closing other applications to free system resources. If the problem persists, lowering the playback speed slightly may help maintain smooth audio-video sync.
Unsupported video formats can prevent speed adjustments altogether. QuickTime Player supports common formats like MOV and MP4, but files encoded with uncommon codecs might lack speed control functionality. Converting the video to a compatible format using tools like HandBrake can enable playback speed changes.
If problems continue, restarting your Mac can clear system-wide issues affecting QuickTime. Additionally, ensure macOS and QuickTime Player are updated to the latest versions available through System Preferences or the App Store. Updates often include improved media support and bug fixes that enhance playback speed controls.
- Close QuickTime Player completely and reopen it. You should see playback speed controls restored if they were missing.
- If playback stutters at high speed, reduce speed slightly and close other apps; video should play smoothly.
- Check your video format by selecting the file and pressing Command + I. If unsupported, convert the file to MP4; then try speed controls again.
- Restart your Mac if issues persist; upon reboot, QuickTime should respond correctly to speed adjustments.
- Update macOS and QuickTime Player via System Preferences > Software Update. After updating, verify if speed controls work without issues.
Frequently asked questions
Can you change playback speed on quicktime player?
Yes, you can change playback speed in QuickTime Player, but the options are limited. You can use keyboard shortcuts to play videos faster or slower, and in some cases, adjust speed through the A/V controls if available. For more precise speed changes, exporting a modified video or using third-party tools may be necessary.
How to change video speed on quicktime player?
To change video speed, try using keyboard shortcuts like Option + Right Arrow to increase speed and Option + Left Arrow to decrease it. If your QuickTime Player version supports A/V controls, you can adjust speed directly from the playback controls. Otherwise, exporting a new version with adjusted speed is a good workaround.
Can you change playback speed on QuickTime Player?
Playback speed control exists but is somewhat basic in QuickTime Player. You can speed up or slow down playback using keyboard shortcuts or A/V controls on some versions. For detailed speed adjustments, you might need to export the video with altered speed or use additional software.
How to increase playback speed on QuickTime Player?
You can increase playback speed by pressing Option + Right Arrow on your keyboard during video playback. Each press typically increases the speed incrementally. If you want a permanently faster version, export the video after changing its speed through the Edit and Export functions.
How to change video speed in QuickTime Player?
Changing video speed can be done temporarily during playback using keyboard shortcuts or A/V controls. For a lasting change, use the Export function after adjusting the speed via the Edit menu. This creates a new file with the altered playback speed.
Understanding QuickTime Player’s Playback Speed Limitations
QuickTime Player provides only basic playback speed adjustments, primarily through keyboard shortcuts and limited A/V controls. It does not support permanently changing the video speed when exporting, so any speed changes you make during playback won’t be saved to the file itself. If you require precise speed control, slow-motion effects, or the ability to export videos at modified speeds, you’ll need to use dedicated video editing software like iMovie, Final Cut Pro, or Adobe Premiere Pro. These tools offer more flexibility for editing and exporting videos with customized playback speeds.
For casual viewing and quick speed changes, QuickTime Player’s built-in options are sufficient. However, if your goal is to create videos with altered speed for sharing or professional use, consider switching to specialized editors that support these features natively.
Start by experimenting with QuickTime’s keyboard shortcuts to adjust playback speed during viewing, as this is the fastest way to control video speed without extra tools or exports.
See also: How to Join Two Videos in QuickTime Player: Step-by-Step Guide · How to Record iPhone Screen Using QuickTime Player: Step-by-Step Guide