
How to Record a Voiceover in iMovie: Step-by-Step Guide
Discover how to record a clear, engaging voiceover in iMovie with easy steps and tips for better audio quality and syncing.
You're working on your latest video project in iMovie and want to add a clear, engaging narration to guide your viewers. Whether you're explaining a tutorial or sharing a story, recording a voiceover directly in iMovie can streamline your workflow and improve the final product.
This article will show you exactly how to record a voiceover in iMovie, including step-by-step instructions for capturing audio inside the app and tips on using your iPhone's voice recording and screen recording features. You'll also learn how to manage and edit your voiceovers effectively to ensure your narration syncs perfectly with your visuals.
Key takeaways
- Use iMovie’s built-in voiceover tool accessed via the microphone icon on the timeline for direct recording.
- Record voice memos on your iPhone and import them into iMovie for more control over audio quality.
- Combine iPhone screen recording with voiceover to capture app demonstrations seamlessly.
- Detach audio from video clips in iMovie to edit voiceovers independently.
- Common issues like background noise or syncing problems can be fixed with simple adjustments in iMovie and your recording environment.
Before you start: What you need to record a voiceover in iMovie
To record a clear voiceover in iMovie, you first need a compatible device: an iPhone, iPad, or Mac with iMovie installed. Make sure your device’s operating system is up to date, as this ensures compatibility and access to the latest features. Before recording, confirm that iMovie has permission to access your microphone by checking Settings > Privacy > Microphone on iPhone or iPad, or System Preferences > Security & Privacy > Microphone on Mac.
Next, prepare a quiet environment to minimize background noise. Even small sounds like keyboard clicks or air conditioning can reduce voiceover quality. If possible, choose a room with soft furnishings that absorb sound reflections to help your voice sound natural and clear.
Consider using an external microphone if you want better audio quality than the built-in mic. While the built-in microphones on iPhones and Macs capture sound well for casual use, they can pick up ambient noise and have limitations on dynamic range. External microphones, such as a USB condenser mic or a lavalier mic connected via Lightning or USB-C, generally deliver richer, clearer recordings with less background hiss.
To illustrate, typical built-in mic recordings often show waveforms with less volume consistency and more background noise, while external mics produce smoother, fuller waveforms with clearer peaks. This difference is noticeable when listening back in iMovie’s timeline.
Finally, you should have a basic familiarity with the iMovie interface, especially how the timeline works, so you can efficiently navigate and place your voiceover track. Knowing how to play, pause, and scrub through your project will make recording and syncing your narration much easier.
- Check your device compatibility: Open iMovie and verify it launches without errors. You should see your project timeline ready.
- Verify microphone permissions: Go to Settings > Privacy > Microphone, and ensure iMovie is allowed to access the microphone. On Mac, open System Preferences > Security & Privacy > Microphone, and check the box next to iMovie.
- Test your recording environment: Use the Voice Memos app to record a short clip. Listen back and note any distracting background noise or echo.
- Connect an external microphone (optional): Plug in your mic, then open iMovie and check the audio input settings to confirm the mic is recognized.
- Familiarize yourself with the timeline: Open a project and try scrubbing through your clips using the playhead to ensure you can navigate smoothly.
How to do a voiceover in iMovie
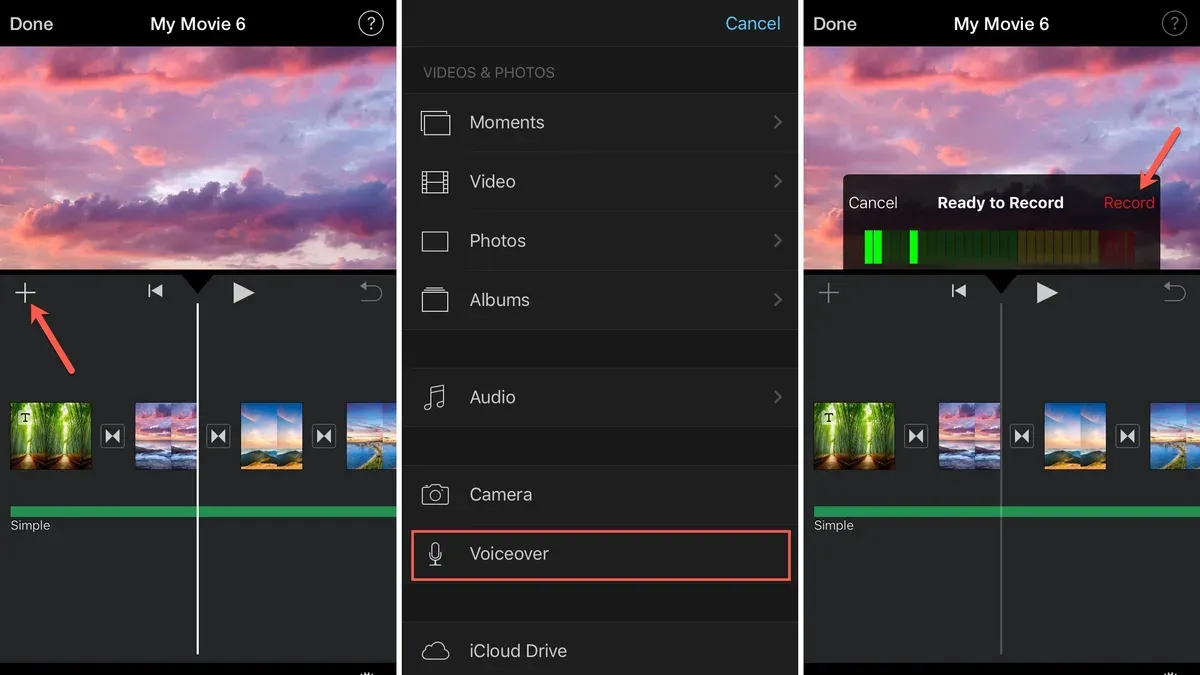
- Open your iMovie project on your iPhone, iPad, or Mac. Position the playhead in the timeline exactly where you want your voiceover to begin. You should see the video frames update in the preview window as you move the playhead.
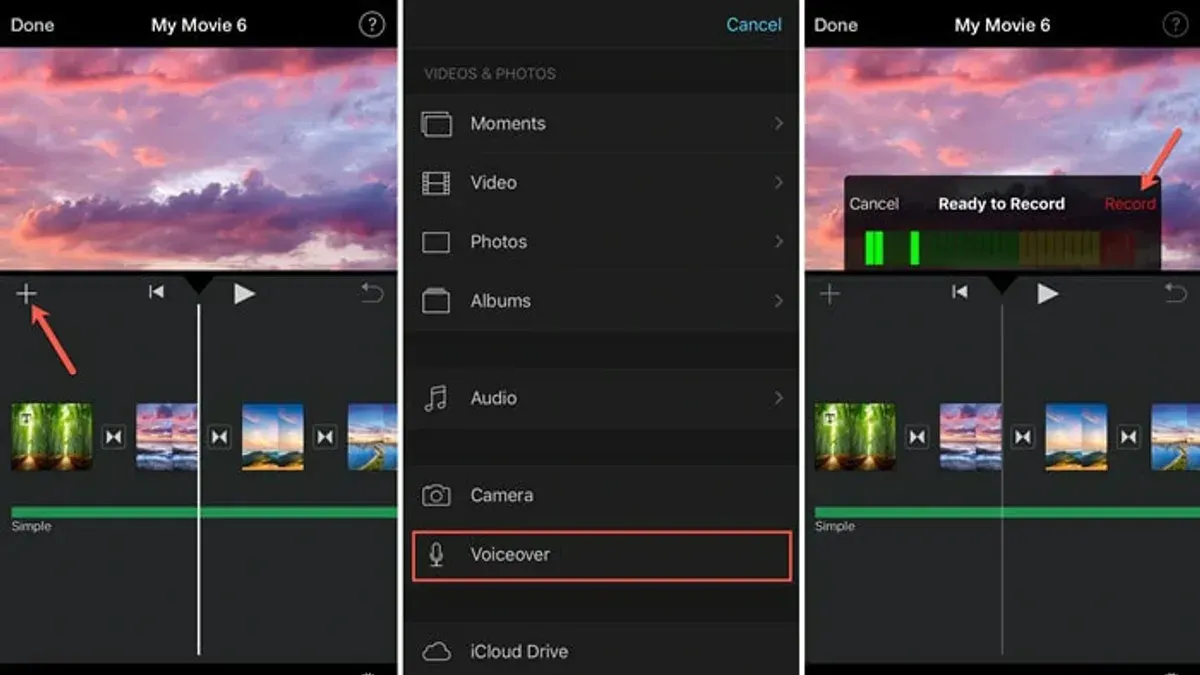
- Tap or click the 2B20button, then select Voiceover from the menu. On iPhone and iPad, this icon is found above the timeline; on Mac, it’s in the toolbar. A voiceover recording panel will appear, showing microphone options and input levels.
- Adjust your microphone input levels by speaking softly into your mic and moving the slider until the levels peak around 3/4 of the meter. This prevents distortion or too low volume. Choose your preferred microphone if multiple options are available.
- Tap or click the Record button to start recording. The video will play from your playhead position, so you can synchronize your narration as you watch. Speak clearly and keep an eye on the input meter to maintain consistent volume.
- When you finish, tap or click the Stop button. The recorded voiceover clip will automatically appear as an audio waveform directly below your video clip in the timeline. You should see the new audio track's waveform reflecting your recording.
- Listen to the playback of your voiceover with the video. If you want to redo it, tap or click the Record button again, and iMovie will prompt you to replace the previous voiceover clip.
- Once satisfied, tap or click Done to save the voiceover. The voiceover clip remains editable independently, allowing you to trim or adjust volume without affecting the video.
Following these steps ensures your voiceover is well synced and clearly recorded directly within iMovie, visible as a distinct audio waveform track beneath your footage.
How to add a voiceover in iMovie from a pre-recorded voice memo
Using a pre-recorded voice memo allows you to add carefully crafted narration to your iMovie projects. Start by recording your voice memo using the iPhone Voice Memos app, ensuring a quiet environment for clear audio. Once recorded, share or export the memo by tapping the three-dot menu and selecting "Save to Files" or directly sharing it to iMovie if available.
Next, open your iMovie project on your device. To import the voice memo, tap the "+" button and choose "Files" to locate and select your saved voice memo audio file. The audio clip will appear in your media browser, ready to be added to your timeline.
- Add the voice memo to your timeline by dragging it beneath your video clips; you should see the audio waveform appear below the video track.
- Position the audio clip so it syncs with the relevant video section; dragging left or right adjusts timing. When synced correctly, the narration will match the on-screen action.
- Adjust the volume by selecting the audio clip and tapping the volume icon; set it to a comfortable level where the voice is clear but balanced with other audio.
- Trim the voice memo by dragging the edges of the audio clip to remove any silence or unwanted parts; the waveform helps identify where to cut.
On your timeline, the imported voice memo will appear as a purple audio track under your video clips, clearly marked and editable independently. This separation makes it easy to fine-tune your narration without affecting the video.
How to record on iMovie for screen recording with voiceover on iPhone
Recording your iPhone screen along with a voiceover is straightforward once you enable the right settings. You’ll capture both the device audio and your narration simultaneously, which is perfect for tutorials or app demos. This method uses the built-in screen recording feature in iOS combined with the microphone for voice input.
- Enable Screen Recording in Control Center: Go to Settings > Control Center and tap the green plus icon next to Screen Recording to add it if it’s not already included. This ensures you can access the recording tool quickly.
- Open Control Center and Prepare to Record: Swipe down from the top-right corner of your iPhone screen (or swipe up from the bottom on older models) to open Control Center. Long-press or firmly press the Screen Recording button until a menu appears.
- Turn on Microphone Audio: In the Screen Recording menu, tap the Microphone Audio icon so it shows red, indicating that your voice will be recorded along with the screen.
- Start Screen Recording: Tap Start Recording in the menu. After a three-second countdown, your screen recording begins along with your voice narration. You’ll see a red bar or red clock at the top of your screen indicating recording is active.
- Stop Recording When Finished: Tap the red status bar or open Control Center and tap the Screen Recording button again to stop. Your recording will automatically save to the Photos app.
- Import the Screen Recording into iMovie: Open iMovie and create or select your project. Tap Add Media > Video > Recents, then select the screen recording you just made. It will appear on your timeline ready for editing.
- Sync and Enhance Audio: Review the imported clip’s audio waveform for clarity and timing. You can trim or split the clip as needed and adjust volume levels within iMovie to ensure your voiceover and device sounds balance well.
Remember, background noise can affect your recording. Choose a quiet environment and speak clearly. Also, be mindful of device notifications or sounds that may interrupt your narration during recording.
How to use iPhone to record voice for iMovie projects
Using your iPhone's Voice Memos app is a convenient way to capture clear voiceovers outside of iMovie. This app records high-quality audio that often sounds cleaner than direct iMovie recordings because you can focus solely on capturing your voice without background distractions from the video environment.
Follow these steps for the best results when recording voiceovers with Voice Memos:
- Open the Voice Memos app on your iPhone. You should see a red record button ready to use.
- Position your iPhone's microphone close to your mouth, about 6 to 12 inches away, to capture clear sound and reduce ambient noise. You should hear your voice clearly when you speak.
- Tap the red Record button to start. Speak steadily and clearly. Tap Stop when finished. Your recording will appear in the list with a timestamp.
- Play back your recording to check for clarity and any background noise. If necessary, re-record for a cleaner take.
- To export, tap the recording, then the Share icon. Choose Save to Files, AirDrop, or iCloud Drive to transfer the audio file to your Mac or iPhone for import into iMovie.
Remember, the Voice Memos app saves files as M4A, a format fully compatible with iMovie. Using Voice Memos can improve audio quality by letting you focus on voice capture without juggling video recording simultaneously.
How to separate audio from video in iMovie to edit voiceover independently
Separating audio from a video clip in iMovie allows you to edit the voiceover or background sound without affecting the video itself. This is especially useful when you want to replace or fine-tune the existing audio track for clearer narration or improved sound quality.
- Select the video clip in your iMovie timeline. You should see it highlighted with a yellow border indicating it’s active.
- Right-click (or Control-click) the selected clip to open the context menu. Choose Detach Audio from the options. The audio track will appear as a separate purple bar directly below the video clip.
- Once detached, you can click and drag the audio track independently. Move it along the timeline to resync or align it with other elements. You can also trim the audio by dragging the edges or delete it entirely if you want to add a new voiceover.
- To add a new voiceover or background audio, import your audio file or record directly in iMovie, then place it underneath or alongside the detached track for layered sound.
- Adjust the volume and apply fade effects to the detached audio by selecting the track and using the volume slider and fade handles visible on the clip. This helps blend the voiceover smoothly with other sounds or the video ambiance.
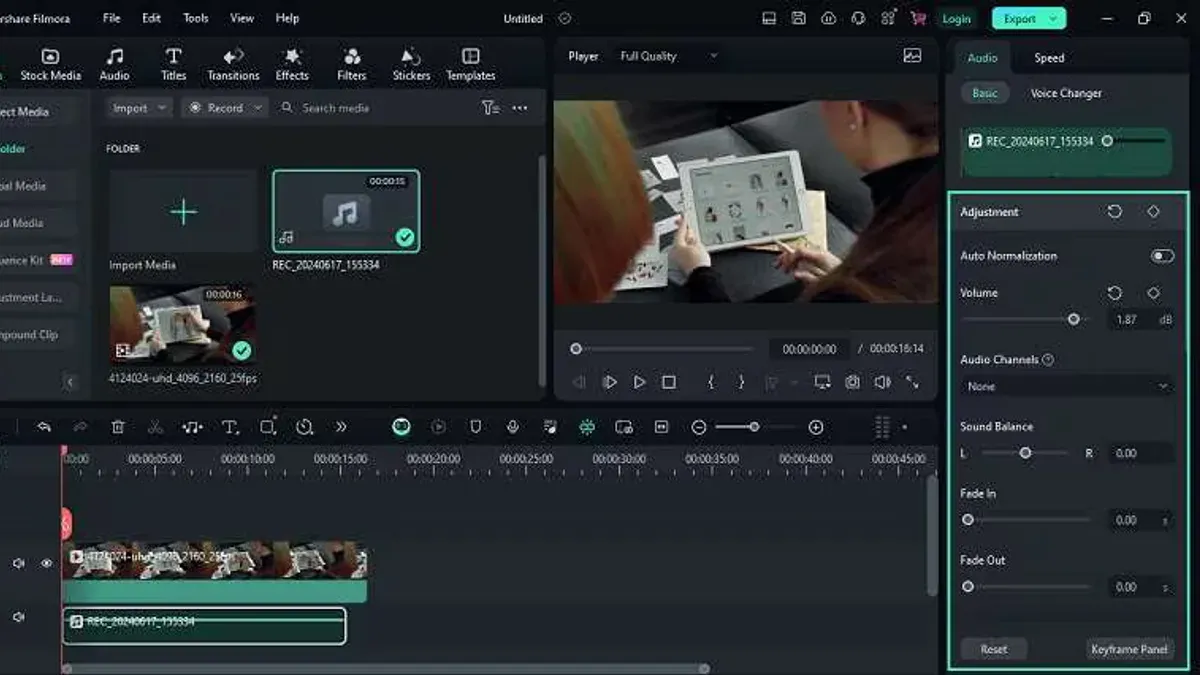
Before detaching, the timeline shows audio and video combined as one clip. After detaching, the audio track appears separately, giving you full control to edit voiceover independently without altering the video visuals.
Troubleshooting common voiceover recording issues in iMovie
Sometimes, recording voiceovers in iMovie may not go as smoothly as planned. If your microphone isn’t detected or no sound is recorded, first check that iMovie has permission to access the microphone. Go to your device’s Settings > Privacy > Microphone and ensure iMovie is toggled on. If it still doesn’t work, restart the app and reconnect any external microphones.
Background noise and echoes can reduce voiceover clarity. To minimize these, record in a quiet room with soft furnishings that absorb sound. You can also try moving closer to the microphone and adjusting the input volume slider in iMovie’s voiceover tool to avoid distortion.
Sync issues between your voiceover and video often happen if you move clips after recording. To fix this, zoom in on the timeline and manually drag the audio clip to align with the video. Lock clips once synced to prevent accidental shifts.
If your voiceover audio is too quiet or distorted, check the input levels before recording. Aim for input meters that peak around -6 dB to -3 dB to avoid clipping. If distortion persists, lower the input volume or use an external microphone for better sound quality.
Occasionally, iMovie may crash or the audio track disappears. Save your project frequently to prevent data loss. If a crash occurs, reopen iMovie and check for software updates. Restarting your device can also clear temporary issues affecting audio tracks.
- Verify microphone access in device Settings > Privacy > Microphone; when enabled, iMovie should detect your mic.
- Record in a quiet, furnished room and position the mic close; background noise should lessen noticeably.
- Zoom into the timeline and drag the voiceover clip to sync precisely; voice and video should match playback.
- Adjust input volume to keep meters around -6 dB; audio should sound clear without distortion.
- Save your project often; if a crash occurs, update iMovie and restart the device to restore audio track stability.
Frequently asked questions
How to do voice over in imovie?
To do a voiceover in iMovie, open your project and position the playhead where you want the narration to start. Click the microphone icon below the preview window, then press the red record button to begin recording your voice. Speak clearly, and when finished, click stop. You can review and rerecord as needed before adding the voiceover to your timeline.
How to screen record on imovie?
iMovie itself does not have a built-in screen recording feature. To record your screen, use the iPhone's Control Center by tapping the screen recording button. Once you have the screen recording video, import it into iMovie to edit and add voiceovers or other effects.
How to record voice in iphone?
Use the Voice Memos app on your iPhone to record voice. Open the app, tap the red record button, and speak into your phone’s microphone. Tap stop when done, then save or share the recording to import it into iMovie or other apps.
How to record a voiceover?
Record a voiceover by preparing a script and setting up a quiet environment. In iMovie, select the voiceover tool (microphone icon), then press record at the desired timeline position. Speak steadily and clearly, and stop recording when finished. Alternatively, record your voice using another app and import the audio file into iMovie.
How to make voice recording on iphone?
To make a voice recording on iPhone, open the Voice Memos app and tap the red record button. Speak directly into the device's microphone, then tap stop when you’re done. You can edit the recording within Voice Memos or export it for use in iMovie or other projects.
What This Guide Does Not Cover
This guide focuses on iMovie’s built-in voiceover tools and iPhone’s native recording apps. For professional audio editing or multi-track mixing, dedicated audio software like GarageBand or Audacity is recommended. While screen recording with voiceover on iPhone captures device audio and microphone input simultaneously, it may have limitations in audio quality and editing flexibility compared to separate recordings. Additionally, users with older devices or outdated iMovie versions might notice differences in interface or may not have access to some features described here.
The most useful next step is to practice recording voiceovers directly in iMovie while experimenting with the built-in audio controls like volume and fade. This hands-on approach helps you better understand timing, syncing narration with visuals, and making quick edits. Over time, you can refine your workflow by trying pre-recorded voice memos or combining screen recordings to suit your project’s needs.
See also: How to Fade Out Audio in iMovie: Step-by-Step Guide · How to Add Background Music in iMovie: A Step-by-Step Guide · How to Add Transitions in iMovie: Step-by-Step Guide for iPhone, iPad, and Mac



