How to Reset Fonts to Default in Font Book and Related Apps
Step-by-step guide to reset fonts to default in Font Book and popular apps for a clean, consistent font appearance on your computer.
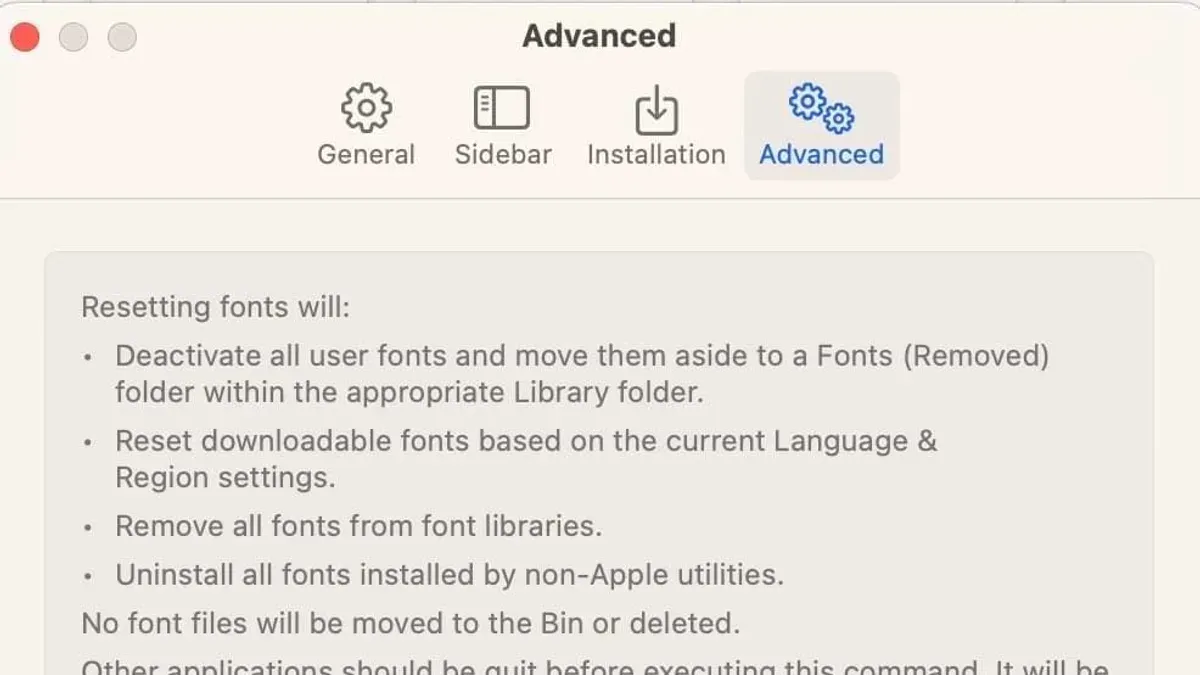
You’ve customized fonts on your Mac or within apps like Microsoft Word and Outlook, but now things don’t look quite right. Maybe some text appears strange or inconsistent, and you want a clean slate. Knowing how to reset fonts to default in Font Book is your first step to restoring order.
This article guides you through step-by-step instructions for resetting fonts both system-wide using Font Book and within popular apps such as Word and Outlook. You’ll also learn how to handle font defaults on both macOS and Windows, plus tips for adjusting default font sizes and troubleshooting common issues. By following these clear, patient steps, you’ll confidently bring your fonts back to their original, tidy settings.
Key takeaways
- Use Font Book’s “Restore Standard Fonts” feature to reset system fonts on macOS.
- Reset Microsoft Word’s default font by modifying the Normal template and Styles pane.
- Change Outlook’s default email fonts via Preferences under Fonts settings.
- On Windows, restore fonts through the Control Panel’s Font settings or System Settings.
- Always back up important documents before resetting font settings.
Before you start: What you need to know and prepare
Resetting fonts to default means returning your system and applications to their original font settings, removing any custom fonts or style changes you have made. Font Book is the built-in macOS tool that manages all fonts installed on your Mac. When you reset fonts in Font Book, you affect the system fonts available to macOS and all apps, but note that individual applications like Microsoft Word and Outlook maintain their own font preferences separately, so they require additional resetting steps.
Before proceeding, back up any important documents to avoid losing formatting or style information. Also, make a note of any custom fonts you have installed or specific font settings you want to restore later, as resetting will remove these customizations. For example, if you have installed third-party fonts for design projects, export or save copies of those font files outside the Fonts folder.
You need administrator permissions to make changes in Font Book and system font settings. To check if you have these permissions, try opening Font Book from the Applications folder or Launchpad. When you attempt to validate or remove fonts, macOS will prompt you for an administrator username and password if necessary. You should also be familiar with accessing app preferences in Word and Outlook to reset their font settings later.
- Open the Font Book app from your Applications folder. You should see a list of all fonts currently installed on your Mac.
- Confirm you can access the File menu and use options like Validate Fonts or Restore Standard Fonts. If prompted, enter your administrator credentials to proceed.
- Locate any custom fonts you want to keep, right-click them, and choose Export Fonts to save copies outside the system fonts folder.
How to reset fonts to default in Font Book
Font Book organizes fonts into three categories: User, Computer, and System. User fonts are those you installed yourself; Computer fonts are installed for all users on the Mac; System fonts come pre-installed with macOS and should not be removed. Understanding these categories helps you identify which fonts to manage during the reset process.
- Open Font Book from your Applications folder or Spotlight search. The main window displays the font categories on the left sidebar.
- Click on All Fonts to see your full font collection. Select File > Validate Fonts from the menu bar. A validation window appears showing fonts flagged with issues such as duplicates or errors.
- Select fonts with warnings or errors in the validation window and click Remove Checked. This removes corrupted or problematic fonts that could interfere with default settings.
- Return to the main Font Book window. Choose Edit > Look for Enabled Duplicates. If duplicates are found, Font Book will list them. Use the Resolve Automatically button to disable duplicate fonts, keeping the default system versions active.
- Next, go to the User category in the sidebar. Select any fonts you installed that are not part of macOS defaults and press the Delete key or right-click and choose Remove. This clears user-installed fonts that override system defaults.
- To ensure system fonts are restored, verify the System category has all default fonts enabled. If any are disabled, right-click and choose Enable.
- After cleaning duplicates and removing user fonts, restart your Mac. This final step applies the changes system-wide and confirms that only default macOS fonts are active.
By following these steps, you clear out duplicate and problematic fonts, remove custom fonts that may interfere, and ensure the system fonts are correctly enabled, restoring Font Book to its default font state.
How to reset font settings in Microsoft Word to default
Microsoft Word stores default font settings primarily in the Normal.dotm template, which controls the default styles and fonts for new documents. Customizing fonts in Word changes this template, so resetting it can restore default fonts. Additionally, Word’s preferences allow you to manually set the default font if you prefer a direct approach.
Follow these steps to reset the Normal.dotm template and restore Word’s default fonts:
- Close Microsoft Word completely to ensure changes apply properly.
- Open Finder, then press Command + Shift + G to open the “Go to Folder” dialog.
- Enter ~/Library/Application Support/Microsoft/Office/User Templates/ and click Go.
- Locate the file named Normal.dotm. Move this file to the Desktop or Trash to back it up and remove it from the templates folder.
- Restart Microsoft Word. Word will create a new Normal.dotm file with default settings, including the default font (usually Calibri 11 pt).
To manually set the default font in Word preferences, use these steps:
- In Word, go to the menu Word > Preferences.
- Select Font under Authoring and Proofing Tools.
- Choose your desired font and size (for example, Calibri 11), then click Default at the bottom left.
- Confirm the dialog to apply this font as the default for all new documents based on the Normal template.
Verify the reset worked by creating a new blank document; the font should reflect the default or your manually set choice. If the font still appears customized, ensure no other templates or add-ins override the default settings.
How to reset default fonts in Microsoft Outlook
Outlook stores font settings separately for composing new emails and reading received messages, so resetting fonts involves adjusting both areas. If you previously changed fonts through stationery or themes, resetting those settings is also necessary to fully restore default fonts.
- Open Microsoft Outlook and go to the Outlook menu, then select Preferences. You should see the Preferences window open.
- Click on Fonts under the Email section. This opens the font settings for composing and reading email.
- Under New mail messages, click Select and choose the default font, typically Calibri with size 11. Click OK. You should see the new setting reflected in the preview.
- Repeat the above step for Replying or forwarding messages and Plain text messages, selecting the default fonts and sizes for each. Confirm changes with OK.
- To reset stationery, return to the Preferences menu and choose Signatures & Stationery. Under the Theme or stationery section, select No Theme or the default option to remove custom font styles applied by stationery.
- Close Preferences and fully quit Outlook (use Quit Outlook from the menu). Reopen Outlook to ensure all font resets are applied.
After these steps, creating a new email should show the default font settings. For example, if your new email window previously showed a customized font like Arial 14, it will now display Calibri 11 as the default. This confirms that the reset was successful.
How to return to default font settings system-wide on Windows and macOS
Resetting fonts system-wide varies significantly between Windows and macOS due to their different font management approaches. On Windows, you can restore default fonts through the Control Panel or the Settings app, while macOS relies primarily on Font Book for font management and system font restoration.
Resetting Fonts to Default on Windows
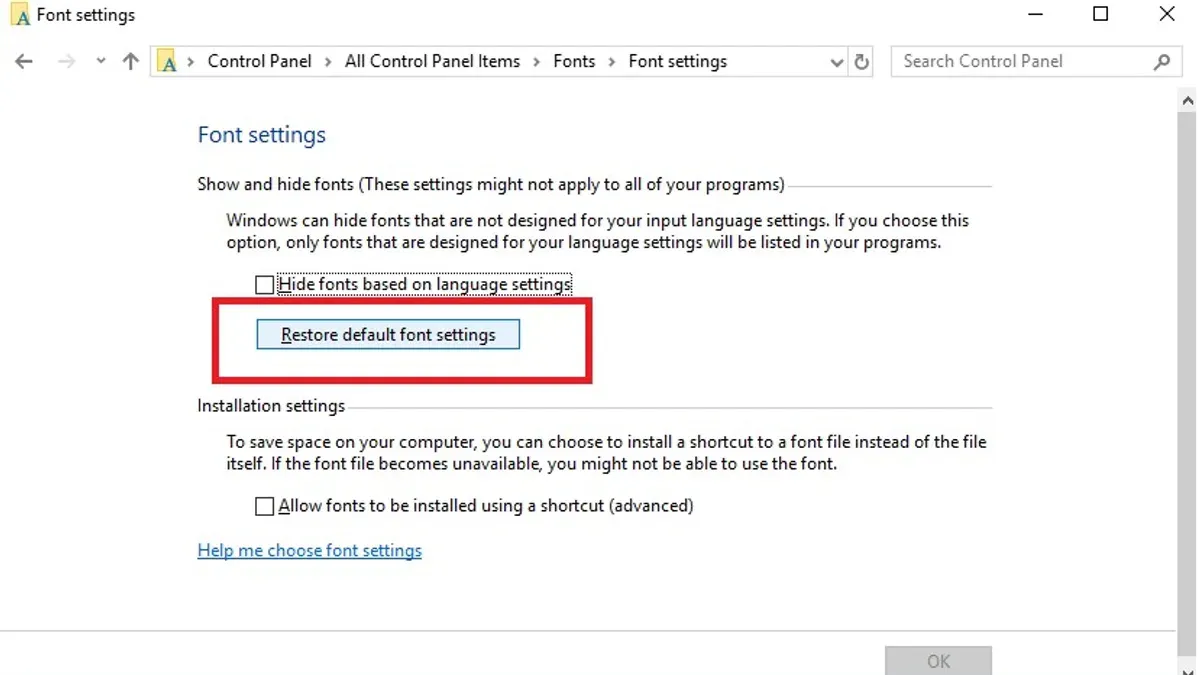
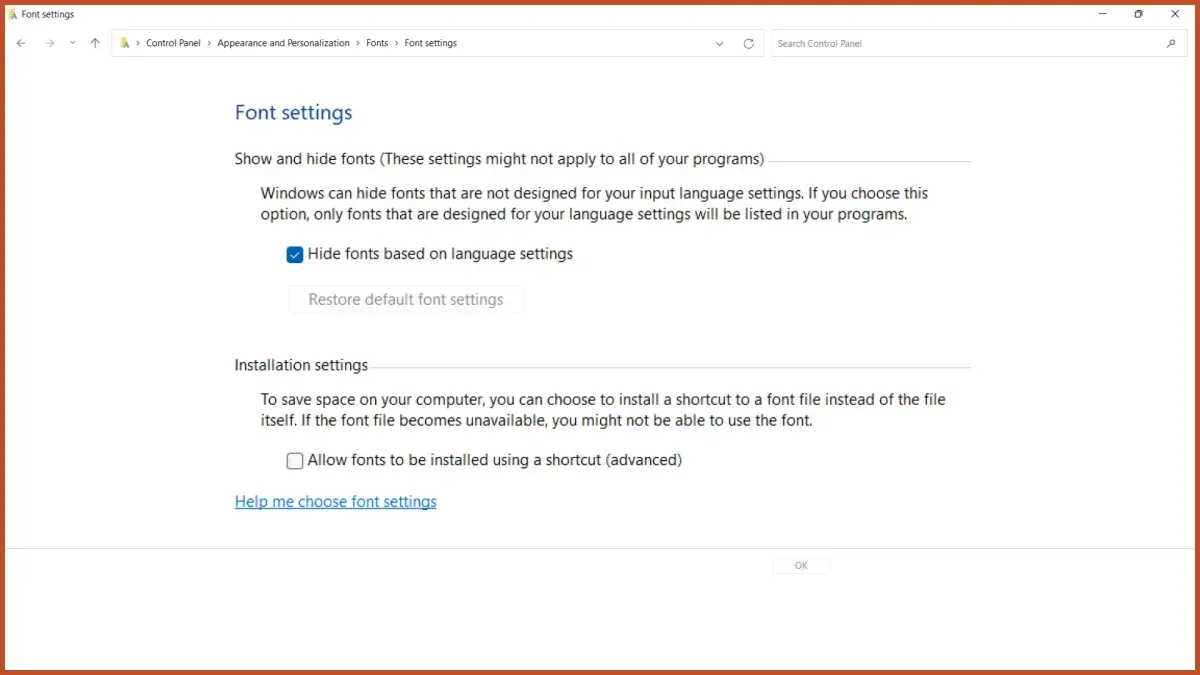
- Open the Control Panel by typing "Control Panel" in the Start menu search and selecting it.
Once open, navigate to Appearance and Personalization and then Fonts. - In the Fonts window, look for the option Font settings on the left sidebar and click it.
You should see a section titled Restore default font settings with a button. - Click Restore default font settings.
After clicking, Windows will reset any changed fonts back to the system defaults, removing custom font installs and changes. - Restart your computer to ensure the changes apply throughout the system.
After reboot, check system menus and app interfaces to confirm fonts have reverted to the defaults.
System-Wide Font Management on macOS
macOS does not provide a separate system-wide font reset outside of Font Book. If you experience font issues beyond Font Book, such as missing or corrupted system fonts, the recommended approach is to validate fonts within Font Book and remove duplicates or problematic fonts. For more severe system font problems, reinstalling macOS or restoring from a Time Machine backup may be necessary. Unlike Windows, macOS tightly integrates font management with system files, limiting direct user resets.
To verify font resets on either OS, observe the system interface elements like menus, dialog boxes, and default text appearance in apps such as Finder on macOS or File Explorer on Windows. If fonts appear as expected and customizations are absent, the reset was successful.
Note: Remember that resetting system fonts does not automatically change app-specific font settings. Applications like Word or Outlook maintain their own font preferences, which need resetting separately as previously described.
How to change default fonts and font sizes in apps and system settings
After resetting fonts, you might want to customize your default fonts and sizes for better readability or personal style. On macOS, you can adjust font sizes system-wide through Accessibility settings. Navigate to System Preferences > Accessibility > Display, then use the Cursor size and Menu bar size options to increase visibility. While macOS doesn’t offer a direct system-wide font family change, these tweaks help improve readability across many apps.
Many apps, including Microsoft Word, Outlook, and code editors like Visual Studio, allow you to set default fonts independently. For example, in Word, open the Font dialog from the Home tab, choose your preferred font and size, then click Set As Default to apply it to all new documents. Visual Studio lets you customize fonts via Preferences > Fonts and Colors, where you can select text editor fonts and sizes and save your configuration for reuse.
Saving and exporting custom font settings is useful for applying your preferences on multiple devices. In Word, your default font settings persist with your user profile, but you can also export templates to share. Visual Studio allows exporting and importing settings files that include font preferences, streamlining setup on other machines.
- Open System Preferences on your Mac and go to Accessibility > Display. Adjust Menu bar size or Cursor size to improve font visibility system-wide. You should see interface elements enlarge accordingly.
- In Microsoft Word, select the Home tab, click the small arrow in the Font group to open the dialog, choose your preferred font and size, then click Set As Default. Confirm the prompt to apply to all new documents. New documents will now use your chosen defaults.
- Launch Visual Studio and open Preferences > Fonts and Colors. Select the text editor or environment element, choose your desired font and size, then click Export Settings to save your customization. Importing this file on another device applies the same fonts.
Troubleshooting common issues when resetting fonts
Sometimes, after following the steps to reset fonts, you might notice that custom fonts still appear or changes don’t take effect. A frequent cause is a corrupted font cache, which macOS and applications use to speed up font loading. Clearing these caches forces the system to rebuild font information and often resolves stubborn font display problems.
To clear font caches on macOS, open Terminal and enter the following command:
- sudo atsutil databases -remove — This removes font cache databases.
- sudo atsutil server -shutdown — Stops the font server.
- sudo atsutil server -ping — Restarts the font server.
After running these commands, restart your Mac. When the font cache clears successfully, fonts should display correctly without remnants of previous customizations.
If fonts still don’t reset, check that you have the necessary permissions to modify fonts and Font Book settings. Sometimes, third-party font managers or profiles installed by other software can override system fonts. Look for these in your System Preferences under Profiles or check for apps like Extensis Suitcase Fusion that may lock fonts.
If you identify fonts stuck due to such software, disable or uninstall those utilities, then clear caches again. When issues persist, consider using specialized font repair tools like OnyX or FontDoctor, or seek support from Apple or software vendors to avoid system instability.
Frequently asked questions
How to reset default font in word?
To reset the default font in Microsoft Word, open a blank document and go to the Home tab. Click the small arrow in the Font group to open the Font dialog box. Choose your preferred font and size, then click the "Set As Default" button at the bottom. Select "All documents based on the Normal template" and confirm by clicking OK. This restores the default font for new documents.
How to reset default font in outlook?
In Outlook, go to File > Options > Mail and click on "Stationery and Fonts." Under the Personal Stationery tab, click each font button (New mail messages, Replying or forwarding messages, and Composing and reading plain text messages) to choose your desired default fonts. After setting them, click OK to apply the changes. This resets the font used in new and reply emails.
How to change font to default?
Changing a font back to default typically involves selecting the text and resetting the font style and size to the system or app’s original settings. In apps like Word or Outlook, use the "Clear All Formatting" button on the Home tab to remove custom fonts and return to default styles quickly. On macOS system-wide, resetting fonts requires using Font Book to restore default font collections.
How to change font for books?
If you’re referring to eBooks or reading apps, font changes are usually made within the app’s settings or preferences menu. For example, in Apple Books, open the book, tap the "aA" icon, and select your preferred font and size. This customization affects your reading experience without altering system fonts.
How to reset default font in Word quickly?
The quickest way to reset the default font in Word is to open a new document, press Ctrl+D (Cmd+D on Mac) to open the Font dialog, select your default font and size, then click "Set As Default." Confirm for all documents based on the Normal template. This shortcut bypasses navigating through menus.
What This Guide Does Not Cover
This guide focuses on resetting fonts to their default states within Font Book, Microsoft Word, Microsoft Outlook, and general system settings on macOS and Windows. It does not cover reinstallation of macOS or Windows, which may be necessary if font system files are deeply corrupted or missing. If you use advanced font management tools or maintain extensive custom font libraries, it is essential to back up your fonts and settings before resetting. In such cases, or if you encounter persistent issues after following these steps, consulting professional support or a specialist in typography and system administration is advisable.
For the most reliable and immediate improvement, start by resetting fonts in Font Book and then reset font defaults in the specific applications you use most, such as Word and Outlook. This step often resolves inconsistencies quickly and restores a clean slate without affecting your entire system or requiring advanced troubleshooting.
See also: How to Install and Use Fonts in Font Book on Your Mac