How to Turn On and Customize Color Filters on Your Mac
Discover how to enable and customize color filters on your Mac to improve visual accessibility and reduce eye strain.
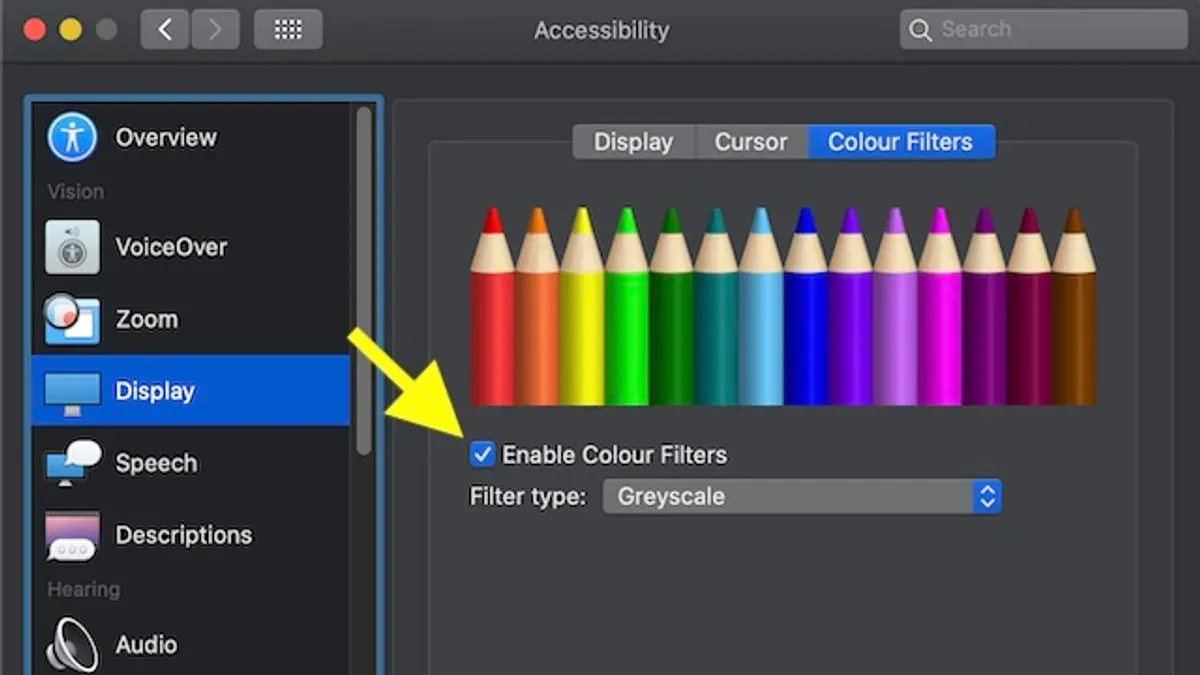
You might find yourself struggling to distinguish certain colors on your Mac’s screen or wanting to reduce eye strain during long work sessions. Adjusting the display with color filters can help enhance visual accessibility or simply change how content appears to better suit your preferences.
This article explains how to turn on color filters on Mac and guides you through customizing these settings. You’ll learn practical steps to enable filters, compare options across devices like iPhone and PC, and discover how to create tailored filters beyond the defaults for an optimal viewing experience.
Key takeaways
- Enable color filters via System Settings under Accessibility > Display > Color Filters.
- Choose from filter types like Grayscale, Red/Green, Green/Red, Blue/Yellow, or customize your own.
- Cross-device differences mean filter settings on Mac won’t sync automatically with iPhone or PC.
- Adjust intensity and hue to tailor filters according to your visual needs.
- Turning filters off is done in the same Accessibility section to revert to the original display.
Before you start: what you need to know about Mac color filters
Color filters on Mac are an accessibility feature designed to help users with color blindness, reduce visual fatigue, or simply personalize screen appearance. These filters adjust the display colors to enhance contrast or shift hues, making content easier to differentiate or more comfortable to view over extended periods.
Color filters are available on Macs running macOS Catalina (10.15) and later. They work on most Mac models with Retina displays, but performance and availability might vary slightly depending on your hardware and macOS version. To access these filters, you’ll use the Accessibility pane in System Settings.
It’s important to distinguish color filters from other display adjustments like Night Shift or True Tone. Night Shift changes the color temperature of your display to reduce blue light in the evening, while True Tone dynamically adjusts white balance based on ambient lighting. Color filters, by contrast, specifically alter color perception to aid users with color vision deficiencies or preferences.
Compared to Windows and iPhone implementations, Mac color filters offer a similar range but with some differences in filter types and customization. For example, Windows provides several color blindness modes including Deuteranopia, Protanopia, and Tritanopia, whereas Mac includes options like Grayscale, Red/Green filters, and Blue/Yellow filters. iPhone filters align closely with Mac but are optimized for smaller screens and touch input.
| Filter Type | Mac | Windows | iPhone |
|---|---|---|---|
| Grayscale | Yes | Yes | Yes |
| Red/Green (Protanopia/Deuteranopia) | Yes (Red/Green) | Yes (Protanopia/Deuteranopia) | Yes |
| Blue/Yellow (Tritanopia) | Yes | Yes | Yes |
| Invert Colors | Separate Accessibility setting | Yes | Yes |
macOS compatibility for color filters is as follows:
- macOS Catalina (10.15) and later: Full color filter support
- Earlier macOS versions: Limited or no native color filter support
Understanding these basics will help you set realistic expectations before you enable and customize color filters on your Mac.
How to turn on color filters on Mac step-by-step
- Click the Apple menu icon in the top-left corner of your screen and select System Settings. This opens the main settings window where you control various Mac features.
- In System Settings, scroll down the sidebar and click Accessibility. The Accessibility panel contains options designed to help users customize their Mac experience.
- Within Accessibility, find and select the Display section. This area controls visual adjustments including color filters.
- Look for the Color Filters option and click it to open its settings. You will see a toggle switch at the top of the Color Filters pane.
- Toggle the switch to On. Upon activation, you will immediately notice a change in your screen colors that corresponds to the currently selected filter.
- Below the toggle, choose from the main filter types: Grayscale, Red/Green (Protanopia), Green/Red (Deuteranopia), Blue/Yellow (Tritanopia), and an option to invert colors. Selecting each filter updates the screen preview to help you decide which suits your needs best.
- Once selected, close System Settings. The filter remains active until you turn it off or change it.
The immediate visual effect of turning on color filters can range from subtle hue adjustments to more pronounced color shifts, depending on the filter chosen. This helps users identify the filter that best improves their viewing comfort or accessibility.
How to change color filter on iPhone and PC: understanding cross-device differences
Color filter settings on iPhone and Windows PCs offer accessibility options that help users adapt screen colors, but the locations, filter types, and customization levels differ significantly from Mac.
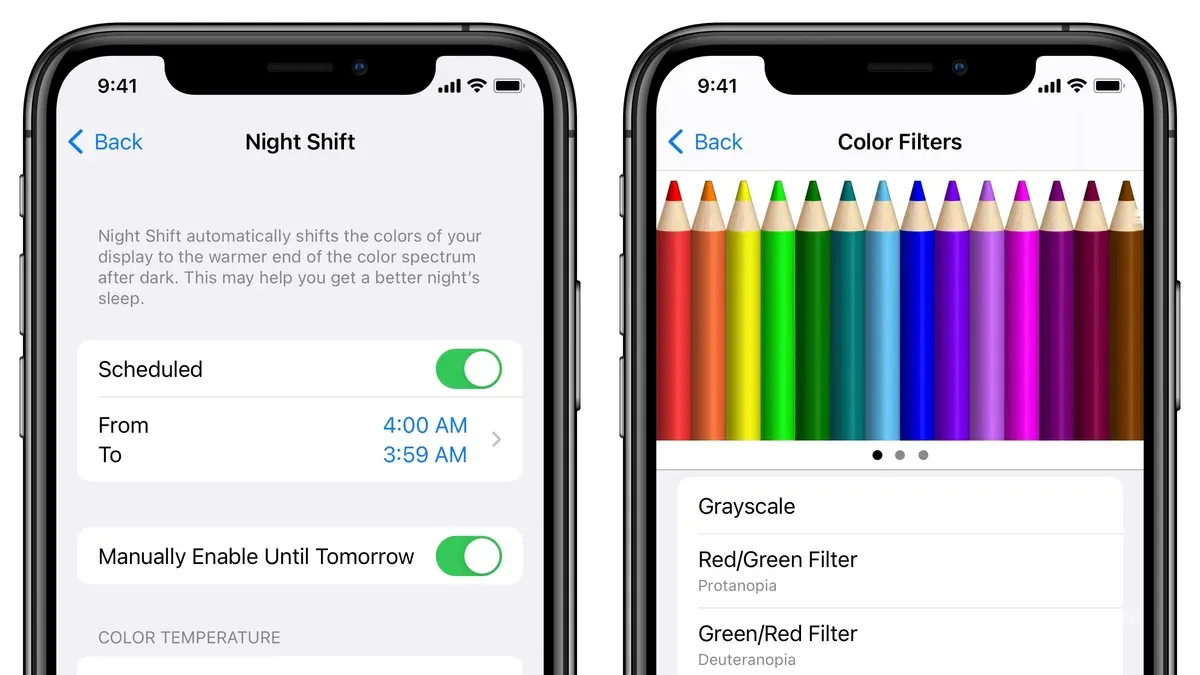
Changing color filters on iPhone
- Open Settings on your iPhone.
- Tap Accessibility.
- Select Display & Text Size.
- Scroll down and tap Color Filters.
- Toggle the Color Filters switch to turn it on; the screen colors will change immediately.
- Choose from preset filters such as Grayscale, Red/Green for Protanopia, Green/Red for Deuteranopia, Blue/Yellow for Tritanopia, or Color Tint.
- Adjust the intensity slider if you select Color Tint to fine-tune the effect.
Once enabled, the filters apply system-wide, including apps and the home screen.
Changing color filters on Windows 10/11 PCs
- Click the Start button and select Settings.
- Go to Ease of Access (Windows 10) or Accessibility (Windows 11).
- Choose Color Filters from the sidebar.
- Toggle Turn on color filters to enable the feature; you will see the screen adjust instantly.
- Select a filter type from options such as Grayscale, Inverted, Grayscale Inverted, Deuteranopia, Protanopia, and Tritanopia.
Windows offers less granular customization beyond these presets but includes an option to toggle filters quickly using the keyboard shortcut Windows key + Ctrl + C.
Key differences and considerations
| Feature | iPhone | Windows PC |
|---|---|---|
| Menu location | Settings > Accessibility > Display & Text Size > Color Filters | Settings > Ease of Access/Accessibility > Color Filters |
| Filter options | Multiple presets + adjustable Color Tint intensity | Fixed presets only, no intensity adjustment |
| Activation shortcut | No default shortcut | Windows key + Ctrl + C |
| System-wide application | Yes | Yes |
| Customization flexibility | Moderate (especially with Color Tint) | Limited to predefined filters |
Each platform’s approach suits different user needs: iPhone offers more nuanced control with adjustable tint, while Windows focuses on quick toggling and simplicity. Understanding these differences can help you maintain a consistent visual experience across your devices or choose the platform that best fits your accessibility preferences.
How to change and customize color filter settings on Mac
After turning on color filters, you can refine your choice to better suit your vision needs. macOS offers several preset filters tailored to common types of color blindness, such as Red/Green (Protanopia), Green/Red (Deuteranopia), and Blue/Yellow (Tritanopia). Selecting the most appropriate filter helps enhance color differentiation based on your type of color perception.
While macOS does not provide a direct slider to adjust filter intensity or opacity within System Settings, you can combine color filters with other display adjustments to fine-tune screen appearance. For example, adjusting the display’s brightness or enabling “Reduce White Point” in Accessibility settings can soften colors and reduce glare when used alongside filters.
To change your color filter or experiment with alternatives:
- Open System Settings and go to Accessibility.
- Select Display, then Color Filters.
- Choose a different filter from the list; the screen updates immediately so you can compare before and after.
- Test each filter with your typical apps or content to see which improves visibility and comfort.
For users seeking more granular control or the ability to create custom filters, macOS’s built-in options are limited. Some third-party apps, like Color Oracle or f.lux’s color adjustments, allow simulation of various color blindness types or screen tinting beyond the defaults. These tools may offer adjustable intensity and custom presets but can vary in system integration and ease of use.
Remember that combining multiple adjustments can affect color accuracy, so balance filter strength with overall comfort and usability. Taking screenshots before and after applying filters can help you evaluate changes objectively.
How to turn off color filters on Mac and revert settings
Disabling color filters on your Mac is straightforward and ensures your display returns to its default color profile. Follow these steps to toggle off color filters and reset any customizations you applied.
- Open System Settings from the Apple menu.
- Navigate to Accessibility and select Display from the sidebar.
- Click on the Color Filters section.
- Toggle the Color Filters switch to the off position. Your screen colors should immediately revert to normal.
- If you created custom filters, click Reset or remove any saved presets to clear these settings fully.
- Close System Settings and observe your display to confirm colors appear natural and consistent with your usual appearance.
If colors still seem altered after turning off filters, try these troubleshooting steps:
- Restart your Mac to ensure system changes fully apply.
- Check for any active third-party apps that modify screen colors and disable them.
- Verify that other display adjustments, such as Night Shift or True Tone, are not affecting color tones.
- Reset your Mac’s NVRAM/PRAM, which can influence display settings.
Following these instructions will reliably turn off color filters and restore your Mac’s display to its original state.
How to filter by color and filter based on color in Mac apps and system-wide
Filtering by color often refers to sorting or displaying content based on color attributes, which is different from applying color filters for accessibility or image effects. On Mac, this type of filtering is mainly available within specific apps rather than system-wide.
In Finder, you can organize and filter files using color tags. Color tags are user-applied labels that help you group files visually. To filter by color tag in Finder, create a Smart Folder that automatically collects files with selected tags.
- Open Finder and select File > New Smart Folder.
- Click the '+' button in the upper-right corner to add search criteria.
- From the first dropdown menu, choose 'Other…' and search for 'Color Tag'.
- Select 'Color Tag' and set the condition to 'is' followed by the color tag you want to filter by, for example, 'Red'.
- Save the Smart Folder by clicking 'Save' and give it a descriptive name.
This Smart Folder now dynamically lists all files tagged with that color, making it easier to find and manage them.
In the Photos app, you can filter images by their assigned color labels as well. Use the sidebar’s 'Albums' section under 'Colors' to view photos grouped by color tags, aiding in quick retrieval based on color themes or organization.
System-wide filtering by color metadata or visual content is limited. Most apps do not support automatic filtering based on image or document colors beyond these tagging methods. For more advanced color-based filtering, third-party tools like photo management or digital asset management software offer enhanced options, including searching by dominant colors or color ranges within images.
These third-party solutions can integrate with Finder tagging or work independently, but they require installation and separate setup.
Troubleshooting common problems with Mac color filters
If the Color Filters option is missing or greyed out, first check that your Mac is running a supported macOS version with Accessibility features enabled. Restarting your Mac can also refresh system settings. If the issue persists, ensure you are signed in with an administrator account, as some settings may be restricted for standard users.
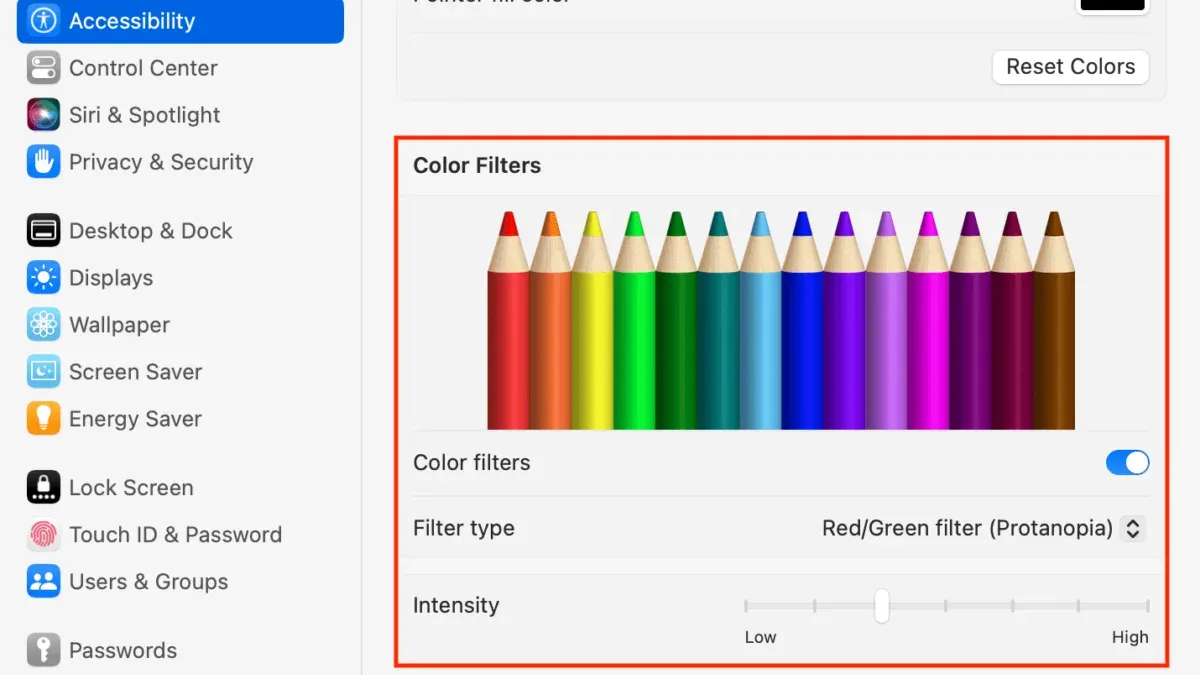
When filters do not display correctly or show no visible change, verify that you have selected a filter type under System Settings > Accessibility > Display > Color Filters. Sometimes toggling the feature off and on again helps. Additionally, confirm that your display profile is set to the default or a compatible color profile, as custom profiles can interfere with filter rendering.
Conflicts can arise between Color Filters, Night Shift, True Tone, and external monitors. Night Shift and True Tone adjust screen warmth and can diminish filter effects. To resolve this, disable Night Shift and True Tone temporarily via System Settings > Displays. When using external monitors, some filters may not apply correctly due to hardware or connection type limitations; try adjusting monitor settings or using filters on the Mac’s built-in display only.
Regarding performance and battery impact, enabling color filters typically has a negligible effect on modern Macs. However, older models or those with integrated graphics may experience slight slowdowns or increased battery drain. If you notice performance issues, consider disabling filters when high performance is needed, or use preset filters instead of custom ones.
- Open System Settings and navigate to Accessibility > Display > Color Filters. You should see the toggle and filter options enabled.
- If the toggle is greyed out, restart your Mac and check again for display changes.
- Turn off Night Shift and True Tone from System Settings > Displays to avoid conflicts.
- Test filters on the built-in display if using an external monitor, as external displays may not support filter effects fully.
- Switch to the default color profile under System Settings > Displays > Color to ensure compatibility.
- If filters still do not work, create a new user account to check if the issue is user-specific.
These steps address common issues and known workarounds for macOS color filter bugs affecting visibility and functionality.
- How to Turn On Zoom Accessibility on Mac: Step-by-Step Guide
- How to Increase Cursor Size on Mac: Clear Step-by-Step Guide
- How to Turn On Live Captions on Mac: A Clear Step-by-Step Guide
- How to Use VoiceOver on Mac: A Complete Step-by-Step Guide
Frequently asked questions
How to change color filters?
To change color filters on your Mac, open System Settings and navigate to Accessibility > Display > Color Filters. From there, toggle Color Filters on if needed and choose a different filter from the list, such as Grayscale, Red/Green filter, or Blue/Yellow filter. The change applies immediately, letting you see which filter suits your needs best.
How to do mac filtering?
Mac filtering typically refers to applying color filters for visual accessibility. You enable this via System Settings under Accessibility > Display > Color Filters. This feature adjusts screen colors to assist users with color blindness or visual preferences, enhancing readability and reducing eye strain.
How to change colour filter settings?
Changing colour filter settings on a Mac involves going to System Settings > Accessibility > Display > Color Filters. After turning on Color Filters, you can select from preset options or customize a filter by adjusting intensity and hue to better fit your vision needs. This customization allows more precise control than default filters.
How to turn off filter by color?
To turn off filter by color on your Mac, go to System Settings > Accessibility > Display > Color Filters and toggle the Color Filters switch to the off position. This will immediately revert your screen to its standard color display without any filter applied.
How to filter based on color?
Filtering based on color on Mac generally involves using Color Filters in Accessibility settings, which changes screen colors to highlight or mask certain hues. Some Mac apps also support filtering or sorting by color for files or images, but system-wide color filtering is primarily managed through Accessibility options.
What color filters on Mac won’t do and who should look elsewhere
Color filters on Mac are designed to enhance accessibility and visual comfort but do not calibrate your screen’s color accuracy for professional tasks like photo editing or video grading. For precise color work, hardware calibration tools remain essential. Additionally, some older Mac models or versions of macOS may not support every filter type or customization option described here. This guide focuses solely on built-in macOS features; third-party applications can offer more extensive customization but may vary in reliability and introduce security risks.
The most useful next step is to explore the Accessibility pane in System Settings, specifically the Color Filters section, where you can experiment with different filter presets and custom adjustments. Pay attention to the “Invert Colors” and “Reduce White Point” options alongside filters to tailor the screen to your specific needs. Trying out these settings while working or browsing will help you find the balance that best suits your vision and daily usage.