How to Use Night Shift on Mac: A Clear Step-by-Step Guide
Discover how to enable and customize Night Shift on your Mac to reduce eye strain and improve your sleep cycle effectively.
Working late on your Mac can leave your eyes feeling strained and disrupt your sleep cycle. Adjusting your display settings to reduce blue light is a practical way to ease these issues.
This article explains how to use Night Shift on Mac, guiding you through enabling and customizing the feature to minimize eye strain. It also offers advice for those adapting to night shift work schedules, helping you balance comfort and productivity effectively.
Key takeaways
- Enable Night Shift via System Preferences > Displays > Night Shift tab.
- Set a custom schedule or use Sunset to Sunrise for automatic adjustment.
- Adjust color temperature slider for warmer or cooler screen hues.
- Use Night Shift alongside other tools like True Tone or Dark Mode carefully to avoid conflicting settings.
- Regular breaks and screen brightness adjustments complement Night Shift for eye comfort.
Before you start with Night Shift on your Mac
Night Shift is a feature designed to reduce blue light emitted by your Mac's display, which can help decrease eye strain and support better sleep patterns. Before enabling it, you need to ensure your Mac and its software are compatible.
Night Shift requires macOS Sierra 10.12.4 or later. To check your macOS version, click the Apple menu, select "About This Mac," and view the version number. If your macOS is earlier than 10.12.4, you will need to update your system to use Night Shift.
Not all Mac displays support Night Shift. Compatible displays include built-in Retina and non-Retina screens on MacBook Pro, MacBook Air, iMac, Mac mini, and Mac Pro models that support the required macOS version. External displays generally do not support Night Shift.
If you use other Apple devices, such as an iPhone or iPad, you can enable Night Shift on those as well. This coordinated approach helps maintain consistent blue light reduction across your devices, especially useful if you switch between them during night shifts.
- Check your macOS version: Click the Apple menu > About This Mac; confirm your version is 10.12.4 or later. If not, update via System Preferences > Software Update.
- Verify your Mac’s display supports Night Shift: Built-in Retina or non-Retina displays on supported Macs are compatible; external monitors generally are not.
- Consider enabling Night Shift on your other Apple devices for a unified experience during night hours.
How to enable Night Shift on Mac
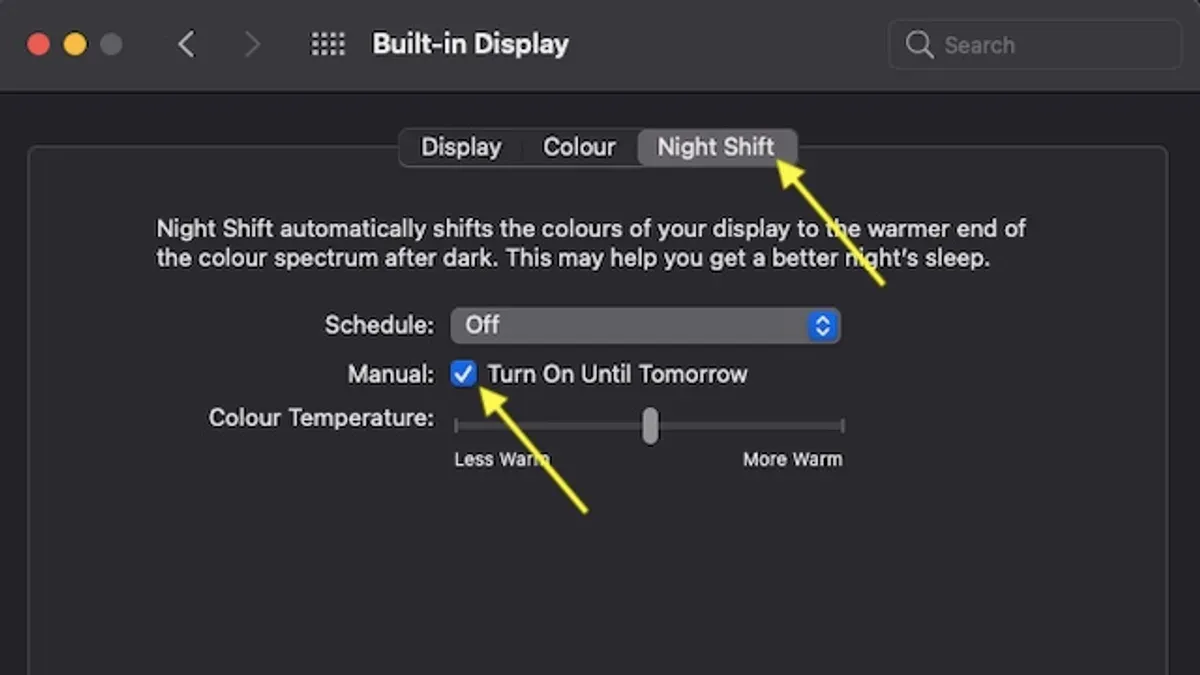
To turn on Night Shift on your Mac, start by opening System Preferences. From there, navigate to Displays and select the Night Shift tab at the top of the window.
- Click the Apple menu () in the top-left corner of your screen and choose System Preferences.
- Select Displays to open display settings, then click the Night Shift tab.
- To activate Night Shift manually, check the box labeled Turn On Until Tomorrow. Your display will shift to warmer colors immediately, reducing blue light.
- Adjust the Color Temperature slider to select your preferred warmth level. Moving it towards More Warm increases the yellow-orange tint, which can be easier on your eyes at night.
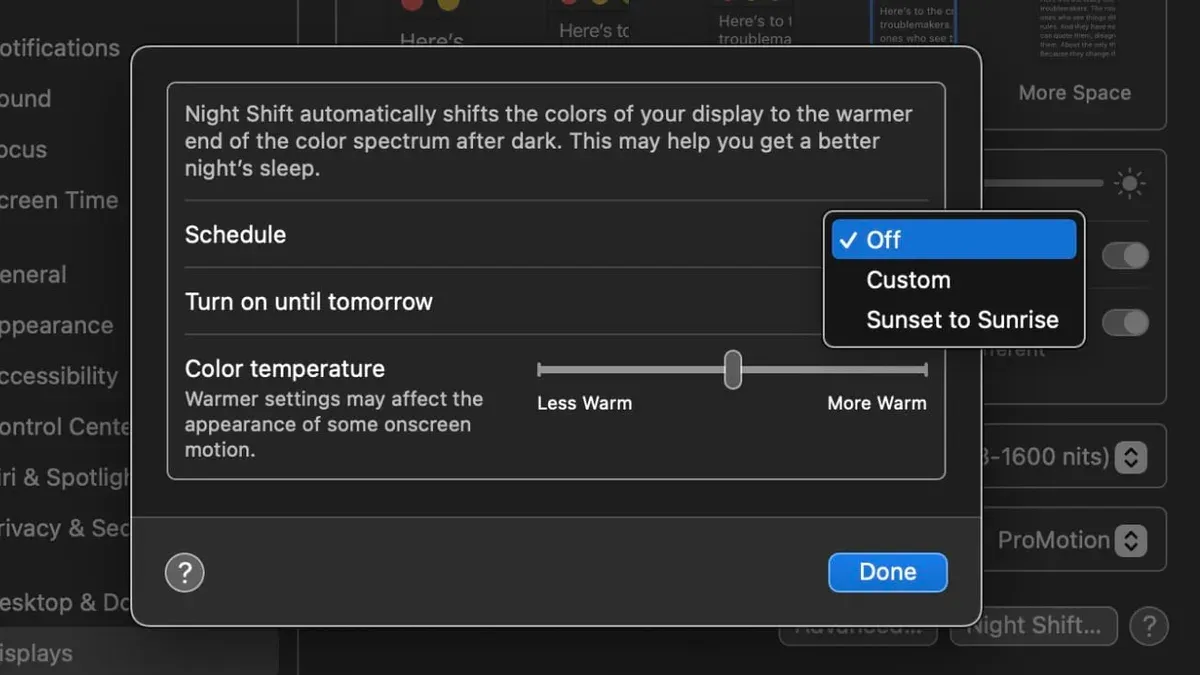
- To schedule Night Shift automatically, choose one of the options from the Schedule dropdown menu:
- Sunset to Sunrise: Night Shift activates based on your geographic location and local sunset time, turning off at sunrise.
- Custom: Set specific start and end times that fit your routine.
- Close System Preferences to save your settings.
- For quick toggling outside of System Preferences, open the Control Center icon in the menu bar, click Display, and toggle Night Shift on or off.
- You can also ask Siri to "Turn on Night Shift" or "Turn off Night Shift" for hands-free control.
Each step will update your display settings accordingly, and you should notice the color temperature shift when Night Shift is active.
How to put Night Shift on MacBook and adjust settings for comfort
Night Shift on your MacBook can be fine-tuned to reduce eye strain and improve comfort during night use. Adjusting the color temperature slider lets you choose a warmer or cooler hue, which affects how yellowish or bluish your screen appears.
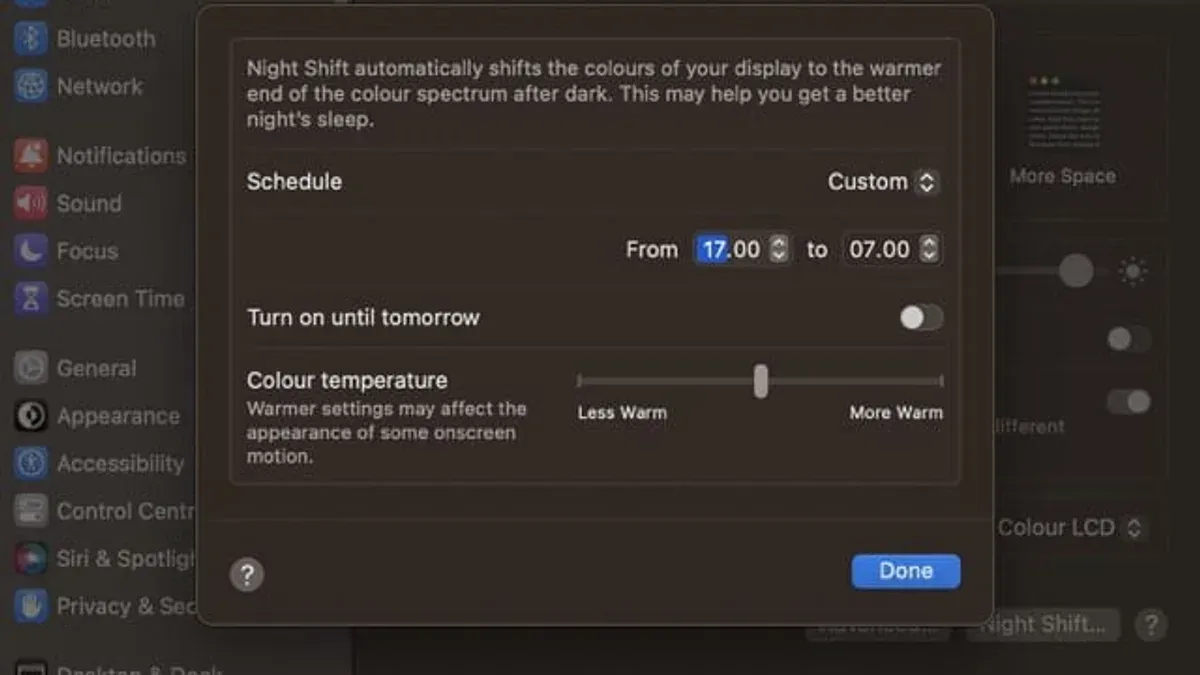
- Open System Preferences and select Displays. You should see a Night Shift tab.
- Under the Color Temperature slider, move it towards More Warm for a stronger yellow tint or Less Warm for a subtler effect. When adjusted properly, your screen shifts from a bluish-white tone to a soft amber glow, which can help reduce blue light exposure.
- Next, adjust your Night Shift schedule to align with your personal sleep or work hours. Choose either a custom time range or the default Sunset to Sunrise setting based on your preferences. For example, if you work night shifts from 10 PM to 6 AM, set Night Shift to activate shortly before 10 PM and end after 6 AM.
- Check how Night Shift interacts with True Tone and Dark Mode. True Tone adapts the display’s color temperature based on ambient light, which can complement Night Shift’s effect. Dark Mode adjusts overall screen brightness and interface colors but does not change the display temperature. Using both can enhance comfort but may alter color perception slightly.
- Be aware that running Night Shift continuously on your MacBook has a minimal impact on battery life, as it primarily adjusts software settings rather than hardware intensity. Battery usage might increase slightly if combined with high brightness or intensive applications, but Night Shift alone is not a significant drain.
How to successfully work night shift using Night Shift on Mac
Night Shift reduces blue light exposure, which helps support your circadian rhythm by minimizing interference with melatonin production. This can improve sleep quality and reduce eye strain during overnight work sessions.
- Set a consistent Night Shift schedule aligned with your work hours: open System Preferences > Displays > Night Shift, then choose a custom schedule matching your night shift. When set correctly, your display will shift to warmer colors during your work period.
- Organize your work sessions and breaks around this schedule: work in focused intervals of 90 to 120 minutes followed by 10-15 minute breaks in low-light environments. Proper breaks help maintain alertness and reduce fatigue, which you should notice in your productivity.
- Adjust screen brightness manually or enable "Automatically adjust brightness" in System Preferences > Displays to complement Night Shift. Lower brightness levels combined with warmer colors reduce eye strain during night hours.
- Use ambient lighting that is soft and indirect rather than harsh overhead lights to reduce visual discomfort. A desk lamp with adjustable color temperature can help you avoid excessive blue light exposure.
- Adopt good sleep hygiene by avoiding bright screens at least one hour before your planned sleep time and creating a dark, quiet sleeping environment. This supports the effects of Night Shift and helps your body adapt to the night work schedule.
Many users report improved sleep onset and less eye fatigue when Night Shift is combined with these behavioral practices. Scientific studies indicate blue light exposure before sleep can delay melatonin release, so reducing it during night shifts aids in maintaining a healthier sleep-wake cycle.
How to manage Night Shift work with related devices
Night Shift is available not only on your Mac but also on your iPhone and iPad, providing a consistent blue light reduction experience across Apple devices. To keep your Night Shift schedules aligned, use iCloud and Apple ecosystem features that sync settings automatically when devices share the same Apple ID.
On your iPhone or iPad, Night Shift can be configured in Settings > Display & Brightness > Night Shift, where you can schedule it similarly to your Mac. This complementary setup helps maintain consistent lighting conditions whether you switch between devices during your night shift work or leisure time.
To ensure syncing of Night Shift schedules and preferences:
- Make sure each device is signed in with the same Apple ID under Settings > [your name] on iPhone/iPad and System Preferences > Apple ID on Mac. You should see your Apple ID info displayed.
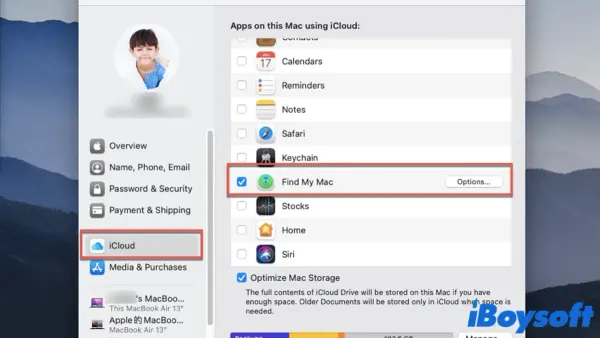
- Enable iCloud Drive and ensure that System Preferences or Settings allow syncing of display or accessibility settings. On Mac, this is under System Preferences > Apple ID > iCloud, where iCloud Drive should be checked.
- Set Night Shift schedules on each device to match, such as from sunset to sunrise or custom times. Changes on one device will reflect on others signed into the same Apple ID.
- Verify on each device that Night Shift turns on and off at the scheduled times, confirming proper sync.
If you use non-Apple devices alongside your Mac, such as Windows PCs, Night Shift is not available. Instead, consider third-party software like f.lux or Windows’ built-in "Night light" feature found under Settings > System > Display > Night light settings. These tools offer similar blue light reduction but require manual schedule synchronization with your Apple devices for consistency.
While Apple devices benefit from integrated syncing, managing cross-platform Night Shift-like settings demands extra attention to keep schedules aligned and minimize eye strain across your work environment.
Common troubleshooting for Night Shift on Mac
If the Night Shift option is missing or greyed out in System Preferences, it often indicates an unsupported display or outdated macOS version. Verify you are running macOS Sierra 10.12.4 or later and that your Mac’s built-in display supports Night Shift.
If Night Shift does not activate at scheduled times, check your Mac’s date and time settings to ensure they are correct and set to update automatically. Also, confirm that Night Shift’s schedule is properly configured under System Preferences > Displays > Night Shift.
Conflicts can occur between Night Shift and True Tone or external displays. True Tone dynamically adjusts colors based on ambient lighting and may override Night Shift's color temperature. To test this, temporarily disable True Tone in System Preferences > Displays and observe if Night Shift’s effect becomes visible.
When using external monitors, Night Shift may not function if the display does not support it. Apple’s official support notes that Night Shift works only on built-in Retina displays and certain external monitors connected via Thunderbolt or DisplayPort.
Display color issues or perceived flicker with Night Shift may result from graphics driver glitches or incompatible hardware. Restart your Mac and update to the latest macOS version. Resetting the NVRAM/PRAM can also resolve display anomalies.
- Open System Preferences > Displays > Night Shift; if the option is missing, confirm macOS and hardware compatibility.
- Check Date & Time settings in System Preferences > Date & Time; enable “Set date and time automatically” to ensure correct scheduling.
- Disable True Tone under System Preferences > Displays > Display tab to check for conflicts affecting Night Shift.
- Test Night Shift with the built-in display only; disconnect external monitors to identify hardware limitations.
- Restart your Mac and apply any available macOS updates from System Preferences > Software Update.
- Reset NVRAM/PRAM by restarting your Mac and holding Option + Command + P + R keys until the second startup sound or Apple logo appears twice.
For detailed guidance, consult Apple’s official support page on Night Shift troubleshooting, which covers these steps and additional diagnostics.
Alternatives and complements to Night Shift on Mac
While Night Shift offers a solid baseline for reducing blue light exposure, other tools provide more granular control over your display's color temperature and scheduling. Third-party apps like f.lux, Iris, and Twilight allow you to customize blue light filtering intensity, transition speeds, and even adjust brightness based on ambient light, which can enhance comfort during extended night work.
| App | Custom Blue Light Levels | Scheduling Options | Additional Features |
|---|---|---|---|
| f.lux | Yes, adjustable color temperature | Auto based on location and time | Brightness control, disable for apps |
| Iris | Yes, multiple modes and presets | Flexible scheduling and manual override | Screen brightness without PWM flicker, health reminders |
| Twilight | Yes, filter intensity slider | Scheduled by time | Simple interface, Android support |
Dark Mode on macOS complements Night Shift by reducing overall screen brightness and using darker interface colors, which can decrease eye strain in low-light environments. However, Dark Mode does not reduce blue light, so using both together can provide better results.
For users who also work on Windows or other PCs at night, built-in features like Windows Night Light or third-party apps such as f.lux offer similar blue light reduction. Coordinating schedules across devices helps maintain consistent eye comfort.
Keep in mind that Night Shift and similar tools are not a cure-all. Regular breaks following the 20-20-20 rule—looking 20 feet away for 20 seconds every 20 minutes—are essential. Additionally, optimizing your workspace ergonomics, including monitor height and ambient lighting, supports long-term eye health and productivity during night shifts.
- How to Set and Customize a Screen Saver on Your Mac
- How to Change Screen Resolution on Mac: Clear Step-by-Step Guide
Frequently asked questions
How to night shift?
To night shift your display, activate a feature like Night Shift that adjusts your screen's color temperature to warmer tones. This reduces blue light exposure, which can help lessen eye strain and support better sleep. On most devices, you can schedule this to turn on automatically at sunset or set custom times.
How to use night shift on macbook?
On a MacBook, open System Settings and go to Displays. Select the Night Shift tab, then enable it either manually or schedule it for sunset to sunrise or specific hours. Adjust the color temperature slider to your comfort level, usually towards the warmer side for less blue light.
What is iphone night shift?
iPhone Night Shift is a display setting that changes the screen colors to warmer tones during evening hours. This helps reduce blue light exposure, which can interfere with your natural sleep cycle. You can find it under Settings > Display & Brightness > Night Shift.
How to enable Night Shift on Mac?
Go to System Settings > Displays > Night Shift. You can toggle Night Shift on manually or set a schedule, such as sunset to sunrise or custom hours. Adjust the color temperature slider to reduce blue light according to your preference.
How to use Night Shift on MacBook?
Navigate to System Settings, then Displays, and open the Night Shift tab. Turn on Night Shift manually or schedule it to activate automatically. Adjust the warmth slider to find a balance that reduces eye strain without distorting colors too much.
What Night Shift Does Not Cover
Night Shift helps reduce blue light exposure by adjusting your Mac's display colors, but it is not a replacement for good sleep hygiene or managing overall screen time. If you continue to experience eye strain or sleep disturbances despite using Night Shift, consider consulting an eye care professional or sleep specialist. Additionally, Night Shift does not address other sources of blue light exposure such as lighting in your environment or use of other devices.
To get the most out of Night Shift, focus on setting a schedule that matches your night shift hours and adjusting the color temperature to a warmer tone that feels comfortable without overly distorting colors. Avoid relying solely on Night Shift to combat fatigue or sleep problems.
The single most useful next step is to open System Settings > Displays > Night Shift and set a custom schedule that aligns with your work hours. Adjust the color temperature slider to a warmer setting that reduces blue light but still allows you to see your screen clearly. This simple action ensures Night Shift works effectively to support your well-being during night shifts.