How to Blur Your Background in Microsoft Teams on Mac: A Step-by-Step Guide
Discover easy steps to blur your background in Microsoft Teams on Mac for a more professional and private video meeting experience.
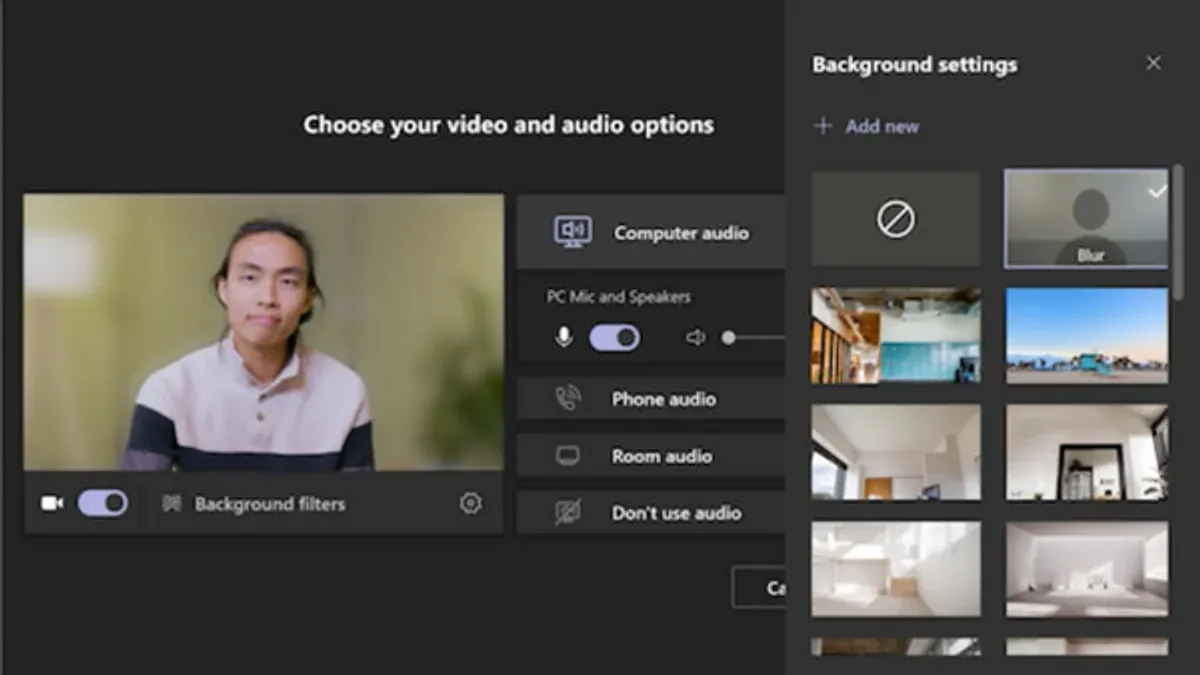
You are about to join a Microsoft Teams meeting on your Mac, but your background feels too distracting or personal. Blurring your background can help maintain privacy and present a professional appearance without rearranging your surroundings.
This article explains how to blur background in Microsoft Teams on Mac with clear, step-by-step instructions. You will learn how to check if your Mac supports background effects, where to find the background settings, and how to enable blur both before and during meetings. Troubleshooting tips and optimization advice make sure you get the best results, even if you encounter common issues.
Key takeaways
- Check that your Mac runs macOS Big Sur or later and has Microsoft Teams version 1.4.00.19572 or newer for background blur support.
- Find background effects by clicking the three-dot menu (...) and selecting "Apply background effects" before or during a meeting.
- Enable "Blur" to soften your background while keeping you in focus, improving privacy and professionalism.
- If blur doesn’t appear, verify Teams permissions for camera and try restarting the app or your Mac.
- Good lighting and a plain backdrop help background blur perform more smoothly and look natural.
Before You Start: Check Your Mac and Teams Requirements
Before enabling background blur in Microsoft Teams on your Mac, it’s essential to confirm your device and software support this feature. Background blur requires a Mac with at least an Intel 6th generation processor or Apple Silicon (M1 or later). Older Macs may not support this effect smoothly or at all. To check your Mac model, click the Apple menu, select About This Mac, and look for your processor information.
Next, ensure you have the latest Microsoft Teams version installed. Background effects require Teams version 1.4.00.19572 or newer. To verify your Teams version, open the app, click your profile picture in the top-right corner, and select About > Version. If your version is older, update Teams via the App Store or the official Microsoft website.
It’s also important to understand the difference between background blur and custom backgrounds. Background blur softens everything behind you, while custom backgrounds replace your surroundings with an image or video. On some older Macs or outdated Teams versions, blur may be unavailable, but you might still use static custom backgrounds.
- Click the Apple menu and choose About This Mac. Confirm your processor is Intel 6th generation or newer, or Apple Silicon (M1 or later). You should see your Mac model and chip information here.
- Open Microsoft Teams, click your profile picture in the top-right corner, and select About > Version. Confirm the version number is 1.4.00.19572 or higher.
- If your Teams version is outdated, update it via the App Store or Microsoft’s website. After updating, restart Teams to ensure the new features are available.
Open Microsoft Teams and Locate Background Settings
To blur your background in Microsoft Teams on a Mac, you first need to start or join a meeting. Open the Teams app and either click Calendar to join a scheduled meeting or select Meet Now to begin instantly. Before you enter the meeting, you will see a preview of your video feed on the join screen.
On this preview screen, look for the Background filters button, represented by a person icon with a shaded background, typically located below or beside your video preview. Clicking this opens the background settings panel where you can choose the blur option.
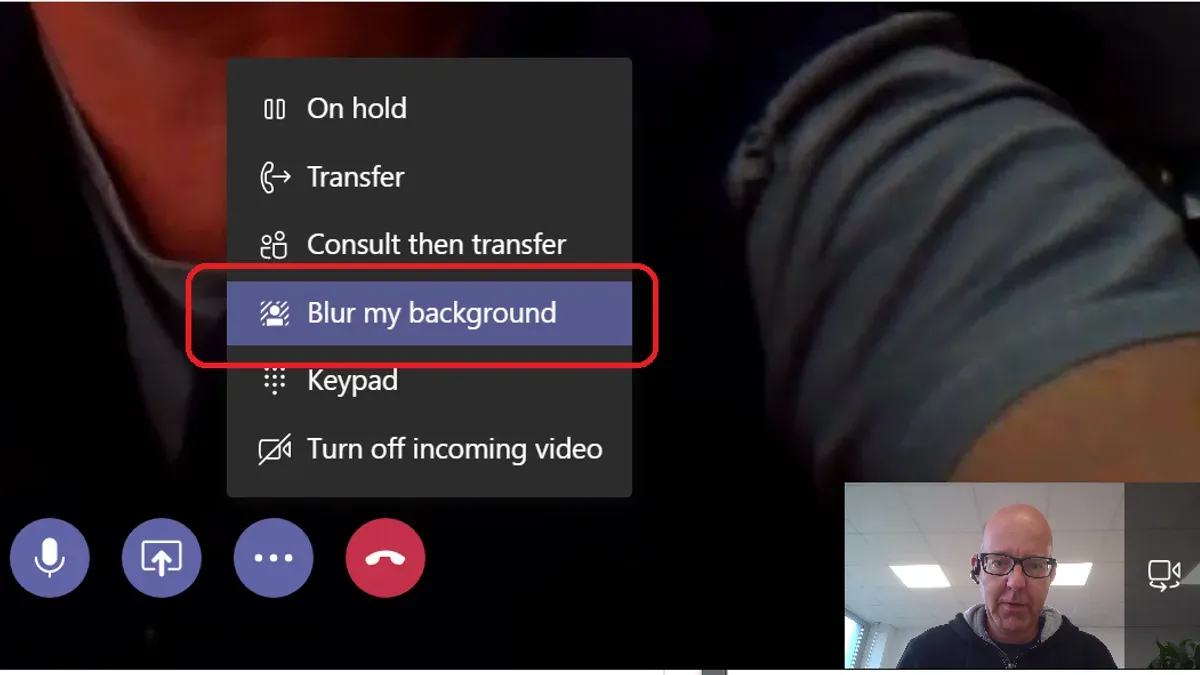
If you are already in a meeting, move your mouse to reveal the meeting controls at the bottom of the window. Click the More actions button (three dots), then select Apply background effects. This will open the same background settings panel.
Depending on your Teams app version or Mac OS, the exact button placement may vary slightly. Some updates place the background icon directly on the pre-join screen, while others require you to open a sidebar menu. Familiarize yourself with these interface elements to locate the background settings smoothly.
Turn On Background Blur Before Joining a Meeting
To enable background blur before your video feed starts, begin at the pre-join screen where you prepare to enter the meeting. This allows you to control your background privacy proactively and see how the blur effect looks before others can see you.
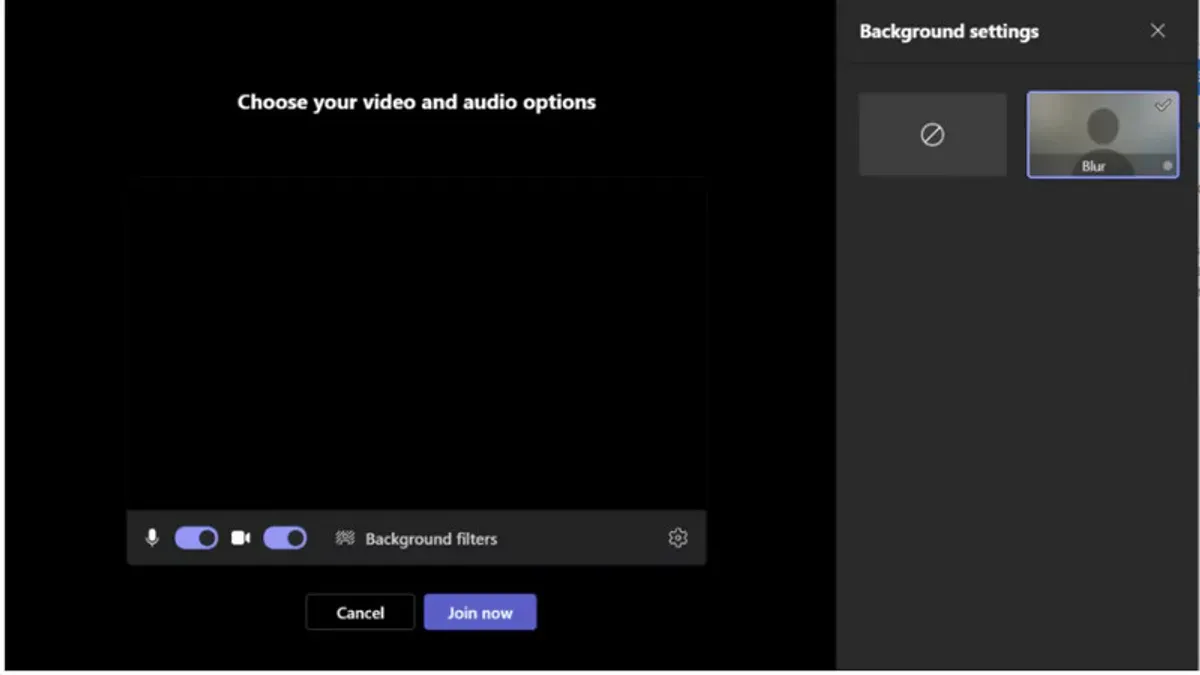
- On the pre-join screen, locate the video preview window showing your camera feed. Just below or beside it, find and click the Background filters button (it looks like a person icon with a shaded backdrop).
- From the available background options, select Blur. You should immediately see your background blur in the video preview, with your image clear and the surroundings softened.
- If the blur effect looks too strong or weak, note that the intensity cannot be adjusted, but you can turn the blur off and choose a different background or none at all.
- Once you are satisfied with the blurred background preview, click Join now to enter the meeting with your background effect active.
- If the Blur option is missing or greyed out, verify your Mac meets Teams’ hardware requirements and that your camera is properly connected. Sometimes restarting Teams or your Mac can help refresh available features.
For example, when blur is active, your preview shows a soft, foggy background behind your face rather than a clear room. If the option is unavailable, the button may appear dimmed or the list of backgrounds might be empty.
Enable Background Blur During a Meeting
Once you are already in a Microsoft Teams call on your Mac, you can easily turn on background blur or adjust it without leaving the meeting. This flexibility allows you to maintain privacy or professionalism as your environment changes during the call.
- Move your cursor to reveal the meeting control bar at the bottom of your Teams window.
- Click the More actions button (represented by three dots).
- From the menu, select Apply background effects. A sidebar will appear on the right side of your screen showing background options.
- Find and select the Blur option. You will see a preview of how your video feed looks with the blur applied.
- Click the Apply button below the preview to enable background blur live during the call.
You can toggle the blur off by returning to the same menu and selecting None or switch to other background effects if desired. Keep in mind that while blur helps protect your privacy and looks professional, it slightly uses more processing power, which may affect video quality on older Macs. If you notice any lag or reduced clarity, consider disabling blur or closing other applications to improve performance.
For example, if you start a call without blur but then decide to blur your background, following these steps will update your video feed immediately, maintaining clear focus on you while softening the environment behind. Switching blur off mid-call works just as smoothly, instantly restoring the normal background view.
Troubleshoot Common Issues with Background Blur on Mac
If the background blur option is missing or grayed out, the first step is to ensure your Microsoft Teams app is updated to the latest version. Blur support was introduced in later releases, so older versions may not display this feature. To update, open Teams, click your profile picture, select Check for updates, and wait until the process finishes. After updating, restart Teams and check if the blur option appears.
Another frequent cause is outdated macOS software. Background blur requires certain system capabilities, so update your Mac by going to System Preferences > Software Update. Installing the latest macOS version can resolve compatibility issues.
Camera permissions can also block background effects. Verify this by opening System Preferences > Security & Privacy > Privacy > Camera and ensuring Microsoft Teams is checked. Without camera access, Teams cannot apply blur effects.
Resetting the Teams cache may fix persistent glitches. Close Teams, then in Finder press Shift + Command + G and enter ~/Library/Application Support/Microsoft/Teams. Delete the Cache folder, then restart Teams. If problems persist, uninstall and reinstall the app to ensure a clean setup.
Keep in mind that older Macs with less powerful processors or graphics capabilities might not support background blur. In such cases, consider using static background images as an alternative for privacy during calls.
Optimize Your Setup for the Best Background Blur Experience
Improving your background blur quality in Microsoft Teams on Mac starts with lighting and camera positioning. Ensure your face is well-lit from the front to help Teams distinguish you from your background. Avoid harsh backlighting or uneven shadows, which can confuse the blur effect and reduce clarity. Position your Mac’s camera at eye level and center yourself in the frame for the most natural and consistent blur.
Next, manage your Mac’s performance settings to avoid lag during calls. Close unnecessary applications to free up memory and CPU resources. You can also check Activity Monitor to identify resource-heavy processes. Smooth video with blur enabled depends on your Mac maintaining enough power and processing headroom.
Network quality plays a major role too. A stable, high-speed internet connection reduces video compression, preserving the blur effect’s sharpness and responsiveness. If possible, use a wired Ethernet connection or connect to a reliable Wi-Fi network with strong signal strength.
If your Mac struggles despite these steps, consider hardware upgrades like increasing RAM or switching to an external webcam with better optics and processing. Users often see a clearer, more stable blur effect and smoother video after upgrading their camera or hardware.
Frequently asked questions
Why can’t I see the background blur option in Microsoft Teams on my Mac?
The background blur feature may not appear if your Mac does not meet the minimum hardware or macOS version requirements. Microsoft Teams requires a Mac with at least an Intel i5 processor or better and macOS Mojave (10.14) or later. Also, ensure you are using the latest version of Microsoft Teams, as older versions might not include this feature.
Does background blur work with all Mac models and macOS versions?
No, background blur is supported only on certain Mac models that have sufficient processing power, typically those with newer Intel processors or Apple silicon chips. Additionally, your Mac must run macOS Mojave or a later version. If your device or software is older, the option may not be available or may function poorly.
Can I use background blur with a virtual background at the same time?
No, Microsoft Teams does not allow you to apply background blur and a custom virtual background simultaneously. You must choose either to blur your background or to select a virtual image or video as your background. Switching between these settings is possible, but they cannot be combined in a single meeting.
How do I disable background blur if I don’t want it during meetings?
You can turn off background blur by clicking the “Background filters” button in the meeting controls and selecting “None” from the available options. If you enabled blur before joining, you can also disable it from the preview screen by clicking the same background settings icon and choosing no effect. This will restore your normal camera view without any background modification.
What This Guide Does Not Cover
Background blur may not be available on older Mac models or if your Microsoft Teams app is not updated to the latest version. This guide focuses solely on using the built-in background blur feature within Microsoft Teams on Mac and does not cover third-party applications or external camera software that might offer alternative background effects. If your Mac does not support background blur natively or you want more advanced customization, exploring specialized software or hardware solutions could be necessary.
For the smoothest experience, make sure your Mac is running a supported macOS version and that Teams is updated through the Mac App Store or Microsoft website. If you encounter persistent issues beyond basic troubleshooting, consulting Apple Support or Microsoft’s official help resources may provide additional help tailored to your setup.
Now that you have a clear understanding of how to enable and troubleshoot background blur, the most useful next step is to practice turning the blur on and off during a test call in Teams. This hands-on practice helps you become comfortable with the settings and ensures the feature works smoothly before important meetings.
See also: How to Fix Microsoft Teams Camera Not Working on Mac: A Clear Troubleshooting Guide · How to Share Screen with Audio in Microsoft Teams on Mac: Step-by-Step · Master Portrait Mode in FaceTime on Mac: A Step-by-Step Guide