How to Disable Spotlight Indexing in Mac Terminal: A Step-by-Step Guide
Step-by-step guide to disable Spotlight indexing in Mac Terminal, helping you control search indexing and improve privacy on your Mac.
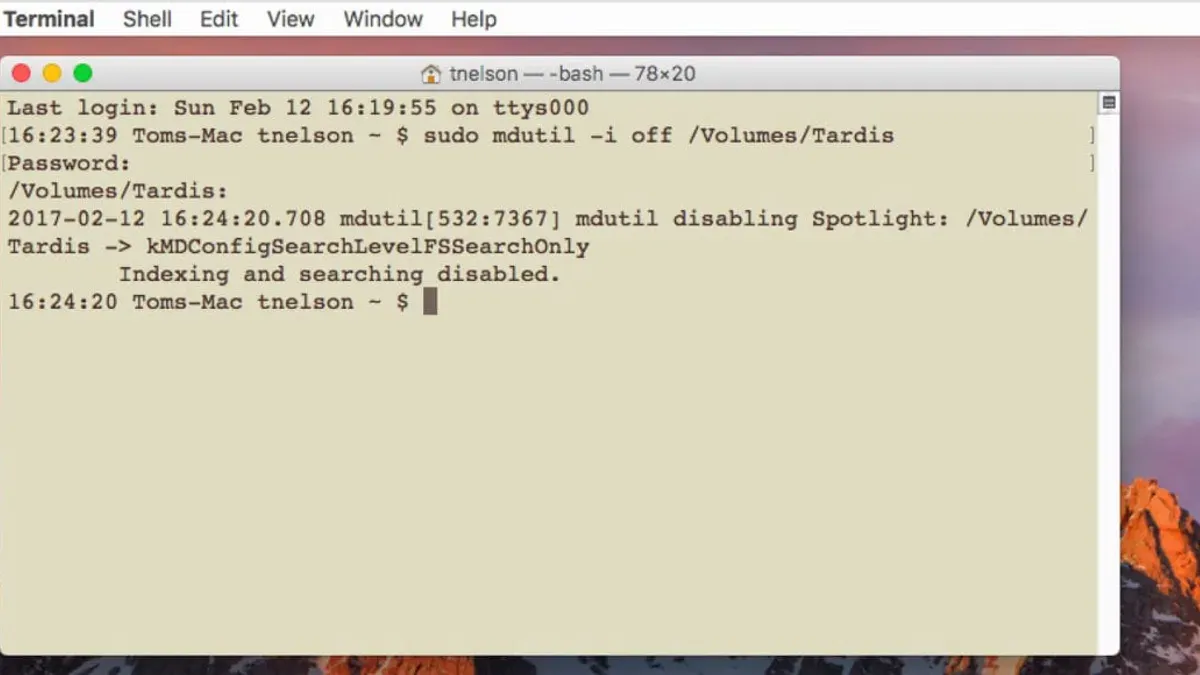
Your Mac feels slower than usual, or you want to limit what Spotlight indexes to protect your privacy. You know Terminal offers powerful control, but you want to avoid blindly entering commands without understanding the consequences.
This article covers how to disable Spotlight indexing in Mac Terminal with clear, step-by-step instructions. You'll learn how to check the current indexing status, disable Spotlight for specific volumes or system-wide, and manage exclusions safely. Alongside practical commands, we explain the trade-offs involved, such as the impact on search speed and functionality, so you can make an informed decision.
Key takeaways
- Use the Terminal command
mdutil -s /to check Spotlight indexing status on volumes. - Disable indexing for a specific volume with
sudo mdutil -i off /VolumeName. - Disabling Spotlight system-wide can reduce search capabilities and affect apps relying on indexing.
- Manage indexing exclusions via
sudo mdutil -i offcombined with.Spotlight-V100directory handling. - Re-enable indexing easily with
sudo mdutil -i on /when needed.
Before you start: What you need to know and prepare
Spotlight indexing organizes your Mac’s files, emails, and apps to provide fast search results and support features like Siri suggestions. Disabling Spotlight indexing can reduce system resource usage and disk activity, which some users report leads to slight improvements in responsiveness or battery life, especially on older machines or those with near-full drives. However, turning it off also means losing quick file search capabilities and may affect apps that rely on Spotlight data.
You must have administrator privileges to run the Terminal commands needed to disable indexing. Without these rights, the commands will not execute properly.
Before proceeding, back up any important data. Disabling Spotlight is generally safe but making a backup ensures you can recover if any unexpected issues arise.
Understanding these trade-offs helps you decide if disabling Spotlight indexing aligns with your needs.
How to check the current Spotlight indexing status
To verify whether Spotlight indexing is active on your Mac, use the Terminal command mdutil. This tool provides detailed information about indexing status on each mounted volume.
- Open Terminal from Applications > Utilities.
- Type
sudo mdutil -s /and press Enter. You will be prompted to enter your administrator password. - Observe the output. If it reads "/: Indexing enabled.", Spotlight indexing is active on your system volume. If it says "Indexing disabled.", Spotlight is turned off for that volume.
- To check other mounted volumes, replace
/with the volume path, for example/Volumes/MyDrive.
Note that System Integrity Protection (SIP) may restrict changes or access to indexing status on system volumes, causing some commands to fail or show limited information. Administrator privileges are required to get accurate status reports.
Sample output when indexing is enabled:/: Indexing enabled.
Sample output when disabled:/: Indexing disabled.
Step-by-step: Disable Spotlight indexing for specific volumes
- Identify the volume or directory you want to exclude from Spotlight indexing. You can list volumes by running diskutil list in Terminal or checking Finder for mounted drives. For example, your main boot volume is typically /, and an external drive might be mounted at /Volumes/ExternalDriveName.
- Open Terminal and enter the command sudo mdutil -i off [volume], replacing [volume] with the path to the desired volume. For example, to disable indexing on the boot volume, type sudo mdutil -i off / and press Enter. You will be prompted for your administrator password.
- After running the command, verify the change by checking the indexing status with mdutil -s [volume]. It should return that indexing is disabled on the specified volume.
- If you want to disable indexing on a secondary external drive mounted at /Volumes/ExternalDriveName, use sudo mdutil -i off /Volumes/ExternalDriveName. Check the status similarly with mdutil -s /Volumes/ExternalDriveName.
- To re-enable Spotlight indexing on any volume, run sudo mdutil -i on [volume], then verify with mdutil -s [volume] to confirm indexing is active again.
Disabling indexing on specific volumes helps improve performance or privacy for those drives but means you won’t be able to search their contents using Spotlight.
Disabling Spotlight indexing system-wide and what that means
To disable Spotlight indexing across your entire Mac, use the Terminal command sudo mdutil -a -i off. This command turns off indexing on all mounted volumes simultaneously. After running it, verify the status with mdutil -a -s, which should show indexing as disabled everywhere.
Turning off Spotlight system-wide disables the Finder and Spotlight search bar’s ability to quickly locate files, emails, or metadata. This can significantly slow down searches within the system interface, as these features rely on Spotlight’s index for instant results.
Additionally, some third-party applications depend on Spotlight’s metadata to function efficiently. Disabling indexing may cause slower performance or reduced functionality in these apps, especially those that rely on file tagging or content-based search.
This global approach is appropriate if you need to maximize system performance or privacy and do not frequently use built-in or app-based search features. However, if you regularly depend on fast searching or metadata-driven applications, consider disabling indexing only on specific volumes instead.
- Open Terminal and enter
sudo mdutil -a -i off. You will be prompted to enter your administrator password. - Press Enter and wait for the command to execute; no immediate output means success.
- Verify the change by running
mdutil -a -s. The output should confirm indexing is disabled on all volumes.
How to manage Spotlight indexing exclusions with the Terminal
Instead of disabling Spotlight indexing entirely, you can exclude specific folders from being indexed. This approach preserves search functionality on most of your system while preventing Spotlight from indexing large or sensitive directories.
- To view the current list of excluded folders, enter the command mdutil -X. You should see paths that Spotlight is set to ignore.
- To exclude a folder, use the command sudo mdutil -i off /path/to/folder. For example, to exclude a large folder named "Movies" in your home directory, run sudo mdutil -i off ~/Movies. If successful, Spotlight will stop indexing that directory.
- Run mdutil -s /path/to/folder to verify the exclusion status. It should report indexing as disabled for that folder.
- If you want to force Spotlight to re-index a previously excluded folder, use sudo mdutil -i on /path/to/folder followed by mdimport /path/to/folder. This will re-enable and trigger indexing.
Using these commands lets you fine-tune Spotlight’s behavior, balancing performance, privacy, and search relevance without fully disabling indexing system-wide.
Troubleshooting common issues when disabling Spotlight indexing
If you encounter permissions errors like "Operation not permitted" when running mdutil commands, System Integrity Protection (SIP) may be restricting your actions. To confirm, check if SIP is enabled by running csrutil status in Recovery Mode. Disabling SIP is not recommended unless absolutely necessary, as it reduces system security.
If Spotlight indexing appears to continue despite using sudo mdutil -i off /VolumeName, ensure you have specified the correct volume path and that you ran the command with sudo. Also, verify with mdutil -s /VolumeName that indexing is truly disabled.
To fix corrupted Spotlight indexes, use Terminal to rebuild them by running:
sudo mdutil -E /VolumeNameto erase and rebuild the index; you should see "Indexing enabled" indicating the process started.- Wait several minutes for indexing to complete, depending on the volume size.
If problems persist or you receive unusual error messages, it is advisable to seek professional help to avoid unintended system issues, especially if you are unfamiliar with macOS system internals.
When not to disable Spotlight indexing
If you rely heavily on macOS search functionality, disabling Spotlight indexing can significantly hinder your workflow. For example, if you frequently use Finder's search bar or the Spotlight menu to locate files quickly, turning off indexing will slow or prevent these searches from returning timely results.
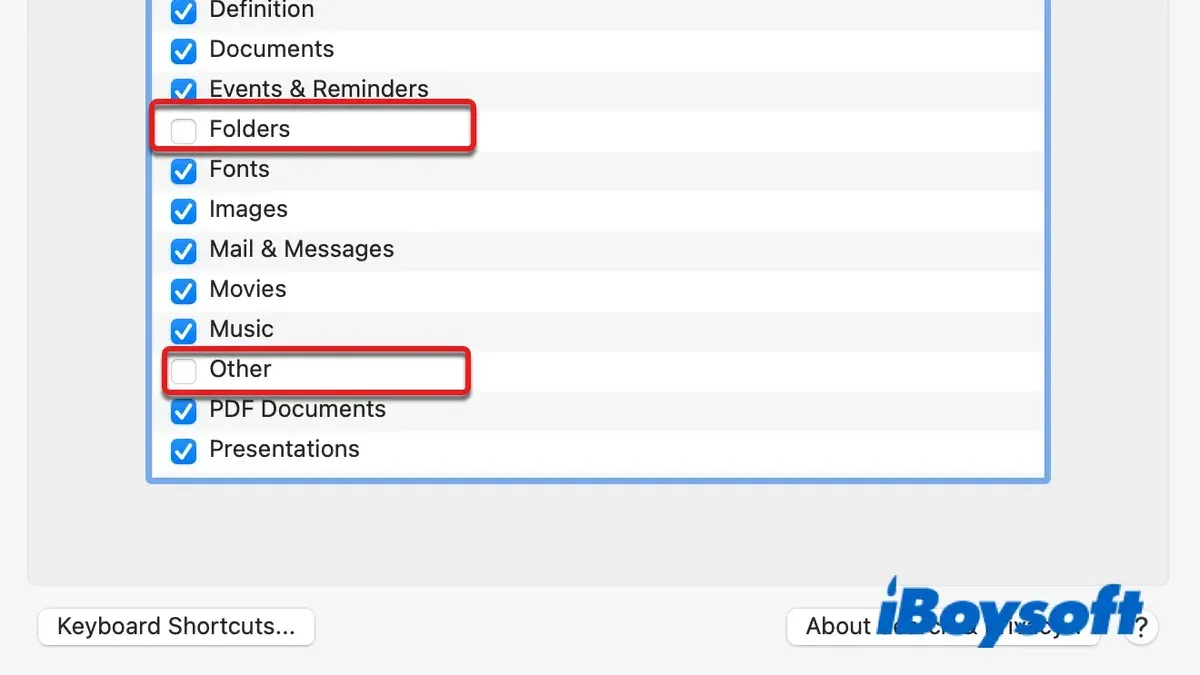
Users of apps integrated with Spotlight metadata, such as Mail or Photos, should also avoid disabling indexing. Mail uses Spotlight to search email content and attachments, while Photos depends on metadata indexing for efficient browsing and face recognition. Disabling Spotlight may cause these apps to perform poorly or lose search capabilities.
Instead of disabling Spotlight entirely, consider alternative approaches. You can exclude specific folders containing sensitive data or large files from indexing to preserve privacy and manage disk usage without losing global search functionality. Adjusting these settings offers a better balance between performance and usability than a full disable.
For example, a user who disables Spotlight to improve performance on an older Mac might find that searching for recent documents or emails becomes cumbersome, slowing daily tasks more than the indexing itself. Conversely, selectively excluding only nonessential volumes or directories maintains search speed and privacy.
- How to Disable Gatekeeper in Mac Terminal: Step-by-Step Guide
- How to Clear Font Cache in Mac Terminal: Step-by-Step Guide
- How to Clear System Logs in Mac Terminal: A Complete Step-by-Step Guide
- How to Test Internet Speed Using networkQuality in Mac Terminal
Frequently asked questions
Will disabling Spotlight indexing improve my Mac’s performance?
Disabling Spotlight indexing can reduce background CPU and disk activity, which might improve performance on Macs with limited resources or slow drives. However, the impact is usually minor on modern Macs with SSDs. Keep in mind that search capabilities will be limited without indexing, affecting how quickly you find files.
Can I disable Spotlight indexing for only certain folders?
Yes, you can exclude specific folders or volumes from Spotlight indexing using the Terminal command sudo mdutil -i off /path/to/folder. This allows you to keep Spotlight active for the rest of your system while preventing indexing on large or sensitive directories.
How do I re-enable Spotlight indexing if I change my mind?
You can re-enable Spotlight indexing by running sudo mdutil -i on / in Terminal, which turns indexing back on for your main volume. If you disabled indexing on specific folders, use the same command with their paths. The system will then rebuild the index, which may take some time.
Does disabling Spotlight indexing affect Time Machine backups?
Disabling Spotlight indexing does not directly affect Time Machine backups; they continue to run as scheduled. However, without indexing, Time Machine’s ability to efficiently locate and manage backed-up files may be reduced, potentially slowing file restoration or incremental backup operations.
Limits of disabling Spotlight indexing
Disabling Spotlight indexing will reduce or disable local search functionality, which may impact daily workflows and app integrations relying on Spotlight metadata. Features like Mail search, Finder’s quick search, and Siri suggestions depend on up-to-date Spotlight indexes to function smoothly. If you rely heavily on these tools for productivity, consider carefully whether disabling indexing is worth the trade-off.
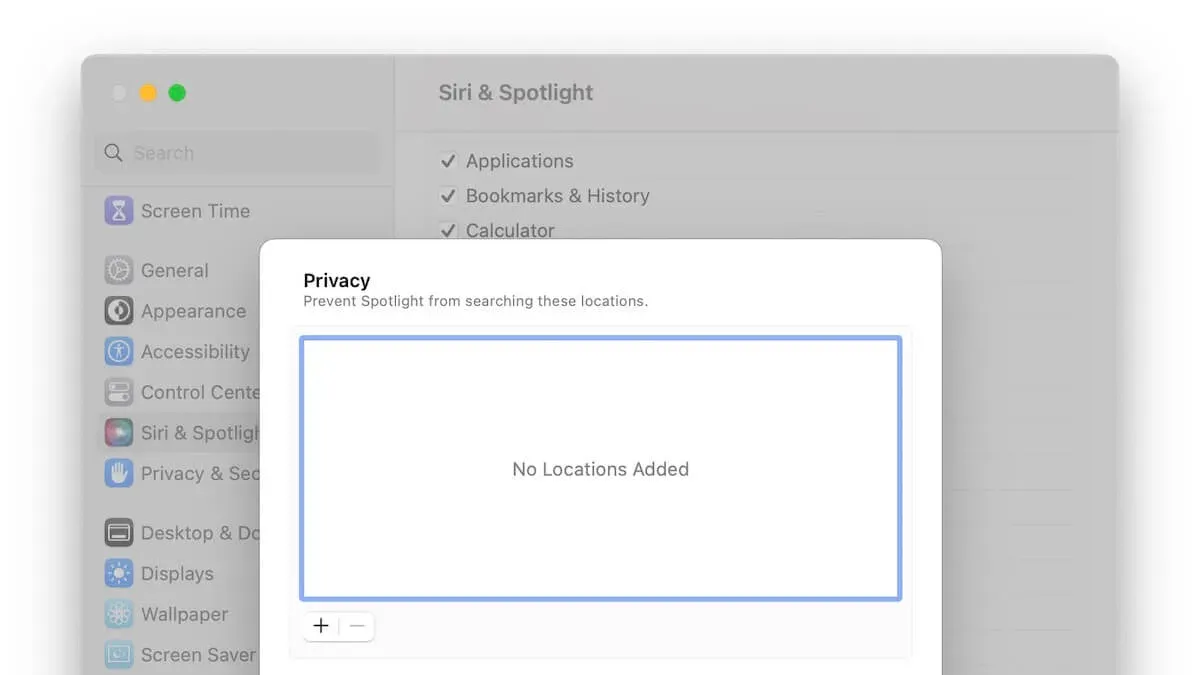
Additionally, some third-party apps integrate with Spotlight to provide enhanced file management or search capabilities. Disabling Spotlight indexing could limit their effectiveness or cause unexpected behavior. For users unfamiliar with Terminal or those who require seamless search experiences, it is advisable to manage Spotlight preferences via System Settings or consult Apple support before proceeding.
The most useful next step after disabling Spotlight indexing is to verify that the changes took effect by running sudo mdutil -s / in Terminal. This command shows the current indexing status for your main volume, helping ensure your intended configuration is active. Keeping an eye on system performance and search behavior over the following days will help you decide if the change fits your needs.