How to Draw Automation in Logic Pro: A Step-by-Step Guide
Master drawing automation in Logic Pro to enhance your mixes with precise control over volume, pan, and plugin parameters.
You’re working on a mix in Logic Pro and want to add dynamic changes to your track without relying solely on volume fades. Maybe you want to automate a plugin parameter or create precise movement in your effects throughout the arrangement. Understanding how to draw automation in Logic Pro allows you to take full control of your mix and arrangement with accuracy and flexibility.
This step-by-step guide covers everything you need to know about drawing automation curves and points, enabling you to automate channel volume, pan, plugin parameters, and more. You’ll learn how to navigate the automation view, choose the right automation mode, and use advanced tools like automation curve presets and live recording modes. By the end, you’ll be confident in applying automation creatively to enhance both your performances and mixes.
Key takeaways
- Enable automation view by pressing the 'A' key or using the View menu.
- Select automation mode such as Read, Touch, or Latch from the track header for different control options.
- Use the Pointer tool to click and drag automation points or draw curves precisely.
- Automate plugin parameters by selecting them from the Automation Parameter menu in each track.
- Record automation live with Touch or Latch modes to capture expressive movement during playback.
Before you start: What you need to draw automation in Logic Pro
Before you begin drawing automation, make sure you have the right setup to work efficiently. You need Logic Pro installed on a Mac, as this software does not run natively on Windows. If you use Windows, check the FAQ section for alternative solutions or workarounds.
Open a basic project that contains at least one audio or MIDI track. This provides a canvas for your automation work. You should already be comfortable navigating Logic Pro’s main interface, including the track headers, inspector pane, and control bar, so you know where to find key controls.
For drawing automation, have a reliable input device ready, such as a mouse, trackpad, or MIDI controller. A MIDI controller is helpful if you prefer recording automation live, but drawing directly with the pointer tool is fully supported.
Lastly, understand which parameters you want to automate. Common choices are track volume, pan, and plugin parameters like filter cutoff or reverb mix. Knowing these basics helps you focus your automation efforts effectively.
- Open Logic Pro and load a project with at least one audio or MIDI track. You should see the tracks listed in the main window.
- Verify you can identify the track headers and control bar, which contain automation options and playback controls.
- Ensure your input device (mouse, trackpad, or MIDI controller) is connected and responsive within Logic.
- Confirm your Mac meets Logic Pro’s minimum system requirements—generally macOS 11.5 or later with sufficient RAM and storage.
- Check that your Logic Pro version supports automation features, which are standard in all recent releases.
Turn on automation view and select your automation mode
To start drawing automation in Logic Pro, you first need to reveal the automation lanes. Press the A key on your keyboard or click Mix > Show Automation from the menu bar. When successful, each track in the workspace will expand to show a lane where automation points and curves can be drawn.
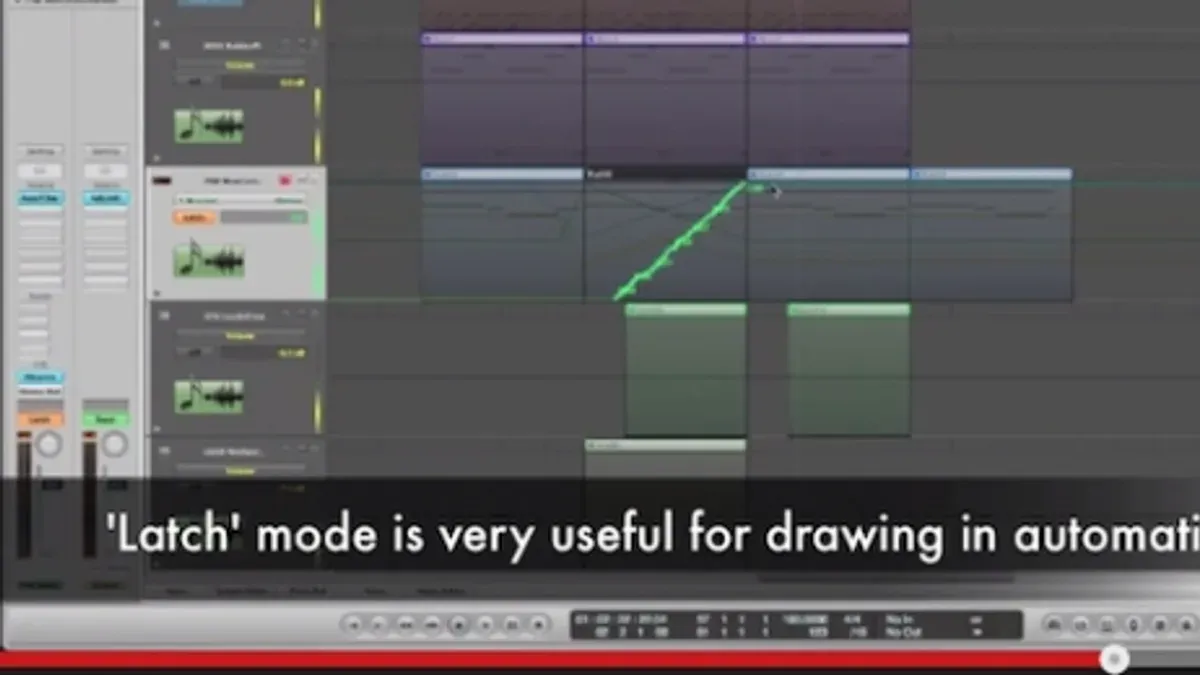
Next, select the automation mode from the track header’s dropdown menu. The main modes are Read, Write, Latch, and Touch. Read mode plays back existing automation without recording changes. Write mode replaces all automation data during playback. Latch mode starts writing automation when you move a control and continues until playback stops. Touch mode writes automation only while you move a control, then returns to the previous value.
Choose the mode based on your goal: use Write for initial automation recording, Touch or Latch for fine adjustments, and Read to listen without editing. You can select a different mode for each track to control how automation is handled across your project.
To automate specific parameters, click the track’s automation parameter menu (usually defaults to Volume) and select the desired control, such as Pan or a plugin parameter. To enable automation on multiple tracks simultaneously, hold Shift while selecting tracks, then toggle automation view; all selected tracks will display automation lanes with their chosen parameters.
For example, if you set a track to Write mode and automate volume, Logic Pro will overwrite existing volume automation while you record. Switching to Read mode afterward lets you hear the automation without changes. This workflow helps you test different automation approaches efficiently.
Draw automation curves and points with the pointer tool
To manually draw automation in Logic Pro, you switch between the Pointer tool and the Pencil tool depending on whether you want to adjust existing points or create new ones. The Pointer tool lets you click and drag automation points to fine-tune their position, while the Pencil tool allows you to draw freehand curves or lines directly on the automation lane.
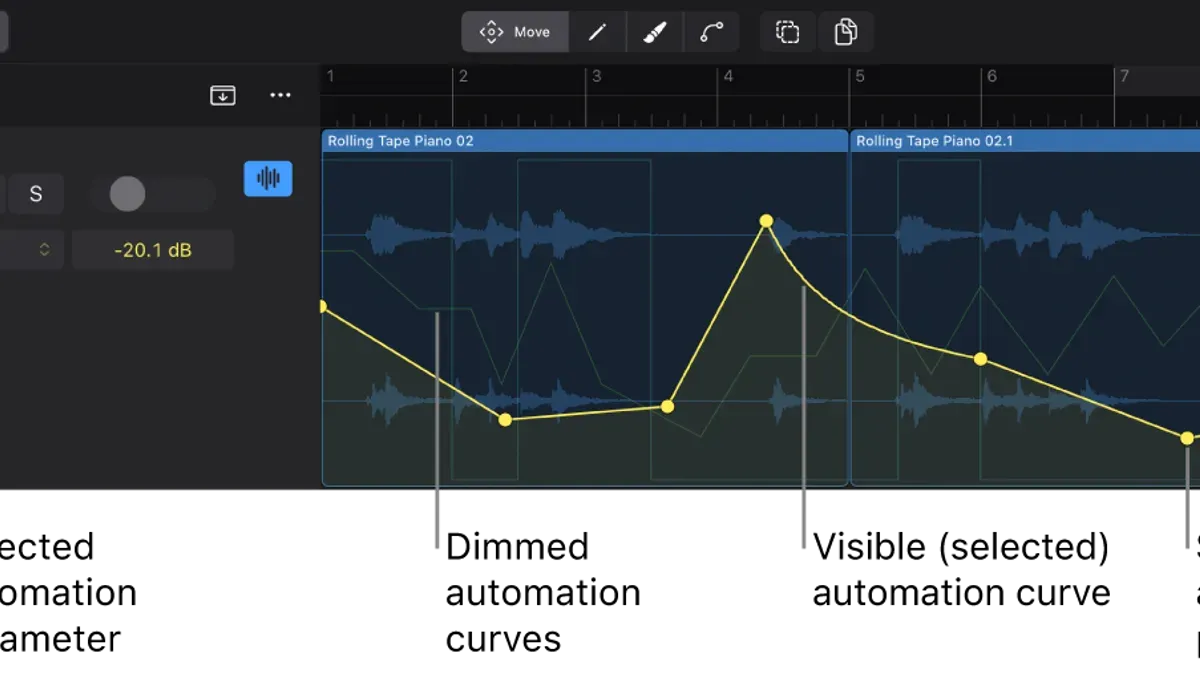
- Select the Pencil tool from the toolbar or press Command-7. Use it to click and drag on the automation lane to draw new automation curves. You should see a continuous line following your cursor, allowing smooth or stepped automation shapes.
- Switch to the Pointer tool by pressing Command-6 or clicking its icon. Click on an existing automation point to select it, then drag it vertically or horizontally to adjust the level or timing. The automation line updates accordingly.
- To create smooth curves between points, click and drag the line segment between two points with the Pointer tool. This reveals a curve handle that you can adjust to shape the automation transition.
- Enable snap-to-grid by clicking the Snap button in the toolbar or pressing Control-G. This helps you align automation points rhythmically to your project’s grid, ensuring timing precision.
- To remove automation points, select them with the Pointer tool and press Delete, or use the Pencil tool to draw over the points to reset automation to default values.
For example, when drawing a volume fade-in, fewer automation points create a simple linear transition but may sound abrupt. Adding more points and adjusting curves with handles results in a smoother, more natural fade. Balancing point count and curve smoothness is key for precise automation control.
Automate plugin parameters and advanced controls
Logic Pro lets you automate far beyond volume and pan by controlling plugin parameters, synth settings, and even external hardware. To start automating a plugin parameter, first reveal the automation lanes on your track, then select the parameter from the drop-down menu. You can find it by choosing the desired plugin, then browsing its list of adjustable controls like knobs and sliders.
- Open the track's automation lane by clicking the disclosure triangle next to its name in the track header. You should see the current automation parameter displayed.
- Click the parameter drop-down menu and navigate through the plugin hierarchy to locate the specific control you want, such as a synth’s filter cutoff frequency. Once selected, the automation lane updates to show its envelope.
- Use the Pencil tool to draw automation points or curves on this lane. For example, automating the cutoff frequency allows you to create sweeping filter effects that dynamically shape your sound—before automation, the synth’s tone is static; after, it evolves over time.
- To automate hardware controllers, enable Learn Automation by right-clicking the desired parameter and selecting "Learn Automation." Move your external controller knob or slider, and Logic will map it automatically.
- You can automate multiple parameters on the same track by adding more automation lanes. Name each lane clearly by double-clicking the lane header to keep your session organized and easy to navigate.
Keep in mind that automating many parameters simultaneously may increase CPU load and affect performance. To manage this, automate only the most impactful parameters and consider freezing tracks if needed. Clear naming and organization help you keep track of complex automation setups as your project grows.
Use automation curves presets and copy-paste automation data
Applying automation curve presets can significantly speed up your workflow compared to drawing every point manually. Logic Pro offers built-in curve shapes like linear, exponential, and S-curve that you can apply to existing automation regions. These presets help you create smooth and consistent transitions quickly, saving time especially when repeating similar automation patterns.
- Select the automation region you want to modify. You should see the automation points highlighted.
- Control-click (or right-click) on the automation line and choose "Automation Curve" from the contextual menu.
- Select the desired preset such as "Linear," "Exponential," or "S-Curve." The automation line updates immediately to reflect the chosen curve shape.
- Play back the section to verify the transition is smooth and matches your creative intent.
Copying and pasting automation data allows you to reuse precise control moves across tracks or regions, ensuring consistency in your mix or sound design. For example, you can copy volume automation from one vocal track and paste it onto a different vocal track or even onto a plugin parameter like a filter cutoff, provided the parameter types are compatible.
- Select the automation points or region you want to copy by dragging over them.
- Press Command+C to copy the automation data.
- Click on the destination automation lane or region where you want to paste.
- Press Command+V to paste. The automation points appear in the new location.
- Check that the pasted automation matches the expected parameter; if it does not, Logic Pro will not apply the data properly.
Automation Quick Access lets you assign a hardware controller to quickly tweak any automation parameter live during playback or recording. This feature streamlines performance adjustments without having to manually draw or edit points.
Keep in mind that copying automation between different parameter types—such as from volume to pan or from one plugin parameter to another unrelated parameter—may not work as expected. Logic Pro requires the parameters to be compatible to apply copied automation data correctly.
Record automation live using touch and latch modes
To capture natural and expressive automation in Logic Pro, you can record parameter changes in real time using Touch or Latch automation modes. These modes allow you to manipulate controls with a MIDI controller or mouse during playback, and Logic Pro records the automation data as you go.
- Set the automation mode to Touch or Latch for the track you want to automate. You can do this by clicking the automation mode button in the track header and selecting the desired mode. Touch mode records automation only while you move a control, returning to the previous value when released. Latch mode records changes and holds the last value until playback stops.
- Start playback and use your MIDI controller knob, fader, or mouse to move the parameter you want to automate, such as a volume fader for a volume swell. As you move the control, observe the automation lane updating in real time with your movements.
- To avoid abrupt jumps or glitches, begin your automation move from the current parameter position, or use the Automation Quick Access feature to map your hardware controller for smooth transitions. Also, ensure the automation mode is set correctly before recording to prevent sudden value jumps when playback starts.
- Once recorded, stop playback and review the automation lane. You can refine the recorded data by adjusting points with the Pointer tool, smoothing curves, or deleting unintended changes for a polished, natural automation effect.
For example, when automating a volume swell live, you’ll see the automation graph rise and fall smoothly following your fader movement, visually confirming the recorded dynamic changes in the waveform or automation lane.
Use automation in performance and arrangement creatively
Automation in Logic Pro extends far beyond simple volume fades. You can automate effect sends and returns to create dynamic build-ups that evolve your tracks, such as gradually increasing reverb or delay on a snare drum to add tension before a drop. Muting and unmuting tracks with automation lets you introduce or remove elements seamlessly, enhancing arrangement flow without manual intervention. Additionally, changing instrument parameters like filter cutoff or modulation depth through automation adds movement and variety to your sound.
Combining automation with Logic Pro’s Live Loops and performance modes allows you to modify effects and instrument settings in real time during a performance. This interaction transforms static loops into evolving soundscapes and keeps your arrangement fresh and engaging. For example, automating a filter sweep on a bass synth while triggering Live Loops can create a dynamic groove that reacts to your live input.
Consider a common professional technique: an automation-driven build-up section where you automate increasing delay feedback and raise the send level to a reverb bus while gradually muting rhythmic elements. Compared to a static mix, this automation creates anticipation and energy that catches the listener’s attention. Implementing these techniques requires thoughtful planning of automation points and curves to ensure smooth transitions that serve the arrangement’s emotional arc.
Troubleshoot common automation issues in Logic Pro
Sometimes automation in Logic Pro does not behave as expected. If automation is not visible or not recording, first check that the track's automation mode is set correctly. Make sure it is not on Read mode only if you plan to write automation, and confirm the track’s automation is enabled by verifying the small automation button on the track header is active. If automation points reset unexpectedly when you play back, verify the plugin you are automating is fully compatible with Logic Pro’s automation system, as some third-party plugins may cause conflicts.
Conflicts with MIDI controller assignments can also interfere with automation recording or playback. To resolve this, check Logic Pro’s MIDI Controller Assignments window (under Logic Pro > Control Surfaces > Controller Assignments) and disable or adjust any overlapping controls that might override your automation.
Automation playback glitches or jumps often result from stuck automation points or abrupt transitions. A common fix is to delete the problematic automation point and redraw it smoothly using the Pointer or Pencil tool. For example, if a volume automation point remains fixed and does not respond to changes, select the track, enter automation view, find the stuck point, delete it, then redraw a smooth curve that transitions naturally.
- Confirm the track automation mode is set to Write, Touch, or Latch for recording automation. You should see red automation points appear as you move controls.
- Check the track automation button is toggled on; the automation lane should be visible and editable.
- Open the MIDI Controller Assignments window and disable conflicting assignments. Automation lanes should now respond properly without MIDI overrides.
- If automation points reset or glitch, delete the suspect points and redraw them with the Pencil tool. Playback should become smooth without jumps.
- Verify plugins are compatible by testing automation on a built-in Logic Pro plugin. If that works but third-party does not, consider updating or replacing the problematic plugin.
Frequently asked questions
How to draw logic?
If you mean drawing logical diagrams or flowcharts, that is typically done with specialized software like Microsoft Visio, Lucidchart, or draw.io. Logic Pro is a digital audio workstation and does not have tools for drawing logic diagrams. For music production, "drawing automation" refers to creating control changes in your mix, which you do inside Logic Pro's automation lanes.
How to use logic pro on windows?
Logic Pro is exclusive to macOS and is not officially supported on Windows. To use Logic Pro, you need an Apple computer running macOS. Some users attempt to run macOS on Windows hardware via virtualization or Hackintosh setups, but these methods are complex, not supported by Apple, and can be unstable.
How to learn logic pro?
Start by exploring Logic Pro’s built-in tutorials and user manual accessible from the Help menu. Next, practice creating simple projects focusing on key areas like recording, editing, and automation. Online courses, video tutorials, and forums can provide structured lessons and community support to build your skills progressively.
What is automation logic?
Automation in Logic Pro refers to the process of recording or drawing changes to parameters over time, such as volume, pan, or plugin controls. This allows you to dynamically control your mix or arrangement during playback, enabling more expressive and polished productions. Automation logic involves using Logic Pro’s automation modes and tools to create these parameter changes precisely.
How to use logic pro?
Begin by creating a new project and adding tracks for audio or software instruments. Use the record and edit features to capture and refine your performances. Utilize the mixer to adjust levels and effects, and apply automation to control changes over time. Logic Pro offers many tools, so focus on learning one workflow aspect at a time and gradually expand your knowledge.
What This Guide Does Not Cover
This guide does not cover scripting or advanced MIDI environment automation setups, which require deeper technical knowledge and a more specialized approach. If you need to automate complex MIDI behaviors or create custom automation scripts, exploring Logic Pro’s Environment window or third-party tools may be necessary. Additionally, Logic Pro is only natively supported on macOS. Windows users must rely on workarounds such as virtual machines or dual-boot setups, which often lack full functionality and may limit your automation capabilities.
The single most useful next step is to practice drawing automation on a simple mix using the Pointer tool’s different curve types. Experiment with automating plugin parameters like EQ frequency or reverb mix to hear how subtle changes affect your sound. This hands-on approach will build your confidence and help you understand how precise automation can shape your tracks creatively and dynamically.
See also: How to Quantize MIDI in Logic Pro: A Step-by-Step Guide · How to Master a Song in Logic Pro: A Step-by-Step Guide · How to Bounce a Track in Logic Pro: Step-by-Step Guide · How to Use Drummer in Logic Pro: A Step-by-Step Guide