How to Embed Fonts in PowerPoint on Mac: A Clear Step-by-Step Guide
This guide explains how to embed fonts in PowerPoint on Mac to preserve your chosen typography across devices and avoid font substitution issues.
You’ve carefully chosen unique fonts to make your PowerPoint presentation stand out, but when you open the file on another Mac or a Windows PC, the fonts look different or default to something else. This inconsistency can disrupt the professional or academic impression you want to make.
This guide explains how to embed fonts in PowerPoint on Mac to preserve your chosen typography across devices. You’ll learn how to check if your fonts support embedding, the exact steps to embed fonts using PowerPoint’s features on Mac, and solutions when the usual options aren’t available. Additionally, the article covers font licensing considerations and how to verify your fonts are embedded, ensuring your presentation looks just as you designed it on any system.
Key takeaways
- Not all fonts support embedding; check your font’s licensing first.
- Use “Save As” and select the option to embed fonts in PowerPoint on Mac.
- If the embed fonts option is missing, try adding fonts via Font Book or adjusting PowerPoint preferences.
- Confirm fonts are embedded by inspecting the file’s properties or opening it on another device.
- Embedding fonts prevents substitution issues and maintains layout consistency on different computers.
Before you start: What you need to know about embedding fonts on Mac
Embedding fonts in PowerPoint on Mac works differently than on Windows. While Windows versions of PowerPoint often provide straightforward font embedding options, the Mac version has limited native support. This means that not all fonts or font types can be embedded directly within your presentation when working on a Mac.
Fonts come in different formats, primarily TrueType (TTF) and OpenType (OTF). PowerPoint for Mac generally supports embedding TrueType fonts more reliably, but OpenType fonts sometimes present challenges depending on their specific features and licensing restrictions. Additionally, some fonts are protected by licensing terms that explicitly prevent embedding, even if the software allows it.
To embed fonts on your Mac, you need PowerPoint for Mac installed and have access to the fonts on your system with appropriate permissions. System-installed fonts that allow embedding can be embedded, but certain popular fonts—such as some versions of Arial, Calibri, or custom downloaded fonts—may not embed because of restrictions or unsupported formats.
Cross-platform compatibility is another important factor to consider. Even if you successfully embed fonts on Mac, the presentation may display differently on Windows devices if the fonts are not universally supported or if the embedding process did not fully succeed.
| Font Type | Embedding Support on Mac PowerPoint | Licensing Restrictions | Example Fonts |
|---|---|---|---|
| TrueType (TTF) | Generally supported | Depends on font license | Verdana, Georgia |
| OpenType (OTF) | Partially supported | Often restricted | Adobe Garamond, Minion Pro |
| Proprietary or Restricted | Not supported | Embedding disabled | Calibri, Segoe UI |
Check if your font supports embedding in PowerPoint on Mac
Before embedding fonts into your PowerPoint presentation on Mac, you need to confirm whether your chosen font allows embedding. Fonts come with different embedding permissions set by the font creator, which can restrict or allow embedding in documents. These permissions fall into four main categories: Installable, Editable, Preview & Print, and Restricted. Fonts marked as Installable or Editable generally support embedding, while Preview & Print allows limited embedding for viewing or printing only. Fonts labeled Restricted cannot be embedded at all.
You can check these permissions using macOS Font Book or third-party tools designed for font inspection. Font Book lets you view basic font details but does not explicitly show embedding permissions, so a dedicated tool like Microsoft Font Validator or OTF Explorer is better for this purpose.
Here is a step-by-step guide to check embedding permissions using a free tool:
- Download and install a font inspection tool such as Microsoft Font Validator or a similar macOS-compatible app.
- Open the tool and load the font file you want to check (for example, "Arial.ttf").
- Navigate to the font's embedding permissions section within the tool.
- Look for the embedding rights, which should indicate one of the categories: Installable, Editable, Preview & Print, or Restricted.
- If the font shows "Installable" or "Editable," it is safe to embed in your PowerPoint presentation.
For instance, the popular font "Arial" typically has an Installable permission, allowing embedding without issues. However, some custom or decorative fonts may have Restricted embedding permissions, blocking embedding and causing problems when sharing your presentation.
Remember that font licensing often governs these permissions. Even if a font technically supports embedding, check your license to ensure you have the rights to embed it in shared documents. Choosing fonts with clear embedding permissions and appropriate licenses helps avoid unexpected display issues on other devices.
How to embed fonts in PowerPoint presentation on Mac: Using the Save As feature
Embedding fonts in PowerPoint on Mac is primarily done through the Save As or Export function, depending on your version of PowerPoint. This process ensures your chosen fonts travel with your presentation, maintaining consistent appearance on other computers.
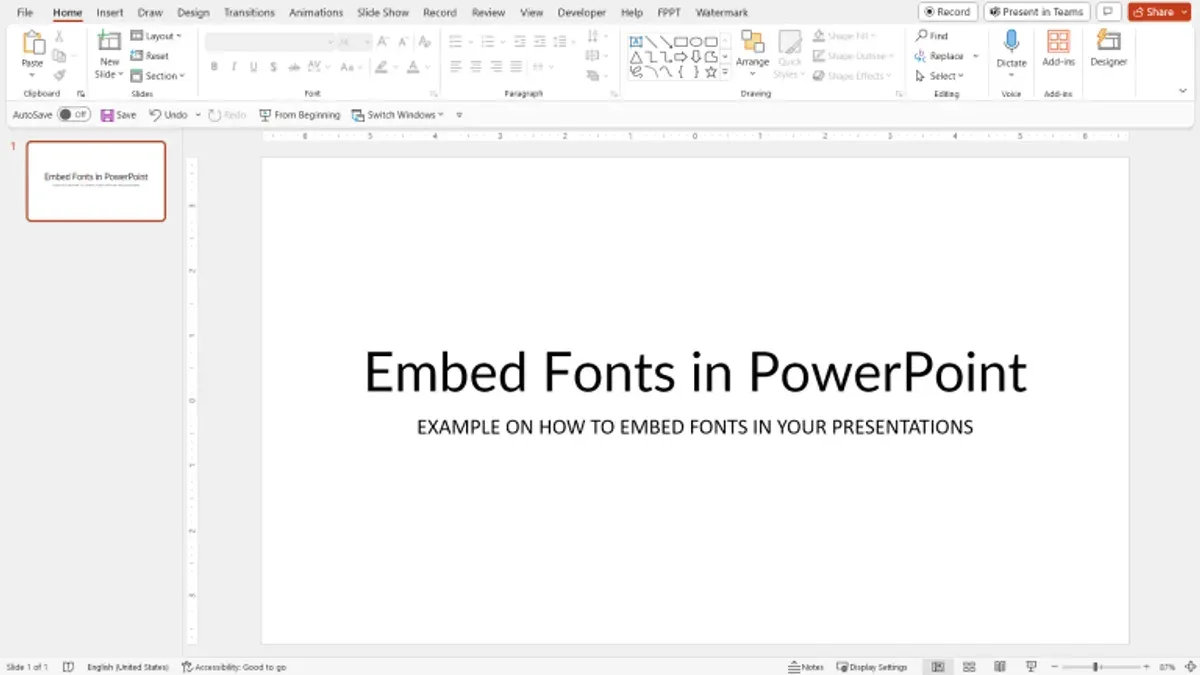
- Open your presentation in PowerPoint on your Mac.
- Go to the File menu and select Save As or Export, depending on what your version offers. You should see a dialog box for saving your file.
- In the save dialog, look for an option labeled Embed fonts in the file or Include fonts. This option may appear as a checkbox or a dropdown menu.
- Check or enable the font embedding option. If this option is missing, your PowerPoint version might not support font embedding directly or your fonts may not allow embedding (see prior sections).
- Choose your desired file format, usually .pptx, as older formats like .ppt often do not support embedded fonts.
- Complete the save by clicking Save or Export. The file size will typically increase slightly if fonts are embedded.
- After saving, verify fonts are embedded by checking file properties or reopening the presentation on a different device to confirm font appearance remains consistent.
The Save As method varies slightly between PowerPoint versions; newer versions tend to have more straightforward embedding options. If you do not see font embedding settings, updating PowerPoint or using a different method may be necessary.
Embedding fonts usually increases file size noticeably—sometimes by a few megabytes depending on the font—and this is a good sign that embedding worked. Screenshots of PowerPoint’s Save As dialog with embedding options can help you identify these settings in your version.
How to add fonts in PowerPoint on Mac before embedding
To embed a font in your PowerPoint presentation on Mac, you first need to ensure the font is installed and active on your macOS system. The primary tool for managing fonts on Mac is Font Book, which allows you to install, activate, deactivate, and organize fonts efficiently.
- Open Font Book from the Applications folder or use Spotlight search.
- Click the + (Add) button or go to File > Add Fonts to locate the font file (usually.ttf or.otf) on your Mac.
- Select the font and click Open. The font will be installed and appear in the Font Book list.
- Check that the font is Active by looking for a checkmark next to its name; if not, right-click the font and select Enable.
- Quit and restart PowerPoint to ensure it recognizes the newly installed font.
- Open your presentation and look for the font in the font dropdown menu in the toolbar to confirm it is available.
To maintain best performance, avoid having excessive fonts enabled simultaneously, as this can slow down your Mac and PowerPoint. Use Font Book’s collections or disable fonts you don’t need regularly. Managing fonts carefully helps PowerPoint load fonts faster and reduces potential conflicts.
After completing these steps, your new font should appear in PowerPoint’s font list, ready to be embedded when you save your presentation.
How to embed fonts in PowerPoint on Mac when the built-in option is missing
If PowerPoint on your Mac does not offer a native font embedding option, there are alternative methods you can use to preserve your fonts' appearance across devices. One common workaround is exporting your presentation as a PDF. This ensures the fonts are preserved visually, but the file becomes non-editable and larger in size compared to a native PowerPoint file.
Another approach is using third-party tools or add-ins designed to embed fonts into PowerPoint files. These utilities can sometimes embed fonts where PowerPoint cannot, but they vary in reliability and may increase file size. Always verify the tool’s compatibility with your PowerPoint version and macOS before proceeding.
As a last resort, converting text to shapes can preserve the exact look of your fonts because the text becomes vector graphics. This method guarantees appearance consistency but eliminates text editability and may increase file size significantly, especially with large amounts of text.
- Export as PDF: Go to File > Export, select PDF, and save. The resulting PDF shows your fonts exactly but cannot be edited as a PowerPoint file.
- Use third-party embedding tools: Research and install a reputable font embedding add-in compatible with Mac PowerPoint. Follow the tool’s instructions to embed fonts, then reopen the file to verify font preservation.
- Convert text to shapes: Select the text box, right-click, and choose Convert to Shape (or use Convert to SmartArt and then Ungroup). Your text now becomes graphic objects, preserving appearance but disabling text edits.
Native font embedding usually produces smaller files and keeps text editable, while these workarounds often increase file size and limit editing capabilities. Choose the method that best balances your needs for appearance, file size, and future edits.
How to verify if fonts are embedded in your PowerPoint file on Mac
After embedding fonts in your PowerPoint presentation, confirming that the fonts are truly embedded is essential for consistent display across devices. PowerPoint on Mac does not have a direct built-in font embedding verification tool like Windows, but you can still check through several methods.
- Check the file properties: Right-click your saved PowerPoint file in Finder and select Get Info. While this won’t explicitly list embedded fonts, the file size can be an initial indicator—embedding fonts generally increases file size noticeably compared to the original.
- Open the presentation on another Mac without the fonts installed: Transfer your file to a device that does not have the fonts installed. Open it in PowerPoint; if the fonts display correctly without substitution, they are likely embedded.
- Use a third-party font inspection tool: Tools like Font Book or dedicated font utilities (such as FontExplorer X Pro) can inspect font embedding permissions and sometimes detect embedded fonts within files. Upload your PowerPoint file or extract fonts to verify embedding status.
- Use PDF export for confirmation: Export your presentation as a PDF using PowerPoint’s Export feature with font embedding enabled. Then, open the PDF in Preview, go to Tools > Show Inspector > Fonts. The listed fonts here are embedded, which indirectly confirms your PowerPoint fonts are embedded if the PDF exported correctly.
Following these steps helps you verify font embedding on Mac, ensuring your presentation retains its intended appearance on other devices.
Troubleshoot common issues when embedding fonts in PowerPoint on Mac
Sometimes the font embedding option in PowerPoint on Mac is grayed out or missing. This often happens if the font you’re using doesn’t allow embedding due to licensing restrictions or if the font is not properly installed. To fix this, confirm the font’s embedding permissions using a font inspection tool and ensure the font is activated in Font Book. Restart PowerPoint after changes to see if the option becomes available.
If fonts appear embedded on your Mac but show as substituted or missing on other devices, it usually means the fonts weren’t truly embedded or those devices lack the font. Exporting your presentation as a PDF can help confirm if fonts are embedded. Alternatively, use PowerPoint's Save As or Export function with the “Embed fonts in the file” option enabled to improve compatibility.
Unexpectedly large file sizes after embedding fonts can occur when embedding full font sets instead of just used characters. To reduce file size, choose the option to embed only the characters used in your presentation. If this option is missing, try simplifying font usage or converting text to shapes for key slides, understanding that this limits text editing.
If you receive font substitution or missing font warnings, check that all fonts are installed and activated on your Mac. Licensing restrictions can also cause embedding failures; fonts purchased or downloaded with limited licenses may block embedding. In such cases, consider switching to an open license font or converting text to shapes to preserve appearance.
How to ensure your PowerPoint presentation’s fonts appear correctly on other devices
Ensuring your PowerPoint presentation's fonts display consistently across Mac, Windows, and mobile devices requires careful planning. Using embedded fonts is ideal, but since Mac PowerPoint has limitations, consider relying on standard system fonts like Arial, Calibri, or Times New Roman that are widely supported. If you use custom fonts, sharing the font files along with your presentation can help recipients install them, preserving the intended look.
Another effective method is exporting your presentation as a PDF or video. PDFs embed fonts more reliably and maintain layout integrity across platforms, while video exports preserve the visual appearance but remove editability. Both options serve as alternatives when font embedding is not feasible.
- Choose standard system fonts when possible. This ensures your presentation looks consistent on most devices without extra steps.
- If using custom fonts, package and share the font files with your presentation. Recipients can install these fonts on their system, allowing PowerPoint to render the text correctly.
- Export your presentation as a PDF. Open the PDF on different devices to confirm fonts and layout appear as expected.
- Use video export if you want a fixed visual presentation. This guarantees appearance but removes editing capability.
- Inform recipients about the need to install fonts. Provide clear instructions or links to font files to avoid missing font substitutions.
By combining these approaches, you can greatly reduce font-related inconsistencies and ensure your presentation maintains its professional look regardless of the device used for viewing.
Frequently asked questions
How to embed fonts on powerpoint?
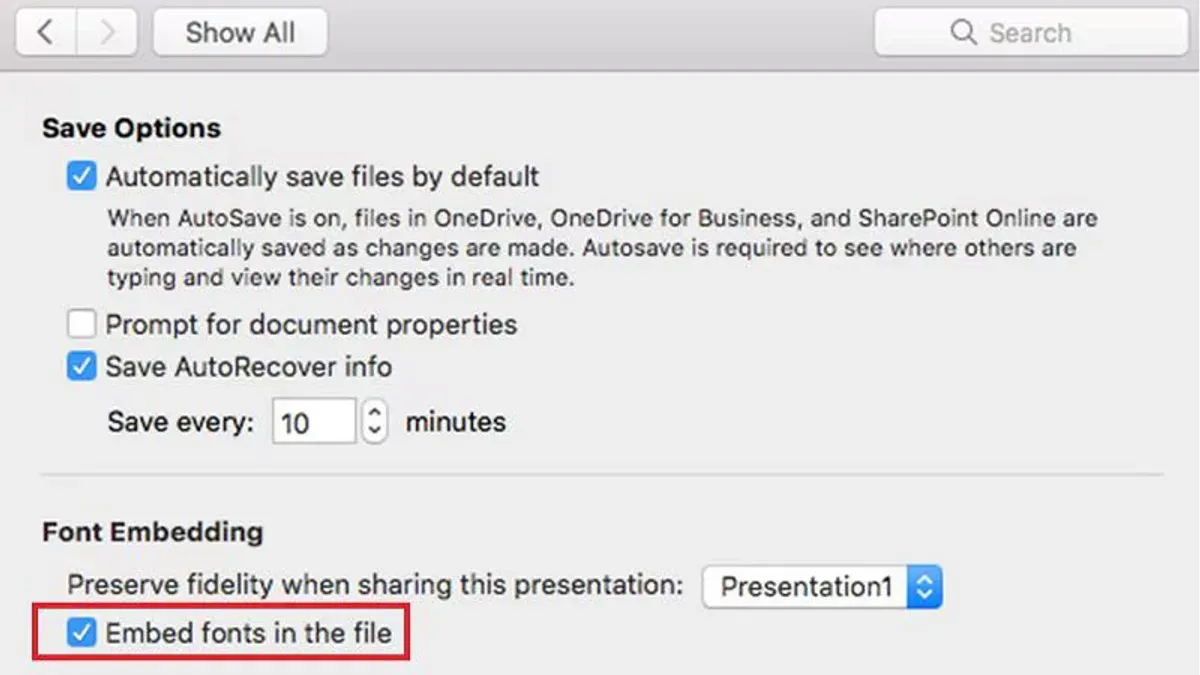
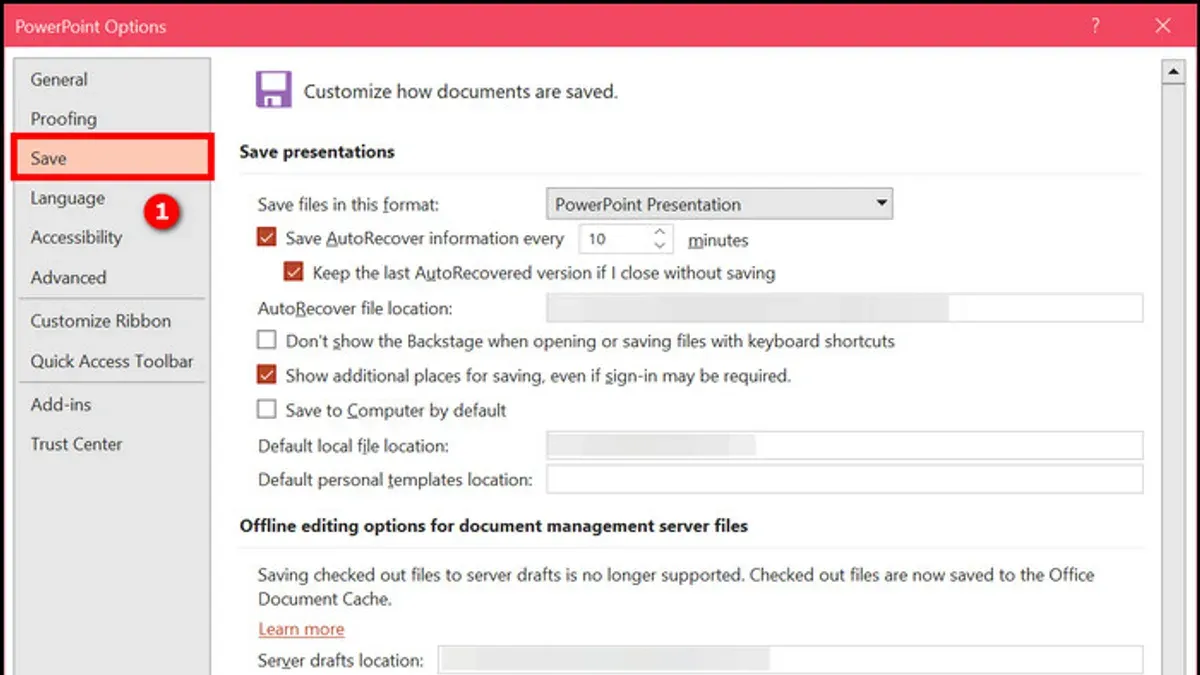
To embed fonts in PowerPoint, go to the File menu and select Save As. In the dialog box, click on the Tools button and choose Save Options. Under the Preserve fidelity when sharing this presentation section, check the box for Embed fonts in the file. Choose either "Embed only the characters used in the presentation" or "Embed all characters" depending on your needs, then save your file.
How to embed fonts on ppt?
Embedding fonts in a PPT file involves saving your presentation with the embedding option enabled. Use the Save As feature, then access Save Options. Check "Embed fonts in the file" to ensure fonts are included. This allows your presentation to maintain its intended appearance on other devices.
How to embed fonts in ppt?
In PowerPoint, embedding fonts requires saving your presentation with font embedding enabled. Navigate to File > Save As, click Tools > Save Options, and check the box for embedding fonts. Remember, some fonts may not support embedding due to licensing restrictions.
How to embed fonts into powerpoint on mac?
On a Mac, PowerPoint does not currently support font embedding directly through the Save As options. Instead, you need to ensure that the fonts you use are installed on any device where the presentation will be opened. Alternatively, export your presentation as a PDF to preserve font appearance, or use cross-platform compatible fonts to avoid issues.
How to embed fonts in PowerPoint presentation?
Embedding fonts involves saving your presentation with the embedding option enabled via File > Save As > Tools > Save Options, then ticking "Embed fonts in the file." This embeds font data to keep your slides' look consistent. Check font licensing to confirm embedding is allowed, and verify the fonts are properly embedded by reopening the file on another device.
What This Guide Does Not Cover
This guide focuses exclusively on embedding fonts in PowerPoint on Mac and does not address the process on Windows or other platforms. It also does not cover modifying font licenses or the legal aspects of embedding fonts. Since font licensing can restrict embedding or sharing, you should always review the specific license terms of your fonts before embedding them in any presentation.
For users who need to embed fonts on Windows or require detailed legal advice about font use, consulting platform-specific resources or legal professionals is recommended.
To move forward confidently, the single most useful next step is to test your PowerPoint file on multiple devices after embedding fonts. Open the presentation on another Mac or Windows machine to verify that your chosen fonts display correctly and consistently, ensuring your audience sees the presentation exactly as you designed it.
See also: How to Change the Default Font in Microsoft Word on Mac: Step-by-Step