How to Generate an SSH Key in Mac Terminal: A Step-by-Step Guide
This guide explains how to generate an SSH key in Mac Terminal and manage your keys securely for remote server access.
Setting up secure connections to remote servers or services like GitHub on your Mac often requires SSH authentication. If you’ve found yourself unsure how to create or manage the necessary keys, you’re not alone.
This guide explains how to generate SSH key in Mac Terminal and covers everything you need to create, find, add, and use your SSH keys effectively. It also addresses common issues you might encounter and best practices for keeping your keys organized and secure.
Key takeaways
- Use the
ssh-keygencommand in Terminal to create SSH keys quickly. - SSH keys are stored by default in the
~/.sshdirectory on your Mac. - Add your SSH key to the authentication agent with
ssh-addto streamline connections. - Verify correct key usage by testing SSH connections with verbose output.
- Address common permission or key format errors by adjusting file settings or regenerating keys.
Before you start: What you need to generate an SSH key on Mac
To generate an SSH key on your Mac, you first need access to the Terminal application and some basic familiarity with command line operations. Terminal is found in the Utilities folder within Applications, or you can launch it via Spotlight search. macOS includes OpenSSH tools by default, typically version 8.x or newer, so you don't need to install additional software to create or manage SSH keys.
Each SSH key pair usually includes a comment—often your email address or another unique identifier—to help distinguish it. This is especially useful if you manage multiple keys for different services or servers.
Before generating a new SSH key, consider whether you already have one suitable for your needs. For example, if you have an existing key configured for GitHub or a remote server and it is secure, you might not need a new key. However, you should create a new key if you’re setting up access to a new service, require a stronger encryption type, or suspect your existing key has been compromised.
To confirm your OpenSSH version, open Terminal and enter ssh -V. You should see output similar to:
- OpenSSH_8.1p1, LibreSSL 2.7.3
This confirms the presence of OpenSSH tools necessary for key generation.
A typical scenario for generating a new SSH key is when you want to set up secure access to a new GitHub account or a freshly provisioned remote server. In such cases, having a unique key with a clear comment helps keep your authentication organized and secure.
How to create ssh key in Mac Terminal
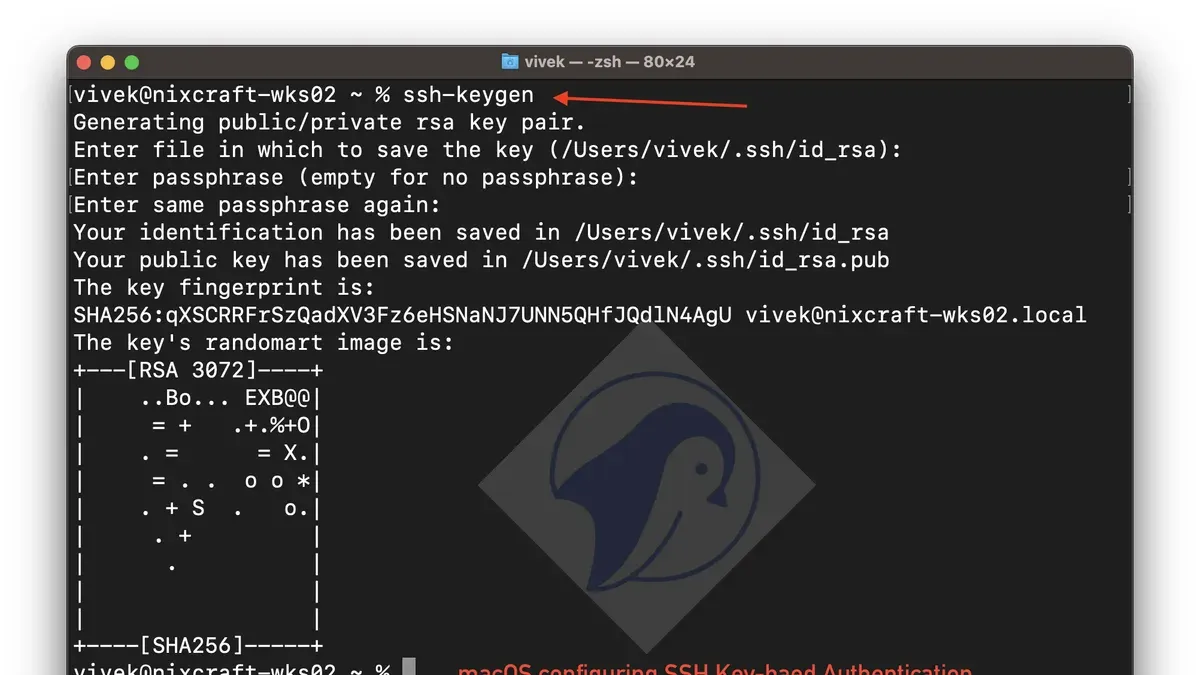
Generating an SSH key on your Mac is straightforward using the ssh-keygen command. This tool creates cryptographic keys for secure authentication. You can choose between RSA and Ed25519 key types, with Ed25519 generally recommended for its stronger security and better performance.
- Open Terminal.
- To generate an Ed25519 key, enter:
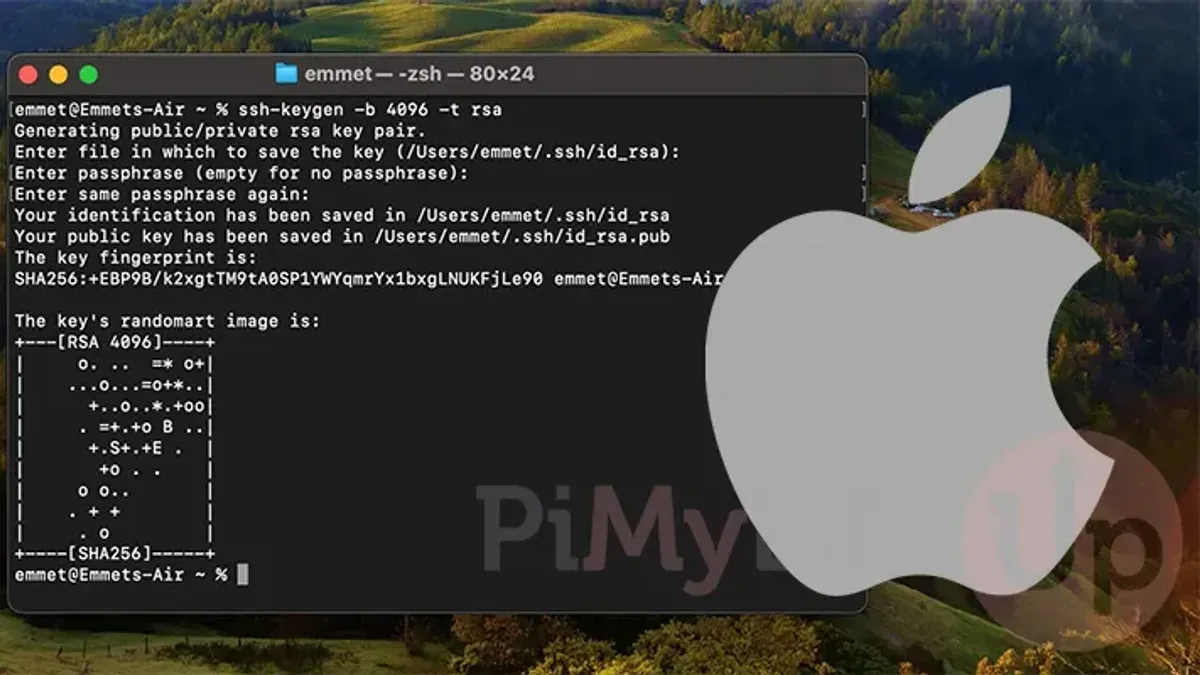
ssh-keygen -t ed25519 -C "[email protected]". For RSA, use:ssh-keygen -t rsa -b 4096 -C "[email protected]". The-Cflag adds a descriptive label, like your email. - Press Enter to accept the default location for saving the key files, usually
~/.ssh/id_ed25519or~/.ssh/id_rsa. - Choose a secure passphrase when prompted. A passphrase adds a layer of protection if your private key is compromised, but you can leave it empty for convenience (not recommended).
- After completion, you will see output confirming your key's fingerprint and location, e.g., "Your identification has been saved in /Users/yourname/.ssh/id_ed25519."
RSA keys use the -b flag to specify bit length, with 4096 bits being a strong choice. Ed25519 keys do not need this flag since their strength is fixed. RSA keys are widely supported but slower, while Ed25519 keys provide better security with faster generation and authentication.
By default, ssh-keygen saves your private key in ~/.ssh/id_type and the public key in ~/.ssh/id_type.pub. Keep your private key secure and never share it.
How to get ssh key in Mac Terminal
To use your SSH key for authentication, you first need to locate and display the public key file in your Terminal. The public key is the one you share with remote servers, while the private key remains secure on your Mac.
- Open Terminal and list the key files by typing ls ~/.ssh. You should see files like id_rsa, id_rsa.pub, id_ed25519, and id_ed25519.pub depending on the key types you created. The .pub files are your public keys.
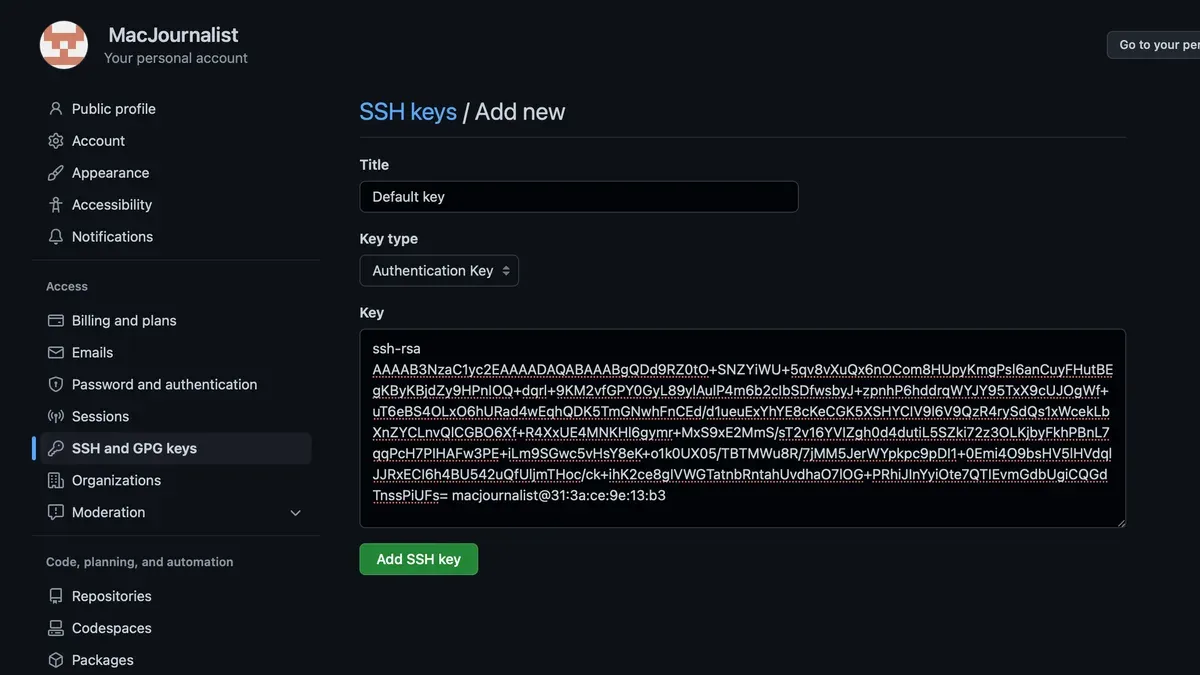
- Display the content of your public key by running cat ~/.ssh/id_ed25519.pub or replace id_ed25519.pub with your specific public key filename. The output should start with ssh-ed25519 or ssh-rsa followed by a long string of characters.
- To copy the public key to your clipboard for easy pasting, use pbcopy < ~/.ssh/id_ed25519.pub. This command copies the entire public key without displaying it, ready for you to paste into services like GitHub or remote server authorized keys.
Remember, never share your private key files such as id_ed25519 or id_rsa. Only the public key files ending with .pub should be distributed. Visualizing the difference, the private key is your secure credential, and the public key is the one you provide to authenticate.
Example output of listing keys:
id_ed25519 id_ed25519.pub known_hosts
Example output of displaying the public key:
ssh-ed25519 AAAAC3NzaC1lZDI1NTE5AAAAIC3EXAMPLEKEYSTRING user@MacBook-Pro
How to add ssh key in Mac Terminal for authentication
To streamline secure connections, you need to add your SSH private key to the ssh-agent. This process allows the agent to handle authentication, so you won’t have to enter your passphrase every time.
- Start the ssh-agent by running eval "$(ssh-agent -s)" in Terminal. You should see output like Agent pid 12345, indicating the agent is running.
- Add your private key to the agent with the command ssh-add ~/.ssh/id_rsa (or replace
id_rsawith your key’s filename). If your key is protected by a passphrase, you will be prompted to enter it once. - Verify the key was added by executing ssh-add -l. The terminal will list the fingerprints of all keys currently managed by the agent.
By adding your SSH key to ssh-agent, the agent caches your decrypted key in memory, helping you avoid repeated passphrase prompts during your session. This makes connecting to remote servers or services like GitHub smoother and faster.
Example output from starting the agent and adding a key:
$ eval "$(ssh-agent -s)"
Agent pid 12345
$ ssh-add ~/.ssh/id_rsa
Enter passphrase for /Users/you/.ssh/id_rsa:
Identity added: /Users/you/.ssh/id_rsa ([email protected])
$ ssh-add -l
2048 SHA256:XXXXXXXXXXXXXXXXXXXXXXXXXXXXXXXXXXXXXXXXXXX /Users/you/.ssh/id_rsa (RSA)
How to ssh from Mac Terminal using your SSH key
Once your SSH key is generated and added to the ssh-agent, connecting to a remote server using your key is straightforward. The basic command syntax is:
ssh username@hostname
Here, username is your user account on the remote server, and hostname can be the server's IP address or domain name.
- Open Terminal.
- Type the ssh command with your server details, for example:
ssh [email protected]
You should see a prompt to confirm the server's fingerprint if connecting for the first time. Type yes and press Enter. - If your SSH key is correctly added to the ssh-agent, the connection will authenticate automatically without asking for a password. You will see a welcome message or server prompt, indicating a successful connection.
If the server requires a different SSH key than the default one, specify it explicitly using the -i flag followed by the private key's path. For example:
ssh -i ~/.ssh/other_key [email protected]
This is useful when you maintain multiple SSH keys for different services or servers.
Troubleshooting tips:
- If the connection fails with Permission denied, confirm that the ssh-agent has the correct key loaded using ssh-add -l.
- Ensure your public key is correctly added to the server’s
~/.ssh/authorized_keysfile. - Check that file permissions on your private key are set securely (usually 600) using chmod 600 ~/.ssh/id_rsa or the equivalent for your key.
Example output when connecting to a test server:
ssh [email protected]
The authenticity of host 'example.com (192.0.2.1)' can't be established.
RSA key fingerprint is SHA256:abc123...
Are you sure you want to continue connecting (yes/no)? yes
Welcome to Ubuntu 20.04 LTS (GNU/Linux 5.4.0-42-generic x86_64)
user@example:~$
Troubleshooting common SSH key generation and usage issues on Mac
When generating and using SSH keys on your Mac, several common issues can arise related to permissions, ssh-agent status, passphrases, and managing multiple keys. Addressing these promptly ensures smooth authentication.
Fixing permissions issues on ~/.ssh directory and key files
Incorrect permissions on your SSH directory or key files cause errors like "Permissions 0777 for 'id_rsa' are too open." or "Bad permissions". To fix this, use the following commands:
- Run
chmod 700 ~/.sshto set the directory permissions correctly. You should not see an error after this command. - Run
chmod 600 ~/.ssh/id_rsato restrict the private key file permissions. This file must be readable only by you. - Run
chmod 644 ~/.ssh/id_rsa.pubfor the public key file, which can be readable by others.
These settings prevent SSH from rejecting your keys due to overly permissive access.
What to do when ssh-agent is not running or keys are not recognized
If you encounter errors like "Could not open a connection to your authentication agent" or your keys do not load, start the ssh-agent manually:
- Run
eval "$(ssh-agent -s)". You should see a process ID confirming the agent is running. - Add your private key with
ssh-add ~/.ssh/id_rsa. If successful, you will see a message confirming the identity added.
For persistent ssh-agent sessions, consider configuring your shell profile or using macOS Keychain integration.
Handling passphrase related problems
If you forget your SSH key passphrase, there is no way to recover it. You must generate a new key pair and update services using the new public key. To avoid frequent passphrase prompts, ensure your ssh-agent is running and keys are added.
Dealing with multiple keys and specifying which to use
When you have several SSH keys, SSH may try the wrong one, causing authentication failures with messages like "Permission denied (publickey)". Specify which key to use by:
- Using the
-iflag in the ssh command, e.g.,ssh -i ~/.ssh/id_ed25519 user@host. - Configuring the
~/.ssh/configfile with entries that specifyIdentityFileper host.
This approach ensures the correct key is used automatically or via explicit command.
Best practices for managing SSH keys on macOS
Maintaining the security and usability of your SSH keys over time requires regular attention. Updating keys and passphrases periodically reduces the risk of compromise. A common recommendation is to change your passphrase every few months and regenerate keys every one to two years, depending on usage and exposure.
Backing up your private keys securely is essential. Store backups in encrypted external drives or use password-protected cloud storage services. Avoid leaving backups on unencrypted devices or shared locations to prevent unauthorized access.
Organize multiple SSH keys using clear, descriptive filenames and comments. For example, use filenames like id_ed25519_github or id_rsa_workserver. When generating keys with ssh-keygen, add a comment with the -C flag, such as your email or service name, to identify the key's purpose.
Revoke or delete old or unused keys promptly. Remove corresponding public keys from servers or services to close access, and securely delete private key files from your system. This limits potential attack vectors from lost or forgotten keys.
- Review your
~/.ssh/directory for existing keys with descriptive names. You should see files likeid_ed25519_githubandid_rsa_workserver. - Backup private keys by copying them to an encrypted external drive or a secure cloud folder. Successful backup means you can restore these files if needed without compromising security.
- Set reminders to update your SSH key passphrases every few months using
ssh-keygen -p. After updating, verify the new passphrase works by attempting to use the key. - Identify unused keys by checking access logs or your authorized_keys files on servers. Remove those keys from both the server and your local machine; ensure deletion by verifying absence in
~/.ssh/. - Use key comments when generating new keys, for example:
ssh-keygen -t ed25519 -C "[email protected]" -f ~/.ssh/id_ed25519_github. This practice helps quickly recognize key ownership and purpose.
- How to Use SSH in Mac Terminal: A Clear Step-by-Step Guide
- How to Disable Gatekeeper in Mac Terminal: Step-by-Step Guide
- How to Check Open Ports in Mac Terminal: A Step-by-Step Guide
Frequently asked questions
How to generate ssh key in mac?
Open Terminal and run ssh-keygen -t rsa -b 4096 -C "[email protected]". Follow the prompts to save the key, usually in ~/.ssh/id_rsa, and optionally set a passphrase. This creates a secure RSA key pair for authentication purposes.
How to get my ssh key in mac?
Your public SSH key is typically stored in ~/.ssh/id_rsa.pub. You can display it with cat ~/.ssh/id_rsa.pub. Copy this key to add it to remote services or servers requiring SSH authentication.
How to generate ssh key in mac os?
On macOS, use the Terminal command ssh-keygen with your preferred options, such as encryption type and bit size. The default RSA 4096-bit key is widely supported and secure. Save the key to the default location and set a passphrase if desired.
How to generate ssh key in macbook?
Generating an SSH key on a MacBook follows the same process as on any Mac. Launch Terminal, run ssh-keygen -t rsa -b 4096 -C "[email protected]", and save the key under the default path ~/.ssh/. Make sure to remember your passphrase if you set one.
How to create ssh key mac os?
To create an SSH key on macOS, open Terminal and enter ssh-keygen. Specify parameters like key type and length, then save the file in the recommended default directory ~/.ssh/. You can then use ssh-add to add the key to the SSH agent for easier authentication.
What this guide does not cover and when to seek other resources
This guide assumes you have basic familiarity with Terminal commands and does not cover advanced SSH configurations such as using certificate authorities, hardware security tokens like YubiKeys, or custom SSH agent setups. If you require multi-factor authentication, enterprise-grade security policies, or integration with centralized identity management, consult specialized documentation or your system administrator.
For most Mac users, the next best step after generating and adding your SSH key is to verify your key’s authentication by connecting to the target service. For example, test your GitHub SSH setup by running ssh -T [email protected] and confirming a successful authentication message. This practical check ensures your key is correctly configured and ready for secure use.