How to Install and Use Loom on Mac: A Complete Step-by-Step Guide
Discover how to install Loom on your Mac and use its features for efficient screen recording and video messaging.
You want to share a quick tutorial or capture feedback but aren't sure how to record your screen on Mac efficiently. Installing Loom can simplify this, yet you might wonder about compatibility and setup steps.
This article explains how to install Loom on Mac and guides you through using its features effectively. It also covers adding Loom to your desktop for easy access, using Loom across devices like iPad, and troubleshooting common issues.
Key takeaways
- Download Loom directly from the official website for the latest Mac desktop app.
- Grant screen recording permissions in System Preferences to enable Loom’s full functionality.
- Add Loom to your Mac dock for quick launching and repeated use.
- Loom’s iPad app has a different interface and feature set compared to the Mac version.
- Uninstall Loom safely by removing the app and clearing related files in Library folders.
Before you start: What you need to install Loom on Mac
To install Loom on your Mac smoothly, you need to confirm your system meets the minimum requirements. Loom’s desktop app requires macOS 10.14 (Mojave) or later and a Mac with an Intel or Apple Silicon processor. Ensure your Mac has at least 4GB of RAM and sufficient free storage for the app and your recordings.
An active internet connection is essential during installation and for using Loom’s cloud features. You also need a Loom account, which you can create for free on Loom’s website or directly within the app after installation.
Understanding Loom app versions
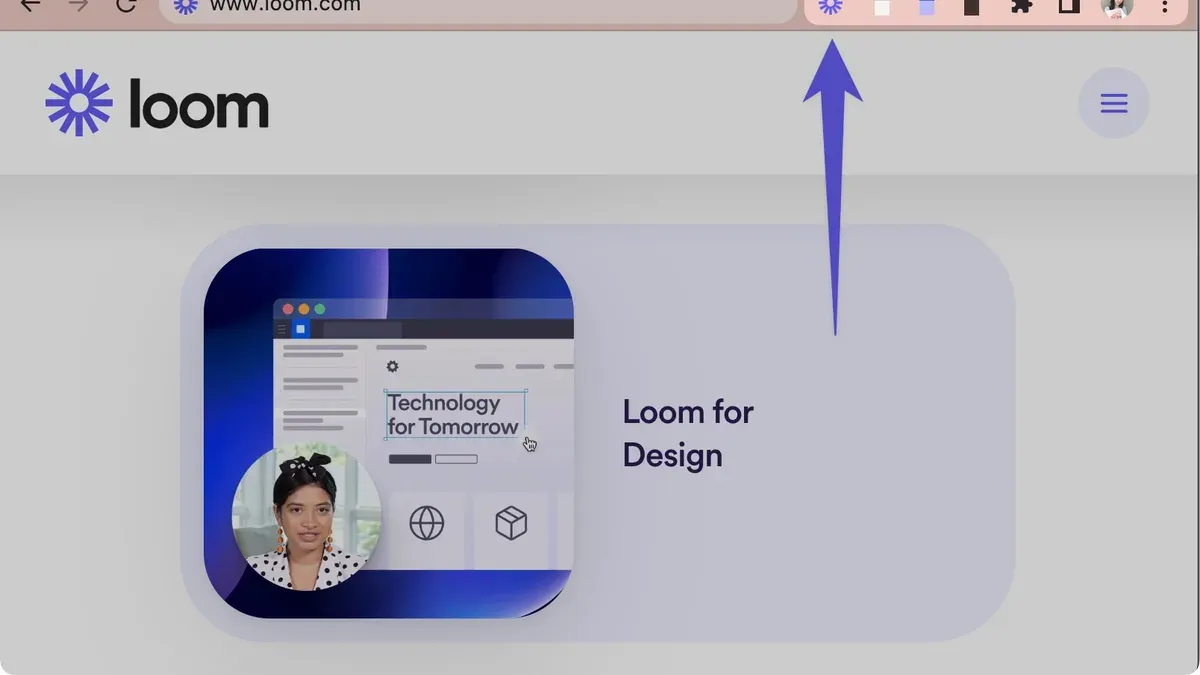
Loom offers multiple ways to record: a desktop app, a browser extension, and mobile apps. The desktop app provides full-featured screen and webcam recording with local file access and faster performance. The browser extension is lightweight and works within Chrome or Edge but has fewer features and depends on browser permissions. Mobile apps for iOS and Android enable video messaging and screen recording on those devices but function differently from the Mac app.
Summary of system requirements and app versions
| Requirement/Feature | Desktop App | Browser Extension | Mobile App |
|---|---|---|---|
| Supported OS | macOS 10.14 or later | Any with Chrome or Edge | iOS, Android |
| Processor | Intel or Apple Silicon | Any compatible with browser | Mobile CPUs |
| Internet Connection | Required for upload and sync | Required | Required |
| Feature Set | Full screen, webcam, audio, local files | Basic screen and webcam | Mobile-specific recording |
Before proceeding, verify your Mac meets these criteria and that you have your Loom login details ready. This preparation helps avoid interruptions during installation and ensures you understand the differences between Loom’s versions for your needs.
How to download Loom for Mac and install the desktop app
- Open your preferred web browser and go to the official Loom website at loom.com. You can also find Loom on the Mac App Store by searching for "Loom".
- On the Loom website, locate the Download for Mac button, usually found on the homepage or under the Products menu. Clicking this will start downloading the installer file, which is typically around 70 to 100 MB in size.
- Once the download finishes, open your Downloads folder and double-click the Loom.dmg file to mount it. A new window will appear showing the Loom app icon and an Applications folder shortcut.
- Drag the Loom app icon into the Applications folder. This copies the app to your Mac's applications directory, making it available system-wide.
- Navigate to the Applications folder and double-click the Loom app to launch it. The system may prompt you with a security warning since the app was downloaded from the internet; click Open to proceed.
- Loom will request permissions to record your screen and access your microphone. Follow the on-screen instructions to grant these permissions in your Mac's System Preferences > Security & Privacy under the Privacy tab.
- After granting the necessary permissions, Loom will complete its setup and open its main interface. You can verify the installation by checking that Loom appears in your Dock or via Spotlight search.
Follow these steps carefully to ensure Loom installs correctly and is ready for use on your Mac.
How to add Loom to your Mac desktop and dock for quick access
To launch Loom quickly, you can place its icon in convenient locations on your Mac. The most common places are the Dock and the desktop, which allow immediate access without navigating through folders.

- Open the Finder and go to the Applications folder. You should see the Loom app listed there.
- Click and hold the Loom icon, then drag it down to the Dock. Place it wherever you prefer among other app icons. When you release the icon, it will stay in the Dock for easy launching.
- To create a desktop shortcut, right-click (or Control-click) on the Loom app in the Applications folder and select Make Alias. An alias file will appear in the same folder.
- Drag this alias file to your desktop. You can rename it if desired. Double-clicking this alias will open Loom just like the original app.
- For automatic startup, open System Settings (or System Preferences) and navigate to Users & Groups. Select your user account, then click the Login Items tab.
- Click the + button, locate the Loom app in Applications, and add it. Loom will now launch automatically every time you log in to your Mac.
Using the Dock icon is generally faster than desktop shortcuts because it remains visible regardless of open windows. However, desktop aliases offer visual separation if you prefer organizing apps on the desktop.
Managing startup preferences helps if you use Loom frequently and want it ready immediately after booting your Mac, saving you from manual launching.
How to use Loom on Mac: Recording your screen and videos
After launching Loom and signing in with your account, you can start creating recordings by selecting the recording mode that suits your needs. Loom offers three main modes: Screen Only, Camera Only, and Screen + Camera. Choose the mode from the Loom control panel before you begin recording.
To start a recording:
- Open the Loom desktop app on your Mac and sign in if prompted. You should see the Loom recording controls appear.
- Click the mode selector to choose whether you want to record your screen, your camera, or both simultaneously. For example, select Screen + Camera to capture your screen alongside your face via the webcam.
- Specify the screen or window you want to record if you have multiple displays or windows open. Loom allows you to record your entire screen, a specific application window, or a browser tab.
- Click the red Start Recording button. Loom will give a short countdown, then begin capturing video and audio.
- During recording, use the Loom control overlay to pause, resume, or stop recording. You can also mute or unmute your microphone here.
- When finished, click the Stop button on the Loom controls. The video will automatically upload to your Loom library in the cloud.
Once uploaded, your video is available for viewing, sharing, or downloading. Loom videos are typically saved in MP4 format, with file sizes depending on recording length and quality settings; a 5-minute screen and camera recording usually ranges between 50MB and 150MB.
To share your recording, copy the video link from your Loom library or use the share options within the app to send it via email or messaging platforms. You can also download the MP4 file for offline use.
Managing your Loom videos is straightforward from the desktop app or the Loom website, where you can rename, delete, or organize recordings into folders.
Can you use Loom on an iPad and how it differs from Mac usage
You can use Loom on an iPad by downloading the app from the Apple App Store. The iPad version offers core recording and sharing features but differs significantly from the Mac desktop app in interface and capabilities.
To get Loom on your iPad:
- Open the App Store on your iPad and search for "Loom". You should see the official Loom app by Loom, Inc.
- Tap "Get" to download and install the app. Once installed, open it and sign in with your Loom account credentials.
The user interface on iPad is streamlined for touch input, focusing on recording your camera, screen, or both with fewer advanced options than the Mac app. For example, the iPad app does not support recording multiple screens simultaneously or advanced editing features found on Mac.
Here is a feature comparison:
| Feature | Mac Loom App | iPad Loom App |
|---|---|---|
| Screen Recording | Yes, multiple screens | Yes, single screen only |
| Camera Overlay | Yes, with size/position control | Yes, limited controls |
| Video Editing | Advanced trimming and annotations | Basic trimming only |
| File Management | Full access with folders and search | Limited file organization |
| Sharing Options | Direct links, downloads, integrations | Direct links and downloads |
Loom accounts sync across devices, so videos recorded on your iPad appear in your Loom library accessible on Mac and vice versa. However, any edits or settings changes made on one device may not fully transfer to the other due to app limitations.
How to uninstall Loom from your Mac safely
To completely remove Loom from your Mac, follow these steps carefully to delete the application, clear leftover files, and ensure no browser extensions remain if you installed any.
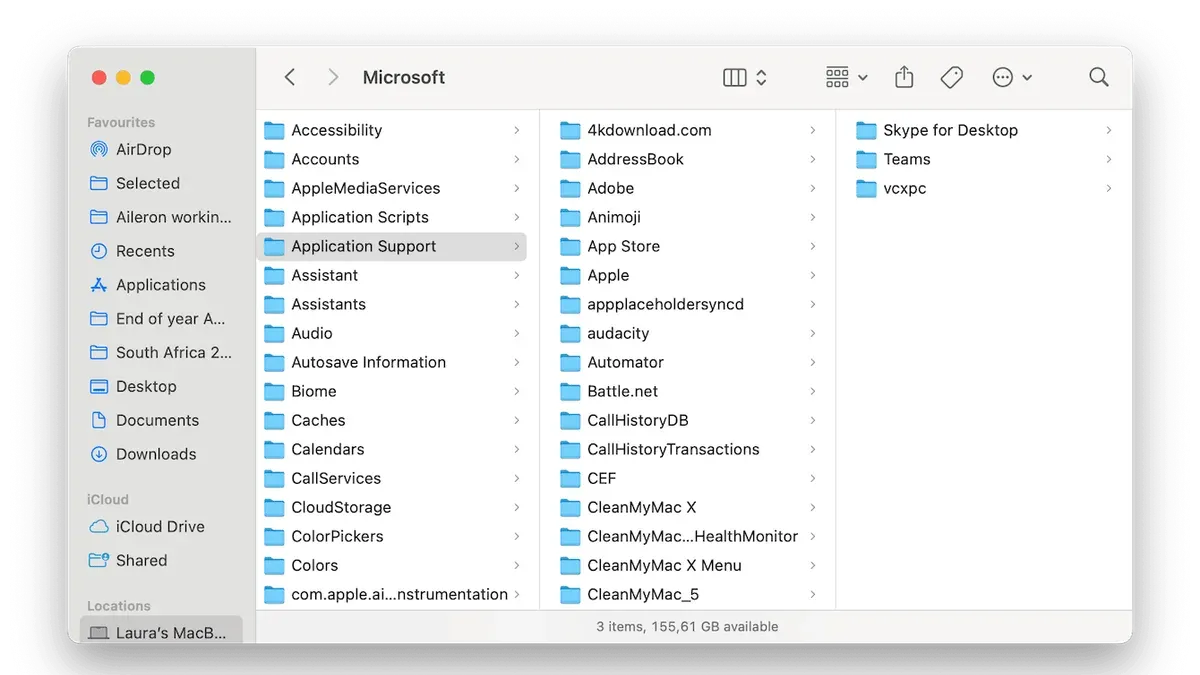
- Open Finder and navigate to the Applications folder. Locate the Loom app icon.
- Drag the Loom app to the Trash or right-click and select Move to Trash. You should see the app disappear from the Applications folder.
- Next, remove Loom’s residual files. In Finder, click Go in the menu bar, then select Go to Folder.... Enter
~/Library/Application Support/and press Enter. - Find the folder named com.loom.desktop or any folder related to Loom and move it to the Trash. This removes saved preferences and data.
- Repeat the previous step for
~/Library/Preferences/, looking for files starting withcom.loom. Move those to the Trash as well. - If you use Loom’s browser extension, open your browser’s extensions or add-ons settings and remove the Loom extension to avoid conflicts.
- Finally, empty the Trash to permanently delete all Loom files.
- Restart your Mac to complete the uninstall process. This helps clear any cached data and ensures no background processes related to Loom remain.
Common errors: If you see an error saying the app is in use and cannot be deleted, open Activity Monitor, search for Loom-related processes, and quit them before retrying.
Following these steps removes Loom completely, preventing leftover files from occupying space or causing unexpected behavior.
Troubleshooting common issues when installing or using Loom on Mac
Installation errors and permission issues
If you encounter installation errors, such as "Installation failed" or "Unable to grant permissions," first ensure you have admin rights on your Mac. Loom requires Screen Recording and Microphone access, which you can enable by going to System Preferences > Security & Privacy > Privacy, then selecting Screen Recording and Microphone and checking Loom. If permissions are denied, Loom cannot record your screen or audio properly.
Restart your Mac after adjusting these settings to apply changes. If installation still fails, try downloading the latest Loom installer directly from the official website to avoid corrupted files.
Recording failures or poor video quality
If Loom stops recording or produces low-quality videos, check your Mac's available storage and CPU usage. High CPU load or insufficient disk space can cause dropped frames or app crashes. Quit unused applications to free resources.
For audio issues, verify your microphone settings under System Preferences > Sound. Using an external microphone may improve quality. Also, ensure you are recording in the recommended resolution and frame rate by adjusting Loom's settings.
Login and syncing problems
When Loom fails to log in or sync videos, confirm your internet connection is stable. If you see errors like "Login failed" or "Unable to sync videos," try logging out and back in. Clearing the app cache can help; go to Loom Preferences > Advanced > Clear Cache.
Also, check if Loom's servers are experiencing downtime by visiting their status page online.
Performance optimization tips
To optimize Loom's performance, keep the app updated to the latest version. Disable unnecessary browser extensions that may interfere with Loom. Close background processes consuming excessive memory. Using a wired internet connection can also improve upload speeds and syncing reliability.
- How to Install Shottr on Mac and Capture Screenshots Efficiently
- How to Install CleanShot X on Mac: A Clear Step-by-Step Guide
- How to Install and Set Up OBS Studio on Mac: A Complete Guide
- How to Install and Use Bartender on Mac: A Step-by-Step Guide
Frequently asked questions
How to add loom to desktop?
After installing Loom on your Mac, you can add it to your desktop by opening Finder, navigating to the Applications folder, and locating the Loom app. Then, drag the Loom icon to your desktop to create a shortcut. For quick access, you can also drag the app icon to the Dock.
How to use loom mc?
If you are referring to using Loom for Minecraft (MC) videos, you start by launching Loom on your Mac and selecting the recording mode suitable for your needs, such as full screen or window capture. Then, open Minecraft and begin recording your gameplay or tutorials. Loom allows you to add webcam overlay and narration during your recording.
How to use a loom on minecraft?
In Minecraft, a loom is a crafting block used to apply patterns to banners. To use it, place the loom block, right-click to open its interface, then add a banner and dye in the appropriate slots. Select the desired pattern from the options to customize your banner's design.
How to download loom on mac?
Visit the official Loom website and navigate to the download section. Choose the Mac version and download the installer file. Once downloaded, open the file and follow the on-screen instructions to complete the installation of Loom on your Mac.
How to make a loom in mc?
To craft a loom in Minecraft, you need 2 wooden planks and 2 strings. Arrange them in the crafting table with the two wooden planks in the top-middle and middle-left slots, and the two strings in the middle-right and bottom-middle slots. This will produce one loom block ready for use.
What this guide does not cover and who should seek other resources
This article does not cover advanced Loom features such as enterprise-level integrations, API usage, or detailed team management tools. If you require custom workflows, bulk user management, or integration with complex software ecosystems, consulting Loom's official support or a technical specialist is recommended.
For users needing extensive video editing beyond basic trimming or those requiring high-security compliance features, third-party software or professional services may better suit your needs.
The single most useful next step is to open Loom on your Mac and explore the Settings menu under the Loom icon in the menu bar. Adjust permissions like camera and microphone access, and familiarize yourself with the keyboard shortcuts listed there. This practical step ensures your recordings start smoothly and that you control the key features from the outset.