
How to Install Snagit on Mac: A Clear Step-by-Step Guide
This guide explains how to install Snagit on Mac, covering downloading, licensing, permissions, and troubleshooting for smooth setup.
You’ve decided to capture your screen more efficiently on your Mac, but the process of getting Snagit up and running isn’t always straightforward. Whether you’re installing it for the first time or setting it up on multiple Macs, understanding the steps and licensing rules can save time and frustration.
This article explains how to install Snagit on Mac, covering everything from safe downloading practices to configuring the software post-installation. It also clarifies how to handle multi-device licenses and perform silent installs, ensuring you know what works and what doesn’t beyond basic download instructions.
Key takeaways
- Download Snagit only from TechSmith’s official site or the Mac App Store to avoid corrupted or outdated versions.
- Follow the installer prompts carefully, including allowing necessary permissions in System Preferences under Security & Privacy.
- One Snagit license typically covers installation on up to two Macs; activating more requires additional licenses.
- Silent installs require command-line tools and are mainly used in managed IT environments.
- Common installation issues often stem from outdated macOS versions or restrictive security settings.
Before you start: What you need to install Snagit on Mac
Before installing Snagit on your Mac, ensure your system meets the official requirements from TechSmith. Snagit supports macOS versions 10.15 (Catalina) and later. You need at least 2 GB of available disk space for the application and additional space for saved captures.
To install Snagit, you must have administrator privileges on your Mac. This ensures you can grant the necessary permissions during setup. Also, a stable internet connection is required to download the installer and activate your license.
Regarding licensing, a single-user license for Snagit typically allows installation on up to two devices. This means you can install Snagit on your Mac and one additional computer, but not on multiple Macs beyond that limit without purchasing extra licenses. Have your license key ready for activation after installation.
Prepare these essentials before beginning the installation process:
- Verify your macOS version is 10.15 or newer. To check, click the Apple menu > About This Mac. You should see your macOS version displayed.
- Confirm you have at least 2 GB of free disk space. Open Finder, select your startup disk, and press Command+I to view available space.
- Ensure you have administrator access. Go to System Preferences > Users & Groups; your user account should show “Admin” below your name.
- Have your Snagit license key available. This is typically emailed after purchase or accessible in your TechSmith account.
- Make sure your Mac is connected to the internet for download and activation.
How to download Snagit for Mac safely and correctly
Downloading Snagit from the official TechSmith website is the safest way to ensure you get a legitimate, up-to-date installer. Avoid third-party websites or file-sharing platforms that may offer outdated versions or pirated copies, which can contain malware or cause compatibility issues.
- Open your preferred web browser and go to https://www.techsmith.com/snagit.html. You should see the official Snagit product page.
- Click on the Download Free Trial or Buy Now button, depending on your intent. A macOS-compatible installer file (usually a.dmg) will start downloading.
- Once downloaded, verify the file name matches the official naming convention, typically including “Snagit” and the version number. This helps avoid corrupted or tampered files.
- If you want to verify the download integrity, check for any available checksum or digital signature details on the TechSmith site. Comparing these with the downloaded file ensures it has not been altered.
- Do not run installers from unknown sources, as user reports indicate risks of malware, missing updates, or unstable Snagit builds from unofficial sites.
By following these steps, you minimize the chance of installation issues and protect your Mac from potential security threats tied to unauthorized software downloads.
How to install Snagit on Mac: Step-by-step installation process
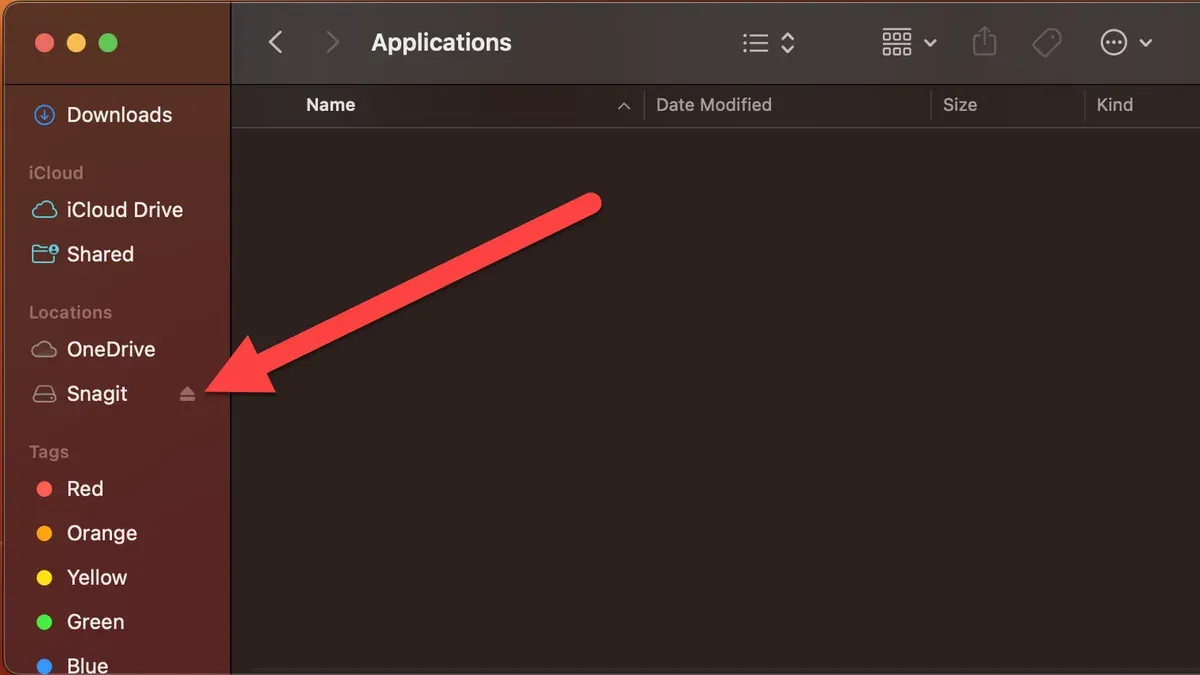
- Locate the downloaded .dmg file in your Downloads folder and double-click it. You should see a new window open displaying the Snagit icon and an Applications folder shortcut.
- Drag the Snagit icon onto the Applications folder shortcut. This action copies Snagit into your Applications directory, confirming the installation files are correctly placed.
- Open the Applications folder and double-click Snagit to launch it for the first time. A security prompt will appear asking for permission to run an app downloaded from the internet—click Open to proceed.
- When Snagit opens, macOS will request permissions for screen recording and accessibility. Go to System Preferences > Security & Privacy > Privacy tab, then grant Snagit access to Screen Recording and Accessibility. You may need to click the lock icon and enter your admin password to make changes.
- Return to Snagit and complete the installation wizard by signing in or entering your license key. Follow the prompts to finalize initial setup, including optional updates and preferences.
- After setup, Snagit will be ready to use. You can test the installation by capturing your screen using the capture button or keyboard shortcuts.
Each step should produce clear visual confirmation: the mounted disk image window, Snagit appearing in Applications, permission dialogs in System Preferences, and the activation prompt within Snagit. Missing permissions commonly cause capture failures, so ensure these are granted before proceeding.
How to set up Snagit on Mac after installation
Once Snagit is installed, configuring it properly can enhance your capture efficiency and workflow. Begin by activating your license key to access all features.
- Open Snagit and go to the Snagit menu, then select Enter License Key. Enter your valid license key and confirm activation; successful activation removes trial limitations and unlocks premium options.
- Next, configure capture preferences by clicking Snagit Preferences from the Snagit menu. Under the Capture tab, set your preferred capture modes such as region, window, or scrolling capture for quicker access during usage.
- Adjust output folders by selecting the Output tab in preferences. Choose a dedicated folder for saving captures automatically, which streamlines file organization and retrieval.
- Set up keyboard shortcuts in the Hotkeys tab. Assign or modify shortcuts for common actions like full screen capture or video recording to speed up your workflow; for example, Command + Shift + 5 is often used for screen capture.
- Customize the toolbar by going to View > Customize Toolbar. Add frequently used tools such as Pan, Text, or Stamp for quick access during editing.
- Finally, integrate Snagit with cloud or sharing services by clicking the Share menu. Connect to services like Google Drive, Dropbox, or email clients to streamline sharing your captures directly from Snagit.
These setup steps help tailor Snagit to your needs, improving capture speed, organization, and sharing convenience.
How to install Snagit on a new computer or second Mac
Before installing Snagit on another Mac, verify your license permits use on multiple devices. TechSmith typically allows installation on up to two computers per license, but check your specific license details to be sure.
If your license limits installations to one device, you must deactivate Snagit on the old Mac before activating it on the new one. Deactivation frees up the license for reuse.
- On the old Mac, open Snagit and go to Help > Deactivate License. You should see confirmation that the license is deactivated.
- On the new or second Mac, download Snagit from TechSmith’s official site if you haven’t already.
- Install Snagit by opening the installer and dragging the app to the Applications folder.
- Launch Snagit, then enter your license key when prompted to activate. Activation confirmation indicates success.
- If activation fails due to license limits, you will receive an error message explaining that the maximum number of activations has been reached.
- In this case, visit your TechSmith account online to manage devices or contact TechSmith support to remove old activations.
This process ensures compliance with TechSmith’s licensing policies while enabling you to use Snagit across your Macs as permitted.
How to perform a silent install of Snagit on Mac
Silent installation is useful for IT administrators deploying Snagit across multiple Macs without user intervention. This method uses terminal commands or device management tools to automate installation, avoiding manual clicks and dialogs.
To perform a silent install, you typically use the command line with the installer’s package. For example, if you have the Snagit installer package named Snagit.dmg mounted and the package Snagit.pkg accessible, you can run:
- Open Terminal on your Mac.
- Run the command:
sudo installer -pkg /Volumes/Snagit/Snagit.pkg -target /
This initiates installation without user prompts. - Wait for the command to complete; no windows should appear, and the prompt returns when done.
- Confirm Snagit is installed by launching it or checking the /Applications folder.
Silent installs are most effective when combined with management tools like Jamf or Munki for large-scale deployments.
Limitations include less control over customization during install and potential permission issues requiring admin rights. Silent installs may not handle license activation automatically, so post-install activation steps might still be needed.
For detailed options and the latest command syntax, consult TechSmith’s official documentation or support resources to ensure compatibility with your Snagit version.
Troubleshooting common Snagit installation issues on Mac
If Snagit’s installer won’t open or crashes, first ensure your macOS is up to date and that you downloaded the installer directly from TechSmith’s official site. If the installer still fails, try right-clicking the.dmg file and selecting "Open" to bypass macOS security blocks. A typical error message is "cannot be opened because the developer cannot be verified." Confirm you allow apps from identified developers in System Preferences > Security & Privacy.
Permission errors preventing Snagit from recording often relate to macOS privacy settings. To fix this, go to System Preferences > Security & Privacy > Privacy tab. Under "Screen Recording," ensure Snagit is checked. Also, check "Accessibility" and "Microphone" permissions. You may need to restart Snagit or your Mac after adjusting these settings.
License activation failures can occur if your license key is already in use on the maximum allowed devices. You might see errors such as "Activation limit reached." To resolve this, deactivate Snagit on an unused device via your TechSmith account before activating on the current Mac.
Missing features or crashes after installation may be due to corrupted preferences or outdated macOS components. Try resetting Snagit preferences by deleting the folder ~/Library/Preferences/com.techsmith.snagit.plist. If crashes persist, reinstall Snagit after uninstalling via dragging it from Applications to Trash and restarting your Mac.
Understanding Snagit licensing limits and installation rights on Mac
With a single Snagit license, you are typically allowed to install and activate the software on up to two Mac computers for your personal use, according to TechSmith’s official licensing FAQ. This means you can use Snagit on your desktop and a laptop without purchasing a second license.
If you need to use Snagit on more than two Macs, you must either deactivate one of the existing installations or purchase additional licenses. Deactivation can be done within the Snagit app by signing out or through the TechSmith account portal, which frees up an activation slot for another device.
Exceeding the allowed activations will prevent new installations from activating, and you will see an error message prompting you to manage your license activations. In this case, review your active devices and deactivate any that are no longer in use.
For organizations or users requiring multiple installations beyond the personal license limit, TechSmith offers volume licensing options or multi-seat licenses that can be managed centrally. Upgrading to these options provides more installation rights and deployment flexibility.
- Open Snagit on your Mac and click the Help menu, then select Manage License. You should see your current activation status and remaining available activations.
- If you need to free an activation slot, click Deactivate License on the device you no longer use. The app will confirm deactivation, and your activation count will update.
- To activate Snagit on a new Mac, install and launch the app, then sign in with your TechSmith account or enter your license key. Successful activation will show your license status as active.
- If activation fails due to exceeding limits, log in to your TechSmith account on the web, navigate to License Management, and review active devices. Deactivate any unused devices to regain activation slots.
- For multiple users or devices, consider purchasing additional licenses or a volume license from TechSmith to ensure compliance and access to support.
- How to Install CleanShot X on Mac: A Clear Step-by-Step Guide
- How to Install Shottr on Mac and Capture Screenshots Efficiently
- How to Install and Use Loom on Mac: A Complete Step-by-Step Guide
- How to Install Dropbox on Mac: A Clear Step-by-Step Guide
Frequently asked questions
Does snagit work on mac?
Yes, Snagit is fully compatible with Mac. It offers a range of screen capture and recording features designed specifically for macOS, ensuring smooth performance and integration with Mac workflows.
How to install snagit on new computer?
To install Snagit on a new computer, download the installer from the official TechSmith website. Run the installer, follow the on-screen instructions, and then sign in with your TechSmith account to activate the license. Remember to deactivate the license on the old device if you have reached your device limit.
Is snagit available for mac?
Snagit is available for Mac and can be downloaded directly from TechSmith’s official site. The macOS version supports the latest macOS releases and includes features tailored for Mac users.
How to download snagit on my laptop?
Visit the TechSmith website and locate the Snagit download page. Choose the macOS version if you are on a Mac laptop, then click the download button. Save the installer file to your preferred location before running it.
How to snagit on mac?
To use Snagit on Mac, open the application after installation and configure capture settings such as region, window, or full screen. Use the menu bar icon or keyboard shortcuts like Shift + Command + 5 to start capturing. After capturing, you can edit or share your screenshots or videos within the Snagit editor.
What this guide does not cover and who should seek other help
This guide does not cover advanced troubleshooting for corrupted macOS installations or conflicts with third-party software beyond common permission and installation errors. If you encounter persistent issues related to system-level problems, kernel extensions, or complex network restrictions, consulting Apple Support or a professional IT technician is recommended. Additionally, this article does not address enterprise deployment methods using MDM solutions or volume licensing complexities that require specialized administrative tools.
For most users, the next best step is to verify your Snagit license status through TechSmith's official website or within the Snagit application itself. Ensuring your license is active and compatible with your Mac will prevent unnecessary installation errors and clarify how many devices you can install on. If you plan to install Snagit on multiple Macs, double-check the license terms in your account to avoid exceeding the allowed number of activations.



