Mac Keyboard Shortcut to Record the Screen: A Complete Guide
Discover how to use Mac keyboard shortcuts to record your screen quickly and efficiently without relying on third-party applications.
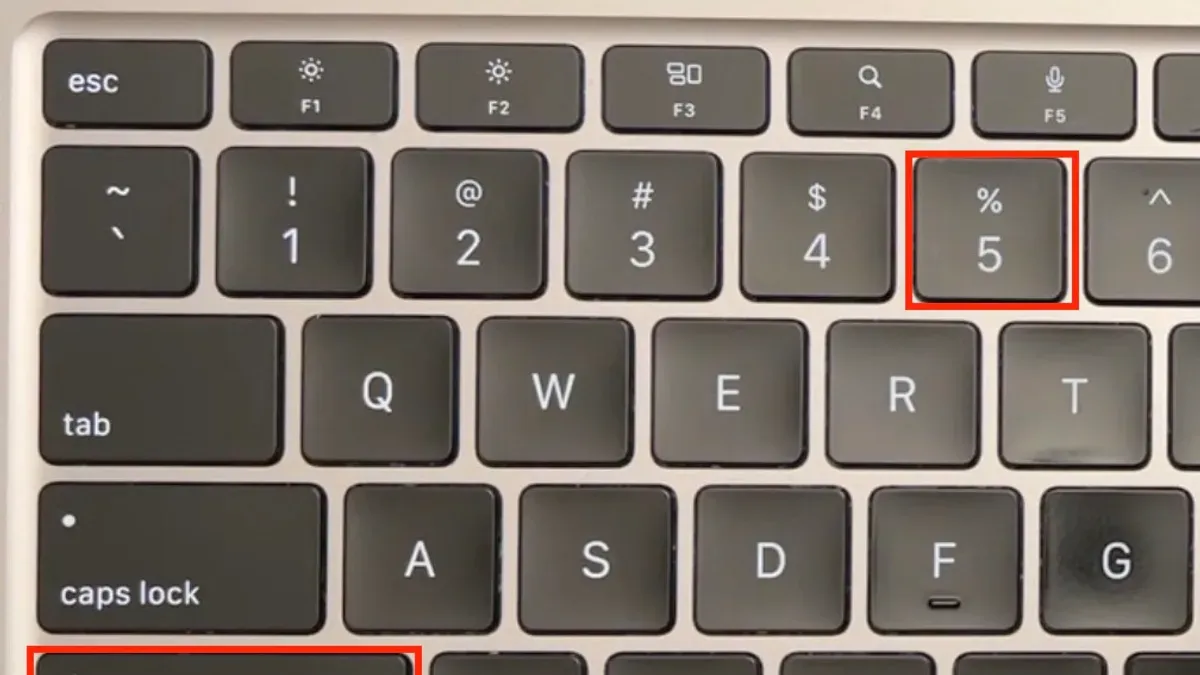
You need to quickly capture a tutorial or save an important moment on your screen without fumbling through menus. Using the right Mac keyboard shortcut to record the screen lets you start recording instantly and efficiently.
This guide explains how to use native Mac shortcuts to record your screen, stop recordings, and avoid common pitfalls that can disrupt your workflow. You’ll also learn when alternative methods might be better suited for your needs, all without relying on third-party applications.
Key takeaways
- Press Shift + Command + 5 to open the screen recording toolbar with multiple options.
- Use Shift + Command + 3 to start a full-screen recording immediately.
- Stop recording by clicking the stop button in the menu bar or pressing Command + Control + Esc.
- Ensure you have screen recording permissions enabled in System Preferences under Security & Privacy.
- Consider QuickTime Player for additional recording features if shortcuts don’t meet your needs.
How to screen record on Mac keyboard shortcut
To start recording your screen on a Mac using native tools, press Shift + Command + 5. This shortcut opens the screen capture toolbar at the bottom of your screen, which includes options for screenshots and screen recordings.
On the toolbar, you will see two recording buttons: one to record the entire screen and another to record a selected portion. Click the desired recording option to select it.
Once selected, click the Record button on the toolbar to begin capturing your screen. Alternatively, after setting the area to record, you can start recording directly from the toolbar without needing further commands.
To stop recording, either click the stop icon in the menu bar at the top right of your screen or press Command + Control + Esc. Your recording will then be saved automatically, typically to your desktop, unless you have specified a different location in options.
For example, pressing Shift + Command + 5 brings up the toolbar where you select “Record Entire Screen,” then click “Record.” When finished, click the stop button in the menu bar or press Command + Control + Esc to end and save the recording.
How to screen record on Macbook shortcut
MacBooks use the same Shift + Command + 5 shortcut for screen recording as other Macs, but the presence of the Touch Bar can offer added convenience. On MacBook models with a Touch Bar, you can customize the Control Strip to include a screen recording button, allowing quick access without using the keyboard shortcut.
To add this button, go to System Settings > Keyboard > Customize Control Strip. Drag the Screen Recording icon onto the Touch Bar for one-tap recording control. This is especially helpful if you prefer tactile controls or want to avoid complex key combinations.
Since screen recording consumes battery and processing power, MacBook users should consider optimizing settings before starting. Lowering display brightness, closing unused apps, and selecting only necessary screen areas for recording can reduce battery drain and improve performance during long sessions.
For example, if you plan to record a 10-minute tutorial, using the Touch Bar button to start recording and ensuring no background apps are running can help preserve battery life and prevent lag.
How to record your screen Mac shortcut
Beyond starting and stopping screen recordings, Mac offers keyboard shortcuts to capture specific parts of your screen efficiently. Pressing Shift + Command + 5 opens the recording toolbar, where you can choose to record the entire screen, a selected window, or a custom portion.
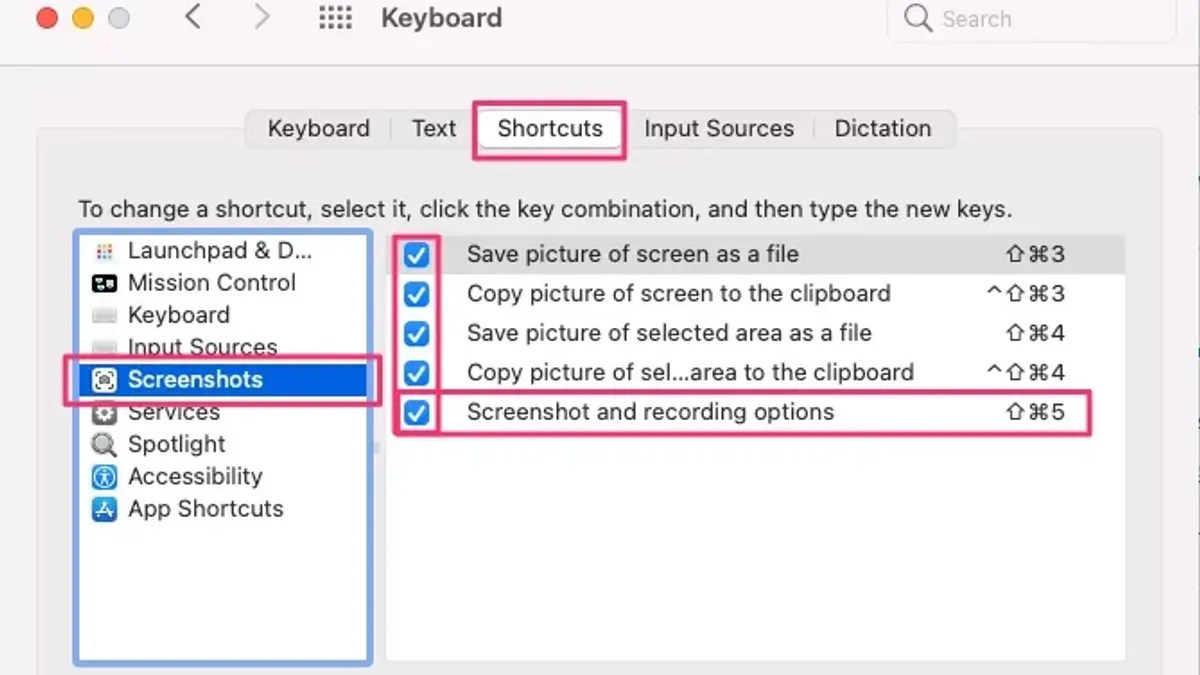
For example, after pressing Shift + Command + 5, click the Record Selected Portion button, then drag to select the area you want to record. You can quickly switch between capture modes using the keyboard: pressing Spacebar while selecting changes from a custom area to a window capture, allowing precise targeting without using the mouse extensively.
To include audio, click Options in the toolbar and select a microphone input such as Internal Microphone. This enables recording your voice or system sounds alongside video. Remember, the toolbar also lets you set timers and choose where to save recordings, streamlining your workflow.
Imagine recording a tutorial: you select just the application window, enable microphone input, then start recording—all through quick shortcuts that avoid navigating menus or third-party apps.
Mac keyboard shortcut to stop screen recording
To stop a screen recording on a Mac, you can click the Stop button located in the menu bar at the top-right corner of your screen. This icon appears as a small square within a circle while recording is active. Alternatively, you can use the keyboard shortcut Command + Control + Esc to halt the recording immediately without needing to move your cursor.
Once you stop the recording, your Mac automatically saves the video file to the default location, usually the Desktop, with a timestamped filename. A thumbnail preview briefly appears in the bottom-right corner, allowing you to quickly review, trim, share, or delete the recording without opening another app.
Common mistakes include accidentally clicking outside the stop icon or pressing unrelated keys, which can disrupt the recording or cause confusion about whether the file saved correctly. For example, if you forget to stop properly and close your Mac or log out, the recording may not save, leading to lost footage. Ensuring you use the menu bar icon or the exact keyboard shortcut helps avoid these issues and ensures your screen capture is preserved cleanly.
Common mistakes to avoid when using Mac screen recording shortcuts
One frequent error is not verifying available storage before starting a recording. Screen recordings, especially long or high-resolution ones, can quickly consume gigabytes of disk space. Without enough free space, recording may stop abruptly or fail to save, causing frustration and lost footage.
Another common issue is neglecting microphone permissions and audio settings. If you want to capture system sound or your voice, ensure that “Microphone” access is enabled in System Preferences under Security & Privacy > Privacy, and that the correct input device is selected in the recording toolbar. Otherwise, your video may lack expected audio.
Forgetting to stop recording properly is a pitfall that leads to incomplete or corrupted files. Relying solely on closing the recording window without using the Command + Control + Esc shortcut or the menu bar stop icon can cause the Mac to mismanage the saved file. Always confirm the recording ends fully before closing apps or shutting down.
Finally, using shortcuts without understanding the screen recording toolbar options can result in unintended captures. For example, starting a recording without selecting between full screen, window, or selected portion may lead to capturing irrelevant content. Take a moment to review the toolbar choices to ensure your recording matches your intent.
Alternative methods and when to consider them
While Mac's native keyboard shortcuts provide efficient screen recording, they have limitations such as basic editing features and a maximum recording duration tied to available storage. For extensive editing, annotations, or scheduled recordings, third-party apps can offer more comprehensive solutions.
Popular third-party screen recorders like OBS Studio, ScreenFlow, and Camtasia support customizable keyboard shortcuts and advanced features like multi-track editing, live streaming, and higher control over audio/video settings. For example, OBS Studio allows you to set global hotkeys for start/stop recording and scene switching, making it ideal for complex workflows.
You might prefer native shortcuts when you need a quick, no-installation-required capture with minimal setup, such as recording a brief tutorial or troubleshooting session. Conversely, if you require precise control over output quality or post-production editing, third-party tools are more suitable.
| Feature | Mac Native Shortcuts | OBS Studio | ScreenFlow | Camtasia |
|---|---|---|---|---|
| Shortcut Support | Shift+Command+5, Command+Control+Esc | Fully customizable global hotkeys | Customizable shortcuts | Customizable shortcuts |
| Editing Tools | Basic trimming via QuickTime | None (external editor needed) | Advanced multi-track editing | Comprehensive editing suite |
| Recording Length | Limited by disk space | No inherent limit | No inherent limit | No inherent limit |
| Audio Control | Basic input selection | Advanced audio mixing | Advanced audio editing | Advanced audio editing |
| Use Case | Quick captures, simple recordings | Live streaming, professional setups | Tutorials, detailed editing | Marketing videos, polished results |
For instance, if you want to record a one-hour webinar with live annotations and multiple audio sources, native shortcuts won't suffice. Using OBS Studio with its customizable hotkeys and audio mixer would be more practical. However, for capturing a quick bug report video, native shortcuts remain the fastest and least intrusive choice.
- Mac Keyboard Shortcut to Copy Screenshot to Clipboard Explained
- How to Take a Screenshot of a Selected Area on Mac Using Keyboard Shortcuts
- Mac Keyboard Shortcut to Lock the Screen: How to Secure Your Mac Quickly
Frequently asked questions
How to screen record on mac shortcut?
Press Shift + Command + 5 to open the screen recording toolbar on your Mac. From there, select either the full-screen recording or a selected portion, then click the record button or press Return to start recording.
how to screen record on mac shortcut
The quickest way is pressing Shift + Command + 5 to bring up the built-in screen capture interface. You can then choose to record the entire screen, a window, or a selected portion without needing extra software.
mac keyboard shortcut to record screen
Use Shift + Command + 5 to access the recording options. This shortcut opens the control panel where you can start, pause, and stop your screen recordings natively.
shortcut keys for screen recording in mac
The primary shortcut is Shift + Command + 5. After starting a recording with this, you can stop it by clicking the stop button in the menu bar or pressing Command + Control + Esc to terminate the recording.
mac keyboard shortcut to capture screen
For screenshots, use Shift + Command + 3 for a full-screen capture, or Shift + Command + 4 to select a portion. These differ from screen recording but are part of the same screenshot utility accessed via keyboard.
What this guide does not cover and who should look elsewhere
This guide covers native macOS keyboard shortcuts and the built-in Screen Capture tool found in macOS, focusing on quick and convenient screen recording without third-party software. It does not cover advanced editing features, multi-source recording, or professional-grade screen recording software like Final Cut Pro, ScreenFlow, or Camtasia. If you require detailed video editing, multi-track audio, or specialized capture options, consider dedicated applications designed for those purposes.
For users who need high-quality live streaming, annotations during recording, or complex workflows involving external devices, third-party solutions will better suit your needs. This guide aims to help you navigate the default macOS environment efficiently without additional installations.
The single most useful next step is to familiarize yourself with the keyboard shortcut Shift + Command + 5, which opens the macOS screen capture toolbar. This tool centralizes options for capturing your entire screen, a selected window, or a custom portion, plus easy access to start and stop recordings. Spending a few minutes mastering this toolbar and its settings will significantly streamline your screen recording process on Mac.