How to Take a Screenshot of a Selected Area on Mac Using Keyboard Shortcuts
Discover how to quickly capture a specific part of your Mac screen using keyboard shortcuts for precise and efficient screenshots.
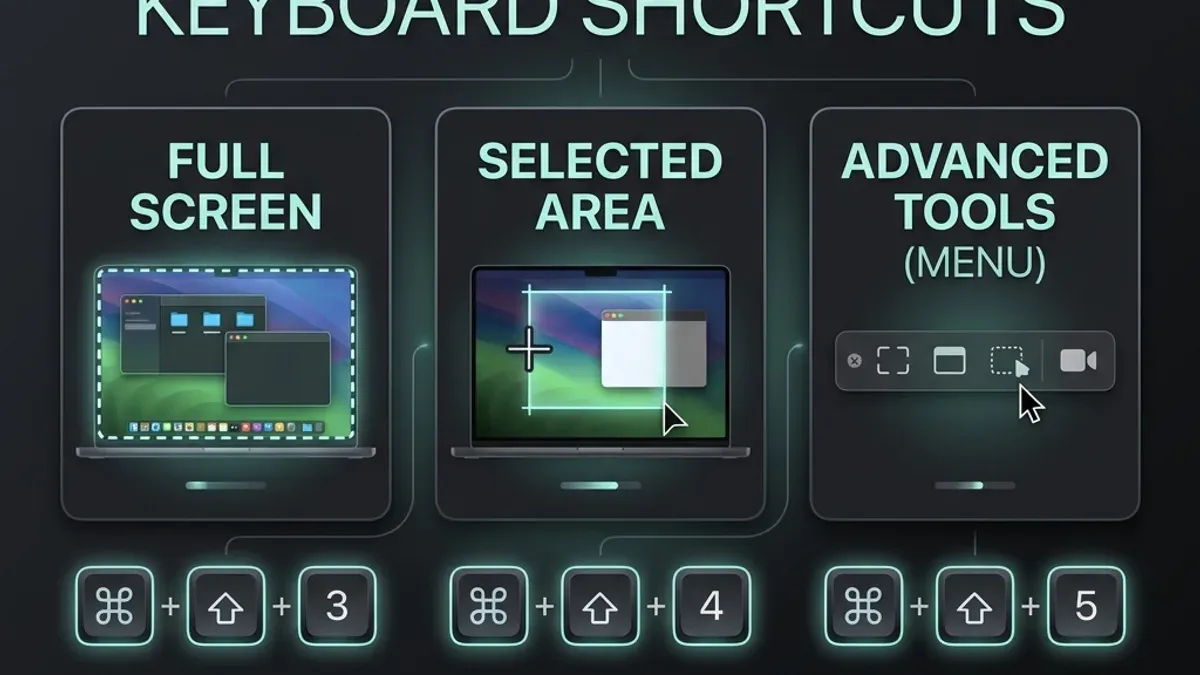
You need to quickly capture a specific part of your Mac screen, whether it's a chart for work or a section of a webpage for study. Instead of grabbing the entire screen and cropping later, you want a faster, more precise method.
This guide explains the Mac keyboard shortcut to take a screenshot of a selected area, how it works, and how you can customize it to fit your workflow. You'll also find practical tips for flawless captures and solutions for common issues that might interrupt your screenshot process.
Key takeaways
- Press Shift + Command + 4 to capture a selected area on Mac.
- Use the Screenshot app or System Settings to change shortcut keys and save locations.
- Hold Spacebar after dragging to move the selection box precisely.
- Common mistakes include accidentally capturing the entire screen or losing the selection.
- Alternative tools like Grab or third-party apps offer different capture options.
What is the Mac screenshot selected area shortcut and why it matters
The Mac screenshot selected area shortcut allows you to capture just a specific portion of your screen instead of the entire display or a single window. This focused capture is triggered by pressing Shift + Command + 4, which turns your cursor into a crosshair to select the exact area you want to save.
Capturing only a part of the screen offers clear advantages: it reduces file size significantly compared to full-screen screenshots, making sharing and storage more efficient. For example, a full-screen screenshot of a 27-inch Retina display can easily be several megabytes in size, while a selected area focusing on an error message or a chart might be only a few hundred kilobytes.
This precision is especially useful for highlighting specific details without exposing unrelated or sensitive information. Common scenarios include sharing error messages during troubleshooting, cropping out confidential data from documents, or focusing on a particular section of a webpage for study or presentation. Using this shortcut helps you communicate more clearly and maintain privacy without additional editing.
How the Mac keyboard shortcut for selected area screenshot works
To capture a specific portion of your screen on a Mac, press Command + Shift + 4. This immediately changes your cursor into a crosshair pointer, signaling that you can begin selecting an area.
Click and drag the crosshair to draw a rectangle around the part of the screen you want to capture. As you drag, the dimensions of the selection box appear near the cursor, helping you gauge the size precisely. When you release the mouse button or trackpad, the Mac takes the screenshot of the selected area.
By default, the image is saved as a PNG file on your desktop with a filename starting with "Screen Shot" followed by the date and time, making it easy to find your recent captures.
Modifier keys can refine this process: holding the Spacebar after starting your selection lets you move the selection area without changing its size, while holding the Option key resizes the selection from its center point rather than the corner, allowing for symmetrical adjustments.
For example, if you want to capture a logo on a website, press Command + Shift + 4, drag around the logo, hold Spacebar to nudge the selection perfectly over the image, then release to save the exact area you need.
How to customize and enhance your screenshot experience
Beyond the basic Command + Shift + 4 shortcut, macOS offers the Screenshot app, accessible with Command + Shift + 5, providing options like capturing the entire screen, a window, or a timed screenshot. This interface also lets you select where your screenshots are saved by default, such as Desktop, Documents, or Clipboard, improving organization and workflow.
To change the default save location via Terminal, you can use a command like defaults write com.apple.screencapture location [path] followed by killall SystemUIServer to apply changes. For example, setting screenshots to save in a folder named “Screenshots” inside Documents keeps your desktop uncluttered.
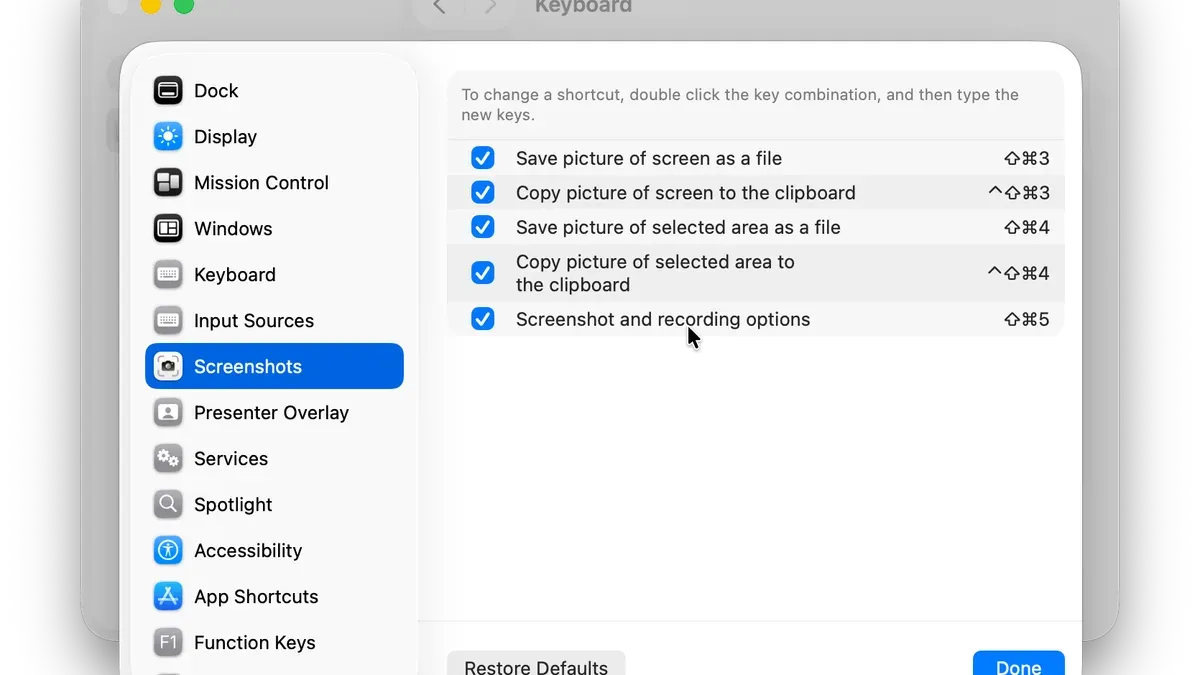
Customizing shortcut keys is available in System Preferences under Keyboard > Shortcuts > Screenshots. Here, you can reassign or disable shortcuts to avoid conflicts with other apps or personal preferences.
After capturing, you can open screenshots in Preview for quick annotations or use third-party apps like Skitch or CleanShot X for enhanced editing features. These tools add shapes, text, or highlights, helping you tailor images for clearer communication.
Practical tips to capture perfect screenshots every time
To achieve clean edges and avoid capturing unwanted UI elements, start by zooming in on the area you want to capture using macOS’s built-in Zoom feature (System Preferences > Accessibility > Zoom). This helps you precisely position the crosshair cursor before making your selection. Additionally, holding the Space bar after drawing your selection lets you move the selected area without resizing it—perfect for fine-tuning.
For capturing dropdown menus or transient interface elements that disappear when you click elsewhere, use the keyboard shortcut Command + Shift + 4, then press the Space bar to switch to window capture mode. Hover over the menu or window and click to capture it intact. Alternatively, you can press Command + Shift + 5 to bring up the screenshot toolbar, which includes options to capture menus with a delay, giving you time to open the dropdown.
When you want to maintain a specific aspect ratio, hold the Shift key while dragging to lock either the height or width of your selection. For example, locking the width allows you to adjust height freely, which is useful for consistent screenshot sizes in presentations or documentation.
Imagine capturing a webpage’s sidebar without the surrounding clutter: zoom in to align the crosshair exactly, hold Shift to lock the sidebar’s width, then use Space to reposition if necessary. This approach reduces editing time by producing a clean screenshot on the first try, saving minutes that would otherwise be spent cropping or retaking images.
Common mistakes and how to avoid them
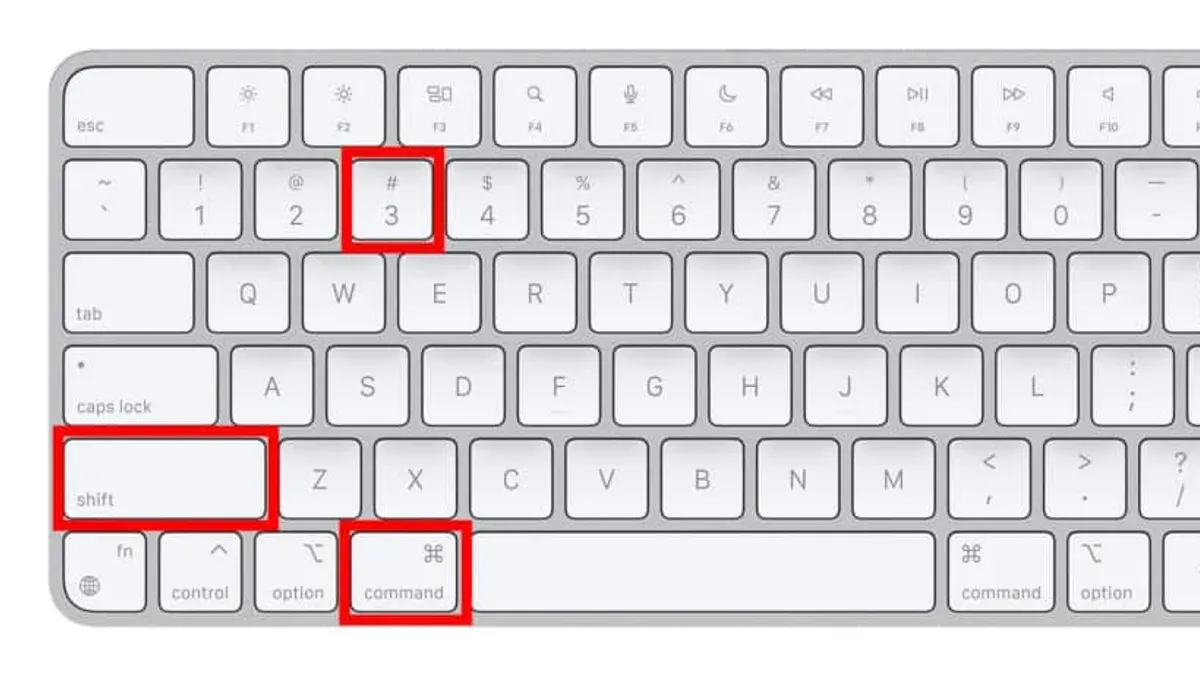
A frequent error is unintentionally capturing the full screen or the wrong area. This often happens when you press Command + Shift + 3 instead of Command + Shift + 4, or when you release the mouse button too early, selecting an incomplete region. To avoid this, confirm you see the crosshair cursor before clicking and dragging precisely to frame the desired area.
Another common issue is losing screenshots because of unexpected save locations. By default, screenshots save to the desktop, but if you've changed the location via the Screenshot app (opened with Command + Shift + 5), files might be harder to find. Use Finder's search with the "Kind:Image" filter or Spotlight by typing the date or "Screenshot" to locate missing files quickly.
Confusion between screenshot modes can also cause errors. For example, using Command + Shift + 4 then Spacebar captures a window, not a selected area, which might not be what you intended. Familiarize yourself with each shortcut's behavior to prevent this mistake.
If you suspect a screenshot was taken but cannot find it, check the Clipboard by pasting into Preview or another app—sometimes screenshots save only to the Clipboard if you hold Control with the shortcut, rather than creating a file.
Alternative methods to capture selected areas on Mac
Beyond the Command + Shift + 4 shortcut, macOS offers other ways to capture selected screen areas that might better suit your workflow or preferences.
Using the Screenshot app interface
Press Command + Shift + 5 to open the Screenshot app interface, which provides on-screen controls for capturing the entire screen, a window, or a selected portion. This interface includes options for setting timers, choosing where to save the screenshot, and showing or hiding the cursor. For example, you can set a 5-second delay to prepare your screen before capturing.
Third-party screenshot utilities
Apps like Snagit or CleanShot X offer advanced features beyond the built-in tools, including scrolling capture to grab long web pages, annotation tools, and cloud syncing. These tools often provide customizable shortcuts and better management of screenshot libraries, ideal if you frequently work with complex captures.
Using Preview to capture screen selections
Preview allows you to capture a selected portion by choosing File > Take Screenshot > From Selection. This method is useful if you want to immediately edit or annotate the screenshot within Preview without saving it first.
Touch Bar shortcuts for MacBook Pro users
If your MacBook Pro has a Touch Bar, you can customize it to include screenshot buttons. Tapping these can trigger selected area captures without using keyboard shortcuts, providing quick access tailored to your workflow.
| Feature | Built-in Screenshot App | Third-party Utilities |
|---|---|---|
| Timed Capture | Yes (up to 10 seconds) | Yes (more flexible) |
| Scrolling Capture | No | Yes |
| Annotation Tools | Basic (Markup) | Advanced |
| Save Location Customization | Yes | Yes, often with cloud options |
| Clipboard Copy | Yes | Yes |
Choosing the right method depends on your needs: for quick, no-frills captures, the built-in tools suffice; for enhanced control and features, third-party apps may be preferable.
- Mac Keyboard Shortcut to Lock the Screen: How to Secure Your Mac Quickly
- Mac Keyboard Shortcut to Switch Between Windows of the Same App
Frequently asked questions
Can I change the keyboard shortcut for taking a selected area screenshot on Mac?
Yes, you can customize the keyboard shortcut for taking a selected area screenshot on your Mac. Go to System Settings, then Keyboard, and select Keyboard Shortcuts. Under Screenshots, you can modify the shortcut for "Capture Selected Portion" to your preferred key combination. Keep in mind that changing shortcuts may cause conflicts with other system or app shortcuts, so choose a combination that doesn’t overlap.
Where do Mac screenshots get saved by default, and how can I change this?
By default, Mac screenshots are saved to your Desktop with filenames starting with "Screen Shot" followed by the date and time. To change the save location, open the Screenshot app by pressing Command + Shift + 5, then click Options and select a new folder under "Save to." You can also create a dedicated folder for screenshots to keep your Desktop organized.
How do I capture a screenshot of a dropdown menu or transient window?
To capture a dropdown menu or other transient window, open the menu first, then press Command + Shift + 4, followed by pressing the Spacebar. The cursor will turn into a camera icon that lets you click on the menu or window to capture it. This method preserves the menu’s appearance, which often disappears if you use other screenshot shortcuts.
Is there a way to preview or edit a screenshot immediately after capturing it?
Yes, after taking a screenshot using Command + Shift + 4 or Command + Shift + 5, a thumbnail appears briefly in the bottom-right corner of the screen. Click this thumbnail to open a quick preview with markup tools for editing, cropping, or annotating the screenshot before saving or sharing. If you don’t interact with the thumbnail, the screenshot saves automatically to the default location.
What this advice does not cover and when to seek other solutions
This guide covers built-in macOS screenshot shortcuts and tools but does not address capturing on Macs with custom keyboard layouts or non-standard input devices. If you use third-party keyboard remapping software or specialized hardware, the default shortcuts might not function as described. Additionally, this guide does not cover advanced screenshot editing or automation via scripting; professionals needing those capabilities should consider dedicated apps like Snagit or Automator workflows.
The single most useful next step is to open the Screenshot app on your Mac by pressing Command + Shift + 5. This interface lets you choose between capturing the entire screen, a window, or a selected portion, and provides options to set timers, choose save locations, and enable or disable the floating thumbnail preview. Experimenting with these settings here allows you to customize your workflow beyond basic keyboard shortcuts and ensures you capture exactly what you need efficiently.