How to Make a Custom Ringtone in GarageBand on iPhone and iPad
Step-by-step guide to making a custom ringtone in GarageBand on iPhone and iPad for a personalized sound experience.
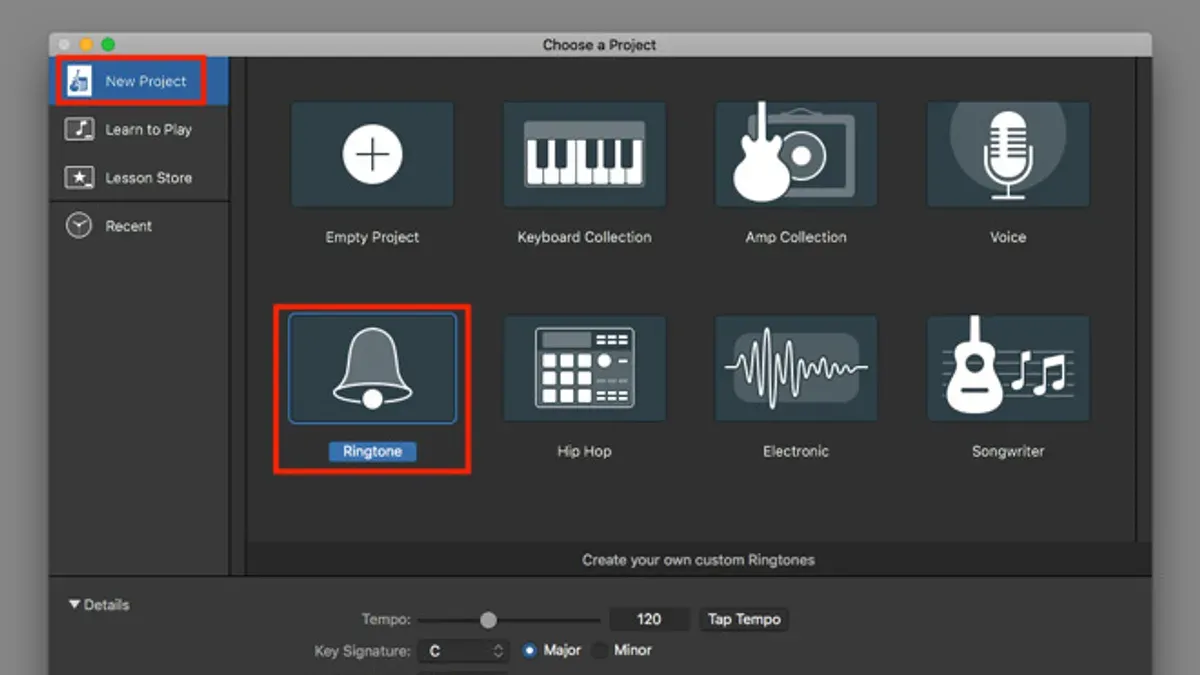
Your iPhone or iPad plays sound notifications all day, but the default ringtones can feel impersonal. Maybe you want a ringtone that reflects your style or instantly signals it's your phone ringing in a crowded room. Learning how to make a custom ringtone in GarageBand gives you the freedom to create a unique sound from your favorite song or your own recordings.
This article guides you step-by-step through making custom ringtones using GarageBand on both iPhone and iPad. You will also find alternative methods if you prefer not to use GarageBand, plus practical tips to optimize your ringtone’s sound and troubleshoot common issues. By the end, you'll have the confidence to personalize your device’s ringtone exactly how you want it.
Key takeaways
- You need GarageBand installed and your audio ready before starting your ringtone project.
- Creating a ringtone involves trimming your audio to 30 seconds or less and exporting it in the correct format.
- Alternative apps and iOS settings can create ringtones without GarageBand if you prefer a simpler process.
- Managing ringtone length and format is crucial to ensure your custom sound works on your device.
- Common issues often stem from export settings or permissions and have straightforward fixes.
Before you start: What you need to create a custom ringtone
To create a custom ringtone using GarageBand on your iPhone or iPad, you need to prepare a few essentials. First, ensure your device has GarageBand installed. It’s available for free from the App Store and requires iOS 15.0 or later for the latest features related to ringtone creation.
Next, you’ll need the audio file or sound clip you want to use as your ringtone. GarageBand supports common audio formats such as MP3, AAC, WAV, and AIFF. Make sure your clip is clear and has good audio quality since this will affect your ringtone’s sound. Also, keep in mind that iOS limits ringtones to a maximum length of 30 seconds, so choose or trim your audio accordingly.
Having a basic familiarity with GarageBand’s interface will help you navigate the process smoothly. If you’re new, don’t worry — this guide will walk you through each step patiently. Lastly, confirm you have enough available storage on your device, as GarageBand projects and audio files can take up space. Having at least 100 MB free is a practical starting point.
Here is a simple checklist to confirm your readiness:
- GarageBand app installed: Ensure it’s version compatible with your iOS (iOS 15.0+ recommended). When opened, you should see the project selection screen.
- Audio file ready: Make sure the file is in MP3, AAC, WAV, or AIFF format. You can locate your file in the Files app or Music library.
- Storage space: Verify at least 100 MB of free space in Settings > General > iPhone Storage or iPad Storage.
- Understand ringtone length limits: Prepare an audio clip no longer than 30 seconds. GarageBand will let you trim it accordingly.
Once these are set, you’re ready to start creating your custom ringtone confidently.
How to make a custom ringtone on GarageBand iPhone
- Open GarageBand on your iPhone. You should see the sound browser with various instrument options. Tap the Audio Recorder icon to start a new audio project; this will create an empty track ready for your audio.
- Import or record your audio clip. Tap the Loop Browser icon (looks like a loop or an 'O') in the top right corner, then select Files to import an existing audio file from your device. Alternatively, record a new sound by pressing the red Record button and speaking or playing your sound.
- Edit your audio to fit the ringtone length limit. Tap the track to reveal the editing controls, then drag the ends of the waveform to trim the clip to 30 seconds or less. You can zoom in with a pinch gesture for more precise trimming.
- Fine-tune your sound. Use the volume slider on the track header to adjust loudness. Tap the Track Settings icon (looks like a mixer) to add fade-in or fade-out effects by adjusting the automation curve. These tools help your ringtone start and end smoothly.
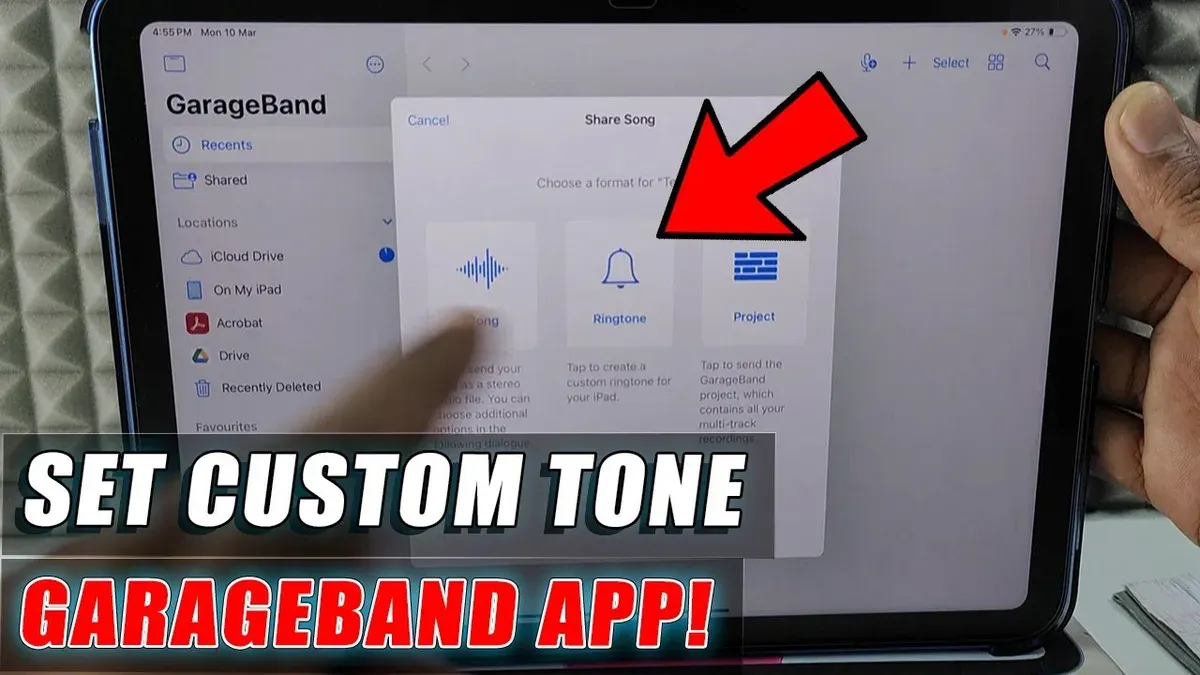
- Export your ringtone. Tap My Songs in the top left to save your project. In the My Songs browser, press and hold your project thumbnail, then select Share > Ringtone. Name your ringtone and tap Export. After exporting, you will see a confirmation dialog asking if you want to use this ringtone as your standard ringtone, text tone, or assign it to a contact—choose accordingly.
Once exported and assigned, you can verify your ringtone by opening Settings > Sounds & Haptics > Ringtone, where your new custom tone will appear at the top of the list.
Following these steps will let you create a personalized ringtone using GarageBand on your iPhone, making your device uniquely yours.
How to make a custom ringtone with GarageBand on iPad
- Open GarageBand on your iPad and tap the plus icon to start a new project. You should see a variety of instrument options, which indicates you're in the right place to begin creating your ringtone.
- Choose either the Audio Recorder or the Tracks view to import or record audio. On iPad, the larger screen allows you to drag audio files directly from the Files app into GarageBand, making importing faster and more visual compared to iPhone.
- Record your audio by tapping the red record button or import audio by selecting the Loop Browser icon, then tapping the Files tab to locate your audio clip. When imported or recorded, the waveform appears on the track timeline, confirming it is ready for editing.
- Trim and edit your audio by selecting the track, then dragging the yellow handles at each end of the clip to set your desired ringtone length, keeping it under 30 seconds. You can also split or loop sections using the Edit menu, accessible by tapping the track.
- Use multitasking features on iPad such as Slide Over or Split View to keep GarageBand open alongside the Files app or Notes. This lets you preview audio or take notes without switching apps, speeding up your workflow.
- When satisfied, tap the down arrow in the upper left to access the Project menu, select "My Songs," then tap and hold your project to bring up the Share option. Choose "Ringtone," name your ringtone, and export it. You will see a success message when the ringtone is ready.
- Finally, set your custom ringtone by going to Settings > Sounds & Haptics > Ringtone on your iPad and selecting the new ringtone from the list.
The GarageBand interface on iPad uses a larger workspace with drag-and-drop capabilities for audio files, unlike the iPhone’s more compact screen that requires navigating through menus, making the iPad experience more flexible and efficient for ringtone creation.
How to make a custom ringtone without GarageBand on iPhone or iPad
If you prefer not to use GarageBand, several alternative methods let you create custom ringtones on your iPhone or iPad. You can use third-party ringtone maker apps from the App Store, online audio editing websites, or transfer ringtones created on a computer via iTunes or Finder.
Third-party apps like Ringtone Maker or Ringtones: Ringtone Maker offer user-friendly interfaces to trim audio files and convert them into iPhone-compatible ringtone formats. These apps often have file size limits and may include ads or require in-app purchases for full features. Compared to GarageBand, they are simpler but sometimes less flexible in editing options.
Online audio editors such as AudioTrimmer or MP3Cut allow you to upload a track, select a segment up to 30 seconds, and download it as an M4R ringtone file. You then import this file to your device using a computer. These tools are free or low cost but rely on internet access and may have upload size restrictions.
To transfer ringtones via iTunes or Finder, you first create or obtain an M4R ringtone file on your computer. Connect your device, open iTunes (on Windows or macOS Mojave and earlier) or Finder (on macOS Catalina and later), and drag the ringtone into the device’s Tones section. After syncing, you can select the ringtone on your iPhone or iPad.
- Download and open a ringtone maker app from the App Store. You should see options to import audio files from your library or files.
- Trim the audio track to a maximum of 30 seconds using the app’s editing tools. Confirm the trimmed version is saved as an M4R or compatible ringtone file.
- Use the app’s export or save feature to add the ringtone to your device’s ringtone list or export it to your computer for syncing.
- If using a computer, connect your device and open iTunes or Finder. Select your device and locate the Tones section.
- Drag and drop the M4R ringtone file into the Tones section, then sync your device. You should see the ringtone available in Settings > Sounds & Haptics > Ringtone.
While these alternatives can be quicker or more straightforward than GarageBand, they often lack GarageBand’s detailed editing capabilities and seamless export process. Also, GarageBand does not charge for ringtone creation, whereas some third-party apps may have fees. Choose the method that balances ease, cost, and control according to your needs.
How to get a custom ringtone with GarageBand: Tips to optimize your sound
Enhancing your ringtone’s sound quality in GarageBand involves fine-tuning several key audio elements. Applying fade-in and fade-out effects can make your ringtone start and end smoothly, preventing abrupt cuts that might be jarring. To add these, tap the track controls, select the automation button, and create fade curves at the beginning and end of your audio clip. When done correctly, you should see the waveform gradually increase or decrease in volume.
Adjusting volume levels is essential to avoid distortion. Use the track volume slider to keep the levels below the maximum threshold, typically around -3 dB, to prevent clipping. You can visually monitor this on the level meter; if it frequently hits the red zone, reduce the volume accordingly. This keeps your ringtone clear and balanced when played on your device.
GarageBand’s built-in EQ and effects help tailor your ringtone’s tone. Open the track settings, tap “Plug-ins & EQ,” and experiment with presets like “Bright Vocal” or manually adjust frequencies to enhance bass or treble. Applying subtle reverb or compression effects can add polish, but keep them moderate to maintain ringtone clarity. The waveform won’t change visibly here, but you’ll hear a richer sound.
Looping or layering sounds creates a unique and engaging ringtone. Duplicate your audio region and overlap or stagger it on different tracks to build depth. For example, layering a percussion loop beneath your main melody can add rhythm. When looping, ensure your regions align seamlessly to avoid clicks or gaps; the waveform should show smooth, continuous patterns.
Finally, save your GarageBand project regularly to preserve your work and allow future edits. Tap “My Songs” and select “Save,” so you can return later to tweak effects or volume. This practice prevents losing progress and helps you refine your ringtone over time.
How to make a custom ringtone on GarageBand: Troubleshooting common issues
Creating a custom ringtone with GarageBand usually goes smoothly, but you might run into a few common problems. If GarageBand doesn’t export your ringtone to the Settings app, first check that your ringtone length is under 30 seconds. Ringtones longer than this won’t appear in the ringtone list. Trim your audio clip precisely by selecting it in the Tracks view and dragging the ends to the desired length.
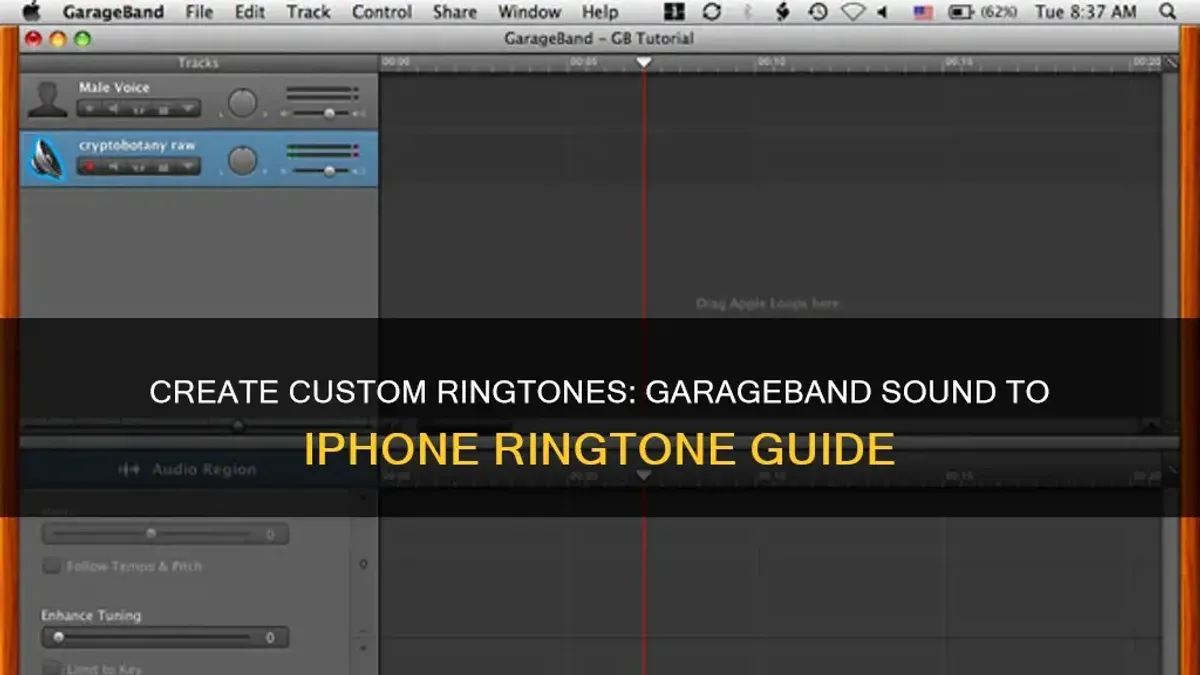
If trimming seems ineffective, try splitting the clip at your desired endpoint by tapping and holding the track, selecting "Split", then deleting the excess. This gives you full control over the ringtone duration.
Sometimes the ringtone won’t show up in the Settings > Sounds & Haptics > Ringtone list after exporting. This often happens if the export process was interrupted or if permissions are restricted. Ensure GarageBand has access to your device’s storage by checking Settings > Privacy > Files and Folders, and confirm you have enough free space—at least several hundred megabytes is recommended.
If GarageBand crashes or freezes during export, close other apps to free up memory and restart your device. Also, update GarageBand to the latest version from the App Store. Export issues can also arise from corrupted audio files, so try using a different audio clip if problems persist.
- Confirm your audio clip is less than 30 seconds. You should see the trimmed track length in the editor.
- Check device storage in Settings > General > iPhone Storage. You should see sufficient free space available.
- Verify GarageBand permissions under Settings > Privacy > Files and Folders. GarageBand should have access enabled.
- Export your ringtone again by tapping the Share button, selecting "Ringtone", and choosing "Export". You should see a confirmation message that the ringtone was exported successfully.
- Open Settings > Sounds & Haptics > Ringtone and look for your custom ringtone at the top of the list.
Following these steps can resolve most export and creation issues. If you keep encountering problems, restarting your device or reinstalling GarageBand often helps clear hidden glitches.
How to make a custom ringtone using GarageBand: Managing ringtone length and format limits
When creating a custom ringtone for your iPhone or iPad, it's essential to keep the file length and format within iOS requirements. The maximum ringtone length allowed is 30 seconds. If your audio exceeds this, iOS will not accept it as a ringtone. GarageBand helps by allowing you to trim or loop your audio so it fits this limit precisely.
Ringtones must be in the M4R file format, a specific type of AAC audio file. When you export your ringtone from GarageBand, it automatically converts your project into the correct M4R format, so you don't have to worry about manual conversions. For example, a 25-second ringtone exported from GarageBand will be saved as an M4R file, ready to be used on your device.
To manage the length effectively:
- Open your GarageBand project and tap the track view to select your audio clips. You should see handles on the ends of the audio regions.
- Drag the handles inward to trim the audio so the total length is no longer than 30 seconds. You can check the duration by tapping the settings gear icon and viewing the song sections.
- If your clip is shorter than 30 seconds and you want it longer, duplicate or loop the audio region by tapping the clip, selecting "Loop", and dragging it to the desired length. This keeps your ringtone within limits but extends playback.
- When ready, tap the down arrow icon, choose "My Songs", then press and hold your project and select "Share" > "Ringtone". GarageBand will package it as a correctly formatted M4R file.
Note that audio files longer than 30 seconds or in unsupported formats like MP3 or WAV cannot be used directly as ringtones. GarageBand's export process ensures your ringtone meets Apple's specifications. If you try to use an audio file longer than 30 seconds without trimming, the export option for ringtone will be unavailable or the file will be rejected when syncing.
Frequently asked questions
How to make custom ringtone iphone garageband?
To make a custom ringtone on your iPhone using GarageBand, start by opening the app and creating a new project with the Audio Recorder or Keyboard. Import or record your desired sound, then trim it to 30 seconds or less. Export the project by tapping the share icon, choosing Ringtone, and naming your ringtone before saving it. Finally, set it as your ringtone in the iPhone Settings under Sounds & Haptics.
How to make custom ringtone using garageband?
Open GarageBand and create a new song. Import or record the audio you want, then use the editing tools to cut the clip to under 30 seconds. Tap the down arrow icon, select My Songs, then press and hold your project to open the share menu. Choose Ringtone, name your file, and export it to use as a ringtone on your device.
How to get a custom ringtone garageband?
After creating and editing your sound in GarageBand, export it as a ringtone by tapping the share button and selecting Ringtone. Name your ringtone and confirm the export. Your custom tone will then be available in your device’s sound settings to assign to calls, contacts, or alerts.
How to make a custom ringtone with GarageBand?
Create a new GarageBand project and add your audio clip or record directly in the app. Edit the track to be 30 seconds or shorter, as longer ringtones won’t export properly. Use the share option to export it as a ringtone, then set it from the Sounds & Haptics settings on your iPhone or iPad.
How to make custom ringtone iPhone GarageBand?
Launch GarageBand on your iPhone and start a new project with any instrument. Import or record your desired sound, trim it to 30 seconds max, then tap the arrow icon to access the My Songs section. Hold down the project file, tap Share, select Ringtone, and export it. You can then assign the ringtone in your iPhone’s settings.
What This Guide Does Not Cover and Who Should Look Elsewhere
This guide focuses exclusively on creating custom ringtones directly on iPhone and iPad using GarageBand or alternative iOS-friendly methods. It does not cover creating ringtones on macOS GarageBand, which involves a different interface, export process, and file management. If you are not at least somewhat familiar with GarageBand’s layout and basic functions, some steps may feel challenging without additional learning or tutorials. Additionally, iOS restricts ringtone length to a maximum of 30 seconds; attempting to create longer ringtones will require trimming or using other tools outside this scope.
For users seeking advanced audio editing features, more extensive ringtone customization, or integration with macOS, dedicated audio software or a computer-based workflow may be more suitable. Similarly, if you prefer a fully automatic ringtone creation process without manual editing, third-party apps with built-in ringtone makers could be easier.
Now that you understand the boundaries of this guide, the best next step is to open GarageBand on your device and start experimenting with importing or recording a sound clip. This hands-on practice will help you become comfortable navigating GarageBand’s interface and applying the step-by-step instructions covered here, empowering you to craft a ringtone that truly fits your style.
See also: How to Use Smart Instruments in GarageBand: A Step-by-Step Guide · How to Make a Hip Hop Beat in GarageBand: Step-by-Step Guide · How to Record Electric Guitar in GarageBand: A Clear Step-by-Step Guide