How to Recover Unsaved Microsoft Word Documents on Mac
Discover practical methods to recover unsaved Microsoft Word documents on Mac using AutoRecovery, temporary files, Time Machine, and OneDrive AutoSave.
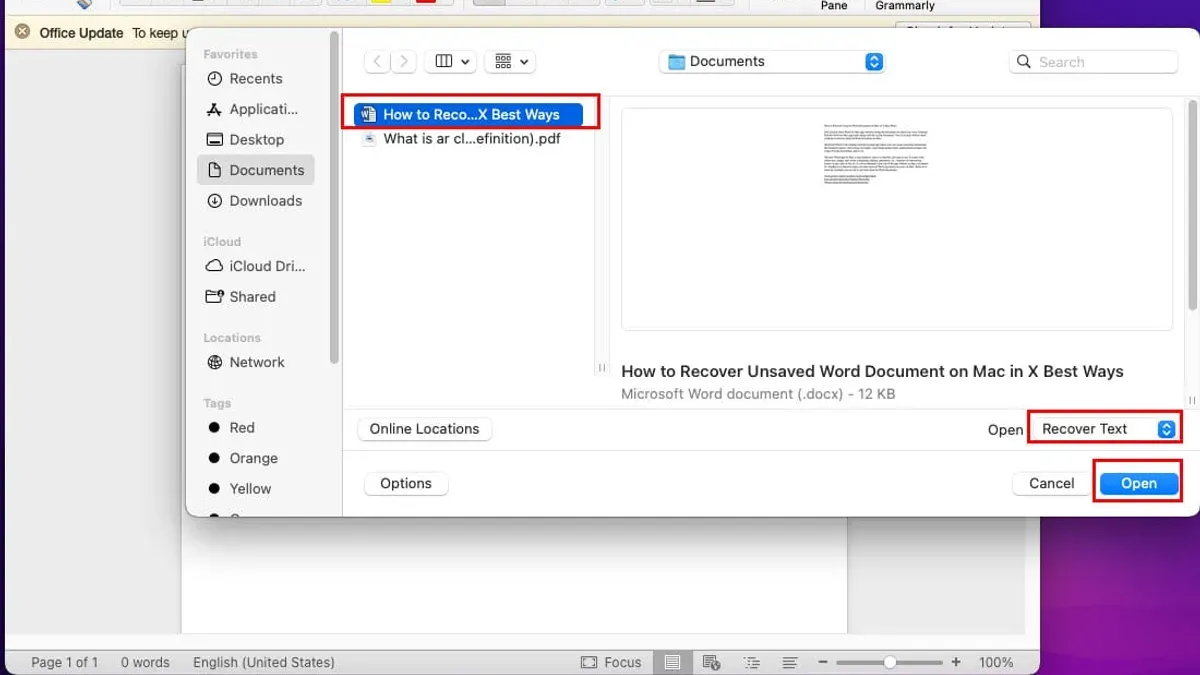
You’re working on an important Word document on your Mac when the unexpected happens — your computer crashes, or Word closes without saving your latest changes. Suddenly, you’re left wondering how to recover unsaved document in Microsoft Word on Mac without losing your work.
This article guides you step by step through practical methods to retrieve unsaved Word documents. You’ll learn how to use built-in features like AutoRecovery, locate temporary and unsaved files, restore from Time Machine backups, and leverage OneDrive’s AutoSave. Along the way, you’ll understand how each option works, what to expect, and how to prevent future data loss.
Key takeaways
- AutoRecovery files are saved every 10 minutes by default and can be accessed from Word’s Document Recovery pane or Library folders.
- Temporary and unsaved files may be found in the ~/Library/Containers/com.microsoft.Word/Data/Library/Preferences/AutoRecovery folder.
- Time Machine backups provide a reliable way to restore previous versions of your documents if enabled.
- OneDrive’s AutoSave feature continuously saves your work when documents are stored in the cloud.
- Understanding Word’s save intervals and backup settings helps prevent data loss before it happens.
Before you start: What you need to recover unsaved Word documents on Mac
Before attempting to recover an unsaved Microsoft Word document on your Mac, make sure you have the right setup and information to improve your chances of success. First, verify that Microsoft Word is installed and updated to a version that supports AutoRecovery. This feature is available in Word 2016, Word 2019, and Microsoft 365 for Mac. Having an updated Word ensures that recovery files are created and accessible.
Next, confirm your Mac is powered on and has enough free disk space. Recovery processes require temporary storage, so if your disk is nearly full, recovery files might not be saved properly. You can check available space by clicking the Apple menu > About This Mac > Storage.
Understanding whether your document was ever saved affects how you proceed. If the document was saved at least once, you have options like AutoRecovery and Time Machine backups. If it was never saved, you will rely more on AutoRecovery and temporary files.
Finally, you should be comfortable using Finder to navigate system folders. For example, AutoRecovery files are typically stored in /Users/your-username/Library/Containers/com.microsoft.Word/Data/Library/Preferences/AutoRecovery/. To check this location, open Finder, press Command+Shift+G, and paste the path to open it. Seeing files here means Word saved recovery data you can access.
- Open Microsoft Word and click Word > About Word to confirm your version supports AutoRecovery. You should see a version number equal to or later than Word 2016. If so, AutoRecovery is supported.
- Click the Apple menu > About This Mac > Storage to verify you have at least a few gigabytes of free space. This ensures recovery files can be saved and accessed.
- Open Finder, press Command+Shift+G, and enter
/Users/your-username/Library/Containers/com.microsoft.Word/Data/Library/Preferences/AutoRecovery/. If you see files here, it indicates AutoRecovery data exists for your documents. - Think about whether you saved the document previously or if it was new and unsaved. This knowledge guides the recovery method you choose next.
How to recover unsaved documents on Microsoft Word on Mac using AutoRecovery
AutoRecovery is a built-in Microsoft Word feature that periodically saves temporary backup copies of your open documents. This helps protect your work if Word crashes or closes unexpectedly. These backups are stored automatically without you having to save manually, but only reflect the document state as of the last AutoRecovery save.
- Open Finder and navigate to ~/Library/Containers/com.microsoft.Word/Data/Library/Preferences/AutoRecovery/. You can access this by selecting Go > Go to Folder… in Finder and entering the path exactly.
- Look for files starting with "AutoRecovery save of" followed by your document name. These files typically have the ".docx" extension but may also appear as unsaved documents.
- Double-click the AutoRecovery file to open it in Word. If the file opens and shows your content, check that it reflects the latest version you need.
- Immediately save the recovered document to a new location using File > Save As to avoid losing it again. Choose a familiar folder like Documents or Desktop.
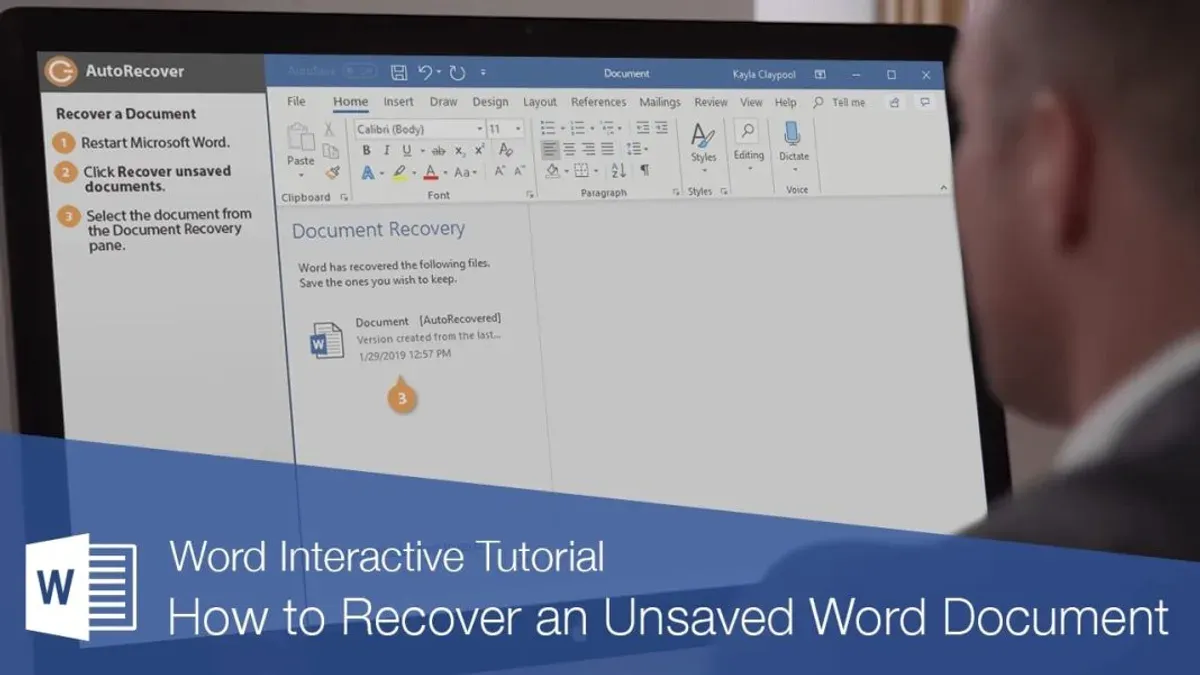
- If Word crashed, you may see the Document Recovery pane when reopening Word; review listed files there and open any that match your lost document, then save them as above.
Keep in mind the AutoRecovery file only reflects the document up to the last auto-save interval, typically every 10 minutes by default. If you closed Word normally without saving, the AutoRecovery file may have been deleted. Checking the folder promptly after a crash increases your chance of successful recovery.
How to find lost Microsoft Word documents on Mac using Temporary and Unsaved Files folders
When Word crashes or closes unexpectedly, some unsaved documents may reside in hidden system folders like TemporaryItems and UnsavedFiles. These folders store temporary copies with file extensions such as .asd (AutoSave files), .tmp (temporary files), and .wbk (backup copies). Identifying and opening these can help you recover lost work.
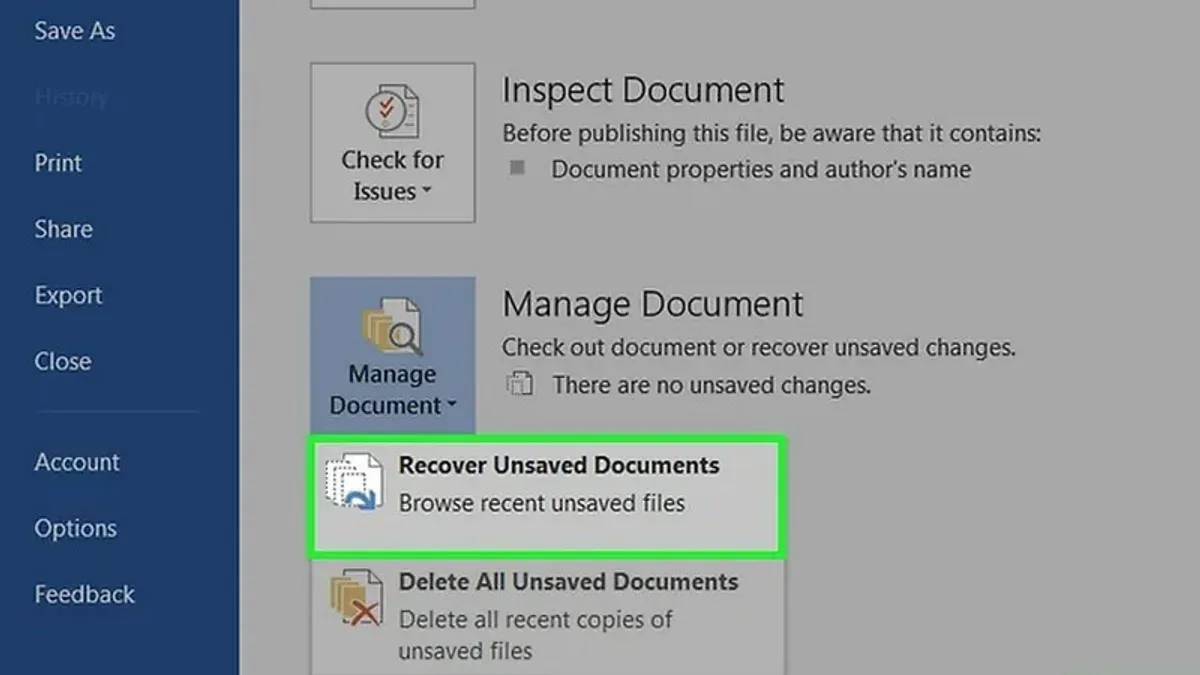
Follow these steps to manually locate and check these files:
- Open Finder, then from the menu bar select Go > Go to Folder. Type
/private/var/foldersand press Enter. Navigate through the subfolders to find aTemporaryItemsfolder. Here, look for files ending with .tmp or .asd. These may correspond to unsaved Word documents. - If you prefer Terminal, open it and enter
open /private/var/folders. This opens the folder in Finder for easier browsing. - Additionally, check Microsoft Office’s UnsavedFiles folder by going to
~/Library/Containers/com.microsoft.Word/Data/Library/Preferences/AutoRecovery/via Finder’s Go to Folder. This location stores Word AutoRecovery files, often ending with .asd or .wbk. - To verify a file’s content, open Microsoft Word, then choose File > Open and navigate to the recovered file. Opening it safely within Word allows you to preview the document’s contents and check integrity without overwriting existing files.
- If the file opens correctly and contains the text you need, immediately save it under a new name and in a known folder. Rename the file with a .docx extension if necessary, to ensure Word recognizes it as a document.
By carefully exploring these folders and distinguishing file types, you increase your chances of recovering lost Word documents that are not found in AutoRecovery or Document Recovery panes.
How to recover lost Microsoft Word documents on Mac from Time Machine backups
To use Time Machine for recovering lost Word documents, you must have set up and enabled it before losing the file. Time Machine automatically backs up your system, allowing you to restore previous versions of documents or recover deleted files. This method can be more reliable than manual searches since it captures snapshots of your files over time.
- Connect your Time Machine backup drive if it is external. Open the folder where your Word documents are usually saved, such as Documents or a dedicated Word folder. You should see your current files here.
- Click the Time Machine icon in the menu bar and select Enter Time Machine. The Time Machine interface will open, showing a timeline on the right side and your folder in the center.
- Use the timeline or the up/down arrows to navigate back to a date and time before the document was lost. Browse the folder contents to locate the missing or previous version of your Word document.
- Select the file you want to restore and click the Restore button. The document will be restored to the current folder. If a file with the same name exists, you will be prompted to keep both, replace, or cancel. Choose carefully to avoid overwriting newer versions.
- After restoration, open the document in Microsoft Word to verify it is the correct version and complete.
If you have not set up Time Machine or your backups do not include the document, you will need to rely on other recovery methods or third-party tools. Unlike manual recovery from temporary files, Time Machine provides a straightforward visual history of your files and is less prone to missing versions.
For example, a user who accidentally deleted a Word file found it in Time Machine by navigating to the Documents folder two days prior, restoring it with a click, and confirming it was the right file without overwriting the current folder contents.
How to recover an unsaved Word document on Mac using Microsoft OneDrive or AutoSave features
AutoSave is a built-in feature for Microsoft Word when your document is stored in OneDrive or SharePoint and you have an active account linked to Word. It continuously saves your work, reducing the risk of losing unsaved changes. To use AutoSave, ensure you are signed into your Microsoft account in Word and that the document is saved in OneDrive or SharePoint.
If you suspect a document is lost or overwritten, check OneDrive’s recycle bin or version history. OneDrive keeps deleted files for a limited time and maintains versions of documents, allowing you to restore a previous state. For example, you can recover an earlier draft by selecting “Version History” on the file in OneDrive’s web interface, then choosing the version you want to restore.
- Open OneDrive on your Mac or go to the OneDrive website and sign in with your Microsoft account. You should see your document list.
- Locate the folder where your Word document was saved. If you don’t see it, check the Recycle Bin in OneDrive by clicking the “Recycle bin” link on the left sidebar. Restored files will reappear in their original location.
- Right-click the Word document in OneDrive and select “Version History.” A list of saved versions will appear, indicating dates and times.
- Choose a previous version that contains the content you need and click “Restore.” The restored version will replace the current file, and you can open it in Word to confirm the recovery.
If AutoSave was not enabled or the document wasn’t stored in OneDrive or SharePoint, this method won’t recover unsaved changes. It’s best to activate AutoSave in Microsoft Word preferences and regularly save files to OneDrive to benefit from this feature.
Troubleshooting common issues when recovering unsaved Word documents on Mac
If you find that AutoRecovery files are missing or corrupted, check that your Word preferences are set to save AutoRecovery information at reasonable intervals (usually every 10 minutes). Corrupted files may not open, so try opening them with a different text editor to salvage some content. If you cannot locate recovery files, it may be due to permission restrictions on system folders. In Finder, right-click the folder you need access to, select Get Info, and verify your user account has Read & Write permissions. You may need to unlock the padlock icon and enter your administrator password to adjust these settings.
Some recovery failures occur because macOS restricts apps from accessing certain directories without explicit permission. To prevent this, go to System Preferences > Security & Privacy > Privacy > Files and Folders and ensure Microsoft Word has appropriate access.
If built-in recovery options fail, third-party data recovery software can sometimes help, especially if files were deleted. However, these tools carry risks such as overwriting recoverable data or exposing your files to less secure environments. Only use reputable software and understand that success rates vary widely; built-in recovery methods generally offer safer, more reliable results.
To reduce future data loss, enable AutoSave for documents stored in OneDrive or SharePoint, and maintain regular backups using Time Machine or another backup solution. These steps provide layers of protection that significantly increase your chances of recovering work after unexpected closures or system issues.
Frequently asked questions
Is there a way to recover an unsaved word document on mac?
Yes, you can recover an unsaved Word document on Mac by using Word’s AutoRecovery feature. This feature saves temporary versions of your document as you work, which you can access by opening Word and checking the Document Recovery pane or by navigating to the AutoRecovery folder in Finder at ~/Library/Containers/com.microsoft.Word/Data/Library/Preferences/AutoRecovery.
Is it possible to recover unsaved word document mac?
It is possible to recover unsaved Word documents on Mac through several methods. Besides AutoRecovery, you can check Temporary and Unsaved Files folders, restore from Time Machine backups if enabled, or retrieve a document using Microsoft OneDrive’s AutoSave if your files were saved to the cloud.
is there a way to recover an unsaved word document on mac
Yes, there is a way to recover an unsaved Word document on Mac. You should first look for AutoRecovery files by opening Word after a crash or unexpected shutdown. If that does not work, explore the UnsavedFiles folder located at ~/Library/Application Support/Microsoft/Office/OfficeVersionNumber/Office AutoRecovery.
is it possible to recover unsaved word document mac
Recovering an unsaved Word document on Mac is possible but depends on your setup. If AutoRecovery was enabled and Word closed unexpectedly, you can recover your file from the automatic backups. Otherwise, if you use Time Machine or OneDrive with AutoSave, those are reliable ways to restore lost content.
how to recover lost microsoft word documents on mac
To recover lost Microsoft Word documents on Mac, start by searching the AutoRecovery folder for temporary files. Next, check your Mac’s Temporary and Unsaved Files folders for any autosaved data. If you use Time Machine, restoring from a recent backup can recover deleted or lost documents. Lastly, check OneDrive if you have AutoSave enabled for cloud-stored files.
What This Advice Does Not Cover
This guidance focuses on recovering unsaved or accidentally lost Microsoft Word documents on Mac using built-in features and common backup options. It does not cover situations involving hardware failure, such as a damaged hard drive or severe file corruption, where professional data recovery services may be necessary. Additionally, if you have not enabled AutoSave or maintained regular backups, your ability to retrieve lost data is very limited. Third-party recovery tools are not recommended here due to their inconsistent effectiveness and potential security risks.
The most effective next step is to enable and configure AutoSave and Time Machine backups if you haven’t already. Doing so ensures that your documents are saved automatically and that you have reliable recovery points going forward. This preventive measure greatly reduces the risk of losing important files in the future and gives you peace of mind when working on your Mac.
See also: How to Fix Microsoft Word Not Responding on Mac: Step-by-Step Guide · How to Reset Fonts to Default in Font Book and Related Apps