How to Set Custom DNS on Mac: Step-by-Step Guide
This guide shows how to set custom DNS on Mac using System Preferences and Terminal to boost speed, privacy, and access.
You notice your internet browsing is slower than usual, or certain websites are inaccessible due to regional restrictions. Changing the DNS server on your Mac can help improve connection speed, enhance privacy, or bypass content blocks.
This article explains how to set custom DNS on Mac using both the graphical System Preferences and Terminal commands. You will also learn how to verify your new DNS settings and troubleshoot common issues, so you understand not only the process but also the reasons behind customizing DNS.
Key takeaways
- Access DNS settings via System Preferences under Network > Advanced > DNS tab.
- Use Terminal commands like networksetup -setdnsservers to change DNS quickly.
- Verify DNS changes with scutil --dns or dig commands.
- Common DNS issues include caching problems and incorrect server addresses.
- Changing DNS can improve speed, privacy, or content access but may affect local network services.
Before you start: What you need to know and prepare
DNS (Domain Name System) translates website names into IP addresses your Mac uses to connect to internet servers. Changing your DNS can improve connection speed, enhance privacy, or help access region-restricted content by directing your queries through different servers.
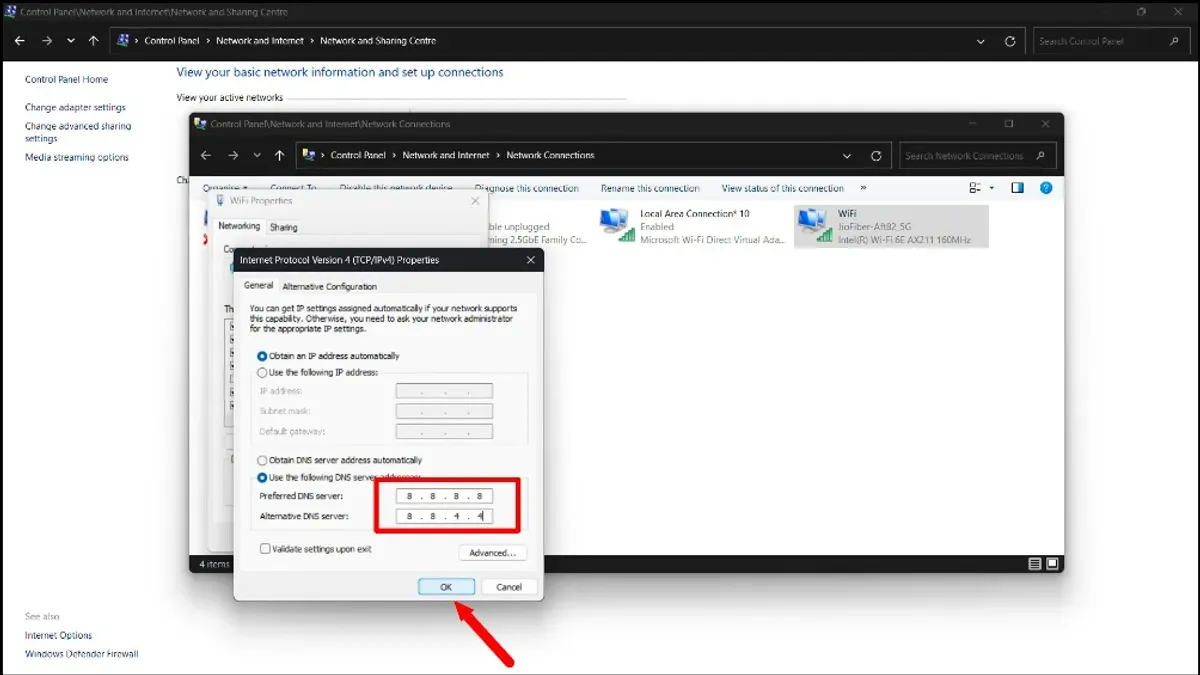
To change your DNS, you need the addresses of the DNS servers you want to use. Popular options include Google DNS (8.8.8.8, 8.8.4.4), Cloudflare DNS (1.1.1.1, 1.0.0.1), and OpenDNS (208.67.222.222, 208.67.220.220). Keep these handy before you start.
Note that whether you use Wi-Fi or Ethernet can affect where and how you change DNS settings on your Mac. Each network interface can have its own DNS configuration.
Administrator access is required to modify DNS settings on macOS. If your account lacks admin rights, you won’t be able to save the changes.
Changing DNS settings does not always guarantee faster internet. For example, default ISP DNS servers may respond faster in some regions than popular public DNS providers. A quick comparison using a DNS benchmarking tool or simple ping tests can show response time differences between your current DNS and alternatives.
- Gather the DNS server IP addresses you plan to use.
After this, you should have a clear list of DNS IPs. - Confirm whether you are connected via Wi-Fi or Ethernet.
You should see your active network interface in the Network pane of System Preferences. - Ensure you have administrator privileges on your Mac.
You can check this in System Preferences > Users & Groups.
How to check DNS settings on a Mac
Before changing your DNS settings, you should identify your current configuration. This helps you understand which DNS servers your Mac is using and whether you need to add or replace them.
Check DNS via System Preferences
- Open System Preferences from the Apple menu.
- Click on Network.
- Select your active network connection from the list on the left (e.g., Wi-Fi or Ethernet).
- Click the Advanced button in the bottom right corner.
- Go to the DNS tab. Here, you will see a list of DNS server IP addresses currently configured.
- Close the window after noting the DNS servers.
Multiple DNS servers are listed in order of priority; your Mac will query them in sequence if the first is unresponsive.
Check DNS using Terminal commands
- Open the Terminal application from Applications > Utilities.
- Type
scutil --dnsand press Enter. This outputs detailed DNS resolver information. - Look for the section labeled resolver #1 or similar, which lists nameserver[0], nameserver[1], etc. These are your current DNS servers.
- Alternatively, type
networksetup -getdnsservers Wi-Fi(replace Wi-Fi with your active interface name) and press Enter. This command returns the DNS servers assigned to that network service.
Example scutil --dns output snippet:
resolver #1
nameserver[0]: 8.8.8.8
nameserver[1]: 8.8.4.4
if_index: 4 (en0)
flags: Request A records, Request AAAA records
reach: 0x00000002 (Reachable)
This means your Mac uses Google's public DNS servers (8.8.8.8 and 8.8.4.4) on the interface en0.
By comparing outputs from System Preferences and Terminal, you can confirm your DNS setup accurately before making changes.
How to change DNS settings on Mac using System Preferences
- Open System Preferences by clicking the Apple menu in the top-left corner and selecting it. You should see a window with various system controls.
- Click on Network. This opens the panel where you manage your internet connections.
- Select the active network connection from the list on the left, typically Wi-Fi or Ethernet. The selected interface will display its status and settings on the right.
- Click the Advanced button at the bottom right of the window. This opens a new dialog with detailed settings for the chosen connection.
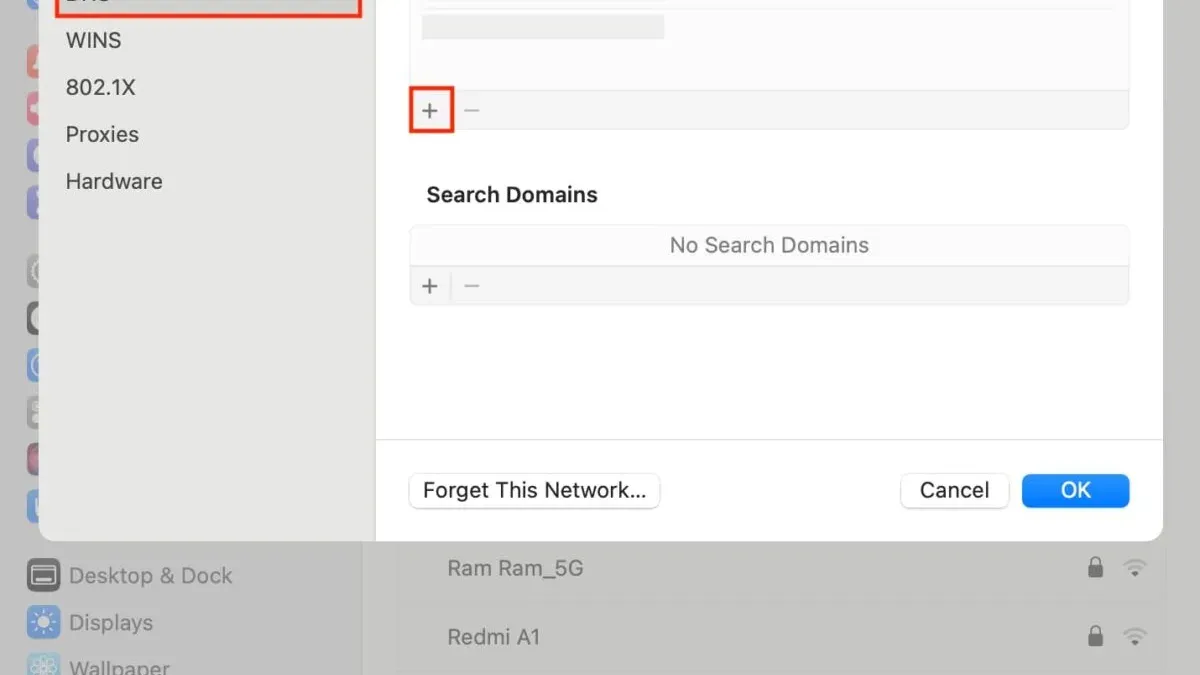
- Navigate to the DNS tab at the top of the Advanced window. Here you will see a list of DNS servers currently used by your Mac.
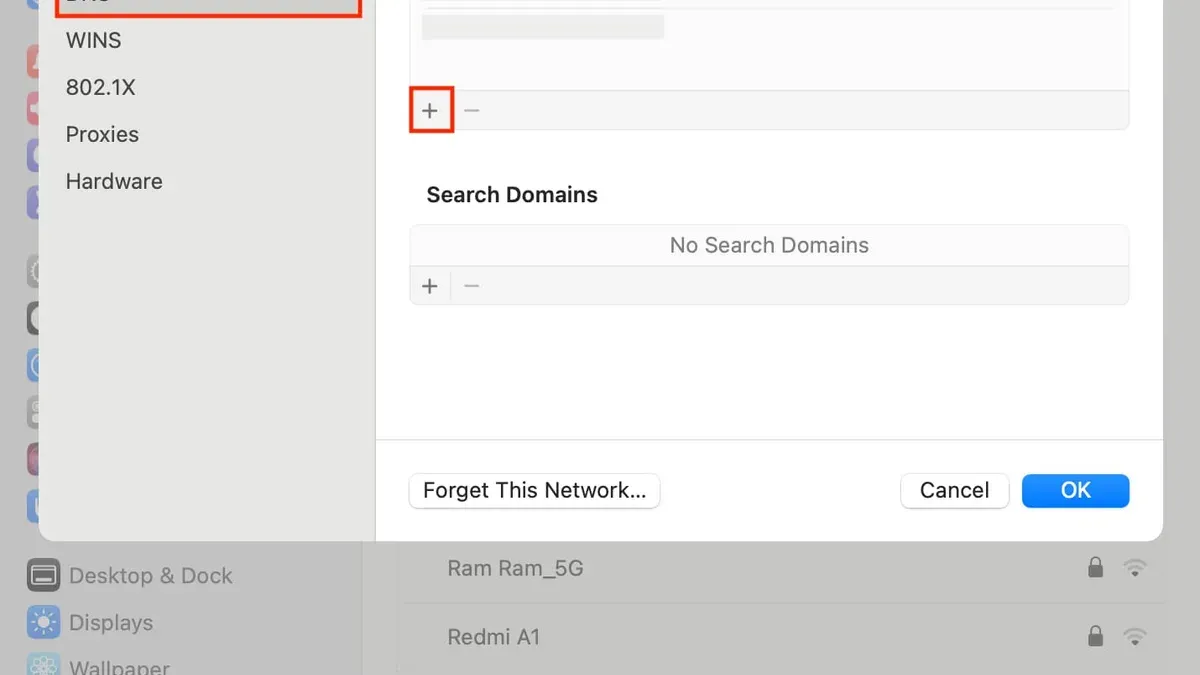
- To add a new DNS server, click the + button below the DNS Servers list. Enter the IP address of the custom DNS server you want to use, such as 8.8.8.8 for Google DNS, then press Enter.
- To remove a DNS server, select the unwanted address from the list and click the − button.
- Reorder the DNS servers by dragging them up or down in the list. The Mac uses the servers in top-to-bottom order, trying the first before moving to others.
- Once you have finished editing, click OK to close the Advanced window.
- Back in the Network window, click Apply to save and activate your new DNS settings. Your Mac will now use these servers for domain name resolution.
For macOS versions using System Settings instead of System Preferences, open System Settings, go to Network, select your active connection, and click Details or Advanced. Then follow similar steps to access the DNS tab and manage server addresses.
Changing DNS via the graphical interface is straightforward but requires admin access. Remember that incorrect DNS addresses can cause connectivity issues, so double-check the IPs before applying changes.
How to change DNS on Mac using Terminal commands
Using Terminal commands offers an alternative for advanced users who prefer command-line control or need to script DNS changes on Mac. This method requires accurate identification of your network service and careful command execution.
- List all network services: Open Terminal and enter
networksetup -listallnetworkservices. This shows all available network interfaces, like Wi-Fi or Ethernet. Ensure you note the exact service name as it appears. - Check current DNS servers for a service: Use
networksetup -getdnsservers "Wi-Fi"(replace Wi-Fi with your service). The output lists current DNS servers or "There aren't any DNS Servers set on Wi-Fi" if none are configured. - Set custom DNS servers: Enter
sudo networksetup -setdnsservers "Wi-Fi" 1.1.1.1 8.8.8.8to assign Cloudflare and Google DNS servers. Replace Wi-Fi and IP addresses as needed. You will be prompted for your admin password. - Confirm the new DNS settings: Repeat the check command to verify the updated servers appear as expected.
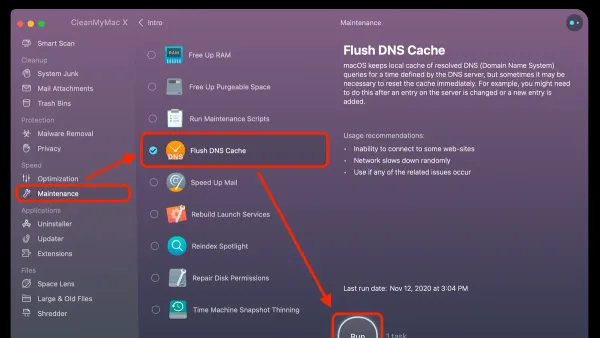
- Flush the DNS cache: Run
sudo dscacheutil -flushcache; sudo killall -HUP mDNSResponderto clear stored DNS data, ensuring the system uses the new settings immediately. No output means success.
Advantages: Command-line changes are scriptable, quick to revert, and useful for remote management. They avoid navigating multiple GUI windows.
Risks: Mistyping commands or service names can misconfigure your connection or leave DNS unset, causing internet issues. Always verify settings after changes.
How to verify your new DNS settings are working
After setting custom DNS servers on your Mac, confirming that the changes took effect and are functioning correctly is crucial. You can use Terminal tools like dig or nslookup to test DNS resolution and response times.
- Open the Terminal app.
- Run a dig command to query a domain, for example: dig www.example.com. When the custom DNS is active, the SERVER: line near the bottom should show the IP address of your new DNS server.
- Compare response times by observing the Query time: value in milliseconds. A lower number generally indicates faster DNS resolution.
- To cross-check, run nslookup www.example.com. The output should list your custom DNS server as the server used for the lookup.
- For privacy-focused users, perform a DNS leak test by visiting a trusted online tool that detects DNS servers your Mac is using. Confirm that only your chosen DNS servers appear, not your ISP’s.
Sample dig output showing custom DNS active:
;; Query time: 30 msec;; SERVER: 1.1.1.1#53(1.1.1.1)
Sample dig output with default DNS:
;; Query time: 50 msec;; SERVER: 192.168.1.1#53(192.168.1.1)
If the SERVER IP does not match your custom DNS, or response times are inconsistent, recheck your settings or flush your DNS cache.
Troubleshooting common DNS setting issues on Mac
If your DNS changes don’t seem to apply, the first step is to ensure you have saved and applied the changes properly in System Preferences or executed the correct Terminal commands. Sometimes, the system may still use cached DNS information, so flushing the DNS cache can help.
- Open Terminal and enter sudo killall -HUP mDNSResponder. You should see no error messages; this command forces your Mac to clear its DNS cache and apply new settings.
- If DNS settings still appear unchanged, check for multiple active network interfaces (e.g., Wi-Fi, Ethernet) where one might override others. Go to System Preferences > Network > the gear icon > Set Service Order. Drag your preferred connection to the top to prioritize it. Once done, your DNS changes should apply to the prioritized interface.
- To reset DNS settings to default, remove all custom DNS entries by selecting each in the DNS tab of your network service and pressing the minus (–) button. Then click Apply. This restores your Mac to use the DNS servers provided by your network automatically.
- Restarting network services or rebooting your Mac can resolve lingering conflicts. Turn off Wi-Fi or unplug Ethernet, wait 10 seconds, then reconnect. If problems persist, perform a full system reboot. Successful reboot often clears residual issues and ensures DNS changes take effect.
Following these steps typically resolves common issues where DNS changes fail to apply or network conflicts interfere with custom DNS usage.
When and why you might want to change DNS on Mac
Changing your DNS on Mac can influence your internet experience in several ways, depending on your goals. One common reason is to improve speed and reliability. Some DNS providers offer faster response times and better uptime than your default ISP DNS, potentially reducing page load delays.
Another motivation is enhancing privacy and security. Providers supporting DNS over HTTPS (DoH) or DNSCrypt encrypt DNS queries, helping prevent eavesdropping or tampering. However, macOS does not natively support DNSCrypt, and DoH requires compatible DNS servers and clients, so benefits may vary.
You might also want to bypass geo-restrictions or content filtering imposed by your ISP or region. Custom DNS servers can redirect requests to access region-restricted content or block unwanted domains, useful for parental controls or accessing international services.
Despite these advantages, using third-party DNS carries some risks. Trusting external DNS providers means relying on their privacy policies and data handling practices. Some may log your queries or inject ads. Additionally, custom DNS can occasionally cause connectivity issues if the servers are unreliable or misconfigured.
When choosing a DNS provider, compare features like speed, privacy policies, and security options. Popular options include Cloudflare (1.1.1.1), Google Public DNS (8.8.8.8), and OpenDNS (208.67.222.222), each with different strengths and trade-offs.
- How to Use Private Wi-Fi Address on Mac: A Clear Step-by-Step Guide
- How to Change Your Default Browser on a Mac: Step-by-Step Guide
- How to Turn On AirDrop for Everyone on Your Mac: A Complete Guide
Frequently asked questions
How to set dns on mac?
To set DNS on a Mac, open System Preferences and select Network. Choose your active connection, click Advanced, then go to the DNS tab. Use the '+' button to add new DNS server IP addresses, then click OK and Apply to save the changes.
How to change dns on macos?
Changing DNS in macOS involves accessing the Network settings in System Preferences. Select your current network, click Advanced, then the DNS tab. Remove existing DNS servers if needed, add new ones, and confirm by clicking OK and Apply.
How to change dns server on mac?
Change your Mac’s DNS server by navigating to System Preferences > Network, selecting your active network, and clicking Advanced. Under the DNS tab, add or edit DNS server addresses. Remember to save changes by clicking OK and Apply.
How to check dns settings on mac?
You can check DNS settings on a Mac by opening System Preferences, selecting Network, choosing your active connection, and clicking Advanced. The DNS tab shows your current DNS servers. Alternatively, use the Terminal command scutil --dns to view detailed DNS information.
How to change dns on macbook?
On a MacBook, change DNS by opening System Preferences, selecting Network, and picking your Wi-Fi or Ethernet connection. Click Advanced, then the DNS tab to add or remove DNS server addresses. Confirm changes by clicking OK and Apply.
What this guide does not cover and who should look elsewhere
This article does not cover configuring DNS over encrypted protocols like DNS over HTTPS (DoH) or DNS over TLS (DoT) on Mac. Those methods require additional tools or third-party apps beyond the built-in system DNS settings and involve more advanced setup steps. If you need enhanced privacy through encrypted DNS queries, consider specialized software such as Cloudflare's 1.1.1.1 app or configuring DoH/DoT through compatible browsers or network tools.
The single most useful next step is to test your new DNS settings immediately by visiting websites known for fast DNS resolution or using the dig or nslookup commands in Terminal. This confirms your Mac is using the custom DNS servers you set and helps identify any connectivity issues before relying on these settings for daily use.