
How to Turn Off Automatic Ear Detection on Mac and AirPods
Discover how to disable automatic ear detection on Mac and AirPods for uninterrupted audio playback and better control over your listening experience.
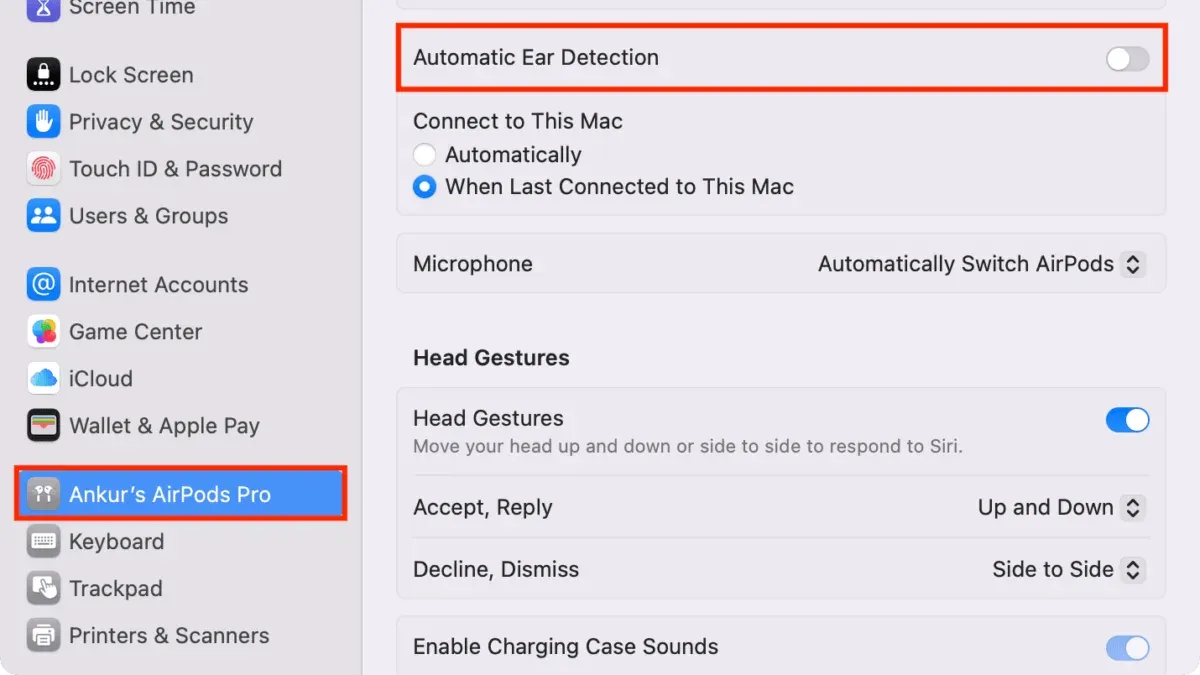
You’re working on your Mac when your AirPods suddenly pause playback as you remove one from your ear, or your headphones start playing audio unexpectedly when you put them on. This automatic ear detection feature can be helpful but sometimes interrupts your listening experience or workflow.
This article explains how to turn off automatic ear detection on Mac and iPhone, including the exact settings to adjust on your MacBook and AirPods, and how to troubleshoot common issues that might prevent the feature from disabling properly. Whether you want uninterrupted playback or more control over when your audio activates, you’ll find clear steps to manage these preferences.
Key takeaways
- On MacBook, turn off automatic ear detection by adjusting Bluetooth device settings in System Settings under Sound.
- For AirPods connected to Mac, disable automatic ear detection via the Bluetooth menu by selecting your device and unchecking the option.
- On iPhone, go to Settings > Bluetooth > Tap the info icon next to your AirPods and toggle off Automatic Ear Detection.
- Disabling this feature may increase battery use since audio won’t pause automatically when removing AirPods.
- If turning off automatic ear detection fails, try resetting your AirPods or restarting your Mac or iPhone before retrying.
Before you start: what you need to disable automatic ear detection
To disable automatic ear detection, you need a Mac and/or iPhone paired with AirPods or compatible headphones that support this feature. Supported AirPods models include AirPods (2nd generation and later), AirPods Pro, and AirPods Max. Other headphones with Apple’s H1 or W1 chip may also support automatic ear detection.
Your devices must be running macOS Big Sur or later for Mac, and iOS 14 or later for iPhone, where settings to control automatic ear detection are available. Check your device's software version by clicking the Apple menu > About This Mac on Mac, or going to Settings > General > About on iPhone.
Automatic ear detection pauses audio playback when you remove AirPods from your ears and resumes when you put them back in. You might want to disable this feature to maintain continuous audio playback, use one AirPod without pausing, or avoid interruptions caused by false detections.
- Confirm your AirPods or compatible headphones are connected to your Mac or iPhone; you should see them listed in Bluetooth settings.
- Verify your Mac is running macOS Big Sur or later by choosing Apple menu > About This Mac and checking the version number; if not, update via System Preferences > Software Update.
- Check your iPhone’s iOS version under Settings > General > About; update if necessary under Settings > General > Software Update.
- Understand the function of automatic ear detection and why you might want to disable it, to decide if this guide suits your needs.
For official details on supported devices and software requirements, refer to Apple’s support pages on AirPods and macOS/iOS updates.
How to turn off automatic ear detection on MacBook
Disabling automatic ear detection on your MacBook requires accessing your Bluetooth device settings. Follow these steps to turn off the feature for your AirPods or compatible headphones.
- Click the Apple menu in the top-left corner of your screen and select System Preferences. You should see the System Preferences window open.
- In System Preferences, click Bluetooth to open the Bluetooth devices list. Your paired devices will appear here.
- Locate your AirPods or compatible headphones in the device list. Click the Options button next to the device name. This opens a window with device-specific settings.
- In the options window, find the toggle labeled Automatic Ear Detection. It is usually enabled by default.
- Click the toggle to turn off automatic ear detection. Confirm that the toggle switches to the off position, indicating the feature is disabled.
- Close the options window and System Preferences. Your MacBook will no longer automatically route audio based on whether the AirPods are in your ears.
Turning off automatic ear detection means audio playback won’t pause when you remove your AirPods. This can be useful for uninterrupted listening but may also drain your AirPods’ battery faster. If you want to re-enable it, repeat these steps and toggle the setting back on.
How to turn off automatic ear detection AirPods on Mac
Disabling automatic ear detection on your AirPods while connected to any Mac differs from turning it off on the MacBook system settings. This setting is accessed directly through the AirPods device options in the Mac's Bluetooth menu rather than the general MacBook audio or Bluetooth preferences.
Note that not all AirPods models allow you to disable this feature on Mac. Below is a comparison of common AirPods models regarding support for this setting:
| AirPods Model | Can Disable Automatic Ear Detection on Mac |
|---|---|
| AirPods (1st generation) | No |
| AirPods (2nd generation) | Yes |
| AirPods Pro (1st and 2nd generation) | Yes |
| AirPods Max | Yes |
- Make sure your AirPods are connected to your Mac. You should see them listed as "Connected" in the Bluetooth menu under System Preferences > Bluetooth. This confirms a successful connection.
- Click the Bluetooth icon in the menu bar or open System Preferences and select Bluetooth.
- Find your AirPods in the list of devices and click the "Options" button next to them. A new window with device-specific settings will appear.
- Look for the "Automatic Ear Detection" checkbox. Uncheck it to disable the feature. Once unchecked, your Mac will stop automatically pausing or playing audio when you remove or insert AirPods.
- Close the options window. The change takes effect immediately, but you may notice that disabling automatic ear detection can cause your AirPods to use slightly more battery as they remain active even when not worn.
Disabling automatic ear detection changes audio behavior by preventing automatic pausing, so you will need to manually pause or stop playback. This trade-off can be useful if you want uninterrupted audio but may reduce battery life marginally.
How to turn off automatic ear detection on iPhone
Disabling automatic ear detection on your iPhone allows you to have consistent control over when your AirPods or compatible headphones activate audio playback. This can differ from Mac behavior, as iOS actively manages audio routing and pausing more tightly around ear detection.
- Open the Settings app on your iPhone. You should see a gear icon on your home screen or in the app library.
- Tap Bluetooth. This opens the Bluetooth device list where your AirPods or headphones appear when connected.
- Find your AirPods or compatible headphones in the list and tap the info (i) button next to their name. This opens the device’s settings.
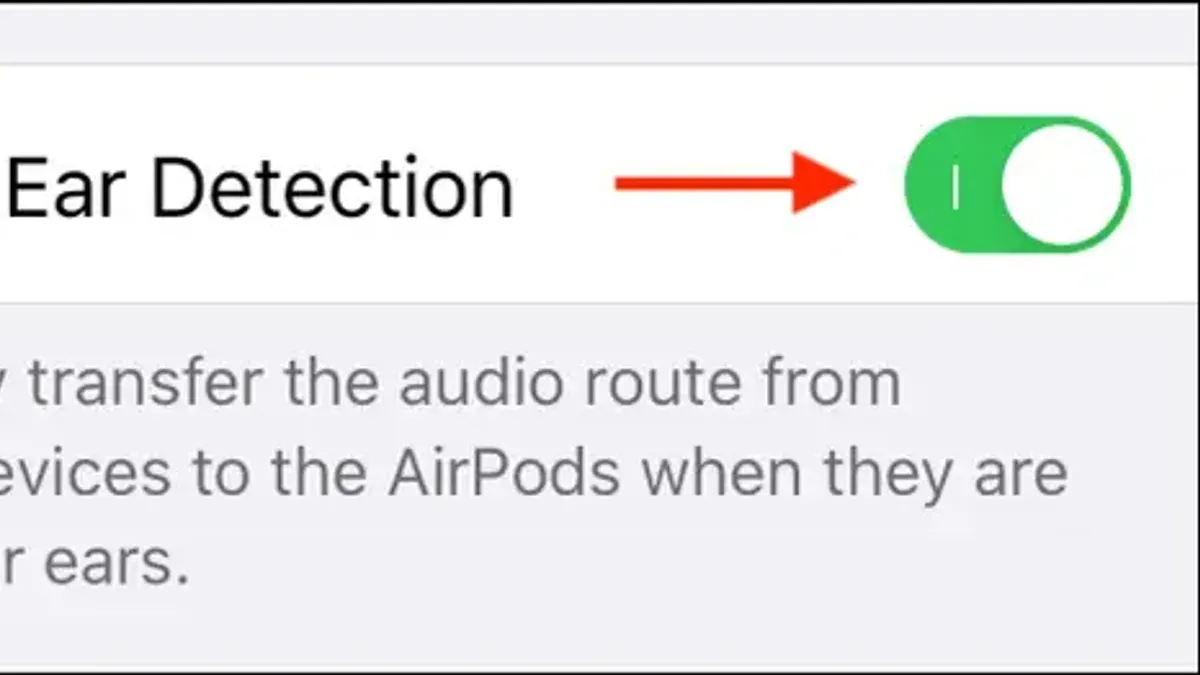
- Scroll down to locate Automatic Ear Detection. It should be toggled on by default.
- Toggle Automatic Ear Detection off. You will notice that audio playback will no longer pause or resume automatically when you remove or insert your AirPods.
On iOS, turning off automatic ear detection means your device will not automatically pause audio when you take out one or both AirPods. Unlike on Mac, where disabling this can sometimes affect battery optimization and audio switching, on iPhone it mainly changes how playback pauses. Keep in mind that without this feature, you’ll need to manually control playback to avoid unwanted audio interruptions.
Troubleshooting common issues when turning off automatic ear detection
If the automatic ear detection option does not appear in your Bluetooth settings, first ensure your AirPods are connected and recognized by your device. Sometimes, the setting is hidden if the device or software version does not support it fully.

Restarting your Mac, iPhone, or AirPods often resolves glitches with settings not saving or appearing correctly. To reset your AirPods, press and hold the setup button on the charging case until the status light flashes amber, then white; reconnect them to your device afterward. Users report this step frequently restores control over automatic ear detection.
Keep in mind that disabling automatic ear detection may impact features like automatic pausing or battery optimization. Some users experience continued audio playback issues or delayed responses because these features rely on the sensor's function.
If after these steps you still cannot disable automatic ear detection or face playback problems, contacting Apple Support is advisable. They can provide device-specific diagnostics and solutions beyond standard troubleshooting.
- Ensure your AirPods are connected and listed in Bluetooth settings; if the option is missing, move to step 2.
- Restart your Mac or iPhone, then check the setting again; the option should appear if supported.
- Reset your AirPods by holding the setup button until the light flashes white; reconnect and verify the setting is accessible.
- Test audio playback to confirm changes; if issues persist, consider the limitations of disabling this feature.
- Contact Apple Support if problems remain unresolved after these steps.
- How to Use AirPods Automatic Switching on Mac: A Clear Step-by-Step Guide
- How to Change Your AirDrop Name on Mac: A Clear Step-by-Step Guide
- How to Turn Off App Notifications on Mac: A Clear Step-by-Step Guide
Frequently asked questions
How to turn off automatic ear detection airpods on macbook
To disable automatic ear detection for AirPods on your MacBook, connect your AirPods and open System Settings. Navigate to Bluetooth, find your AirPods in the device list, then click the Info button (an “i” in a circle). There, toggle off the “Automatic Ear Detection” option to stop your MacBook from pausing or playing audio when you insert or remove the AirPods.
How to turn off automatic ear detection on iphone
On your iPhone, go to Settings and tap Bluetooth. Find your AirPods in the list, then tap the Info button next to them. Disable the “Automatic Ear Detection” switch to prevent audio from automatically routing or pausing when you insert or remove your AirPods. Note that turning this off may affect battery life and audio switching behavior.
How to turn off automatic ear detection airpods on mac
Disabling automatic ear detection for AirPods on a Mac follows the same process as on a MacBook. Open System Settings, select Bluetooth, locate your AirPods, and click the Info button. Simply switch off “Automatic Ear Detection” to manually control audio playback without automatic pausing or routing triggered by ear detection.
How to turn off automatic ear detection
Turning off automatic ear detection requires accessing the settings of your AirPods device through a connected iPhone or Mac. In Bluetooth settings, select your AirPods and toggle off the “Automatic Ear Detection” feature. Keep in mind that disabling it means audio playback won’t automatically pause when you remove the AirPods, so you’ll need to control playback manually.
What this guide does not cover and when to seek other options
Disabling automatic ear detection may reduce battery efficiency and disable features such as automatic pausing when you remove your AirPods or headphones. If you rely heavily on these conveniences or use your devices primarily for seamless switching between devices, keeping automatic ear detection enabled might be preferable. Additionally, this guide does not cover third-party headphones or non-Apple audio devices, which may have different or no ear detection settings. For advanced audio management or accessibility options, consider exploring dedicated apps or Apple’s accessibility settings.
To make the most of your AirPods’ or Mac’s audio settings, the single most useful next step is to regularly check the Bluetooth settings and firmware updates for both your Mac and AirPods. Firmware updates can improve device performance, fix bugs related to automatic ear detection, and occasionally introduce new features or settings that enhance your control over audio playback.



