How to Turn On FileVault on Mac: A Step-by-Step Guide
This guide shows you how to turn on FileVault on Mac to encrypt your disk and secure your sensitive data step-by-step.
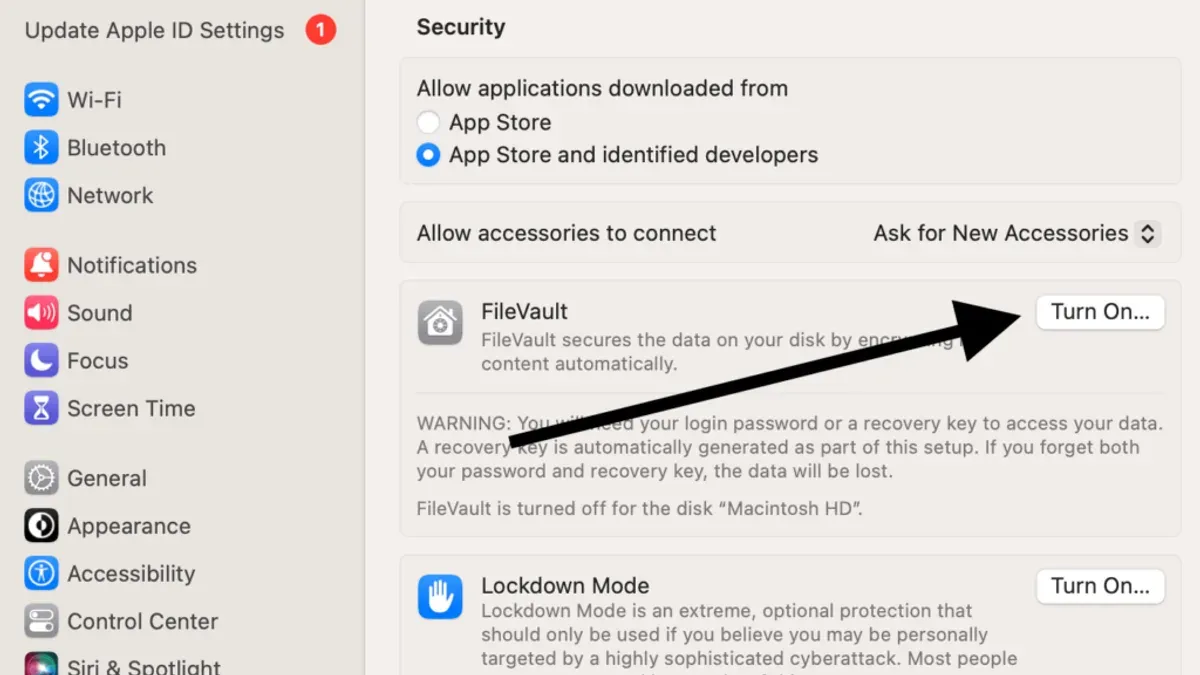
Your Mac stores sensitive information, from personal documents to saved passwords. If you lose your device or it falls into the wrong hands, this data could be at risk without proper protection.
This article explains how to turn on FileVault on Mac, guiding you through each step to enable full-disk encryption. It also helps you decide if FileVault is suitable for your needs, outlines how it impacts everyday use, and offers solutions for common issues you might encounter during setup.
Key takeaways
- FileVault encrypts your entire startup disk, safeguarding your data from unauthorized access.
- Enabling FileVault requires an administrator account and sufficient battery or power connection.
- You can turn off FileVault anytime, but decryption may take some time depending on disk size.
- FileVault may slightly impact system performance but enhances security significantly.
- Common activation problems often relate to user account settings or insufficient disk space.
Before you start: what you need to enable FileVault
FileVault is available on Macs running macOS X 10.7 (Lion) and later versions. Confirm your macOS version by clicking the Apple menu > About This Mac. If your system is outdated, update it via System Preferences > Software Update before proceeding.
Backing up your data is essential prior to enabling FileVault, as encryption issues or errors might risk data accessibility. Use Time Machine or another backup method suitable for your data size—note that typical backups can range from a few gigabytes to hundreds, depending on your files. Verify your backup is complete and accessible.
You must know your user account password, as it unlocks the disk once FileVault is active. If you have multiple user accounts, ensure each has a password set and is authorized to unlock the disk.
During setup, FileVault generates a recovery key, a critical safety net if you forget your password. Store this key securely outside your Mac, such as in a password manager or printed and stored in a safe place. Losing the recovery key and password means permanent data loss, a risk reported by users who failed to retain this key.
- Check your macOS version: Click Apple menu > About This Mac. You should see your version number. If it is below 10.7, update your system. Successful update shows the latest macOS version installed.
- Back up your Mac: Connect your Time Machine drive or open your backup app. Initiate a full backup. Confirm backup completion by checking the timestamp or backup app status.
- Verify your account password: Log out and log back in to ensure you know your password. If you use Touch ID or automatic login, disable these temporarily to test.
- Prepare to save your recovery key: Decide where to store it securely outside the Mac. Have a password manager app open, or prepare a physical storage location like a locked drawer.
How to turn on FileVault on Mac and MacBook models
Enabling FileVault encryption on your Mac varies slightly depending on your macOS version but follows a straightforward process. The goal is to protect your data by encrypting your startup disk.
- Open System Settings (on macOS Ventura or later) or System Preferences (on earlier versions). You should see a window with various system options.
- Navigate to Privacy & Security. In System Preferences, it is often under the Security & Privacy pane, then the FileVault tab.
- Locate the FileVault section and click Turn On FileVault. This button initiates the encryption setup.
- You will be prompted to authenticate with your administrator password. Enter it to proceed.
- Choose how to unlock your disk and reset your password if needed. You can use your iCloud account or create a recovery key. Store this recovery key securely, as losing both your password and key will lock you out permanently.
- Confirm your choices and allow the Mac to begin encrypting the disk. You will see a message indicating that encryption is in progress.
- The encryption process can take several hours depending on your Mac model and the size of your disk. For example, Macs with SSDs typically encrypt faster than those with traditional hard drives. During this time, you can continue using your Mac normally, though performance might be slightly affected.
Typical encryption times range from under an hour for smaller SSD-based Macs to several hours for larger or older drives. You can check encryption status anytime in the same FileVault settings area.
Note: If your Mac has multiple user accounts, each user must enter their password to allow access after FileVault is enabled.
How to disable FileVault on Mac when needed
Disabling FileVault on your Mac involves turning off disk encryption and decrypting your data, which can take significant time depending on your Mac model and disk size. Before proceeding, understand that decrypting removes the protection FileVault provides, leaving your data accessible if the device is lost or stolen.

- Open System Settings (or System Preferences) from the Apple menu. You should see a window with various system options.
- Navigate to Privacy & Security (or Security & Privacy in older macOS versions). This section controls various security features of your Mac.
- Select the FileVault tab. Here, you will see the current status of FileVault encryption.
- Click the Turn Off FileVault button. You may be prompted to enter your administrator password or authenticate with Touch ID.
- Confirm your choice when prompted. The system will start decrypting your disk, which can take from several minutes to a few hours depending on the Mac model and disk size. For example, newer Macs with SSDs may decrypt faster than older models with larger hard drives.
- Keep your Mac connected to power and avoid shutting it down during decryption. You can continue using your Mac as usual, but decryption will not complete if the device powers off.
- Once decryption completes, the FileVault status will update to show that encryption is off.
Consider that disabling FileVault removes the layer of security that protects your data at rest. Without encryption, anyone with physical access to your Mac’s storage could potentially access your files. If you are concerned about data privacy or compliance, weigh these risks before turning off FileVault.
Understanding what Mac FileVault is and how it works
FileVault is Apple's built-in disk encryption feature designed to protect your data by encrypting the entire startup disk on your Mac. Its primary purpose is to prevent unauthorized access to your files, especially if your Mac is lost or stolen.
FileVault uses XTS-AES-128 encryption combined with a 256-bit key to secure your data. This encryption standard is widely recognized for balancing strong security with efficient performance, ensuring your information remains protected without significant slowdowns.
When you enable FileVault, the encryption and decryption process happens transparently in the background as you use your Mac. During startup, FileVault requires you to authenticate with your user password before the system fully boots, adding an extra layer of security by protecting data before macOS loads.
Regarding system performance, real-world usage shows minimal impact on everyday tasks. Modern Macs with SSDs handle encryption efficiently, so most users will not notice a difference in speed during normal operations.
FileVault differs from other Mac security features like Gatekeeper or the built-in firewall, which focus on app verification and network protection respectively. FileVault secures your data at rest by encrypting the disk itself, rather than managing app permissions or network access.
Should you use FileVault on your Mac? Pros and cons
FileVault offers strong encryption that protects your data if your Mac is lost or stolen, making it a valuable tool for privacy-conscious users. It helps comply with privacy regulations by securing sensitive information, which is particularly important in professional or enterprise settings. Many Mac users enable FileVault as a standard security measure, reflecting its broad adoption among those prioritizing data safety.
On the downside, FileVault can cause minor performance impacts during disk encryption and decryption, especially on older Macs, although most modern models handle it smoothly. The most significant risk is losing access to your data if you forget your login password and lose the recovery key, as there is no way to recover encrypted data without them. This makes careful management of recovery keys critical.
FileVault is highly recommended if your Mac stores confidential or sensitive information, if you frequently travel with your device, or if you are required to meet organizational security standards. Conversely, if your Mac is used primarily in a secure home environment with strong physical controls and you have reliable backups, you might decide the encryption trade-offs are unnecessary.
Surveys indicate a growing number of Mac users enable FileVault, but it is not universal—some avoid it due to concerns about complexity or performance. Real-world examples show that encryption has prevented data breaches when devices were stolen, underscoring the practical benefits of FileVault.
Troubleshooting common issues when turning on FileVault
If FileVault refuses to turn on, the cause often lies in incompatible settings or file system problems. For example, Macs using non-APFS file systems or with multiple startup volumes can encounter activation failures. Ensure your startup disk is formatted as APFS by checking Disk Utility under the View > Show All Devices menu.
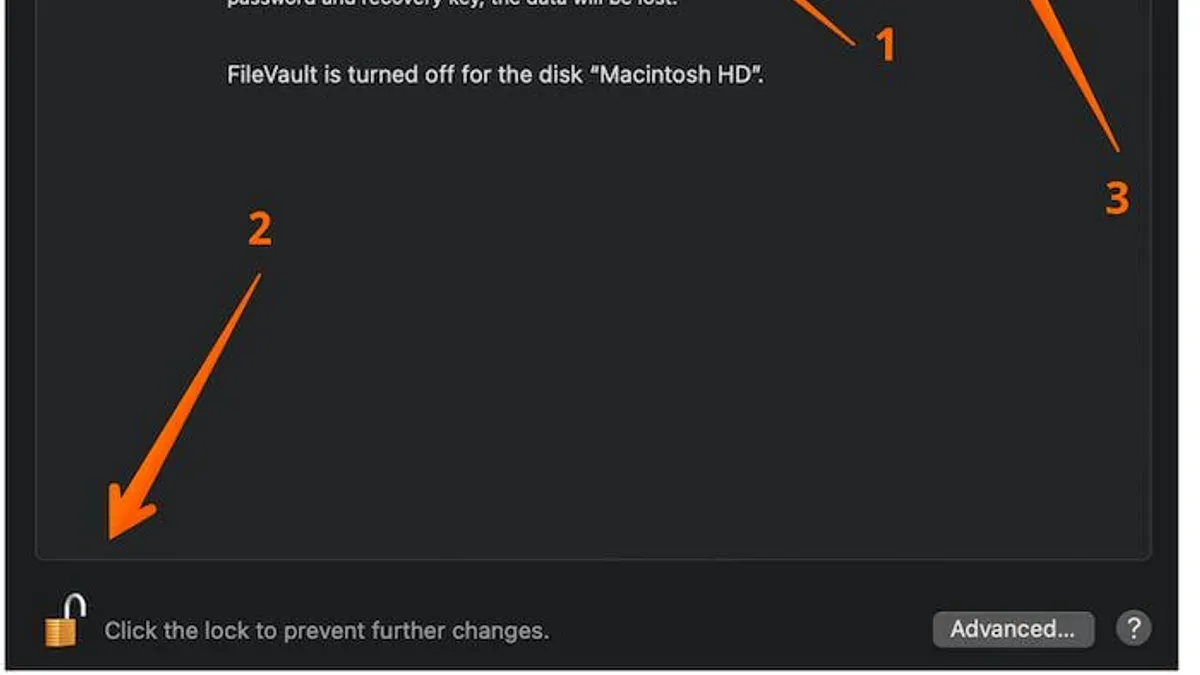
Some users may see error messages like “FileVault can't be enabled because the disk is encrypted or locked” or “FileVault failed to turn on.” These indicate conflicts or permission issues that can sometimes be resolved through Terminal commands.
Using Terminal commands safely
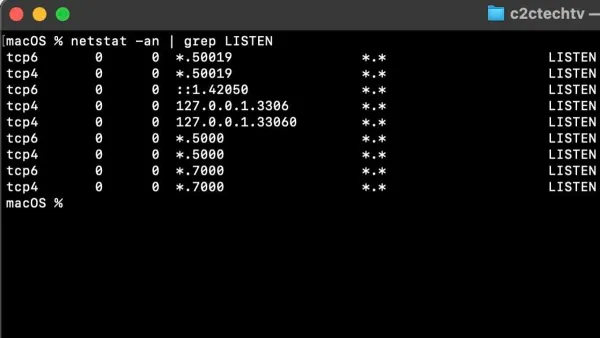
To check FileVault status, open Terminal and enter:
| Command | Expected Output |
|---|---|
| fdesetup status | FileVault is Off or FileVault is On. |
To enable FileVault via Terminal if System Preferences fails, use:
- Type
sudo fdesetup enableand press Enter. - You will be prompted to enter your administrator password; after authentication, the encryption process begins.
- Confirm that FileVault is turning on by reissuing
fdesetup status, which should report FileVault is On.
If the activation stalls or the system shows “Waiting for users to enable FileVault,” try restarting your Mac in Safe Mode and attempt activation again.
Handling activation stalls and errors
When encryption progress does not advance, verify that no external drives interfere and that your Mac is connected to power. Also, check for sufficient disk space for encryption overhead.
In cases where you see the error “FileVault recovery key could not be saved,” ensure your iCloud account is properly signed in if using iCloud to store the key, or safely write down the recovery key when prompted.
If issues persist, boot into macOS Recovery and run Disk Utility’s First Aid on your startup volume to fix file system errors before reattempting FileVault activation.
Using FileVault in enterprise environments like with Mac Intune
In managed IT environments, such as those using Microsoft Intune, FileVault encryption is often enforced through centralized policies to ensure data security across all corporate Macs. IT administrators configure these policies remotely, enabling FileVault automatically or prompting users to activate it with minimal manual intervention.
When FileVault is managed via Intune, you may see system prompts directing you to enable encryption or to enter your password for recovery key escrow. These prompts differ from personal Mac setups by including clear notices that encryption is required by your organization’s security policy.
To check your FileVault encryption status on a managed Mac, open System Settings and navigate to Privacy & Security > FileVault. Here, you should see an indicator stating whether FileVault is on or off. If managed by Intune, you might also find a message confirming that the encryption status is enforced and the recovery key is securely stored by your IT department.
Corporate Mac users should understand that recovery keys are not stored locally but managed centrally, so contacting your IT help desk is necessary if you forget your password or experience access issues.
Steps for users to verify FileVault status under Intune management
- Open System Settings from the Apple menu; you should see a prompt or notification if FileVault is required.
- Go to Privacy & Security > FileVault; the status will show "FileVault is On" with a note indicating management by your organization.
- If FileVault is off, follow the prompts to enable it; the process will automatically escrow the recovery key to the IT department.
- After enabling, check for a confirmation message stating encryption is in progress or complete, ensuring compliance with corporate policy.
- If you lose access or cannot log in, contact your IT administrator to retrieve the recovery key managed through Intune.
A case study from a mid-sized enterprise deploying FileVault with Intune showed a smooth rollout where users received clear prompts and encryption was enforced without significant disruption. Screenshots from managed Macs displayed policy messages such as "Encryption required by your organization" and status indicators confirming compliance.
- How to Turn On Find My Mac on Your MacBook: A Step-by-Step Guide
- How to Require Password After Sleep on Mac: A Clear Step-by-Step Guide
- How to Enable and Use the Root User on Mac Safely and Effectively
Frequently asked questions
How to enable filevault on mac?
Open System Settings and go to Privacy & Security. Scroll down to FileVault and click Turn On FileVault. You will need to authenticate with an administrator password and choose whether to use your iCloud account or create a local recovery key to unlock your disk if you forget your password.
How to enable filevault on macbook?
The steps are the same as on any Mac. Navigate to System Settings > Privacy & Security > FileVault, then click Turn On FileVault. Make sure your MacBook is plugged into power during encryption as it can take some time and requires uninterrupted power.
What is mac filevault?
FileVault is Apple's built-in full-disk encryption feature that secures your startup disk by encrypting data. It uses XTS-AES-128 encryption to protect your information from unauthorized access, requiring your user password or recovery key to decrypt the disk on startup.
Should i use filevault on mac?
You should consider FileVault if you handle sensitive data or want to protect your files in case your Mac is lost or stolen. However, it can slightly impact performance and requires careful management of recovery keys to avoid data loss.
Do i need to turn on filevault on my mac?
Turning on FileVault is not mandatory but recommended for enhanced security, especially if you store confidential information. If you prioritize convenience and have backups, you might choose to keep it off, but encryption adds a valuable layer of protection.
What this guide does not cover
This guide focuses specifically on enabling and disabling FileVault on Mac devices and basic troubleshooting during activation. It does not cover encrypted backups, such as using Time Machine with encryption, or third-party disk encryption tools that might offer alternative features. If you have specialized security requirements, such as compliance with certain industry standards or need centralized management beyond basic enterprise environments, consult IT security professionals for tailored advice and solutions.
To get the most from FileVault, ensure you securely store your recovery key and understand that decrypting your disk can take several hours, during which performance might be slower. If you encounter persistent issues activating FileVault, checking your Mac’s system logs via Console or contacting Apple Support can provide specific insights beyond basic troubleshooting.
Your next step is to enable FileVault through System Settings > Privacy & Security > FileVault, then carefully follow the prompts to create or store your recovery key safely. This will ensure your data is encrypted and protected while maintaining access in case you forget your password.