
How to Use Eye Tracking on Mac: A Step-by-Step Guide
Discover how to set up and use eye tracking on your Mac for improved control, accessibility, and navigation with practical guidance.
You might find yourself wanting to control your Mac simply by where you look—whether to enhance accessibility, speed up navigation, or improve your gaming experience. Setting up eye tracking technology can seem complex, but with the right tools and clear instructions, you can get started quickly.
This article explains how to use Eye Tracking on Mac with practical, step-by-step guidance. You'll learn what hardware and software you need, how to connect and calibrate your eye tracker, tips for improving accuracy, and how to manage settings across your Mac and iPhone. Additionally, it covers troubleshooting common issues and explores alternative software options tailored to Mac users.
Key takeaways
- You need a compatible eye tracker (like Tobii or Pupil Labs) and macOS accessibility settings configured.
- Connect your eye tracker via USB or Bluetooth and calibrate using the manufacturer's app for best results.
- Use macOS Voice Control alongside eye tracking for enhanced navigation and control.
- Adjust tracking sensitivity and lighting conditions to improve accuracy.
- Eye tracking can integrate with iPhone and iPad for a seamless cross-device experience.
Before you start: What you need for eye tracking on Mac
Setting up eye tracking on your Mac requires compatible hardware and appropriate software to work seamlessly. Popular eye trackers that support Mac include the Tobii Eye Tracker 5 and the Pupil Labs Core, both connecting primarily via USB. While Tobii devices often use USB-A, USB-C adapters may be necessary depending on your Mac's ports.
Software compatibility varies: macOS offers basic native support for accessibility features but relies heavily on third-party apps for full eye tracking control. Applications like "GazePoint" and "Enable Viacam" provide different levels of functionality; some are free, while others require a purchase or subscription. Ensure you select software explicitly stating Mac support to avoid compatibility issues.
Additional setup steps include granting accessibility permissions in your Mac’s System Preferences under Security & Privacy > Privacy. This allows apps to control cursor movement or perform clicks based on eye input. For Macs with limited USB ports, powered USB hubs or adapters might be needed to connect both the eye tracker and other peripherals simultaneously.
Users interested in cross-device eye tracking can consider Apple’s built-in Eye Control features available on iPad and iPhone, which can complement Mac setups but operate independently.
| Device | Connection Type | Mac Support | Software Options |
|---|---|---|---|
| Tobii Eye Tracker 5 | USB-A (Adapter for USB-C) | Yes | Native macOS + Tobii software, third-party apps |
| Pupil Labs Core | USB-C | Yes | Open-source software, third-party apps |
| EyeTech TM5 Mini | USB | Limited | Windows-focused, limited Mac apps |
- Check your Mac's available ports and prepare any necessary USB adapters; successful preparation means you can physically connect the eye tracker without issues.
- Choose an eye tracker compatible with macOS and purchase or download the required software; you should see installation instructions or download files ready.
- Install the software and grant accessibility permissions in System Preferences > Security & Privacy > Privacy; confirm that the software can access input monitoring and control features.
- Connect the eye tracker to your Mac and open the software; the device should be detected and ready for calibration or setup.
How to connect an eye tracker to your Mac
- Physically connect your eye tracker to your Mac. For example, the Tobii Eye Tracker 5 uses a USB connection; plug the USB cable into an available USB-A or USB-C port on your Mac. If your device supports Bluetooth, enable Bluetooth on both your Mac and the eye tracker, then pair them via System Settings > Bluetooth. You should see the device appear in the list of connected devices.
- Download the official driver or software for your eye tracker from the manufacturer’s website. For the Tobii Eye Tracker 5, get the latest macOS-compatible software installer. Open the installer and follow the prompts until installation completes successfully.
- Grant necessary permissions to the eye tracking software. Open System Settings > Privacy & Security > Accessibility and check the box next to your eye tracking app. Then navigate to Privacy & Security > Input Monitoring and enable input access for the software. This step ensures the software can control cursor movements and read input data.
- Launch the eye tracking software. It should detect your hardware automatically. Follow any on-screen calibration instructions to align the device with your eyes for accurate tracking.
- If your Mac does not recognize the device, try restarting your computer after installation. Also, check System Settings > Network for any firewall or security settings that might block the connection. Disconnect and reconnect the device, and ensure cables are firmly attached.
For instance, connecting a Tobii Eye Tracker 5 involves USB plugging, installing the Tobii software, and enabling accessibility permissions. The software interface will confirm active tracking and prompt for calibration once connected.
How to use eye tracking on Mac for navigation and control
Once your eye tracker is connected and recognized by your Mac, you need to enable and calibrate it within the supported application, such as Tobii Ghost or another compatible software. Calibration usually involves following a moving dot on the screen with your eyes to map your gaze accurately.
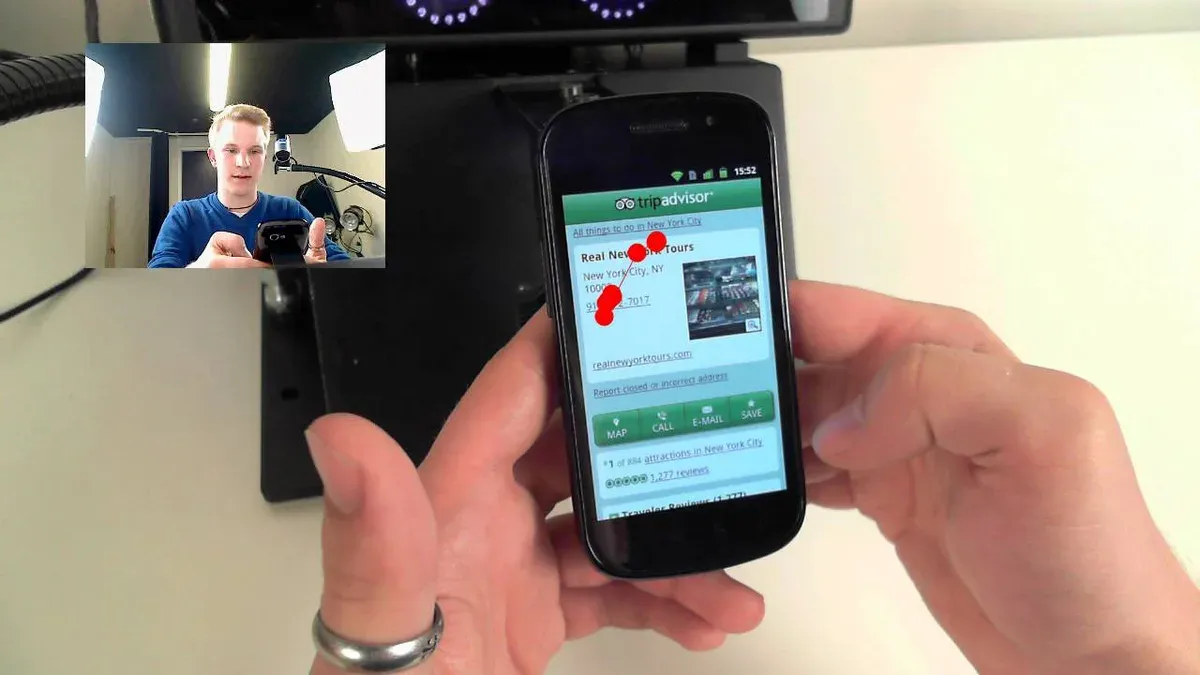
- Open your eye tracking software and locate the calibration tool, often found under settings or device setup. You should see a prompt or animation guiding you to focus on specific points.
- Follow the on-screen instructions by looking steadily at each calibration point until the software confirms completion. Successful calibration improves cursor accuracy and responsiveness noticeably.
- Adjust cursor control settings like sensitivity and dwell time. Sensitivity controls how much the cursor moves relative to your eye movement, while dwell time sets how long you must fixate before a click registers.
- Test cursor movement by looking at different parts of the screen; the cursor should move smoothly and stop accurately where you focus.
- Use eye tracking to perform gestures such as clicking by dwelling, double-clicking, or blinking, depending on your software’s options.
Eye tracking can enhance accessibility by allowing hands-free navigation of menus and apps, making scrolling through documents or webpages easier by simply looking up or down. In gaming, precise gaze control can improve aiming or camera movement with minimal physical input.
Before calibration, cursor movement may feel jittery or inaccurate, but calibration typically reduces errors, resulting in a more natural and effective control experience.
How to improve eye tracking accuracy and performance on Mac
Optimizing your eye tracking experience on Mac involves both environmental adjustments and software fine-tuning. Proper lighting and positioning play a key role: ensure your face is evenly lit without harsh shadows or direct glare on your eyes or the screen. Position your Mac’s camera and eye tracker so your eyes are centered and at a natural distance, typically about 20-30 inches from the device.
Adjusting software settings can filter out noise and reduce false inputs. In your eye tracking software preferences, look for options like "Noise Reduction," "Sensitivity," or "Smoothing." Lower sensitivity settings can prevent unintended cursor movements, while increased smoothing stabilizes the cursor but may introduce slight lag. Experiment with these until you find a balance that fits your workflow.
Regular calibration is essential. Perform a full calibration routine every few days or whenever you notice a decline in tracking accuracy. This re-aligns the system to subtle changes in lighting, position, or your eyes themselves.
Handling glasses or contact lenses requires special attention. Some users find that anti-reflective coatings on glasses improve tracking, while others may need to adjust the angle of the tracker to minimize reflections. If glare on your screen interferes, try repositioning your Mac or adjusting brightness and contrast settings.
- Set up consistent, soft lighting that illuminates your face evenly without glare. When done, your eyes should be clearly visible to the tracker without shadows.
- Position your Mac and eye tracker so your eyes are directly facing the device at a comfortable distance, about 20-30 inches. Successful positioning results in smooth cursor movement that matches your gaze.
- Open your eye tracking software’s settings and adjust "Noise Reduction" and "Sensitivity" sliders incrementally. After each adjustment, test cursor stability and responsiveness to find the best balance.
- Run the calibration process by following your software’s on-screen instructions. Completion is confirmed when the tracker accurately follows your gaze across the screen.
- If you wear glasses, try tilting your head slightly or adjusting the tracker angle to reduce reflections. Check if the software’s performance improves with these changes.
Users often report noticeable improvements in precision and reduced false inputs after applying these steps, with smoother cursor control and fewer calibration interruptions. Monitoring before and after accuracy can confirm the effectiveness of these adjustments.
How to turn off or disable eye tracking on Mac and iPhone
Disabling eye tracking can help protect your privacy, conserve battery, or resolve temporary issues. Here are the steps to pause or turn off eye tracking on your Mac, iPhone, and iPad.
On Mac
- Open System Settings from the Apple menu and select Accessibility. You should see the list of accessibility features.
- Scroll to Pointer Control and click Eye Control (or the name of your eye tracking software if third-party). You will see the toggle for enabling or disabling eye tracking.
- Switch the toggle to Off to immediately disable eye tracking. The cursor will stop responding to eye movements.
- Optionally, quit the eye tracking software from the Dock or Activity Monitor to ensure it does not run in the background.
Disabling here pauses eye tracking without uninstalling software, allowing quick reactivation later.
On iPhone and iPad
- Open Settings and go to Accessibility.
- Select Switch Control or Eye Tracking if available, depending on your setup.
- Toggle Switch Control or the specific eye tracking option off to stop the device from responding to eye movements.
- If you use cross-device features like Universal Control with your Mac, disabling eye tracking on iPhone or iPad will prevent unintended interactions.
Privacy considerations include preventing continuous camera usage by eye tracking software and avoiding accidental input. Turning off eye tracking when not in use minimizes data collection and potential security risks.
Eye tracking alternatives and software options for Mac users
Several software options support eye tracking on Mac, ranging from free tools like Enable Viacam to paid solutions such as Tobii Pro and EyeTech. Free options often provide basic cursor control and gesture recognition but may lack advanced features or robust support. Paid software typically offers higher accuracy, better calibration tools, and integration with other accessibility features, though at a cost.
| Software | Compatibility | Key Features | Price | User Ratings |
|---|---|---|---|---|
| Enable Viacam | Mac | Basic cursor control, click simulation | Free | Moderate |
| Tobii Pro | Mac | Advanced tracking, calibration, analytics | Paid | High |
| EyeTech | Mac | Precision tracking, assistive modes | Paid | High |
Beyond eye tracking, macOS includes built-in assistive technologies like VoiceOver and Switch Control. VoiceOver provides screen reading with voice commands, while Switch Control enables navigation using adaptive switches or external devices. Both assist users with limited mobility and can be easier to set up than eye tracking.
Eye tracking offers hands-free control and can be more intuitive for cursor movement and gesture input, but it requires compatible hardware and calibration. Alternatives like VoiceOver excel at providing detailed audio feedback and command input without additional devices. Switch Control can be more reliable for precise actions but may involve physical input devices.
Choosing between eye tracking and alternatives depends on your specific needs, the tasks you want to perform, and your comfort with hardware setup. For hands-free navigation with natural gaze control, eye tracking is preferable; for audio feedback and command-based interaction, VoiceOver or Switch Control remain strong options.
Troubleshooting common eye tracking issues on Mac
Eye tracking on Mac can encounter several typical issues ranging from device recognition failures to erratic cursor behavior. Addressing these promptly ensures a smooth experience.
Device not recognized or connection failures
If your Mac does not recognize the eye tracker, check for error messages like “Device not found” or “Connection failed.” This often indicates USB port issues or missing drivers.
- Disconnect and reconnect the eye tracker using a different USB port; you should see the device listed under “System Information” > “USB.”
- Restart your Mac to refresh connection protocols; upon reboot, the eye tracker should auto-detect.
- Update to the latest version of your eye tracking software to ensure compatibility; successful update usually removes error alerts.
- Check “System Preferences” > “Security & Privacy” > “Privacy” > “Input Monitoring” to confirm the app has permissions; lack of permission may cause non-recognition.
Calibration problems and erratic cursor movement
Calibration errors often cause jittery or inaccurate cursor movement. You might see messages like “Calibration failed” or notice the cursor not matching your gaze.
- Ensure your face is well-lit and directly facing the camera; poor lighting causes calibration failure.
- Remove or adjust glasses and avoid reflections that interfere with eye detection; this improves tracking accuracy.
- Run the calibration process again from the eye tracking app’s settings until you see a confirmation that calibration completed successfully.
Software crashes or incompatibilities with Mac OS updates
After Mac OS updates, some eye tracking apps may crash or behave unpredictably.
- Check the developer’s website for software updates addressing recent Mac OS versions; updating the app usually resolves crashes.
- If crashes persist, temporarily uninstall and reinstall the software; a clean install often fixes corrupted files.
- Look for any compatibility notes or patches specific to your Mac OS version on support forums or the developer’s site.
Performance drops due to environmental factors or hardware limitations
Slow or lagging eye tracking can result from lighting changes, hardware constraints, or background processes.
- Adjust ambient lighting to be consistent and avoid strong backlight; performance should stabilize afterward.
- Close unnecessary apps to free processing power; you should notice smoother cursor response.
- If your Mac has limited RAM or an older processor, consider lowering the eye tracking app’s sensitivity or frame rate in settings to improve responsiveness.
Using eye tracking beyond Mac: integration with iPhone and iPad
Apple’s iPhone and iPad include built-in eye tracking features under Accessibility settings, primarily through the "AssistiveTouch" and "Switch Control" options. These enable users to control their device using eye movements, supporting hands-free navigation and selection. While the hardware does not natively support external eye trackers, certain third-party apps and devices can connect via Bluetooth or Wi-Fi to extend eye tracking functionality.
To connect and sync an external eye tracker with both Mac and iOS devices, you typically use the device’s companion app or a universal platform that supports cross-device profiles. This allows for seamless switching between devices while maintaining calibration settings and user preferences.
Use cases on iPad include gaming apps like "osu!" with eye tracking tutorials that help improve precision and responsiveness. Productivity apps may leverage gaze input for scrolling, selecting text, or activating shortcuts, providing alternative input methods when touch or voice is impractical.
However, limitations exist: iPhone and iPad generally offer less granular control and fewer customization options compared to Mac, due to hardware constraints and iOS’s closed ecosystem. Additionally, some eye tracking software available on Mac may not have iOS versions, which can restrict workflow consistency.
- Open Settings on your iPhone or iPad and navigate to Accessibility > Touch > AssistiveTouch. You should see the option to enable eye tracking control under "Pointer Devices." Enable it to start eye tracking navigation.
- Install the companion app for your external eye tracking device on both Mac and iOS devices. After launching, sign in or pair your device following on-screen instructions. Once paired, calibration data should sync across devices.
- Launch a supported app such as a game with eye tracking support or a productivity tool. Use your eye movements to interact with the app interface; successful connection is indicated by cursor movement or selection responding accurately to your gaze.
- How to Use VoiceOver on Mac: A Complete Step-by-Step Guide
- How to Turn On Zoom Accessibility on Mac: Step-by-Step Guide
- How to Reduce Motion on Mac: A Clear Step-by-Step Guide
- How to Turn On and Customize Color Filters on Your Mac
Frequently asked questions
How to use eye tracker?
To use an eye tracker, first ensure the device is properly calibrated to your eyes, following the manufacturer’s instructions. Once calibrated, you can control the cursor or interface by moving your eyes to select and interact with items on the screen. Many eye trackers require you to dwell on an item for a set time or use a blink or other gesture for clicking.
How to use eye tracker on pc?
On a PC, connect your eye tracker via USB or Bluetooth, then install the corresponding software, such as Tobii or EyeTech. After calibration, activate the eye tracking feature within the software or Windows settings under Ease of Access options. You can customize control methods, including gaze clicks and scrolling, based on your preferences and the software’s capabilities.
How to use eye tracking on iphone?
Eye tracking on iPhone is available through accessibility features like AssistiveTouch with compatible external devices or apps. Connect a supported eye tracking device via Bluetooth and enable Switch Control in Settings > Accessibility > Switch Control. You can then configure eye movements to act as switches for tap, scroll, or other actions.
How to do eye tracking?
To do eye tracking, position the eye tracker so it has a clear view of your eyes, typically just below or above your screen. Follow the software prompts to calibrate by looking at specific points on the screen. Once calibrated, the system will track your gaze in real-time, enabling interaction based on where you look.
How to connect eye tracker?
Connect your eye tracker to your Mac or PC using the provided USB cable or Bluetooth connection. After physically connecting, install any required drivers or software from the manufacturer’s website. Open the software to complete setup and calibration, ensuring the device is recognized and tracking your eyes accurately.
What this guide does not cover and who should look elsewhere
This guide focuses on currently available eye tracking hardware and software compatible with Mac systems but does not cover specialized research-grade eye tracking solutions used in scientific or clinical settings. Some consumer eye tracking devices may offer limited functionality or require additional setup steps on Mac compared to Windows PCs, due to driver or software support differences. If you have specific eye conditions or physical limitations that impact eye movement control, consulting an accessibility specialist is advisable before relying solely on eye tracking technology for navigation or control.
The most useful next step is to review compatibility details and software requirements of your chosen eye tracker on the manufacturer’s website or support resources. This ensures you have the correct macOS version, USB or Bluetooth connections configured, and any necessary drivers or permissions enabled under System Preferences > Security & Privacy > Privacy. Confirming these details before setup reduces frustration and improves the accuracy and responsiveness of eye tracking on your Mac.



