How to Use Stage Manager on Mac: A Step-by-Step Guide
Discover how to enable and customize Stage Manager on Mac to manage multiple apps and windows efficiently for better multitasking.
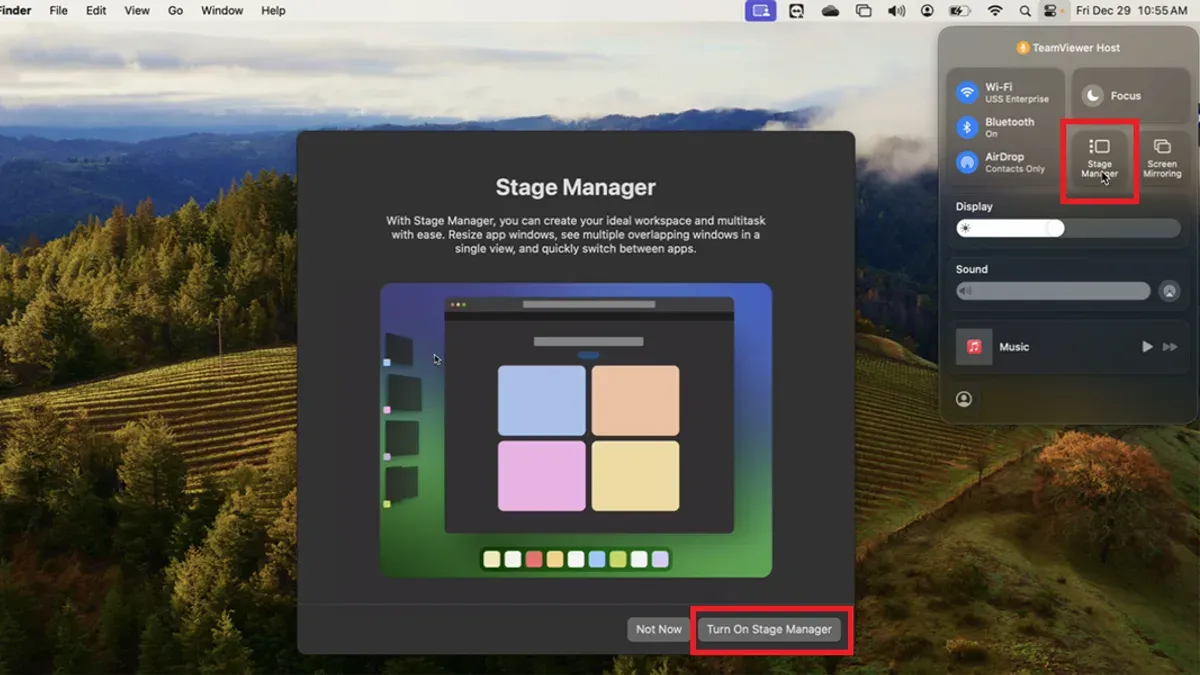
You often have multiple apps and windows open while working on your Mac, making it hard to focus or keep your desktop organized. Stage Manager offers a way to manage these windows more efficiently, grouping apps and allowing quick switching without clutter.
This article explains how to use Stage Manager on Mac, guiding you through enabling it, customizing your workflow, and comparing its functions with the iPad version. By the end, you’ll understand when and how Stage Manager can improve your multitasking on macOS.
Key takeaways
- Enable Stage Manager via System Settings > Desktop & Dock to start organizing windows automatically.
- Stage Manager groups open apps on the left side of the screen for easy switching and less distraction.
- Unlike iPad, Mac’s Stage Manager supports overlapping windows and full desktop control.
- Keyboard shortcuts like Control + Command + Left/Right Arrow help navigate Stage Manager groups quickly.
- You can disable Stage Manager anytime from the same settings if it doesn’t fit your workflow.
Before you start: What you need to use Stage Manager on Mac
Stage Manager requires specific hardware and software to function on your Mac. It is available on Macs running macOS Ventura or later. Supported models include MacBook Air and MacBook Pro with M1 chips or newer, the 24-inch iMac with M1, Mac mini with M1, Mac Studio, and Mac Pro models equipped with Apple silicon. Intel-based Macs generally do not support Stage Manager.
To enable Stage Manager, you need to have macOS Ventura or newer installed. Navigate to System Settings > Desktop & Dock, then scroll to find Stage Manager. Turning it on will reorganize your windows and app thumbnails automatically.
Stage Manager differs in availability compared to iPadOS and iMac models. On iPad, it supports a wider range of devices, including those with A12 Bionic chips or later, whereas on Mac, the feature is limited to Apple silicon Macs. This reflects different hardware capabilities and user workflows.
Stage Manager complements existing window management tools like Mission Control and Spaces. Mission Control offers an overview of open windows and desktops, while Spaces lets you create virtual desktops. Stage Manager adds a new layer of automatic window grouping and quick switching.
| Device Type | Supported Models | Minimum OS Version | Stage Manager Availability |
|---|---|---|---|
| Mac | MacBook Air/Pro with M1 or newer, 24" iMac M1, Mac mini M1, Mac Studio, Mac Pro (Apple silicon) | macOS Ventura | Yes |
| iPad | iPads with A12 Bionic or newer | iPadOS 16 or later | Yes |
- Open the Apple menu and select "System Settings." You should see the settings window open.
- Click on "Desktop & Dock" from the sidebar. The desktop and dock preferences appear.
- Scroll down to find the "Stage Manager" option. It will show a toggle switch.
- Toggle Stage Manager on. Your windows will rearrange into the Stage Manager layout, showing the main window and thumbnails on the side.
How to enable and configure Stage Manager on your Mac
- Open the System Settings app from the Apple menu or Dock. You should see a sidebar with various categories.
- Click on Desktop & Dock in the sidebar to access desktop-related settings.
- Scroll down until you find the Stage Manager section. Here, toggle the switch to On to enable Stage Manager. Your active window will shift to the center with recent apps displayed on the left.
- To customize Stage Manager, click Options below the toggle. You can choose to Show Recent Apps to quickly access recent windows or Group Windows by app to keep multiple windows organized together.
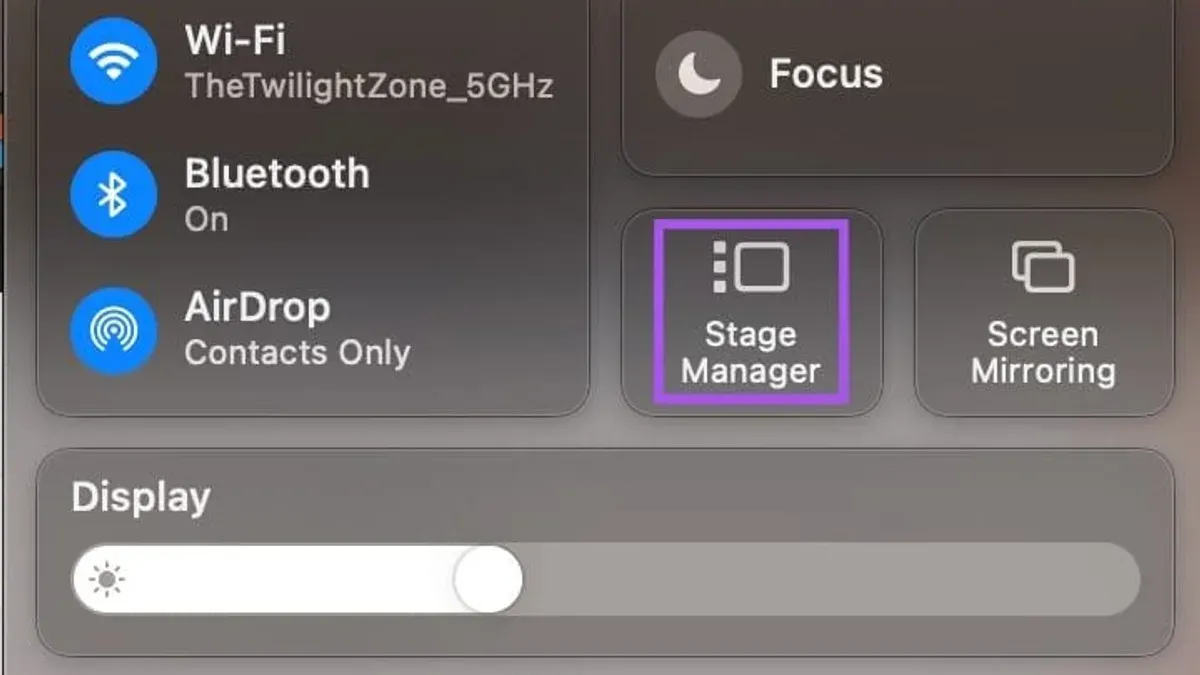
- Close System Settings once configured. To toggle Stage Manager on or off quickly, press Control + Option + Command + S. When toggled, your screen layout changes accordingly, allowing fast switching between traditional window management and Stage Manager.
- If you want to adjust Stage Manager behavior later, just repeat these steps to open System Settings and modify your preferences.
How to use Stage Manager to organize your workspace effectively
Stage Manager groups your open windows into clusters, making it easier to focus on a specific task while keeping other apps accessible. The active app group appears prominently in the center of your screen, with other groups arranged as thumbnails on the left side.
- Click a thumbnail on the left to switch to that app group; the selected group moves to the center, and the previous one shifts to the sidebar thumbnails.
- Drag a window from the center to the sidebar to remove it from the current group; it will become a standalone window accessible via Mission Control or Spaces.
- Drag a window from the sidebar thumbnails into the central group to add it; this lets you customize groups based on your workflow.
- Use Mission Control (swipe up with three or four fingers or press the Mission Control key) to see all open windows and Spaces for broader navigation beyond Stage Manager groups.
For example, you might have a group with your email and calendar apps, another with a web browser and notes, and a third with a design app and reference files. Stage Manager lets you switch instantly between these clusters without cluttering your screen with overlapping windows.
Without Stage Manager, managing multiple windows often means manually resizing and arranging them or using Mission Control’s Spaces exclusively. Stage Manager streamlines this by creating dynamic, manageable groups that keep your workspace organized and reduce distraction.
What is Stage Manager on iMac and MacBook and how does it differ?
Stage Manager on both iMac and MacBook offers a window management system that groups app windows for easier multitasking, but hardware differences influence the experience significantly.
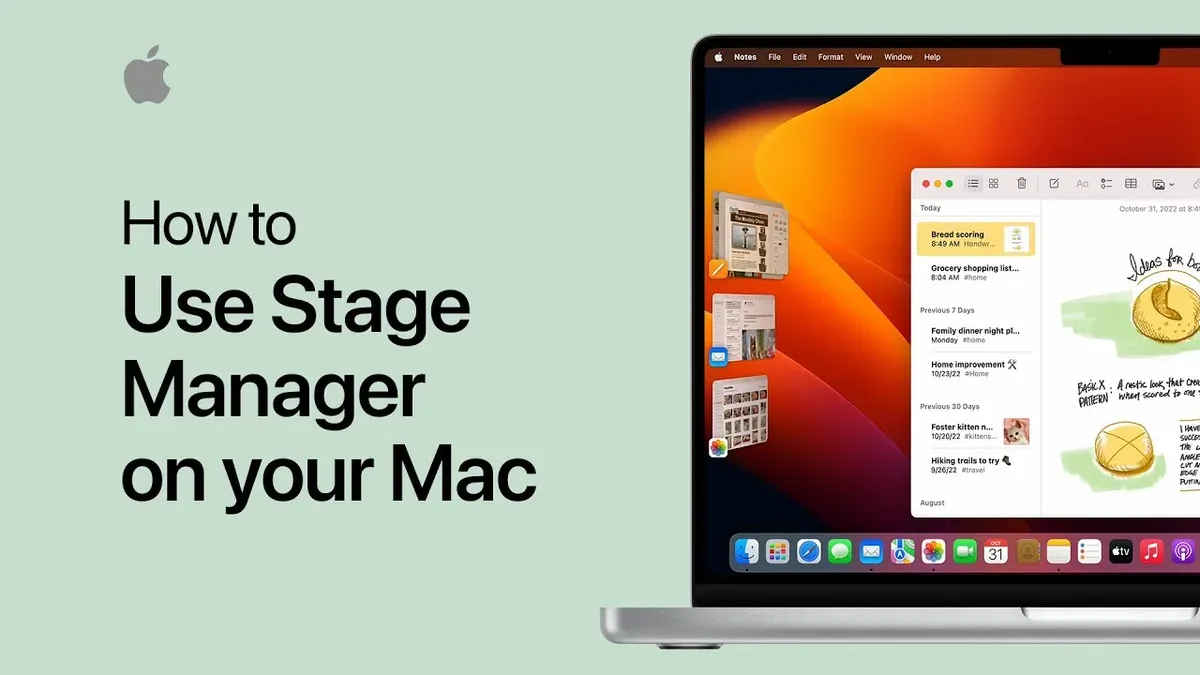
On iMacs, the larger screen size and higher resolution provide more space for multiple windows to be visible simultaneously without feeling cramped. This allows Stage Manager to display more app groups in the sidebar and keeps windows larger and more readable. Conversely, MacBooks, especially those with smaller screens, show fewer groups in the sidebar and have smaller window thumbnails, which can make managing numerous apps less convenient.
Performance-wise, MacBooks with Apple silicon chips generally handle Stage Manager smoothly, but older or lower-powered models may experience occasional lag when switching between groups or resizing windows. iMacs, often equipped with higher-end processors and more RAM, tend to offer a more fluid experience with Stage Manager, especially when running multiple intensive apps.
From a user interface perspective, Stage Manager’s controls and layout are consistent across iMac and MacBook, but the workspace feels more spacious on iMac. Some users note that window animations and transitions appear slightly more responsive on newer MacBooks, likely due to the efficiency of Apple silicon chips optimized for portable devices.
Overall, while the core functionality remains the same, your choice of Mac affects how comfortably you can organize and interact with windows using Stage Manager.
How to use Stage Manager on iPad and how it compares to Mac
Stage Manager on iPad is enabled via Settings > Home Screen & Dock > Multitasking, then toggle on Stage Manager. Once active, apps appear grouped on the left side of the screen, allowing you to quickly switch and combine apps with drag-and-drop gestures tailored for touch. This contrasts with Mac’s keyboard and mouse-driven controls.
- Open Settings and tap Home Screen & Dock.
- Select Multitasking and enable Stage Manager. You should see your current app shrink to a group on the left.
- Drag an app from the Dock or Home Screen onto the current window to create a group.
- Swipe left on the app groups to switch between workspaces.
- Tap the central workspace to focus on that group of apps, which expands to fill most of the screen.
Unlike Mac, iPad Stage Manager supports overlapping windows with resizable edges optimized for touch, but is limited to a maximum of four apps visible simultaneously. The iPad version also integrates with external displays differently, allowing you to move windows between iPad and monitor but with fewer customization options than macOS.
For example, on iPad Pro, you might have Safari, Notes, and Mail grouped for research, switching easily by touch, but without keyboard shortcuts Mac users rely on. Conversely, Mac offers more precise window control, keyboard navigation, and can manage larger numbers of windows and groups.
Workflow tips for cross-device users include setting up similar app groups on both devices to maintain consistency and using drag-and-drop on iPad to quickly build workspaces, while leveraging Mac’s keyboard shortcuts for faster switching. Understanding these differences helps decide when to use Stage Manager on each device effectively.
Stage Manager macOS workflow tips and shortcuts
Mastering keyboard shortcuts can significantly speed up your interaction with Stage Manager. Use Control + Option + Right Arrow and Control + Option + Left Arrow to cycle through your window groups quickly. Pressing Control + Option + D hides or shows the Dock without leaving Stage Manager.
For multitasking, arrange related apps into groups to minimize context switching. Drag windows between groups in the sidebar to reorganize your workspace efficiently. Combining Stage Manager with Mission Control (activated via Control + Up Arrow) offers a broad overview of all open apps and desktops, letting you switch perspectives swiftly.
Customize Stage Manager’s speed and responsiveness in System Settings: under Desktop & Dock, adjust the animation and grouping behavior to suit your workflow pace. Disabling the “Show recent apps” option can reduce distraction if you prefer a cleaner sidebar.
Users often report enhanced focus when using these shortcuts and grouping strategies, noting that combining Stage Manager with keyboard navigation reduces reliance on the trackpad or mouse. Experiment with these methods to find a balance between visual window management and keyboard efficiency.
How to turn off Stage Manager on Mac and when you might want to
Disabling Stage Manager on your Mac is straightforward and can be useful if you encounter compatibility issues, prefer a different window management style, or find the feature distracting. To turn it off, follow these steps:
- Open System Settings from the Apple menu.
- Click on Desktop & Dock in the sidebar.
- Scroll down to the Stage Manager section.
- Toggle the switch next to Stage Manager to the off position. You should see your windows revert to the traditional overlapping style immediately.
Users sometimes disable Stage Manager because certain apps may not interact well with grouped windows, or they prefer managing multiple windows manually without automatic grouping. Others find that the sidebar with app thumbnails takes screen space they want to dedicate to their work.
If you want alternatives, tools like Moom, Magnet, or macOS’s built-in Mission Control can offer window organization without the grouping behavior of Stage Manager. These focus on snapping windows into predefined layouts or offering quick access to open windows.
If you decide to return to Stage Manager later, simply revisit the same Desktop & Dock settings and toggle it back on. Your previous configuration will be preserved, allowing you to resume where you left off.
Troubleshooting common Stage Manager issues on Mac
If Stage Manager does not appear or function as expected, first verify that you are running macOS Ventura or later on an Apple silicon Mac. If you meet these requirements and Stage Manager still fails to work, try restarting your Mac to refresh system processes.
When apps do not group correctly, ensure that the apps support windowing features compatible with Stage Manager. Some older or non-native apps may not integrate well. Closing and reopening the problematic apps often resolves grouping glitches.
Performance slowdowns related to Stage Manager can occur if many windows or resource-intensive apps run simultaneously. Closing unused apps and reducing the number of open windows can improve responsiveness. Also, check Activity Monitor for background processes consuming excessive CPU or memory.
Conflicts may arise between Stage Manager and other macOS features such as Mission Control or third-party window management utilities. Temporarily disabling these utilities can help identify if they interfere. Adjusting System Settings to limit overlapping shortcuts may also resolve conflicts.
For persistent issues, consult Apple’s official support pages at support.apple.com/stage-manager or visit community forums like Apple Discussions at discussions.apple.com where users share solutions.
- How to Customize Control Center on Mac: A Complete Step-by-Step Guide
- How to Hide the Menu Bar on Mac: A Clear Step-by-Step Guide
Frequently asked questions
What is stage manager on macbook?
Stage Manager on MacBook is a window management feature that organizes your open apps and windows to reduce clutter and improve focus. It groups active windows in the center and displays other open apps as thumbnails on the side, making it easier to switch between tasks. This helps streamline multitasking without manually resizing or arranging windows.
How to use stage manager macos?
To use Stage Manager on macOS, open System Settings, go to Desktop & Dock, and toggle on Stage Manager. Once enabled, active windows appear prominently while others are grouped on the left side as thumbnails. You can click any thumbnail to switch focus, drag windows between groups, and customize settings like showing recent apps or desktop items to fit your workflow.
What is apple stage manager?
Apple Stage Manager is a multitasking tool available on Mac, iPad, and iPhone that helps organize open apps and windows visually. It automatically arranges your workspace so the active app is centered, with other apps grouped on the side for quick access. This feature aims to improve productivity by minimizing window clutter and simplifying navigation between tasks.
What is mac stage manager?
Mac Stage Manager is the implementation of Apple’s Stage Manager feature specifically for macOS. It allows you to organize and switch between apps and windows efficiently by grouping them in a sidebar while keeping the main workspace focused. It differs from previous macOS window management by offering a more visual and dynamic way to handle multiple apps.
How to use stage manager ipad pro?
On iPad Pro, enable Stage Manager by going to Settings > Home Screen & Dock > Multitasking, then toggle Stage Manager on. It lets you resize and overlap app windows freely, unlike the fixed split view, and groups open apps on the left side for easy switching. You can drag apps onto the workspace to create multitasking groups, making it a flexible option for managing multiple tasks.
Limits of Stage Manager on Mac
Stage Manager requires macOS Ventura or later and is supported only on select Mac models, including those with Apple Silicon chips and some Intel Macs with M1 compatibility. If your Mac runs an earlier macOS version or lacks hardware support, Stage Manager will not be available. Additionally, users who prefer traditional window management methods or third-party apps might find Stage Manager’s automatic grouping less flexible or intuitive.
For those using older Macs or who rely heavily on specific multitasking workflows, sticking with Mission Control, Spaces, or alternative utilities may be more effective. Stage Manager emphasizes simplicity and quick access but may not suit all advanced multitasking needs.
To get the most out of Stage Manager, start by enabling it in System Settings under Desktop & Dock, then customize your preferences such as showing recent apps or grouping windows. Experiment with organizing your workspace using the thumbnail previews and keyboard shortcuts to see if it aligns with your workflow.