
How to Add a Logo Watermark in iMovie: Step-by-Step Guide
Step-by-step guide to adding a logo watermark in iMovie on Mac and iOS, helping you protect your videos and promote your brand effectively.
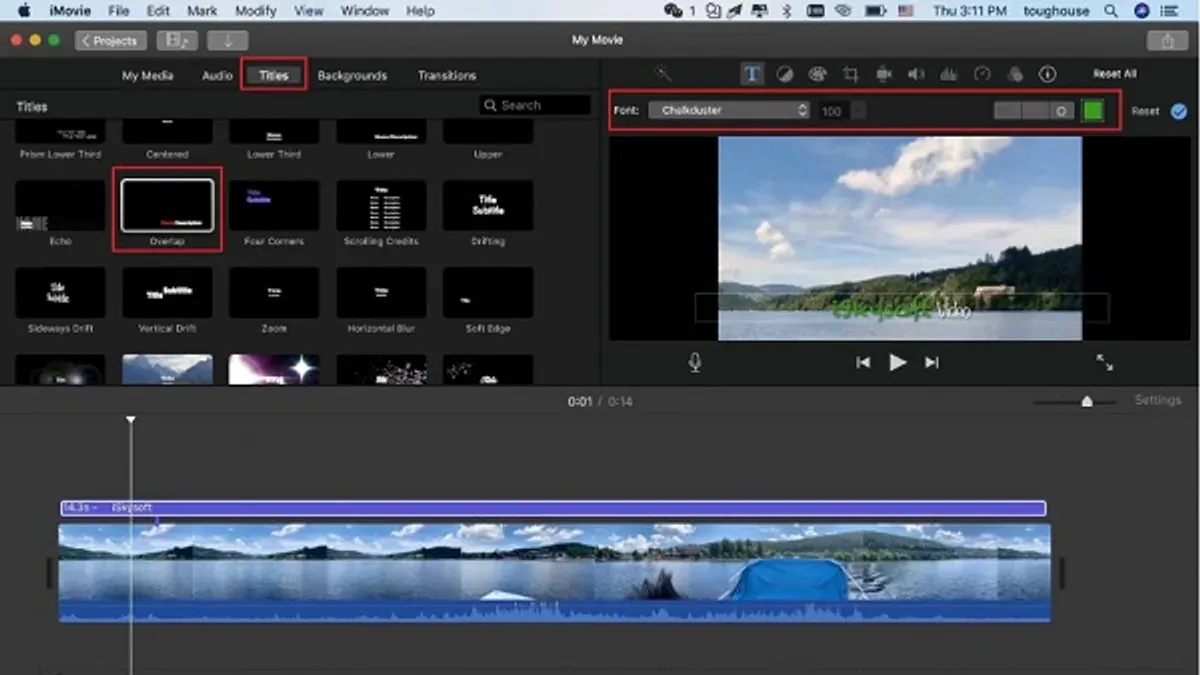
You’ve just finished editing a video in iMovie and want to add your logo to claim ownership or promote your brand. Adding a watermark logo is a simple yet effective way to protect your content and ensure viewers recognize your work.
This article guides you through how to add a logo watermark in iMovie, covering everything from creating or converting your logo into a suitable watermark image to applying it correctly on both Mac and iOS devices. You’ll learn step-by-step actions that suit beginners and intermediate users, helping you create a professional-looking watermark without confusion.
Key takeaways
- Create a transparent PNG logo for the best watermark quality.
- Use the Picture-in-Picture feature on Mac to add your logo as a watermark.
- On iPhone or iPad, overlay your logo using the video overlay settings in iMovie.
- Adjust opacity and size to make the watermark subtle but visible.
- Export your video with the watermark by choosing the appropriate resolution and format.
Before you start: What you need to add a logo watermark in iMovie
To add a logo watermark in iMovie successfully, you first need a logo file with a transparent background. The best format for this is a PNG image because it supports transparency, allowing your watermark to blend smoothly over your video. If your logo is not already a PNG or has a solid background, you may need to convert or create one using a simple graphic editor or even Microsoft Word by saving the image as a PNG.
Make sure you have a basic familiarity with the iMovie interface on your device, whether that’s a Mac, iPhone, or iPad. This will help you navigate the app efficiently when adding and positioning your watermark. On Mac, iMovie’s timeline and overlay options appear in the center and top right, while on iOS devices, the tools are located at the bottom with a simpler interface.
Understanding your video’s resolution and aspect ratio is also important. Common resolutions like 1920x1080 (Full HD) or 1280x720 (HD) determine how large your watermark should appear. A watermark that’s too large can distract viewers, while too small may not be visible. Aim for a logo size that covers about 5-10% of the video frame width to keep it subtle yet effective.
- Locate your logo file on your device. You should see a PNG image with no background around the logo.
- Open iMovie and select your project. On Mac, the timeline is in the center; on iOS, the editing tools are at the bottom.
- Check your video resolution by clicking the project settings icon (on Mac) or tapping the three dots in iMovie on iOS. Confirm you know your aspect ratio, such as 16:9.
- If your logo needs editing, open it in a graphic editor or Word, then save/export it as a PNG with a transparent background.
- Have your logo file and video project ready before proceeding to add the watermark for a smooth workflow.
How to create a watermark logo if you don’t have one
If you don’t already have a logo with a transparent background, you can create one using free online tools or common software like Microsoft Word. A watermark logo should be visible enough to identify your brand but subtle enough not to distract from the video content. Aim for simplicity and minimal colors for the best results.
Using free online tools to create a transparent logo
- Open a site like Canva or Pixlr that supports transparent backgrounds.
You should see an option to start a new project with a transparent canvas. - Design your logo or upload an existing image.
Your design should be simple; use minimal colors and clean lines. - Set the background to transparent if it’s not already.
This ensures the watermark won’t have an unsightly box around it in your video. - Export or download the logo as a PNG file.
The PNG format preserves transparency and is ideal for watermarking.
Creating a watermark logo in Microsoft Word
- Open a blank Word document and insert your logo or text by going to Insert > Pictures or Insert > Text Box.
You should see your logo or text displayed on the page. - Remove the background by selecting the image, then clicking Picture Format > Remove Background.
The background should become transparent, leaving only your logo or text. - Adjust the transparency by selecting the image, then clicking Picture Format > Transparency and choosing a suitable opacity (around 50% works well).
You’ll see the logo become semi-transparent, which helps it act as a watermark. - Save the image by right-clicking it and selecting Save as Picture, then choose PNG as the file type.
You now have a watermark-ready PNG file with transparency.
Tips for designing a subtle but visible watermark
- Use opacity levels between 30% and 60% to keep your logo unobtrusive but noticeable.
- Choose a size that doesn’t cover key parts of the video frame, often placing the logo in a corner.
- Stick to simple shapes or text to avoid clutter.
How to add a logo watermark to a video in iMovie on Mac
- Open iMovie and create a new project or open an existing one. You should see your main video clip in the timeline.
- Import your logo image by clicking the Import Media button. Navigate to your transparent PNG logo file and import it. The logo will appear in your media library.
- Drag your logo from the media library directly above the video clip in the timeline. This will add the logo as a new overlay track.
- With the logo clip selected in the timeline, click the Video Overlay Settings button above the preview window (it looks like two overlapping squares). Then, choose Picture-in-Picture from the dropdown menu. You should see your logo appear over the video in the preview.
- Adjust the size of the logo by dragging its corners in the preview window. A good starting point is around 15-20% of the video frame width, but you can customize this to suit your video.
- Position the logo by dragging it to a corner or an area that does not obstruct important content. Common placements are the lower right or upper left corners.
- To adjust opacity, click the Video Overlay Settings gear icon and use the Fade slider or adjust transparency if available. Aim for subtlety—around 30-50% opacity works well for a watermark.
- Extend the duration of the logo clip to match your video length. Drag the edge of the logo clip in the timeline until it covers the entire video clip. This ensures the watermark stays visible throughout.
- Play back your video in the preview window to confirm the watermark appears correctly and is not distracting. Make any position, size, or opacity tweaks as needed.
Following these steps will overlay your logo as a watermark on your entire video using iMovie on Mac. The Picture-in-Picture feature is key to this process, giving you control over placement and appearance. The timeline screenshot below illustrates the logo overlay track sitting above the main video clip, with numeric size and position settings visible in the Video Overlay panel.
Example: Logo scaled to 18% width, positioned in the lower right corner at coordinates about X: 85%, Y: 90%, with opacity set near 40%.
How to add a logo watermark to a video in iMovie on iPhone or iPad
Adding a logo watermark in iMovie on iOS devices involves a slightly different workflow compared to the Mac version, primarily due to the touch interface and more limited overlay options. First, you need to have both your video and logo image imported into the Photos app or Files app on your device.

Once you start a new project in iMovie and add your main video clip to the timeline, tap the + button to import your logo. Choose Photos or Files, then select your transparent PNG logo. The logo will be added as a separate clip above the video timeline.
To use the watermark as an overlay, tap the logo clip and select More (three dots), then choose Picture-in-Picture. The logo will appear over your video in a resizable and movable frame. Use pinch gestures to resize and drag to reposition the watermark. The smaller screen size means careful placement is necessary to avoid obscuring important video content.
Next, extend the logo clip to match the full duration of your video by dragging its right edge along the timeline. This ensures the watermark remains visible throughout playback. You can preview your video to confirm the watermark stays in place.
Note that iMovie on iOS does not offer opacity adjustment for overlays as the Mac version does, so you might want to prepare your logo with reduced opacity beforehand. The interface for overlays is simpler and more touch-focused, lacking the detailed controls found on Mac.
How to make your logo watermark subtle but effective
Creating a watermark that brands your video without distracting viewers requires careful adjustment of opacity, placement, and size. Start by setting your logo's opacity between 20% and 40%. At 20%, the watermark is very subtle and less likely to interfere with the video, while 40% makes it more visible but still unobtrusive. Some video editors offer blending modes like "Multiply" or "Overlay"—using these can help your watermark blend naturally with the video background, though iMovie has limited blending options.
Next, choose the right position for your watermark. The bottom-right corner is a common choice because it rarely covers important content and is easily seen. However, if your video has logos or text in that area, consider the top-left or bottom-left corners instead. Testing different corners by previewing your video helps you decide which spot balances visibility and subtlety best.
Size your logo proportionally to your video resolution. For example, if your video is 1920x1080 pixels, your logo should be roughly 150 to 250 pixels wide. Too large, and it draws attention away from the video; too small, and it becomes hard to see. After placing and sizing the watermark, watch clips with varied backgrounds—light, dark, and complex scenes—to ensure your watermark remains visible yet unobtrusive across all.
- Adjust the logo opacity slider to about 30%. You should see a faint but clear watermark that does not overpower the video.
- Place the watermark in the bottom-right corner and preview the video. It should remain visible but not block important content.
- Resize the watermark so it is approximately 200 pixels wide in a 1080p video. The logo should be noticeable without dominating the frame.
- Play through different scenes to check watermark visibility on light and dark backgrounds. The watermark should remain consistent and subtle.
- If needed, try moving the watermark to another corner and repeat the visibility test. Choose the position that best balances branding with viewer experience.
How to export your watermarked video correctly from iMovie
After adding your logo watermark, exporting your video with the right settings is crucial to preserve its clarity and visibility. Start by clicking the Share button in iMovie, then select File for local export. In the export dialog, choose your desired resolution—matching or exceeding your project’s original resolution ensures your watermark remains sharp. For quality, select High or Best (ProRes) if available to avoid compression artifacts that can blur or fade your watermark.
- Click Share and choose File. The export window will open.
- Under Resolution, select at least 1080p or higher; you should see this option if your project was created in HD or 4K.
- Set Quality to High or Best (ProRes). The estimated file size will update accordingly.
- Choose Compress to Better Quality rather than Faster to maintain watermark sharpness.
- Click Next, choose your save location, name your file, and click Save.
- Once exported, play the video to check the watermark’s visibility and positioning throughout the video.
When exporting for platforms like YouTube or Instagram, use their recommended resolution and aspect ratio to avoid scaling issues that reduce watermark clarity. For example, YouTube prefers 16:9 aspect ratio videos at 1080p or 4K. If you export with too low a resolution or choose low quality, the watermark may appear pixelated or faint.
Common mistakes include exporting at a resolution lower than the original project or selecting Low quality, which compresses the video excessively. Also, avoid trimming the logo clip’s duration before export, as this can cause the watermark to disappear prematurely. Checking your exported video on multiple devices helps ensure the watermark appears consistent and effective.
| Setting | Recommended Option | Effect on Watermark |
|---|---|---|
| Resolution | 1080p or higher | Keeps logo sharp and clear |
| Quality | High or Best (ProRes) | Prevents blurring and compression artifacts |
| Compression | Better Quality | Maintains watermark visibility |
Troubleshooting common issues when adding a logo watermark in iMovie
If your watermark isn’t appearing or disappears early in the timeline, check that the logo clip extends over the entire length of your video track. A common mistake is placing the logo clip only at the start, so it ends too soon. Drag the edge of the logo clip along the timeline to match your video’s duration to keep the watermark visible throughout.
If your logo image shows a background instead of transparency, confirm the file format is PNG with a transparent background. JPEGs or other formats often have solid backgrounds that obscure your video. If transparency is missing, try re-exporting your logo from the design tool as a PNG with an alpha channel.
When your watermark looks too large or too small after importing, use the Picture-in-Picture controls to resize it manually. Sometimes iMovie imports images at default sizes, so grab the corners to scale the logo until it fits your desired watermark area without blocking important video content.
iMovie crashing or lagging when adding overlays can happen if your logo file is very large or your device’s resources are limited. Try reducing the logo’s pixel dimensions or file size before importing. Closing other apps and restarting iMovie can also improve performance. Apple Support forums often suggest working with smaller, optimized images to avoid slowdowns.
How to remove a logo watermark from a video (and when it’s appropriate)
Removing a logo watermark from a video edited in iMovie is technically limited because the watermark is embedded as a separate overlay clip. iMovie does not offer a direct tool to erase or remove watermarks once the video is exported. However, if you still have the original iMovie project file, you can delete or hide the watermark overlay clip to remove it from the video before export.
It is appropriate to remove a watermark only if it is your own branding or if you have explicit permission from the watermark owner. Removing watermarks that protect copyright or branding without permission can be illegal and unethical.
Alternatives to removing a watermark include cropping the video to exclude the watermark area or overlaying a new image or blur effect over the watermark. These methods can reduce visibility but also may affect video composition or quality.
Here is how to remove your own watermark from an iMovie project:
- Open your iMovie project containing the watermarked video. After opening, you should see the timeline with all clips and overlays.
- Locate the watermark overlay clip in the timeline, usually a small clip above the main video track representing your logo image.
- Select the watermark clip by clicking on it. When selected, it will highlight or show editing handles.
- Press the Delete key or right-click and choose Delete. The watermark clip should disappear from the timeline and preview window.
- Play the video in the preview to confirm the watermark is gone and the main video plays uninterrupted without the logo.
If you only have the exported video without the original project, removing watermarks is generally not feasible without damaging the video. Specialized software exists to attempt watermark removal, but results vary and may not be legal depending on watermark ownership.
Frequently asked questions
How to make watermark for imovie?
To make a watermark for iMovie, start by designing a logo or text with a transparent background using an image editor like Photoshop or a free tool such as Canva. Save the file as a PNG to preserve transparency. This format allows you to overlay the watermark cleanly on your video when you import it into iMovie.
How to add logo watermark to video?
In iMovie on Mac, import your logo image and drag it above the video clip on the timeline. Then, select the logo clip, click the Video Overlay Settings button, and choose Picture in Picture. Resize and position the logo where you want it to appear, adjusting the duration to match your video length.
How to make a logo a watermark?
To make a logo a watermark, reduce its opacity so it doesn’t distract from the main video content. In iMovie, after placing the logo as a Picture in Picture overlay, use the opacity slider in the Video Overlay Settings to lower the transparency until the logo is subtle but still visible.
How to add a watermark to video?
Add a watermark by importing your logo image into your video editor, placing it as an overlay, and adjusting its size and position. In iMovie, using the Picture in Picture overlay option lets you position the watermark anywhere on the screen. Make sure the watermark clip spans the full length of your video to keep it visible throughout.
How to make logo watermark in word?
In Microsoft Word, insert your logo image and select it. Then go to the Picture Format tab, click Color, and choose Set Transparent Color to remove any unwanted background. Next, reduce the image’s brightness and contrast or set its transparency under Picture Transparency options to create a watermark effect suitable for export or printing.
What This Guide Does Not Cover
This guide focuses on adding a single logo watermark manually within iMovie on Mac, iPhone, or iPad. It does not cover advanced watermarking software that offers batch processing or automated watermark placement across multiple videos at once. Additionally, iMovie’s overlay features are limited to manual positioning and do not support multiple simultaneous logos or dynamic watermark effects.
If you require complex watermarking options like timed appearances, multiple overlays, or batch watermarking, consider using dedicated video editing software such as Final Cut Pro or Adobe Premiere Pro, which provide more advanced controls and automation.
Next Step: Practice Adding Your Logo Watermark
To get comfortable with watermarking in iMovie, open a sample video and try adding your logo using the Picture-in-Picture overlay setting. Experiment with resizing and positioning your watermark, adjusting its opacity to balance visibility without distracting from your content. This hands-on practice will help you understand how your watermark appears in different video contexts and ensure your branding is both clear and professional.
See also: How to Add Subtitles in iMovie: A Complete Step-by-Step Guide · How to Add Background Music in iMovie: A Step-by-Step Guide



