How to Change File Permissions with chmod in Mac Terminal
Learn how to control file access by changing permissions with chmod in Mac Terminal using numeric and symbolic modes.
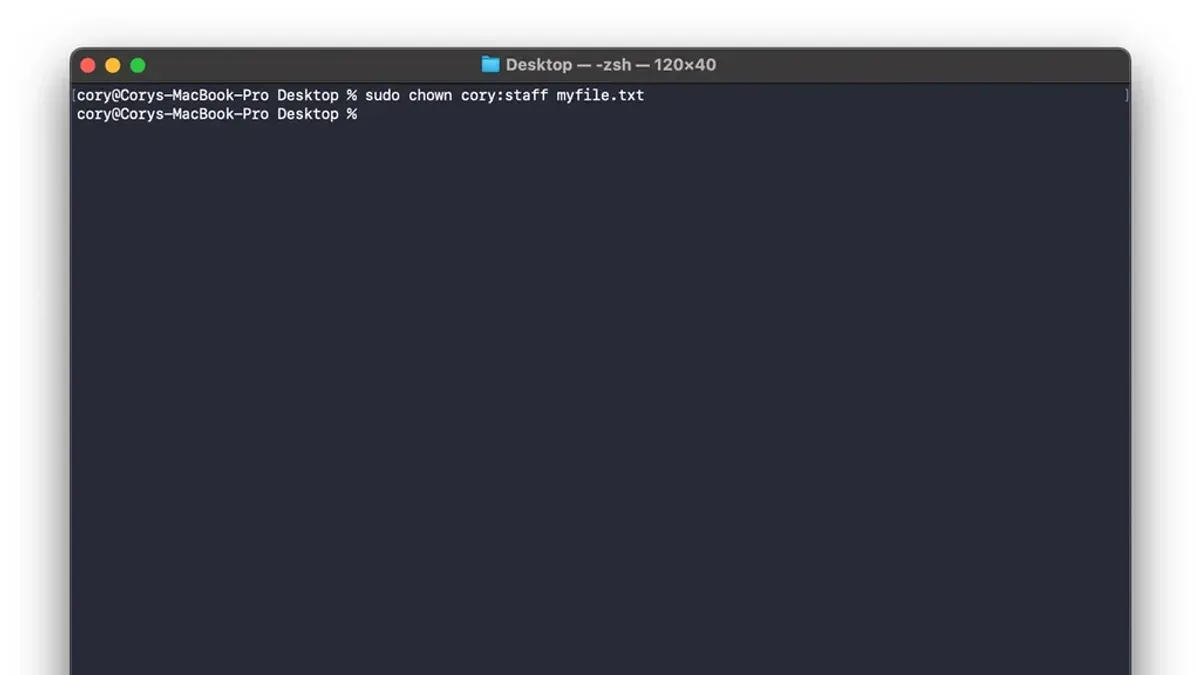
You’ve just downloaded a script or received a file that won’t open, or perhaps you need to restrict access to sensitive documents on your Mac. Adjusting file permissions is essential to ensure you or others have the correct access rights. Understanding how to change file permissions with chmod in Mac Terminal allows you to control who can read, write, or execute your files and folders.
This article explains file permissions and the two main chmod modes: numeric and symbolic. You will find step-by-step instructions to apply these modes confidently, guidance on handling directories versus files, and tips to troubleshoot common errors.
Key takeaways
- Use numeric mode to set exact permission values quickly, like 755 for read/write/execute by owner and read/execute for others.
- Symbolic mode offers flexible permission changes using operators like +, -, and = for users, groups, and others.
- Directories require execute permission to allow access and listing of contents, unlike regular files.
- Common errors often stem from missing sudo privileges or incorrect permission syntax.
- Always review permissions before and after changes to avoid locking yourself out of files.
Before you start: prerequisites for using chmod on Mac
To change file permissions using chmod, you first need to open the Mac Terminal app, which is located in Applications > Utilities > Terminal. When the Terminal opens, you will see a command prompt showing your current directory, typically your home folder.
Check your user privileges by typing whoami and pressing Enter; this command returns your current username. To see the permissions of a file or folder, use ls -l filename which displays file details including owner and permission settings.
Modifying permissions often requires appropriate privileges; if the file is owned by another user or requires admin rights, prepend commands with sudo and enter your password when prompted.
Familiarity with file system paths is essential—know the exact location of your target files or folders. Use commands like cd to navigate directories and pwd to confirm your current path.
Before making changes, back up important files or folders to prevent accidental lockouts or data loss. You can copy files using cp or duplicate them in Finder.
- Open Terminal from Applications > Utilities. The prompt shows your current directory (e.g.,
username$). - Type
whoamiand press Enter. You should see your username. - Use
ls -l filenameto check permissions of your target file; verify ownership and current settings. - Navigate to the file location with
cd, then confirm withpwd. - Make a backup copy of the file using
cp filename filename_backup.
Understanding file permissions and chmod modes
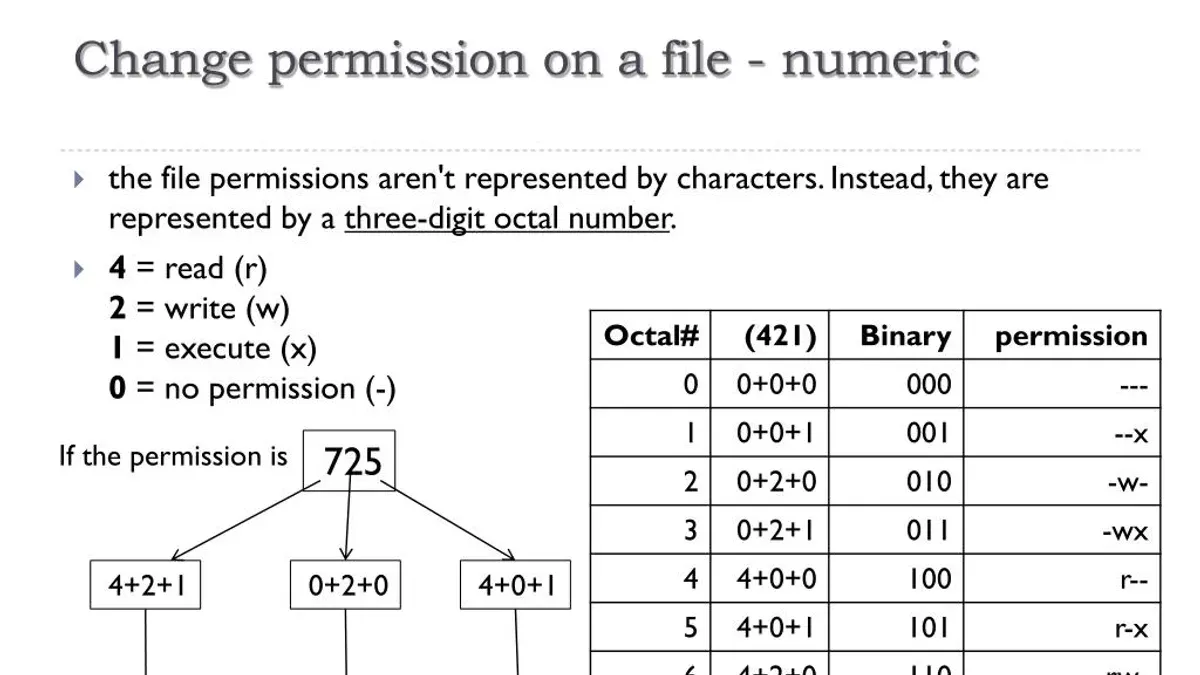
Unix file permissions control who can read, write, or execute a file or directory. These permissions are set separately for three categories: user (the file owner), group (users sharing a group), and others (everyone else). Each permission type is represented as r (read), w (write), and x (execute).
| Symbol | Permission | Numeric Value |
|---|---|---|
| r | Read | 4 |
| w | Write | 2 |
| x | Execute | 1 |
Permissions appear as a string like rwxr-xr-x. This breaks down to rwx for user (read, write, execute), r-x for group (read, execute), and r-x for others (read, execute). To convert this to numeric mode, add the values per category: user (4+2+1=7), group (4+0+1=5), others (4+0+1=5), resulting in 755.
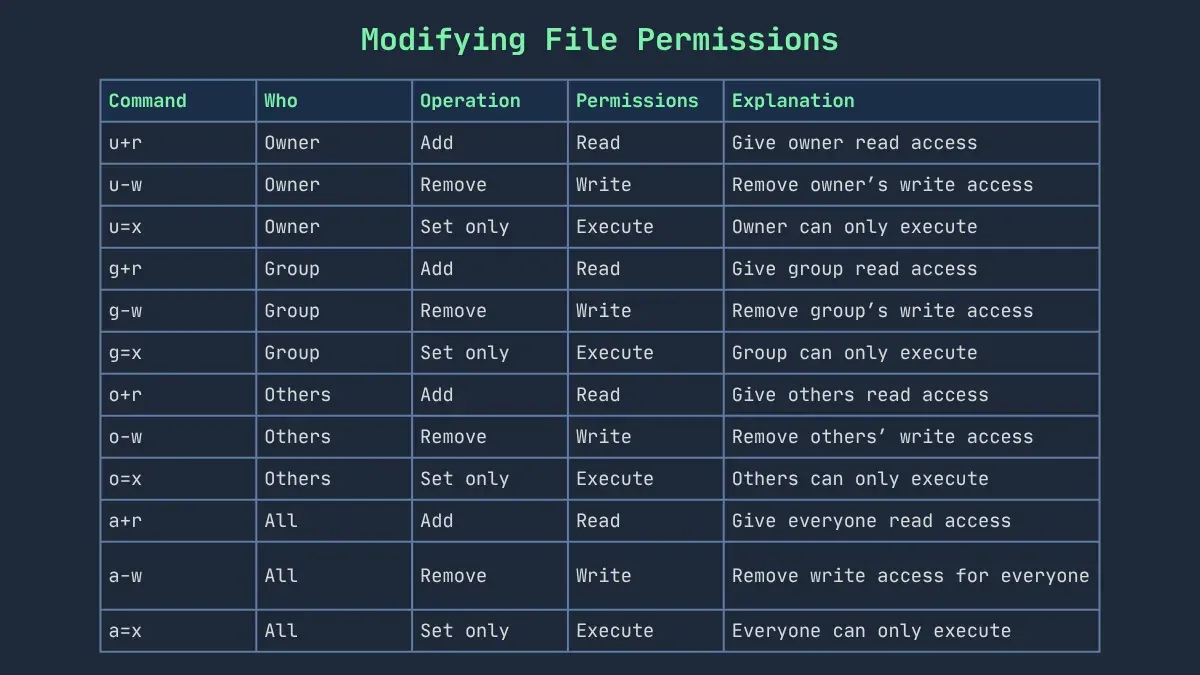
chmod supports two modes for changing permissions: numeric and symbolic. Numeric mode uses three digits representing user, group, and others’ permissions (e.g., 755). Symbolic mode uses letters and operators to add or remove permissions (e.g., u+rwx,g+rx,o+rx).
Use numeric mode for quick, precise changes when you know the exact permissions needed. Symbolic mode offers more flexibility and clarity when adding or removing specific permissions without affecting others.
To see permissions in Terminal, run ls -l filename. The output shows permission strings, owner, group, and other file details, helping you verify current settings before changes.
- Open Terminal and navigate to the file or folder.
- Type
ls -l filenameand press Enter. - Observe the first column showing permissions like
-rwxr-xr-x. - Interpret the first 10 characters: the first indicates file type ("-" for file, "d" for directory), followed by three sets of rwx for user, group, and others.
- Use this information to determine which chmod mode and values to apply for your permission change.
Step-by-step: change file permissions with numeric mode
The numeric mode in chmod uses three digits to represent permissions for the user, group, and others. Each digit is a sum of read (4), write (2), and execute (1) permissions. For example, 644 means read/write for the user, and read-only for group and others; 755 means full access for the user, and read/execute for group and others.
- Open Terminal and navigate to the directory containing your test file, e.g.,
cd ~/Documents. - Check current permissions with
ls -l testfile.txt. You might see-rw-r--r--, corresponding to 644. - To make the file executable (like a script), run
chmod 755 testfile.txt. This sets full permissions for you and read/execute for others. - Verify the change by running
ls -l testfile.txtagain. The output should now show-rwxr-xr-x, reflecting the 755 permissions. - For securing configuration files, use
chmod 600 config.cfgto grant read/write only to the owner, restricting group and others entirely. - Confirm the secure permissions by
ls -l config.cfg, which should display-rw-------.
These examples illustrate how numeric mode allows quick permission changes: 644 for standard files, 755 for executable scripts, and 600 for sensitive files. Adjusting permissions this way helps you control access effectively with simple commands.
Step-by-step: change file permissions with symbolic mode
Symbolic mode in chmod allows you to modify file permissions with precise control using a simple syntax: who (u=user, g=group, o=others, a=all), operation (+ to add, - to remove, = to set exactly), and permissions (r=read, w=write, x=execute).
- To add execute permission for the user on a file, type
chmod u+x filename. Confirm success by runningls -l filename, showing an x added in the user section. - Remove write permission from group with
chmod g-w filename. Check permissions again to see the w cleared in the group section. - Set read and write permissions exactly for others using
chmod o=rw filename. The permission string will reflect rw- for others. - To apply changes recursively to a directory and its contents, use
chmod -R g+rX foldername. This adds read permission and conditional execute permission to group for all files and subdirectories, as confirmed by listing permissions in the folder tree.
Symbolic mode excels in complex scenarios because it adjusts permissions relative to existing ones without overwriting unrelated bits. This makes it safer for incremental permission updates, especially when managing multiple user roles and nested directories.
Managing permissions on directories vs files
Permissions on directories differ fundamentally from those on files, mainly because the execute (x) permission on a directory controls your ability to access and navigate it. Without execute permission, you cannot list or enter the directory, even if you have read permissions.
When you use chmod -R to change permissions recursively on directories and their contents, exercise caution. Applying the same permission mode to both files and directories can cause access problems. For example, removing execute permission from directories will block navigation, while removing it from files may restrict execution.
Common permission settings illustrate these differences:
| Item | Typical Permission | Effect |
|---|---|---|
| File | rw-r--r-- (644) | Owner can read/write; group and others can read |
| Directory | rwxr-xr-x (755) | Owner can read/write/enter; group and others can read and enter |
For example, with a directory set to rwx------ (700), only the owner can list and enter it. If the execute bit is missing (rw-------), you cannot cd into that directory.
Terminal output example:
- Run
chmod 700 myfolder. You should be able to enter withcd myfolder. - Then run
chmod 600 myfolder. Attemptingcd myfolderwill fail with Permission denied.
These distinctions ensure you assign permissions that maintain both security and usability for files and directories.
Common errors and troubleshooting chmod on Mac Terminal
When using chmod, you may encounter Permission denied errors if you lack sufficient privileges. In these cases, prefix your command with sudo to run it as an administrator. For example, sudo chmod 755 /path/to/file should succeed where a plain chmod fails.
Incorrect numeric or symbolic syntax can cause unexpected permission changes. For instance, chmod 777 grants full access to everyone, which might be unintended. Double-check your numbers and symbols before applying changes.
If you accidentally lock yourself out of a file by removing all permissions, you can regain access with sudo chmod u+rw /path/to/file, restoring read and write rights to yourself.
Be cautious with special modes like the sticky bit, setuid, and setgid. The sticky bit (commonly set as chmod +t) limits file deletion in shared directories, but misusing it can restrict legitimate access. Setuid and setgid bits can run executables with elevated privileges; incorrect settings may create security risks or permission conflicts.
- Run a chmod command and note any errors like Operation not permitted – this indicates insufficient rights.
- Retry the command prefixed with
sudo– success should mean no error message. - Verify permissions with
ls -l /path/to/fileto confirm changes applied as intended. - If locked out, restore user access with
sudo chmod u+rw /path/to/fileand verify again. - Before using special bits, research their purpose and impact to avoid unintended restrictions.
Best practices for safe and effective file permission management
Changing file permissions directly affects system security and functionality. Begin by backing up files and testing permission changes on non-critical files to prevent unintended access or lockouts. Avoid using overly permissive settings like 777, which grant all users full read, write, and execute access—this is a common root cause of security breaches.
Document any permission changes, especially in workflows involving multiple users or teams. Keeping a record helps trace issues and maintain consistent security policies.
Regularly audit permissions on critical files and directories to ensure they remain properly restricted. For example, misconfigured permissions on configuration files or sensitive data can expose your system to unauthorized access or data loss.
Use this checklist for safer chmod usage:
- Backup the target file or directory; after backup, verify the backup exists and is accessible.
- Apply permission changes on a test file; confirm the new permissions with
ls -l. - Use the least permissive settings necessary; ensure users retain required access without exposing files broadly.
- Document the exact chmod commands and affected paths; share this within your team if applicable.
- Schedule periodic reviews of permissions on important files; any unexpected changes should be investigated promptly.
- How to Generate an SSH Key in Mac Terminal: A Step-by-Step Guide
- How to Use SSH in Mac Terminal: A Clear Step-by-Step Guide
- How to Show Hidden Files Using Mac Terminal: A Clear Step-by-Step Guide
- How to Find Large Files in Mac Terminal: Step-by-Step Guide
Frequently asked questions
What does each number in chmod's numeric mode stand for?
Each digit in chmod's numeric mode represents permissions for user, group, and others, in that order. The numbers are sums of read (4), write (2), and execute (1) permissions. For example, 7 means read, write, and execute (4+2+1), while 5 means read and execute (4+1).
How do I make a script executable using chmod?
To make a script executable, use chmod with the execute permission for the appropriate user class. For instance, chmod u+x script.sh adds execute permission for the file owner, allowing you to run the script.
What is the difference between user, group, and others in permissions?
User refers to the file owner, group includes users in the file's group, and others means everyone else. Permissions can be set differently for each category to control access precisely.
Can I undo permission changes if I make a mistake?
Yes, you can revert permission changes by applying the previous chmod value if you remember it. If unsure, check the original permissions using ls -l before changes or restore from a backup if available.
What this guide does not cover and who should look elsewhere
This guide does not cover advanced ACL (Access Control List) settings available on Mac, which provide more fine-grained permission control beyond chmod. If you require detailed permission configurations for complex environments or shared drives, exploring the macOS Finder's Get Info window or using the chmod +a command for ACLs is recommended. Additionally, this guide focuses on local file permissions and does not address network file system permissions or macOS System Integrity Protection restrictions.
For your next step, try applying chmod commands on a test file or folder in your user directory. Experiment with both numeric and symbolic modes to see how changing permissions affects access. This hands-on approach will help you confidently manage permissions without risking important system files or data.