How to Set Up Family Sharing on Mac: A Clear Step-by-Step Guide
This guide shows you how to family sharing setup on Mac to share purchases, subscriptions, and storage with your household effortlessly.
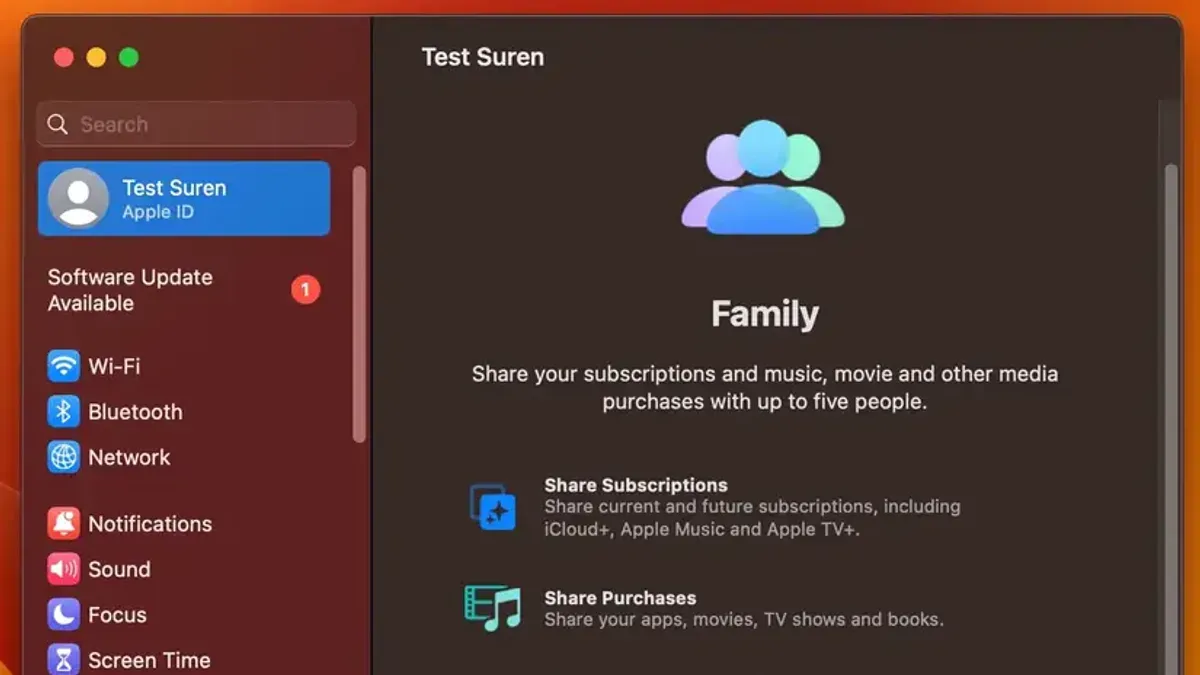
Setting up Family Sharing on your Mac can simplify sharing purchases, subscriptions, and storage plans with your household. Whether you're managing multiple Apple IDs or coordinating with family members who use Windows PCs, knowing how to family sharing setup on Mac correctly is essential to make the most of Apple's ecosystem.
This guide walks you through the steps to establish Family Sharing on your Mac, add members from various devices, and manage settings effectively. You'll also learn how Family Sharing functions across Apple and non-Apple platforms, plus tips to troubleshoot common setup problems.
Key takeaways
- Start Family Sharing by going to System Preferences > Family Sharing on your Mac.
- You can add family members with Apple IDs from Mac, iPhone, or even Windows devices via iCloud for Windows.
- Shared purchases, Apple subscriptions, and iCloud storage are accessible to all family members with proper permissions.
- Managing Family Sharing settings is possible both on Mac and through the Apple ID website on PC.
- Common issues include Apple ID conflicts and invitation errors, often resolved by signing out and back in or checking network settings.
Before you start: What you need for Family Sharing on Mac
To set up Family Sharing on your Mac, you first need an Apple ID signed in on the device. Family Sharing requires macOS Yosemite (10.10) or later; ensure your Mac is running a compatible version by checking System Preferences > Software Update. Keeping your Mac updated helps avoid setup issues.
One person acts as the family organizer who sets up the group and invites others. Apple allows up to six family members per group, including the organizer. Each member must have their own Apple ID.
Family Sharing works across Apple devices such as Mac, iPhone, iPad, and even Windows PCs with iCloud for Windows installed. On a PC, you can access shared content but cannot create or manage the family group.
A stable internet connection is necessary throughout the setup process. Additionally, the family organizer must have a valid payment method on file with Apple ID settings, such as a credit card or PayPal account. This payment method is used for family purchases and subscriptions.
- Open System Preferences on your Mac and click Apple ID. You should see your signed-in Apple ID account details. If not signed in, select Sign In and enter your Apple ID credentials.
- Go to System Preferences > Software Update to confirm your macOS version is Yosemite (10.10) or later. If an update is available, install it and restart your Mac.
- In Apple ID preferences, click Payment & Shipping to verify a valid payment method is set up. Add or update a credit card or PayPal if needed. You will see a confirmation once the payment method is active.
- Ensure your internet connection is active by opening a web page or running a network test. A working connection is required to proceed with Family Sharing setup.
How to set up Family Sharing on Mac
- Open System Settings from the Apple menu. Once open, click your name or Apple ID at the top of the sidebar to access Apple ID preferences. You should see your Apple ID information displayed.
- Click Family Sharing in the sidebar. If this is your first time setting up Family Sharing, you will see an option to Set Up Your Family. Click this to begin the setup process.
- As the family organizer, confirm your payment method if prompted. This ensures purchases made by family members are billed appropriately. After confirmation, you will be taken to the invitation screen.
- Invite family members by entering their Apple ID email addresses or selecting contacts from your Mac. Invitations can be sent via email or iMessage. After sending, you will see each invited member listed with a “Pending” status until they accept.
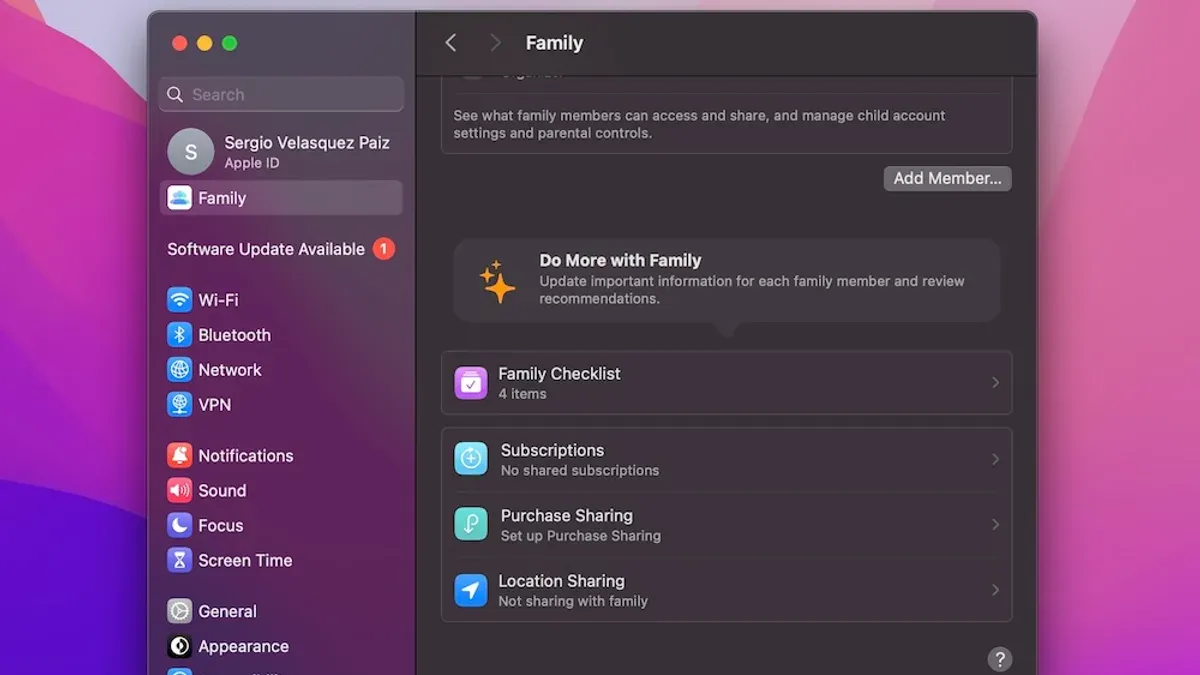
- Once family members accept the invitation on their devices, their status will update to “Active.” You can then configure shared features such as Purchase Sharing, Location Sharing, and Shared Photo Albums by toggling the respective options in the Family Sharing settings.
- Review each shared feature carefully. For example, enabling Purchase Sharing allows all family members to access each other's eligible App Store and iTunes purchases, but all purchases will be billed to the organizer’s payment method. Location sharing is useful for keeping track of devices, but some family members may prefer privacy.
- When setup is complete, you will see a summary page listing all active family members and enabled shared features. You can always return to System Settings > Apple ID > Family Sharing to add members or adjust sharing preferences.
Note: Screenshots of each step typically show the Apple ID sidebar, the Family Sharing setup screen, the invitation entry box, and the final family member list with sharing toggles. Successful addition of family members is confirmed by their status changing from “Pending” to “Active.”
How to add to Family Sharing Apple on Mac and other devices
Adding members to Family Sharing can be done from your Mac, iPhone, or even a Windows PC using iCloud.com. While the process varies slightly, managing invitations and membership remains straightforward across platforms.
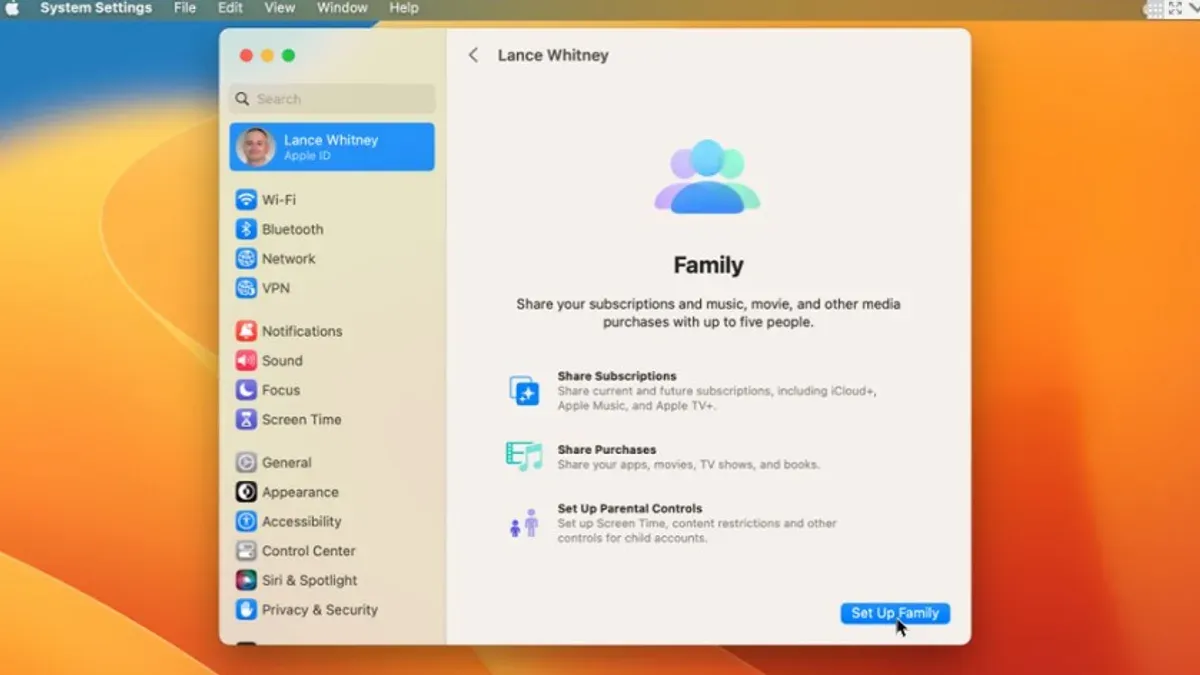
- On your Mac, open System Preferences and click Apple ID, then select Family Sharing.
- Click the + button to add a family member. Enter their Apple ID email and choose whether to send an invitation or create an account for a child.
- The invited member receives a notification on their Apple device or an email if they use a non-Apple device.
- For example, if you invite a member from your Mac, they can accept the invitation directly on their iPhone by opening Settings, tapping their name, and selecting Invitations. Once accepted, the new member appears in your Family Sharing list on all devices.
- On an iPhone, you navigate to Settings > Your Name > Family Sharing, tap Add Member, and follow the prompts to invite someone similarly.
- Windows PC users can visit iCloud.com, sign in, and send invitations via the Family section, but device-based acceptance is still required on an Apple device.
- To manage pending invitations or remove members, return to the Family Sharing section on your Mac or iPhone, where you can view pending invites and use the Remove option to revoke access if needed.
Each platform offers a clear invitation flow, but accepting invitations generally requires an Apple device. Managing your family group is centralized, ensuring you control membership regardless of where invitations originated.
How does Family Sharing work on Apple devices including Mac
Family Sharing integrates key Apple services and features across devices, allowing your household to share purchases, subscriptions, storage, and more while maintaining individual accounts.
Shared purchases and Apple subscriptions mean that apps, music, movies, and Apple One services bought by one family member can be accessed by others without extra cost. For example, if a family member buys an app on their iPhone, it can be downloaded on your Mac without additional payment.
iCloud storage plans can be shared among family members, letting everyone use a single pooled storage plan while keeping private files separate.
Screen Time and parental controls allow the family organizer to set usage limits and restrictions on children’s devices, applicable across iPhone, iPad, and Mac.
Location sharing through the Find My app helps family members locate each other’s devices and share locations, providing peace of mind and easy device recovery.
Shared photo albums and family calendars keep everyone connected with shared memories and coordinated schedules.
| Feature | Mac | iPhone | PC (via iCloud) |
|---|---|---|---|
| Shared Purchases & Subscriptions | Full access | Full access | Limited (no app sharing) |
| iCloud Storage Sharing | Full access | Full access | Full access |
| Screen Time & Parental Controls | Full access | Full access | None |
| Location Sharing (Find My) | Full access | Full access | Limited (via iCloud.com) |
| Shared Photo Albums & Calendars | Full access | Full access | Full access (via iCloud apps) |
How to manage Apple Family Sharing settings on Mac and PC
Managing Family Sharing settings involves adjusting payment methods, controlling shared features, and setting up parental controls. You can do this directly on your Mac or, if using a PC, through iCloud.com.
Access Family Sharing settings on Mac
- Open System Settings on your Mac and click your Apple ID at the top of the sidebar. You will see your account overview.
- Select Family Sharing from the sidebar. This page shows all family members and shared features.
- To change the organizer's payment method, click Payment & Shipping under your Apple ID overview, then select Edit Payment Method. Enter new payment details and save. A confirmation message will appear once updated.
- To enable or adjust Ask to Buy, select a child’s name under family members, then toggle Ask to Buy on or off. The setting saves automatically, and the child will receive notifications accordingly.
- For Screen Time, go to System Settings > Screen Time, choose the family member from the dropdown, and set app limits or downtime. Changes apply immediately, and the member's device will reflect these restrictions.
- Manage shared subscriptions and iCloud storage by clicking Subscriptions or iCloud in the Apple ID menu. You can upgrade storage or review subscription details here.
Access Family Sharing settings on PC via iCloud.com
- Visit iCloud.com and sign in with your Apple ID.
- Click your name or profile icon, then select Account Settings.
- Under Family Sharing, you can view family members and shared features.
- To change the payment method, click Manage Payments, then update your payment information. A confirmation will appear upon saving.
- Note that parental controls like Ask to Buy and Screen Time cannot be adjusted on iCloud.com; these require an Apple device.
By following these steps, you can efficiently manage payment methods, parental controls, and shared subscriptions across your family group on both Mac and PC.
How to set up Family Sharing on iPhone and use it with Mac
Starting Family Sharing on your iPhone allows you to create a family group that syncs seamlessly across all your Apple devices, including your Mac. Once set up, shared purchases, subscriptions, and other features become accessible on your Mac without additional setup.
- Open the Settings app on your iPhone and tap your Apple ID banner at the top.
- Tap Family Sharing, then select Set Up Your Family. You will be guided to become the family organizer and invited to add family members.
- Invite family members by entering their Apple ID email addresses or sending an invitation via Messages. Each invited member must accept the invite on an Apple device to join.
- Once your family group is active, shared features like Apple Music, iCloud storage, and App Store purchases are automatically enabled.
- On your Mac, open System Settings and click your Apple ID to verify that your family group appears under Family Sharing. This confirms syncing across devices.
- Access shared content on your Mac through the respective apps, such as the App Store for shared purchases or the Music app for shared subscriptions. You will see family-shared items marked accordingly.
For example, if you started Family Sharing on your iPhone and invited your spouse, once they accept on their device, both of you will see shared apps and subscriptions immediately when you sign in with your Apple IDs on the Mac. Screenshots of the App Store's Purchased tab and Music app's shared library on Mac clearly indicate shared content availability.
Troubleshooting common Family Sharing setup issues on Mac
When setting up or using Family Sharing on your Mac, you might encounter certain issues. Below are common problems and practical solutions to help you resolve them efficiently.
Invitation not received or accepted
If a family member does not receive or cannot accept an invitation, first confirm their Apple ID email is correct. They should check their email spam folder and ensure they are signed in to iCloud on an Apple device or the latest iOS, iPadOS, or macOS.
- Open System Preferences > Apple ID > Family Sharing.
- Resend the invitation by selecting the pending member and clicking “Resend Invitation.”
- Ask the invitee to open the invitation on an Apple device and accept it.
Successful acceptance removes the pending status and adds the member to your family group.
Family member limits reached
Apple allows up to six family members in one group. If you see an error like “You have reached the maximum number of family members,” you'll need to remove someone before adding another.
- Go to System Preferences > Apple ID > Family Sharing.
- Select the member to remove and click the “Remove” button.
- Confirm removal, then invite the new member.
The family group will update to reflect changes immediately.
Payment method errors
Family Sharing requires a valid payment method for the organizer. If you see an error such as “Your payment method was declined,” verify your billing information in Apple ID settings and update it if needed.
- Open System Preferences > Apple ID > Payment & Shipping.
- Review and update your payment details.
- Try inviting members again after updating.
Ensure your payment method supports recurring charges to avoid interruptions.
Syncing issues across devices
Sometimes shared purchases, subscriptions, or locations don’t sync properly. To fix this, sign out of iCloud on the affected device and sign back in.
- Open System Preferences > Apple ID.
- Click “Overview” and choose “Sign Out.”
- Restart the Mac, then sign back in with your Apple ID.
This refresh often resolves sync delays and restores access to shared content.
Managing multiple families or switching organizers
You can only belong to one Family Sharing group at a time. If you want to switch families or change the organizer, the current organizer must remove you. Then, you can join or create a new family.
- Ask the current organizer to remove you via System Preferences > Apple ID > Family Sharing.
- After removal, accept a new invitation or create a new family group.
Note that switching families may temporarily restrict access to shared purchases or subscriptions until the process completes.
For persistent issues, consult Apple Support's official resources or contact support directly to explore device-specific solutions.
Frequently asked questions
How to set up family sharing apple?
To set up Family Sharing on Apple devices, start by opening the System Preferences on your Mac and click on "Family Sharing." Follow the prompts to start your family group by adding a payment method and inviting family members via their Apple IDs. Each invited member must accept the invitation to join and access shared services.
How to create family sharing on apple?
Creating Family Sharing involves designating yourself as the organizer in the Family Sharing settings on your Mac or iPhone. After confirming your Apple ID and payment details, you can add up to five other members by sending invitations through Messages or Email. Once they accept, the family group is active and ready to share purchased content and subscriptions.
How to turn on family sharing apple?
Turning on Family Sharing is done through the System Preferences on Mac by selecting "Family Sharing" and enabling the feature. On iPhone, go to Settings, tap on your Apple ID, then tap "Family Sharing" and follow the instructions to activate it. You must have a valid payment method linked to your Apple ID to complete setup.
How to use apple family sharing?
Apple Family Sharing lets you share purchased apps, music, subscriptions such as Apple Music or Apple TV+, and iCloud storage with family members. You can also share locations and set up parental controls for children’s devices. Each member uses their own Apple ID while benefiting from shared content and services managed by the family organizer.
How to set family sharing on iphone?
On your iPhone, open Settings and tap your name at the top to access Apple ID settings. Tap "Family Sharing" and select "Set Up Your Family." Follow the steps to add family members by entering their Apple IDs or sending invitations. Confirm a payment method is set to allow shared purchases and subscriptions.
What this advice does not cover
This article does not cover Family Sharing functionality on non-Apple devices beyond basic PC access through iCloud.com. It also does not address enterprise or educational Apple ID family sharing setups, which often have additional restrictions or custom configurations managed by IT departments.
If you need to manage Family Sharing in a corporate or school environment, consult your system administrator or Apple business support for tailored guidance.
The most useful next step is to ensure each family member’s Apple ID is correctly signed in on their device and that you have enabled purchase sharing and location sharing within System Preferences > Family Sharing on your Mac. This setup ensures smooth access to shared content and services across devices and helps avoid common pitfalls such as missing shared purchases or syncing issues.