How to Fix DaVinci Resolve GPU Memory Full Error on Mac
Discover effective ways to fix DaVinci Resolve GPU memory full error on Mac and optimize your video editing workflow without hardware upgrades.
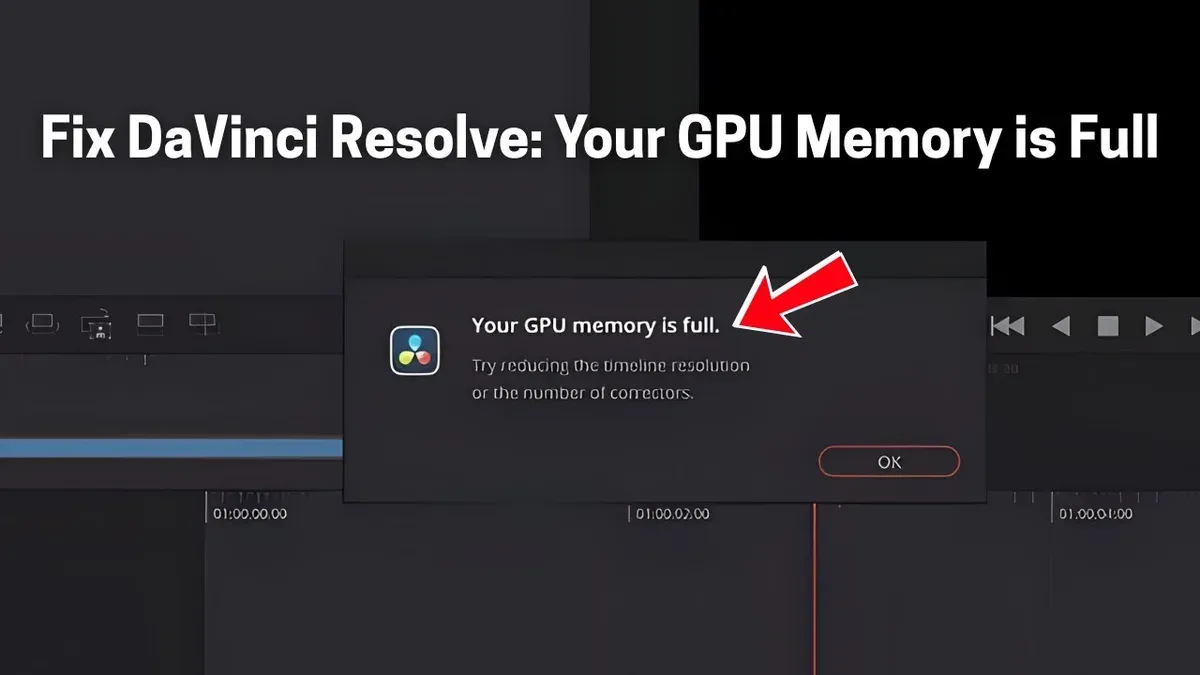
When working on a complex video project in DaVinci Resolve on your Mac, you might suddenly encounter a GPU memory full error that halts your editing process. This message can be frustrating, especially if you rely on your current setup and want to avoid upgrading hardware unnecessarily.
This article explains how to fix DaVinci Resolve GPU memory full on Mac by focusing on macOS-specific GPU memory management and DaVinci Resolve’s configuration. You’ll learn practical steps to optimize GPU usage, adjust project settings, and manage background processes to keep your workflow smooth.
Key takeaways
- Adjust DaVinci Resolve’s GPU selection under Preferences > Memory and GPU to optimize resource allocation.
- Reduce timeline resolution and disable unnecessary effects to lower GPU load.
- Keep macOS and DaVinci Resolve updated to benefit from performance improvements.
- Close background apps that consume GPU resources, visible via Activity Monitor’s GPU History.
- Reset Resolve’s cache and preferences safely to clear corrupt or overloaded GPU memory usage.
Before you start: What you need to know and prepare
Fixing GPU memory full errors in DaVinci Resolve on Mac requires understanding your system and software setup. DaVinci Resolve’s interface can be complex, so ensure you are familiar with accessing its preferences via DaVinci Resolve > Preferences and the Project Settings. Knowing your Mac’s GPU type—whether integrated like the Apple M-series GPU or dedicated such as AMD Radeon Pro—is crucial because GPU memory capacity and management differ significantly.
Common Macs include the MacBook Air and MacBook Pro with integrated GPUs, typically featuring shared memory up to 16GB, and Mac Pro or iMac models with dedicated GPUs offering discrete VRAM between 4GB to 16GB or more. macOS manages GPU resources differently than Windows, often sharing system memory with integrated GPUs.
Also confirm your current versions by clicking the Apple menu > About This Mac for macOS, and in DaVinci Resolve, go to DaVinci Resolve > About DaVinci Resolve. Before making changes, backup your project files externally to prevent data loss. Finally, ensure you have access to both DaVinci Resolve preferences and macOS System Settings for troubleshooting.
- Check your Mac model and GPU specs: Click Apple menu > About This Mac, and note the GPU listed. This confirms your hardware capabilities.
- Verify your macOS version: In About This Mac, check the macOS version number. Updates can affect GPU management.
- Open DaVinci Resolve, navigate to DaVinci Resolve > About DaVinci Resolve to confirm the software version.
- Locate your active project files in Finder, then copy them to an external drive or cloud storage. After the backup, you can safely attempt fixes.
- Open DaVinci Resolve preferences via DaVinci Resolve > Preferences and macOS System Settings to confirm you can access GPU and memory related options.
How DaVinci Resolve uses GPU memory on Mac
DaVinci Resolve relies heavily on GPU memory for caching video frames, applying effects, and ensuring smooth playback. On Mac systems, the way GPU memory is allocated depends on whether you have an integrated GPU, like the Apple M-series chips, or a dedicated GPU found in some Intel-based Macs. Integrated GPUs share memory with system RAM, which can limit available GPU memory during intensive tasks.
macOS manages GPU memory differently than Windows, often reserving portions for system and display tasks, which reduces the effective memory available to Resolve. This is why you may encounter GPU memory full errors even when your system RAM appears sufficient.
For example, Activity Monitor shows that during heavy projects, GPU memory usage can approach the maximum pool allocated to the GPU, causing Resolve to report memory full errors. Macs with integrated GPUs like the M1 Pro may have 16GB unified memory, but a significant portion is reserved by macOS, limiting Resolve's usable GPU memory. Conversely, Macs with dedicated GPUs generally have a fixed VRAM size, such as 4GB or 8GB, which sets a hard cap.
Understanding these nuances helps explain why GPU memory errors occur and highlights the importance of managing Resolve’s GPU usage within your Mac’s specific memory constraints.
Step 1: Adjust DaVinci Resolve GPU and memory settings
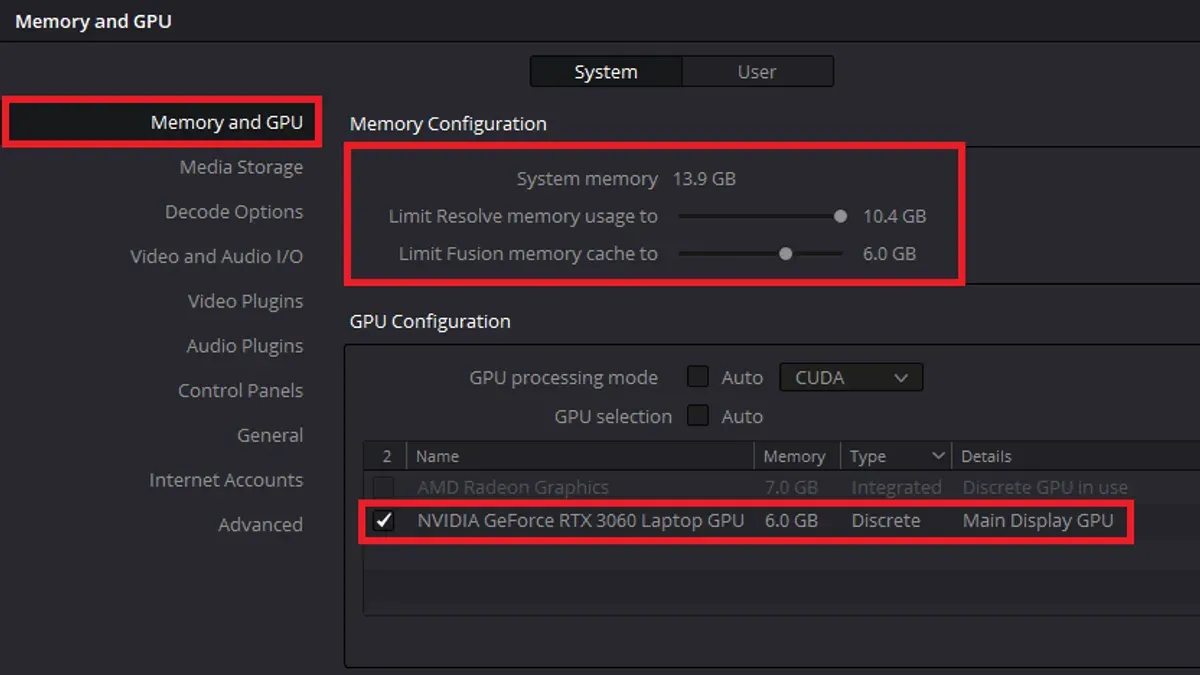
- Open DaVinci Resolve and go to DaVinci Resolve > Preferences > System > Memory and GPU. You should see the current GPU detected by Resolve. Confirm that your preferred GPU is selected under GPU Selection; on Macs with both integrated and discrete GPUs, explicitly choosing the discrete GPU can improve performance and reduce memory errors.
- Within the same tab, locate the GPU Processing Mode dropdown. Select Metal as the preferred GPU API for best macOS compatibility. This setting ensures Resolve leverages GPU resources efficiently.
- Adjust the GPU Memory Usage slider, if available, to allocate more VRAM to DaVinci Resolve. Be cautious not to allocate so much that other system processes lack GPU resources, which could cause instability.
- Navigate to Playback > Proxy Mode and set it to Quarter Resolution or Half Resolution. Lowering proxy resolution reduces GPU workload during editing, helping avoid memory overload without affecting final output quality.
- Enable Optimized Media in the media pool by right-clicking clips and selecting Generate Optimized Media. This reduces GPU demand by using lower-resolution proxies for playback.
- After applying these changes, monitor GPU memory usage using the macOS Activity Monitor’s GPU History or third-party tools. You should observe a noticeable reduction in GPU memory consumption during typical editing tasks.
Adjusting these internal settings balances GPU load and memory usage, preventing errors while maintaining smooth editing performance on Mac systems.
Step 2: Manage timeline and project settings to reduce GPU load
Your project composition directly impacts GPU memory usage. Simplifying timeline complexity by reducing layered effects and node trees can significantly lower GPU demands. For example, a timeline with multiple nested nodes and heavy color grading can be streamlined by consolidating nodes and disabling unnecessary effects.
Using optimized media or proxy files is another effective method. Generate these via Playback > Render Cache > Smart or User, or create proxies in lower resolution to reduce real-time GPU decoding. When proxies are active, playback is smoother and GPU memory usage drops.
Limiting timeline resolution during editing helps conserve GPU resources. Temporarily lower timeline resolution in Project Settings > Master Settings > Timeline Resolution to 720p or lower, then restore it for final render.
Lastly, identify GPU-intensive effects like ResolveFX or OpenFX that strain GPU memory. Replace some with CPU-based alternatives found in the Effects Library, or disable them during editing to maintain responsiveness.
- Open your timeline and assess node complexity; collapse or disable redundant nodes. You should see reduced GPU memory usage in DaVinci Resolve’s Performance Monitoring panel.
- Enable optimized media or proxies via Playback > Render Cache > Smart, then verify smoother playback with less GPU load.
- Lower timeline resolution in Project Settings > Master Settings > Timeline Resolution to 1280x720; playback should become less GPU-intensive.
- Review applied effects, disable high-demand GPU effects temporarily, and switch some to CPU alternatives. GPU memory usage should decrease accordingly.
In practice, reducing layered nodes and enabling proxies has helped users cut GPU memory usage by noticeable margins, preventing memory full errors and improving editing fluidity on Macs.
Step 3: Update and maintain macOS and DaVinci Resolve software
Keeping macOS and DaVinci Resolve updated helps resolve GPU memory management issues and fixes bugs that can cause memory full errors. Updates often include improvements that optimize how GPU resources are allocated and used on Macs.
- Check for macOS updates: Open the Apple menu, select System Settings, then General > Software Update. If an update is available, click Upgrade Now and follow the prompts until the installation completes. Successful installation means your Mac will restart and boot into the updated system.
- Update DaVinci Resolve: Launch DaVinci Resolve, go to the DaVinci Resolve menu, and select Check for Updates. Download and install the latest stable version if available. After updating, Resolve will prompt you to restart the app; do so to apply changes.
- Restart your Mac and DaVinci Resolve: After both updates, restart your Mac again to clear GPU memory caches and system processes. Then launch DaVinci Resolve to work with a refreshed GPU environment.
For example, the DaVinci Resolve 17.4 update addressed several GPU memory allocation issues on Mac that previously caused crashes and memory full errors during complex timeline playback. Users reported smoother performance and fewer memory warnings after applying this update.
Step 4: Free up GPU memory by closing background apps and processes
Other applications running on your Mac can compete with DaVinci Resolve for limited GPU memory, leading to memory full errors. Identifying and closing these GPU-intensive apps can free resources and improve performance.
- Open Activity Monitor from the Utilities folder within Applications.
- Click the Window menu and select GPU History to view real-time GPU usage across all apps.
- Switch to the Memory tab to check overall memory pressure and which processes consume the most RAM.
- Look for apps with high GPU usage or memory allocation, such as web browsers with multiple tabs, video players, or other creative software like Adobe apps.
- Select any unnecessary app or process and click the Quit Process button (the stop sign icon) in the top-left corner of Activity Monitor.
- Confirm Force Quit if the app does not close normally.
- Return to DaVinci Resolve and observe reduced GPU memory pressure, which should lessen or eliminate memory full errors.
Background processes can also use GPU resources without obvious windows. If GPU memory issues persist, check for hidden helpers or daemons via Activity Monitor's process list and quit those that are non-essential during editing sessions.
Closing browser tabs or pausing streaming services can significantly reduce GPU load, as these often use hardware acceleration. Balancing your system’s workload this way helps maintain stable GPU memory availability for DaVinci Resolve.
Step 5: Reset DaVinci Resolve preferences and cache safely
Resetting DaVinci Resolve preferences can resolve corrupted settings that cause GPU memory full errors. Before proceeding, back up your preferences file located at ~/Library/Preferences/Blackmagic Design/DaVinci Resolve/Preferences.xml to a safe location.
- Close DaVinci Resolve completely.
- Open Finder, press Command + Shift + G, and navigate to ~/Library/Preferences/Blackmagic Design/DaVinci Resolve/.
- Move the Preferences.xml file to your backup folder.
- Restart DaVinci Resolve; it will generate a fresh preferences file. You should see default settings restored.
- To clear cache, go to DaVinci Resolve's menu bar and select Playback > Delete Render Cache > All. This removes cached files that can occupy GPU memory.
- Optionally, clear optimized media via Playback > Delete Optimized Media to free additional resources.
Resetting preferences helps when GPU memory errors stem from configuration corruption, as seen in cases where users regained stability after this process. However, it won't fix hardware limitations or deeply embedded software bugs. Cache size directly impacts GPU memory since large or corrupted cache files consume GPU resources and cause errors.
Troubleshooting common failure points
If GPU memory full errors persist after applying software fixes, the issue may lie with your Mac’s GPU hardware limitations. Signs include frequent crashes, sluggish performance, or error messages like “GPU Memory Full” or “CUDA error: out of memory” (less common on Macs but possible with external GPUs).
To isolate hardware issues, test your GPU using other demanding apps like Final Cut Pro or Adobe Premiere Pro. If these also struggle or show memory warnings, your GPU may be the bottleneck.
Consider these Mac GPUs and their DaVinci Resolve suitability:
| Mac GPU Model | VRAM | DaVinci Resolve Suitability |
|---|---|---|
| Apple M1/M2 Integrated GPU | Shared (up to 10GB) | Good for basic editing; limited for heavy color grading or 4K. |
| AMD Radeon Pro 5000/6000 Series | 4GB–16GB | Strong for professional editing; handles complex projects well. |
| External GPUs (eGPU) with AMD cards | Varies | Can improve performance but macOS support is limited and may require workarounds. |
- Confirm GPU is the bottleneck by running other GPU-intensive apps smoothly. If they perform well, revisit software settings.
- If hardware limits are confirmed, evaluate upgrading your Mac or adding an eGPU compatible with macOS.
- Before hardware changes, contact DaVinci Resolve support for tailored advice or Apple Support for hardware diagnostics.
Frequently asked questions
Why does DaVinci Resolve say GPU memory is full even when my Mac has enough RAM?
DaVinci Resolve distinguishes between system RAM and GPU memory (VRAM). Even if your Mac has ample RAM, the GPU memory can still fill up because Resolve uses VRAM for processing video effects, color grading, and timeline rendering. macOS manages VRAM differently than other systems, and integrated GPUs share system memory, which can limit available GPU memory and trigger the error.
Can I use an external GPU (eGPU) to fix GPU memory issues on Mac?
Using an eGPU may improve GPU performance and memory capacity, especially if your Mac’s built-in GPU is limited. However, compatibility depends on your Mac model and macOS version, and some DaVinci Resolve tasks might not fully leverage the eGPU. Additionally, macOS handles eGPU resource allocation uniquely, so results can vary and may not completely resolve GPU memory errors.
How do proxies help reduce GPU memory usage in DaVinci Resolve?
Proxies are lower-resolution or lower-bitrate versions of your source footage that reduce the processing load on your GPU. By working with proxies, Resolve uses less GPU memory during editing and playback, which helps avoid memory full errors. You can enable proxies via the Media Pool by right-clicking clips and selecting "Generate Proxy Media," then switching to proxy mode in playback settings.
Is resetting DaVinci Resolve preferences safe and will it delete my projects?
Resetting preferences in DaVinci Resolve restores default settings without deleting your existing projects or media files. It can resolve configuration issues causing GPU memory errors. To reset preferences safely, hold Option while launching Resolve and confirm the reset prompt; your project database remains intact.
What this advice does not cover and who should seek other solutions
This guide focuses on software and settings fixes within DaVinci Resolve and macOS to manage GPU memory usage effectively. It does not cover hardware upgrades, repairs, or advanced macOS system modifications such as terminal commands or system file alterations that could risk data loss or affect system stability. If your Mac’s GPU hardware is outdated or physically damaged, or if you require professional-grade performance improvements, consulting an Apple-certified technician or considering GPU hardware enhancements may be necessary.
For most users, the single most useful next step is to carefully review and adjust DaVinci Resolve’s memory and GPU settings under Preferences > System > Memory and GPU. Ensuring that GPU processing mode is set appropriately for your Mac’s hardware—typically Metal on modern Macs—and limiting the number of GPU processing threads can prevent memory overloads. Pair this with closing unnecessary background applications to free up resources, which often resolves the GPU memory full error without requiring hardware changes.