How to Install MonitorControl on Mac for Effective External Display Management
This guide shows how to install MonitorControl on Mac for seamless external monitor brightness and volume control using keyboard shortcuts and menu bar access.
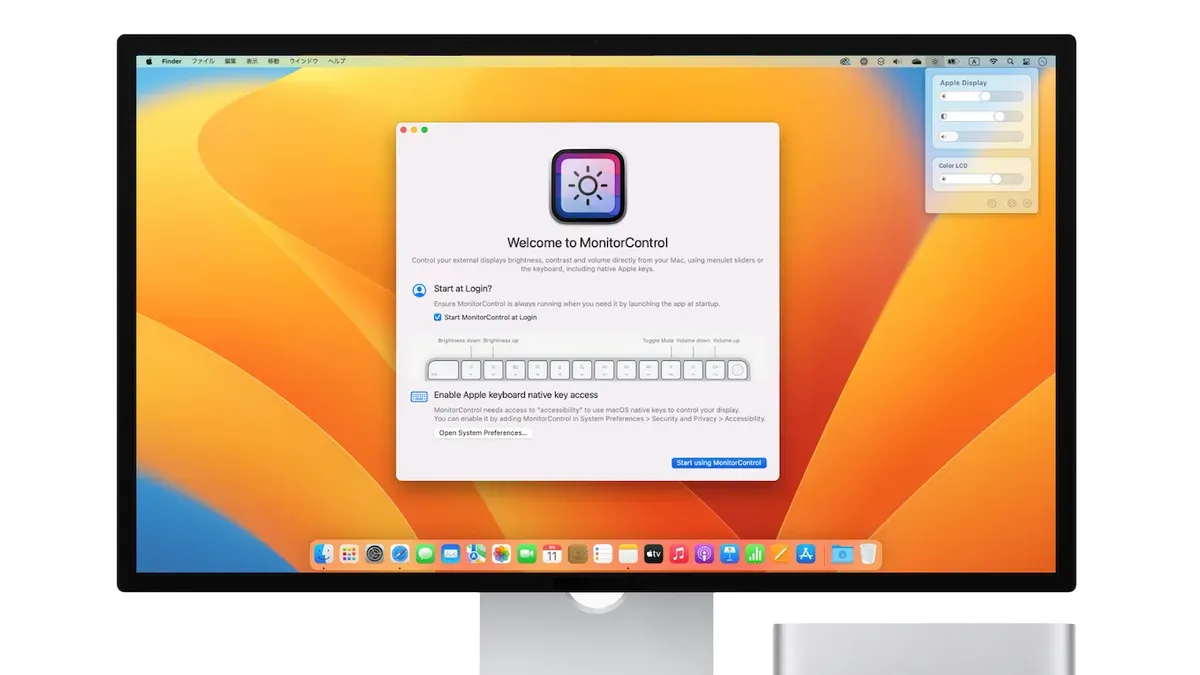
Connecting an external monitor to your Mac often brings convenience but also challenges, especially when you want to control brightness and volume without juggling multiple remotes or clunky menus. You might notice that the built-in macOS controls don’t always adjust your external display’s settings as intuitively as the internal screen.
This guide explains how to install MonitorControl on Mac, a free software solution that lets you manage your external monitor’s brightness and volume directly from your keyboard or menu bar. Beyond installation, you’ll find practical advice on setting up your external display for optimal compatibility, using MonitorControl effectively, and handling multi-monitor or Mac-as-monitor configurations.
Key takeaways
- Download MonitorControl from its official GitHub repository for the latest stable release.
- Ensure your external monitor supports DDC/CI for brightness and volume control via software.
- Use System Preferences > Displays to configure resolutions and arrangement before using MonitorControl.
- MonitorControl adds intuitive keyboard shortcuts and menu bar access for seamless external display management.
- Be prepared to troubleshoot permissions and compatibility issues, especially with certain USB-C or Thunderbolt monitors.
Before you start: What you need to install MonitorControl on Mac
MonitorControl supports macOS versions starting from macOS Mojave (10.14) through later releases including Ventura and Sonoma. Ensure your Mac runs a compatible macOS version to avoid installation or functionality issues.
The software is open source and available primarily through its official GitHub repository and trusted app stores. Download MonitorControl only from reputable sources to reduce the risk of malware or corrupted files.
Before installation, you will need to grant MonitorControl the necessary permissions. This typically includes Accessibility permissions found under System Settings > Privacy & Security > Accessibility and possibly Screen Recording permissions. These allow the app to intercept keyboard shortcuts and control external displays.
Hardware-wise, MonitorControl works best with external monitors that support DDC/CI (Display Data Channel Command Interface), enabling software control of brightness and volume. Common compatible monitors include many from LG, Dell, BenQ, and ASUS lines.
Connection type affects compatibility: DisplayPort, USB-C, and Thunderbolt connections often provide the best control capability. HDMI connections can work but may have limitations depending on the monitor and Mac model.
- Confirm your Mac’s macOS version by clicking Apple menu > About This Mac. You should see macOS Mojave (10.14) or later.
- Check your external monitor model supports DDC/CI by reviewing its specifications or user manual.
- Prepare the appropriate connection cable: USB-C to USB-C, DisplayPort, or Thunderbolt cables are preferred over HDMI for control features.
- Allow MonitorControl permissions by going to System Settings > Privacy & Security > Accessibility and enabling MonitorControl, which you will be prompted to do during installation.
- Download MonitorControl from its official GitHub page or the Mac App Store and verify the file integrity if possible.
How to download and install MonitorControl on your Mac
- Open your web browser and navigate to the official MonitorControl GitHub page at https://github.com/MonitorControl/MonitorControl/releases. You will find the latest stable version available for download here.
- Scroll to the latest release and locate the file named MonitorControl-x.y.z.dmg (where x.y.z is the version number). Click this file to download the disk image. Once downloaded, the file usually appears in your Downloads folder.
- Double-click the downloaded .dmg file to mount the disk image. A new window should open showing the MonitorControl app icon.
- Drag the MonitorControl app icon into your Applications folder. This step installs the application on your Mac.
- Open the Applications folder and double-click the MonitorControl app to launch it. The first time you open it, macOS may show a security prompt. Click Open to proceed.
- MonitorControl requires certain permissions to function properly. Go to System Preferences > Security & Privacy > Privacy. Under Accessibility, click the lock to make changes, then add MonitorControl by clicking the plus icon and selecting the app. Repeat this in the Screen Recording section if prompted.
- Once permissions are granted, return to MonitorControl. To have it start automatically on login, open MonitorControl's menu bar icon, select Preferences, then check Launch at login. This ensures the app runs in the background whenever you start your Mac.
Following these steps, MonitorControl will be installed safely and configured to run smoothly on your Mac.
How to connect your external monitor to Mac for best compatibility
Connecting your external monitor to your Mac properly is essential for smooth operation with MonitorControl and to ensure macOS detects your display correctly.
- Choose the right cable based on your monitor and Mac ports. Common connection types include HDMI, DisplayPort, USB-C, and Thunderbolt. Each has different compatibility and bandwidth capabilities. When connected correctly, your Mac should recognize the display automatically.
- Connect the cable firmly between your Mac and the external monitor. After plugging in, power on your monitor. Your Mac should detect the display and show it in the Displays preferences.
- Open System Settings > Displays to verify detection. You should see your external monitor listed with its resolution and refresh rate. If not detected, try unplugging and reconnecting the cable or restarting your Mac.
- Adjust resolution and scaling as needed. macOS usually defaults to the monitor’s native resolution. You can also select “Scaled” to choose other resolutions if desired.
- Add a monitor to MacBook or MacBook Pro by connecting via the appropriate port. For newer MacBooks with USB-C or Thunderbolt ports, use compatible USB-C to DisplayPort or USB-C to HDMI cables or adapters. Older Macs may require Mini DisplayPort or Thunderbolt adapters.
| Cable Type | Compatibility | Notes |
|---|---|---|
| HDMI | Widely supported on Mac and monitors | Common for TVs and many monitors; supports audio |
| DisplayPort | Preferred for higher resolutions and refresh rates | Supports DDC/CI needed for MonitorControl brightness control |
| USB-C | Common on newer MacBooks and monitors | Video, audio, and power delivery through one cable |
| Thunderbolt | High bandwidth for 4K+ displays | Compatible with USB-C ports; requires Thunderbolt-capable devices for full features |
Using your Mac as an external monitor is generally not supported natively; instead, you connect external monitors to your Mac. When connecting PC monitors, ensure the monitor supports macOS-compatible resolutions and refresh rates to avoid compatibility issues with MonitorControl.
How to use MonitorControl to adjust brightness and volume on your Mac's external monitor
MonitorControl extends macOS's limited external display management by providing direct control over brightness and volume through a convenient menu bar interface. This allows you to adjust settings without reaching for your monitor's physical buttons.
- Click the MonitorControl icon in your Mac's menu bar. It typically appears as a small monitor or slider icon. When you open it, you should see sliders for brightness and volume corresponding to each connected external monitor.
- Drag the brightness slider left or right to decrease or increase the external monitor’s brightness. You will notice the screen dimming or brightening immediately, reflecting the change in real time.
- Adjust the volume slider in the same menu to control the external monitor's speakers (if available). The audio level changes instantly, allowing fine-tuning without using macOS sound settings.
- Open MonitorControl preferences from the menu bar icon by selecting “Preferences.” Here, customize keyboard shortcuts for brightness and volume adjustments, enabling quick control using keys or gestures. For example, you can set Command+Option+Up/Down arrows to change brightness.
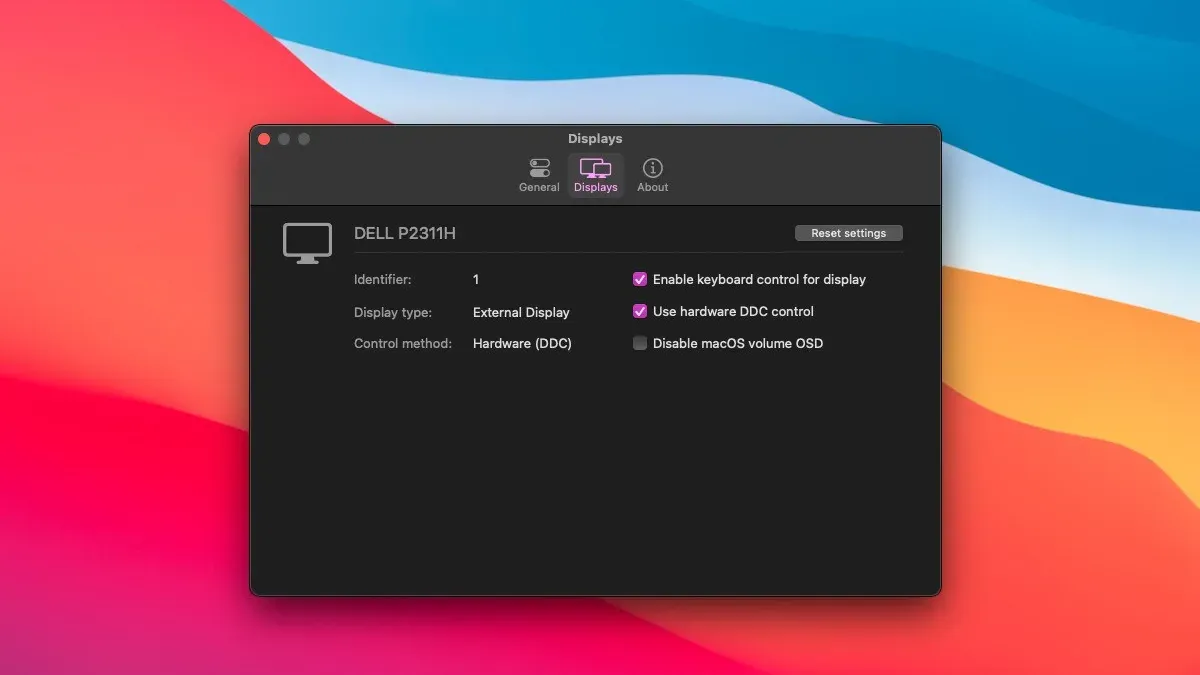
- If you have multiple external monitors, MonitorControl lists each one separately in the menu bar dropdown. You can adjust each monitor’s brightness and volume independently, avoiding confusion or unwanted global changes.
- MonitorControl integrates smoothly with macOS native controls. Using the Mac keyboard brightness keys while MonitorControl is active adjusts the external monitor instead of the built-in display. Volume keys behave similarly, letting you control the external display volume without switching sound output manually.
In practice, the MonitorControl interface shows clear labels for each connected monitor, and the sliders reflect the current settings accurately. When you change brightness or volume, macOS’s sound and display icons update accordingly, confirming the interaction between MonitorControl and native controls.
How to use Mac as a monitor or with MonitorControl in multi-monitor setups
Using your Mac as an external monitor is limited by Apple’s software restrictions. Target Display Mode, which allowed certain iMacs to act as external displays via Thunderbolt or Mini DisplayPort, is no longer supported on newer Macs. For most users, using screen sharing or third-party apps to mirror or extend displays is the alternative, but these methods often introduce latency and are not suitable for high-performance workflows.
When managing multiple external monitors, MonitorControl enhances your workflow by enabling brightness and volume adjustments across all connected displays from a single interface. To set up multiple monitors:
- Connect all external monitors to your Mac using compatible cables.
- Open System Preferences > Displays > Arrangement.
- Drag the display icons to match the physical layout of your monitors. This ensures the cursor moves naturally between screens.
- Enable Mirror Displays only if you want identical content on multiple screens.
MonitorControl recognizes each external monitor separately, allowing independent control of brightness and volume. You can customize shortcut keys for each display via the MonitorControl preferences, which helps when adjusting settings quickly during multitasking.
For example, a typical workflow might involve using a laptop display as the primary workspace while two external monitors display reference materials and communication apps. MonitorControl lets you dim one monitor while keeping others bright without adjusting macOS system settings repeatedly.
In complex setups, MonitorControl supports adjusting monitors that use different protocols, as long as they support DDC/CI. This flexibility means you can mix and match brands and models without losing control convenience.
Troubleshooting common issues when installing or using MonitorControl
MonitorControl may occasionally fail to detect your external monitor or have limited control over brightness and volume. Addressing permission settings, conflicts, and connection issues can resolve most problems.
MonitorControl not detecting the external monitor
- Verify your monitor supports DDC/CI and is connected via a compatible cable (e.g., DisplayPort or USB-C). When successful, MonitorControl’s menu bar icon becomes active.
- Restart MonitorControl and check the macOS Display preferences to confirm the external monitor is recognized. If not, reconnect cables or reboot your Mac.
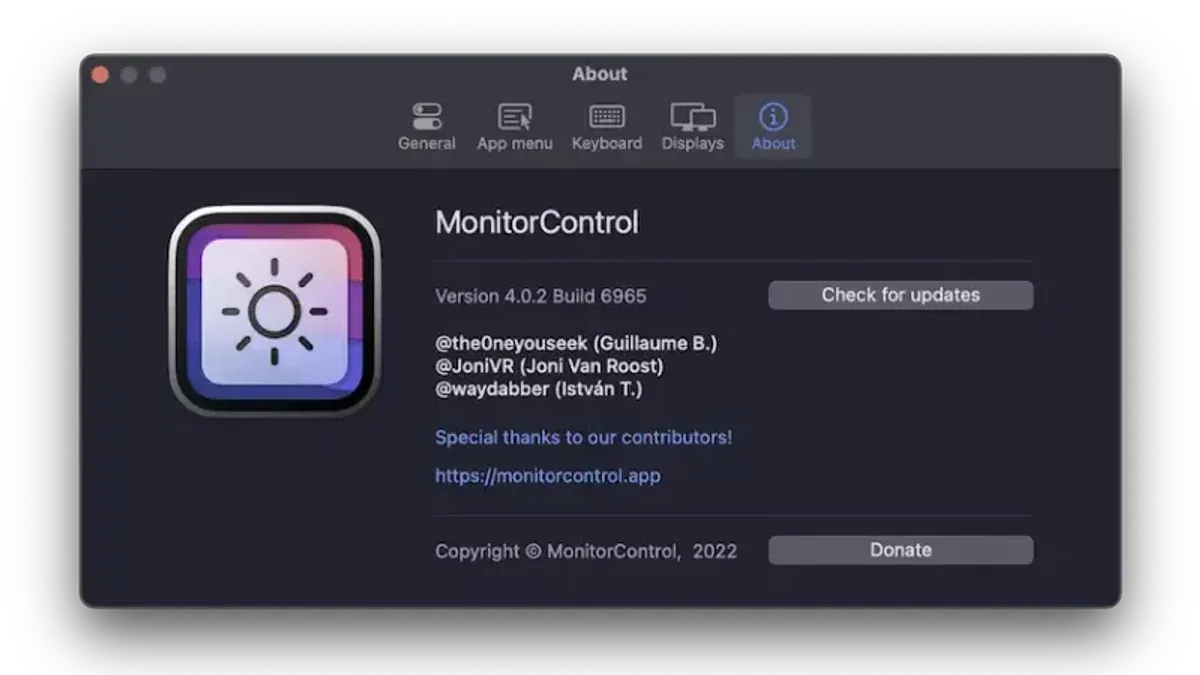
- Open MonitorControl’s “About” window and review the detection log. If errors like “No DDC response” appear, your monitor may not support required protocols.
Brightness or volume controls not working as expected
- Ensure MonitorControl has Accessibility and Screen Recording permissions in System Preferences > Security & Privacy > Privacy. When permitted, controls should respond smoothly.
- Check for conflicts by temporarily disabling other monitor control apps or utilities. If controls work after this, adjust settings to avoid overlapping shortcuts or features.
- If volume control fails, confirm your monitor supports audio control over DDC/CI. Some monitors require manual volume adjustment despite brightness control compatibility.
Permission or security settings blocking MonitorControl
- Go to System Preferences > Security & Privacy > Privacy and enable MonitorControl under Accessibility, Screen Recording, and Full Disk Access if listed.
- After granting permissions, restart your Mac and relaunch MonitorControl. The app should gain full functionality without security blocks.
Conflicts with other system monitor or control software
- Identify any other software managing display settings (e.g., Lunar, DisplayBuddy). Temporarily quit these apps and test MonitorControl.
- If MonitorControl works without conflicts, configure exclusive use or disable overlapping features in other software.
- Keep MonitorControl updated to maintain compatibility with macOS and reduce conflicts.
Additional tips for managing external monitors on Mac
Beyond MonitorControl, macOS offers built-in display preferences that can enhance your external monitor experience. Use System Settings > Displays to access options like Night Shift, True Tone, and resolution scaling, which can improve comfort and image quality. Adjust refresh rates where available to balance smoothness and battery life.
Third-party tools such as DisplayBuddy and Lunar complement MonitorControl by offering features like color calibration, gamma adjustments, and automatic profile switching. DisplayBuddy integrates well with Mac’s menu bar but may consume slightly more system resources, whereas Lunar focuses on adaptive brightness syncing via ambient light sensors.
Keep system performance in mind when running multiple display management utilities. Some tools increase CPU usage, which can affect battery life and responsiveness, especially on MacBooks with integrated graphics. Monitor CPU and GPU load using Activity Monitor when testing new software setups.
Cable and adapter quality directly influences display stability and compatibility. For 4K or higher resolutions at 60Hz, use certified Thunderbolt 3 or USB-C cables. Avoid low-quality HDMI adapters that may cause flickering or disconnects. Where possible, use direct connections over hubs to reduce latency and signal loss.
- How to Install BetterTouchTool on Mac: A Step-by-Step Guide
- How to Install and Set Up Karabiner Elements on Mac: A Step-by-Step Guide
- How to Install and Use Magnet on Mac: A Complete Step-by-Step Guide
- How to Install and Set Up Rectangle on Mac: A Step-by-Step Guide
Frequently asked questions
How to turn on mac monitor?
Your Mac monitor typically powers on automatically when you open the lid or press any key on the keyboard. If you are using an external display, ensure it is connected and powered on separately, as most external monitors require their own power button to be pressed. For built-in Mac displays, sleep mode can be exited by pressing a key, clicking the mouse, or tapping the trackpad.
How to add monitor to macbook?
To add a monitor to your MacBook, connect the external display using the appropriate cable or adapter, such as HDMI, USB-C, or DisplayPort. Then, go to System Settings > Displays to arrange and configure the new monitor. Make sure the external display is powered on and recognized by your MacBook before adjusting settings.
How to use mac as monitor?
Using a Mac as a monitor is not natively supported by macOS but can be achieved with third-party software like Sidecar for iPads or screen sharing apps. For Macs, Target Display Mode was available on some older iMac models but is no longer supported on recent versions. Alternatives require network connections and can introduce latency, so they may not be suitable for all use cases.
How to connect monitor to mac?
Connect your monitor to Mac by using the correct cable or adapter that matches your Mac’s ports, such as USB-C to HDMI or Thunderbolt to DisplayPort. After connecting, ensure the external monitor is switched on and visit System Settings > Displays to detect and arrange the display. Adjust resolution and refresh rate here to optimize compatibility.
How to connect mac to pc monitor?
To connect a Mac to a PC monitor, check the monitor’s input options and use a compatible cable like HDMI, DisplayPort, or VGA with an appropriate adapter if needed. Once connected, power on the monitor and configure display settings on your Mac by going to System Settings > Displays to select resolution and arrangement. Some PC monitors may require manual input source selection via the monitor’s on-screen menu.
What MonitorControl does not cover and when to seek alternatives
MonitorControl does not support all external monitors equally; some displays may have limited functionality due to hardware or firmware restrictions. For example, certain monitors may not respond to brightness or volume adjustments through software because they lack compatible control protocols like DDC/CI. If you rely on precise color calibration or professional-grade display management, dedicated hardware controllers or manufacturer-specific software might be more appropriate. Additionally, if you experience persistent connectivity or compatibility issues, consider consulting the monitor manufacturer's support or using macOS native display preferences alongside third-party utilities.
For the best experience, focus on monitors known for good DDC/CI support and ensure your macOS permissions allow MonitorControl to control your display. If your setup involves complex multi-monitor arrangements or Mac-as-monitor configurations, verifying each device's compatibility will save time.
To take the next step, explore MonitorControl’s preferences pane after installation and customize the hotkeys and menu bar options. This adjustment often unlocks the most convenient and responsive control tailored to your workflow and display setup.